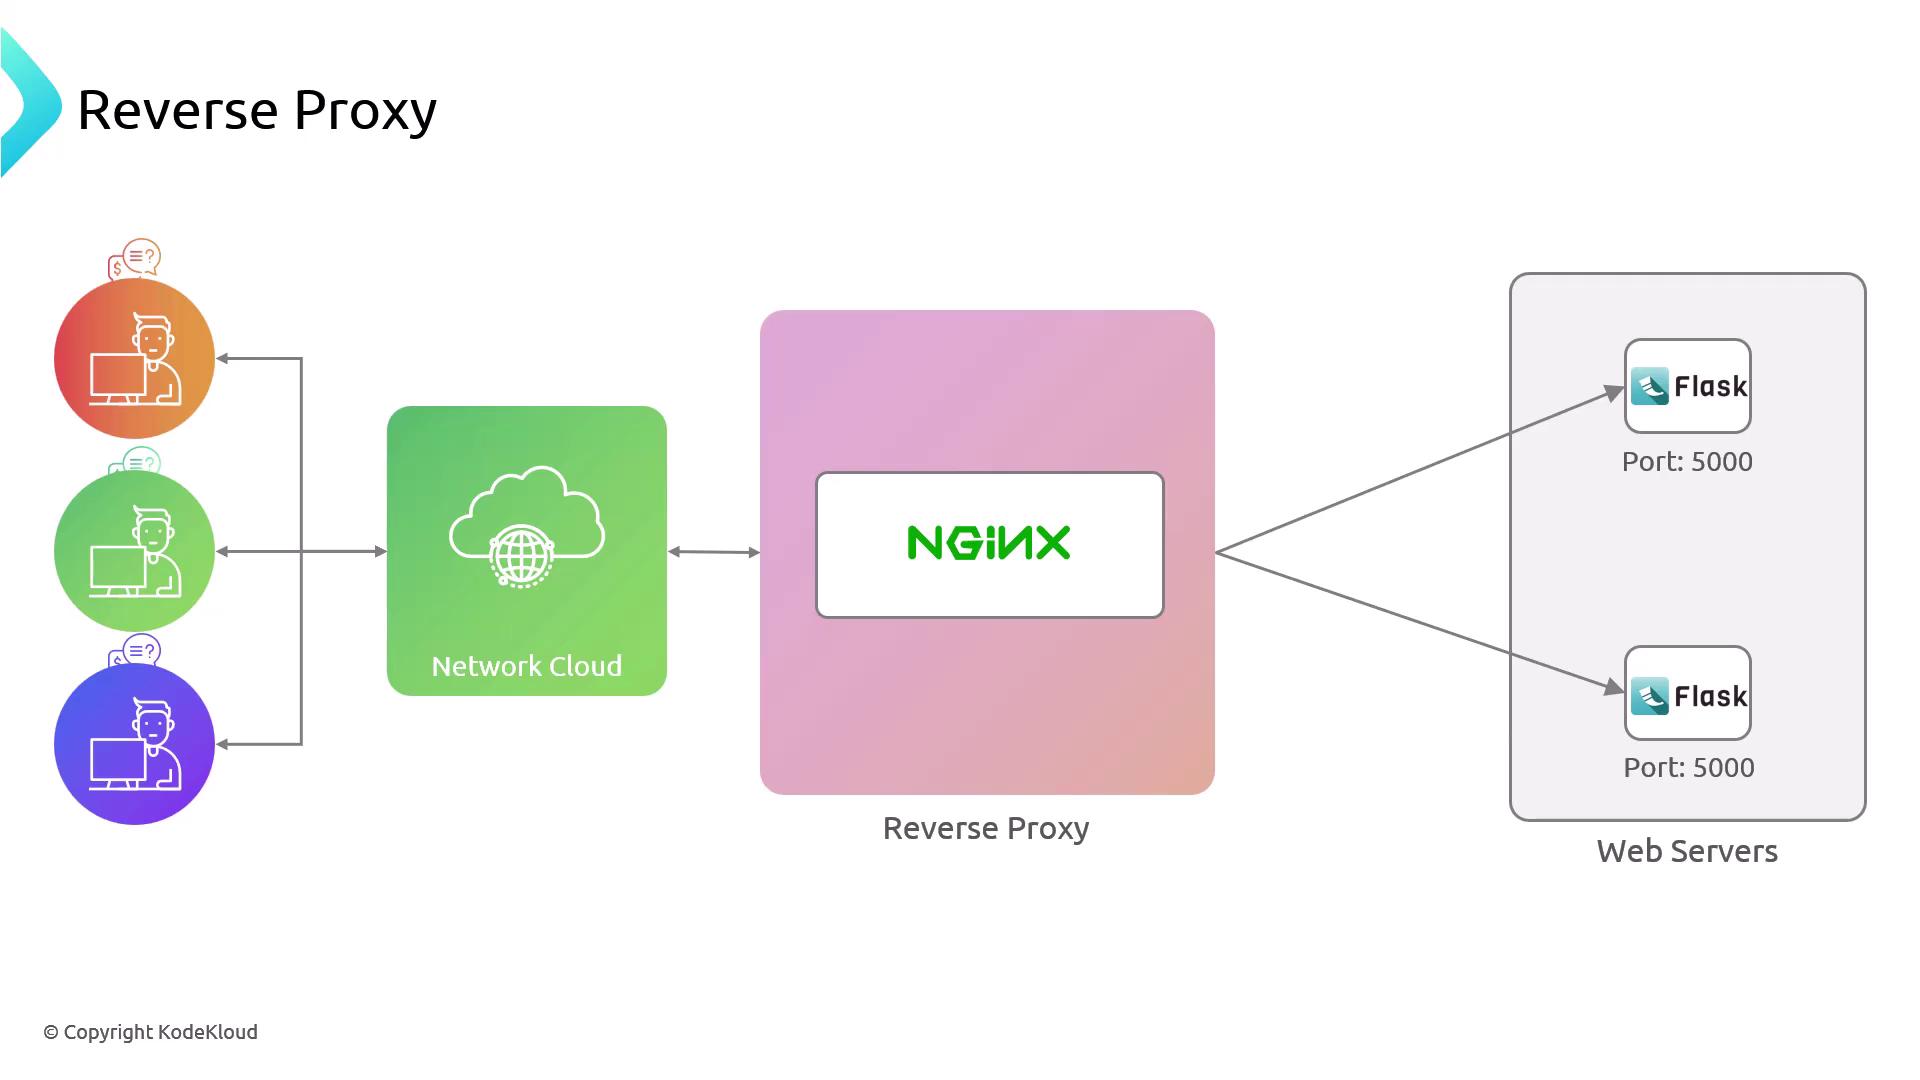
Nginx For Beginners
Intermediate Config
Demo Reverse Proxy
In this tutorial, you’ll set up NGINX as a reverse proxy and simple load balancer for two Flask apps running on separate hosts (node01
and node02
) at port 5000. Incoming HTTP requests hit NGINX, which forwards them to healthy backends—improving scalability and fault tolerance.
Lab Environment
Below is the topology for this demo:
Host | Role | IP Address |
---|---|---|
nginx | Reverse proxy server (NGINX) | 192.230.206.12 |
node01 | Flask application (port 5000) | 192.230.206.3 |
node02 | Flask application (port 5000) | 192.230.206.6 |
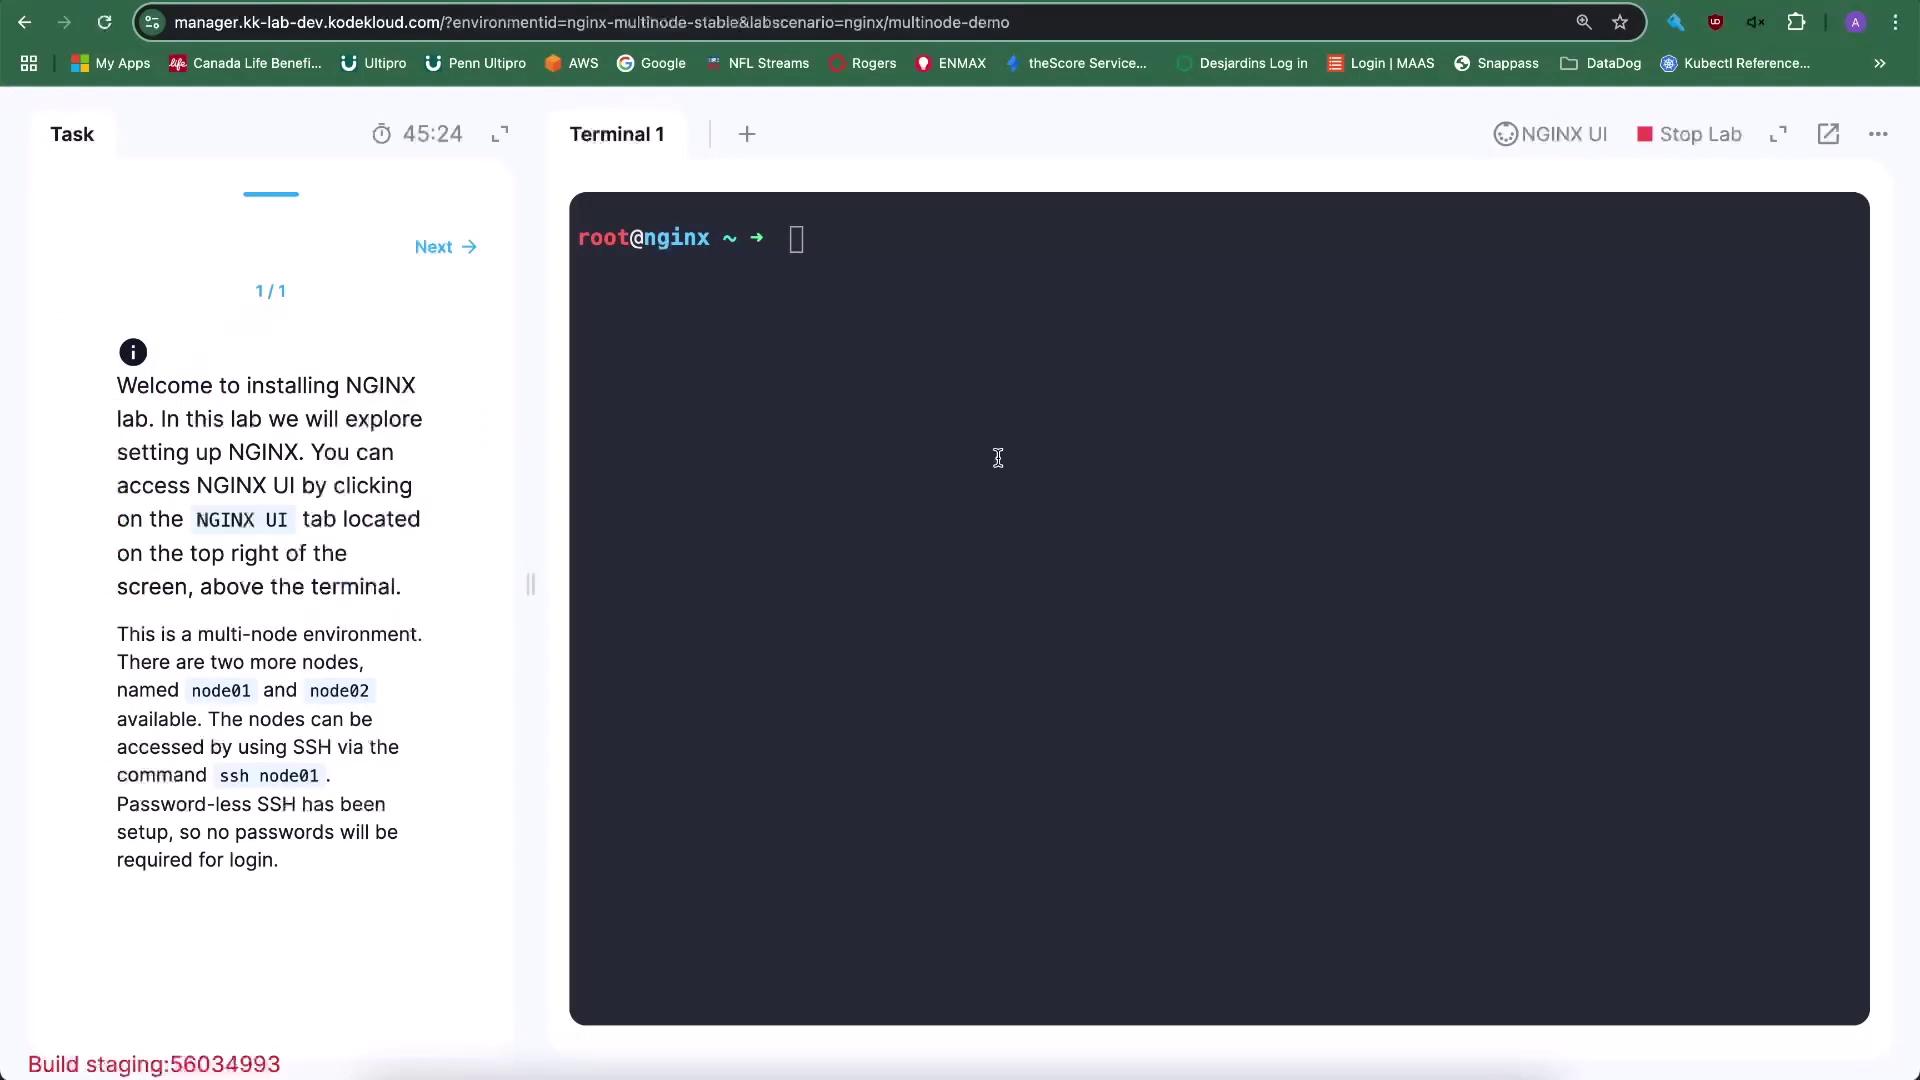
SSH into the Backends
From the nginx
host, connect to each Flask server:
root@nginx ~ ➜ ssh node01
# or
root@nginx ~ ➜ ssh node02
Step 1: Verify Backend Servers
On node01:
root@node01 ~ ➜ curl localhost:5000
# <h1>Hello, Human!</h1>[Not Authenticated]
On node02:
root@node02 ~ ➜ curl localhost:5000
# <h1>Hello, Human!</h1>[Not Authenticated]
Step 2: Configure Firewall Rules
Ensure only the NGINX proxy can reach port 5000 on your Flask servers, while keeping SSH open for management.
Note
If UFW is already enabled, skip sudo ufw enable
and proceed with rule creation.
# 1. Enable UFW (if not already running)
sudo ufw enable
# 2. Allow SSH management
sudo ufw allow 22/tcp
# 3. Permit Flask traffic from the proxy only
sudo ufw allow from 192.230.206.12 proto tcp to any port 5000
# 4. Verify the active rules
sudo ufw status
# Status: active
# To Action From
# -- ------ ----
# 22/tcp ALLOW Anywhere
# 5000/tcp ALLOW 192.230.206.12
# 22/tcp (v6) ALLOW Anywhere (v6)
Step 3: Configure NGINX as a Reverse Proxy
Remove the default site and switch to the config directory:
cd /etc/nginx/sites-enabled sudo rm default cd /etc/nginx/sites-available
Create
/etc/nginx/sites-available/helloworld
with upstream and server blocks:# Upstream definition for Flask backends upstream hello_world { server 192.230.206.3:5000; server 192.230.206.6:5000; } server { listen 80; server_name helloworld.com; root /var/www/html; index index.html index.htm; location / { proxy_pass http://hello_world; proxy_set_header Host $host; proxy_set_header X-Real-IP $remote_addr; } }
Enable the site and reload NGINX:
sudo ln -s /etc/nginx/sites-available/helloworld /etc/nginx/sites-enabled/ sudo nginx -t sudo nginx -s reload
Step 4: Test the Reverse Proxy
Use curl
with a custom Host header to emulate requests to helloworld.com
:
# Root path
curl -H "Host: helloworld.com" http://localhost
# /foo endpoint
curl -H "Host: helloworld.com" http://localhost/foo
# /bar endpoint
curl -H "Host: helloworld.com" http://localhost/bar
# <h1>Bar page</h1>...
Step 5: Simulate a Backend Failure
Comment out one server in the upstream
block to test NGINX’s resilience:
# /etc/nginx/sites-available/helloworld
upstream hello_world {
server 192.230.206.3:5000;
# server 192.230.206.6:5000; # node02 offline
}
Reload NGINX and re-run the curl tests; traffic should automatically route to the healthy backend.
sudo nginx -s reload
curl -H "Host: helloworld.com" http://localhost/foo
curl -H "Host: helloworld.com" http://localhost/bar
Warning
Ensure that helloworld.com
resolves to your NGINX server IP (192.230.206.12) in DNS or /etc/hosts
before testing.
You’ve now configured NGINX as a robust reverse proxy and simple load balancer for your Flask applications. Next, explore advanced proxy settings, SSL termination, and health checks in the NGINX documentation.
Watch Video
Watch video content
Practice Lab
Practice lab