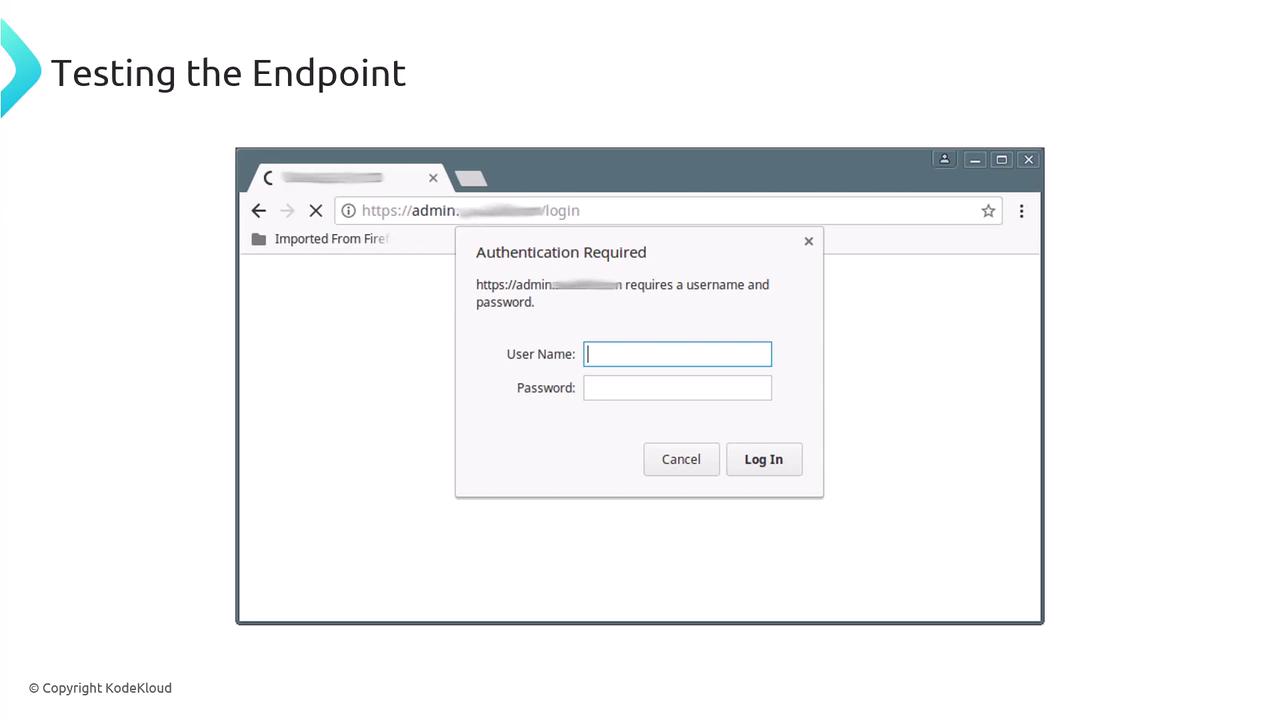
kodekloud.com, but visiting kodekloud.com/admin will trigger a browser login prompt:
HTTP basic authentication sends credentials encoded in Base64, not encrypted. Use it only within trusted networks (VPN or internal LAN). For public-facing apps, consider OAuth, JWT, or framework-native authentication for better security and user experience.
1. Generate the Password File (.htpasswd)
You can create the .htpasswd file with either Apache’s utility or OpenSSL. Store this file in a secure directory (e.g., /etc/nginx/conf.d/).
| Method | Requirement | Usage Example |
|---|---|---|
Apache htpasswd | apache2-utils or httpd-tools | Add users with a prompt |
| OpenSSL | Built-in on most systems | Manually append hashes |
1.1 Using Apache’s htpasswd
1.2 Using OpenSSL
Once hashed, plain-text passwords cannot be recovered. Store them securely using a password manager like LastPass or a secrets vault (e.g., HashiCorp Vault).
.htpasswd entries:
2. Configure Nginx to Require Authentication
Edit your server block (commonly in/etc/nginx/sites-available/ or /etc/nginx/conf.d/) to protect a specific location, such as /admin:
- auth_basic: Text shown in the browser’s login dialog.
- auth_basic_user_file: Path to your
.htpasswdfile.
http://example.com/admin, a login popup appears:
3. Next Steps & References
A live demo will follow, showcasing each step in action. In the meantime, explore these resources to deepen your understanding:| Resource | Link |
|---|---|
| Nginx Official Documentation | https://nginx.org/en/docs/http/ngx_http_auth_basic_module.html |
Apache htpasswd Guide | https://httpd.apache.org/docs/2.4/programs/htpasswd.html |
| OpenSSL Password Hash Options | https://www.openssl.org/docs/man1.1.1/man1/openssl-passwd.html |
| OAuth 2.0 Overview | https://oauth.net/2/ |