Nginx For Beginners
Security
Demo HTTP Headers
In this tutorial, we’ll configure an NGINX server to send custom HTTP headers, improve security, and then turn it into a load balancer that forwards client details to Apache backends.
First, let’s inspect the default response from our site before any custom headers are added.
Testing the Default Response
Map
example.com
to127.0.0.1
by editing/etc/hosts
:cat /etc/hosts
127.0.0.1 localhost ::1 localhost ip6-localhost ip6-loopback ... 127.0.0.1 example.com
Curl over HTTP to see the redirect:
curl -I http://example.com
HTTP/1.1 301 Moved Permanently Server: nginx/1.18.0 (Ubuntu) Date: Wed, 12 Feb 2025 19:24:14 GMT ...
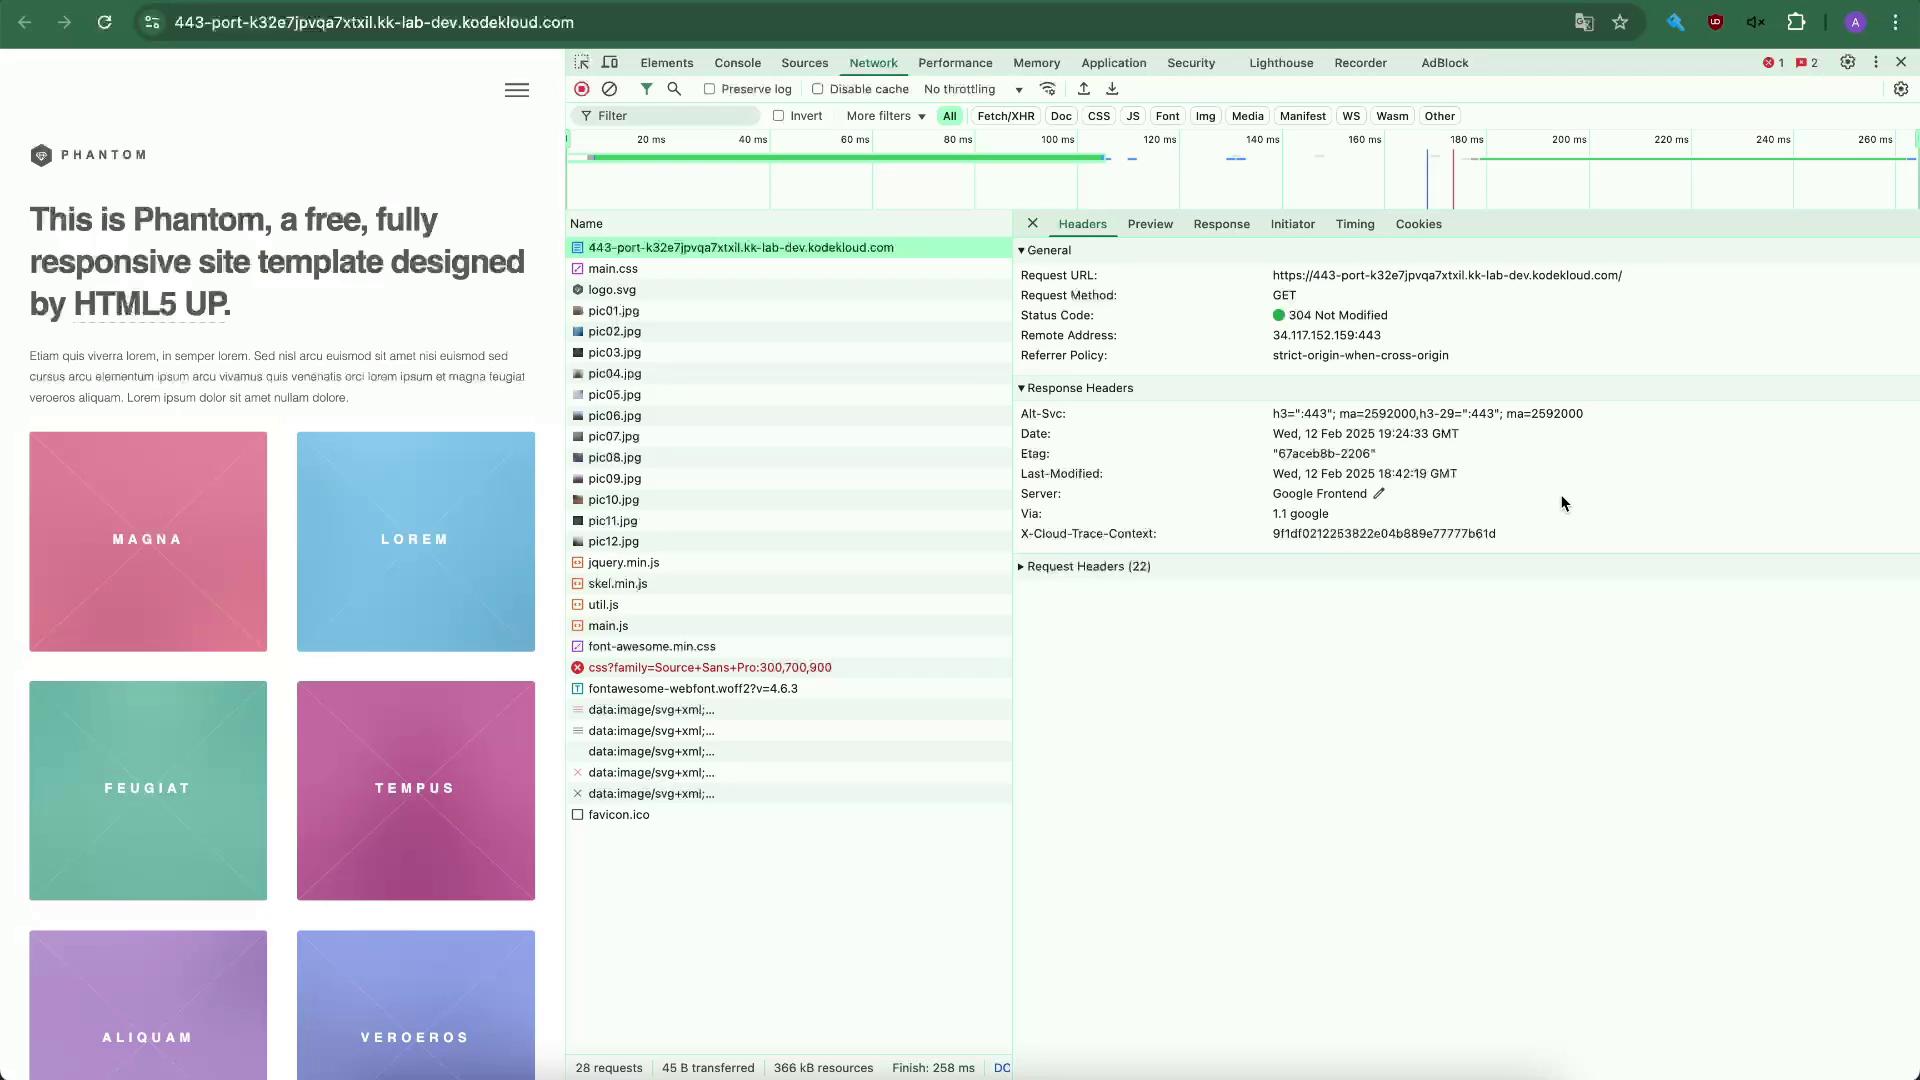
Fetch only headers from HTTPS:
curl --head https://example.com
HTTP/1.1 200 OK Server: nginx/1.18.0 (Ubuntu) Date: Wed, 12 Feb 2025 19:24:14 GMT Content-Type: text/html Content-Length: 8710 Last-Modified: Wed, 12 Feb 2025 18:42:19 GMT Connection: keep-alive ETag: "67ace8b-2206" Accept-Ranges: bytes
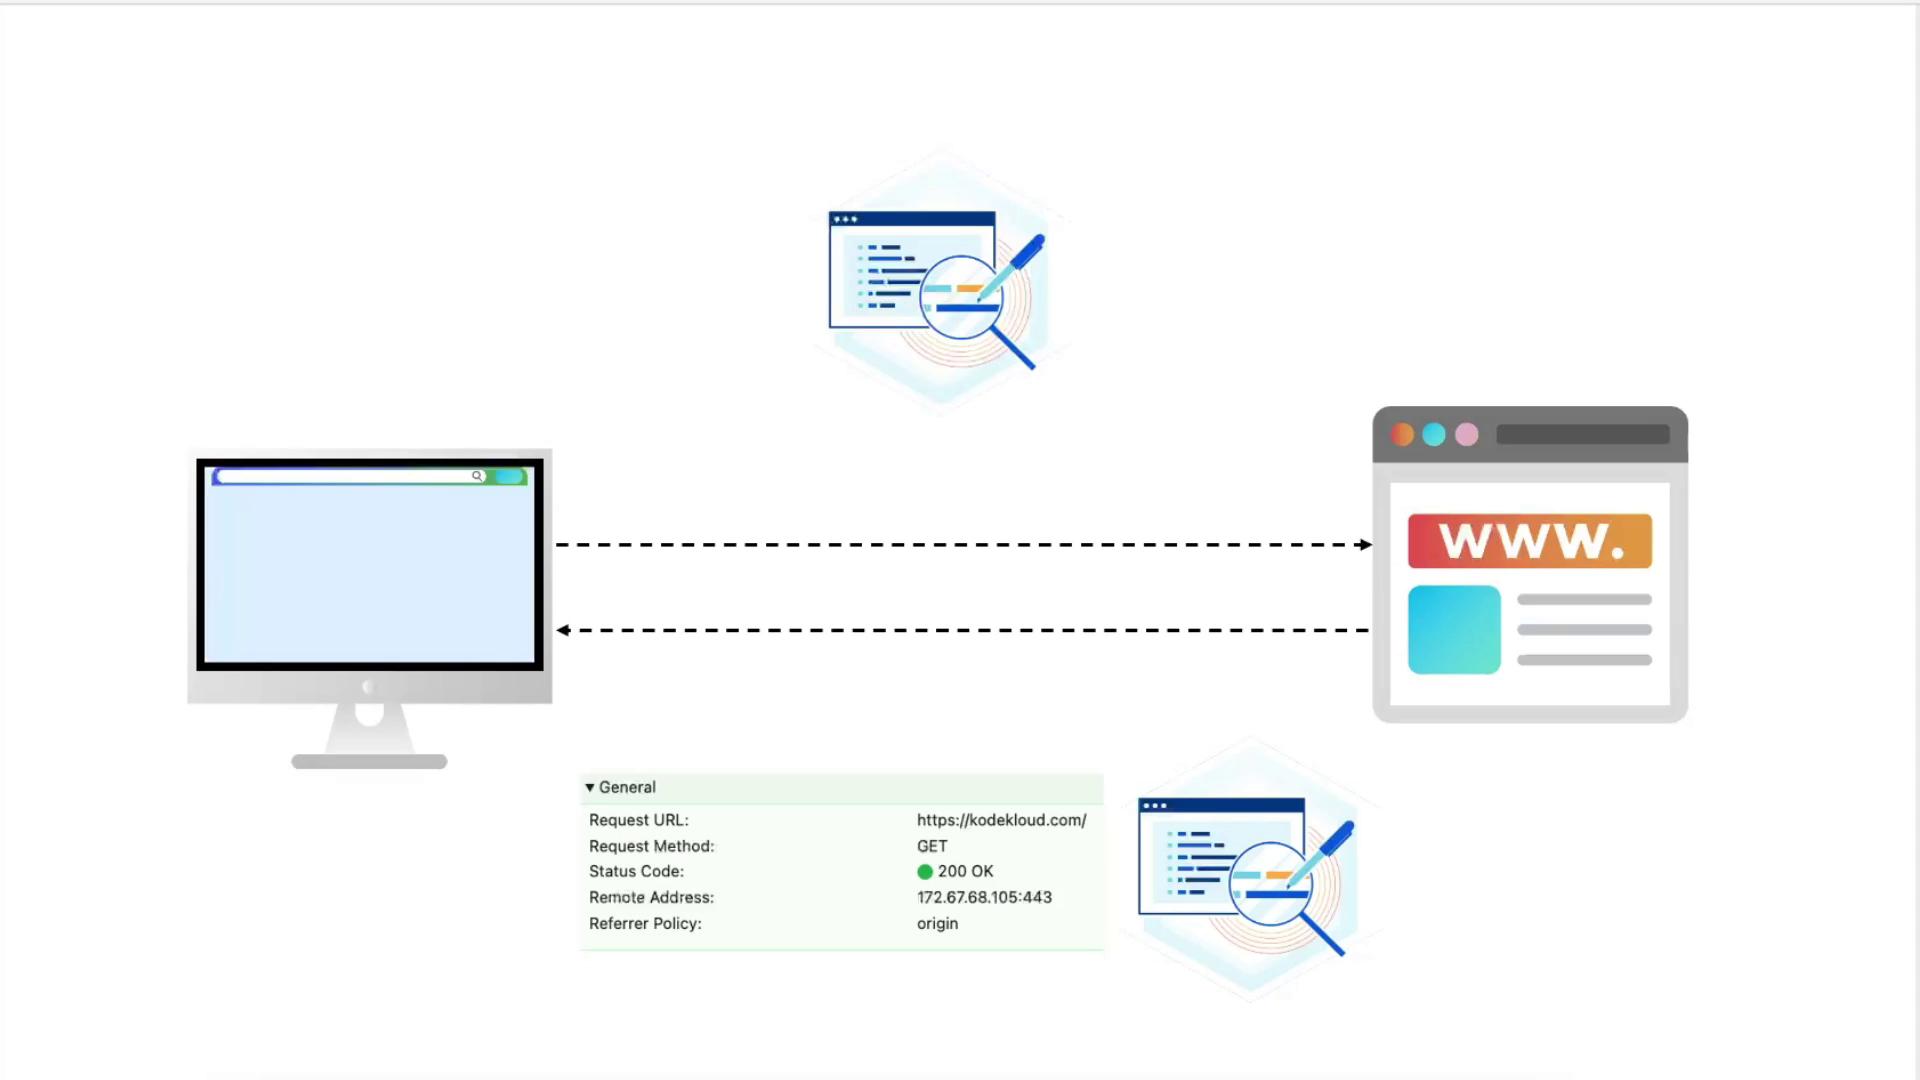
Open your browser’s developer tools (Network tab) and refresh. You’ll see only default headers like
Server
,Date
, etc.
Adding Security Headers
Edit your HTTPS server block (e.g., /etc/nginx/sites-available/example-https
):
server {
listen 80;
server_name example.com;
return 301 https://$host$request_uri;
}
server {
listen 443 ssl;
server_name example.com;
ssl_certificate /etc/ssl/certs/example.com.pem;
ssl_certificate_key /etc/ssl/certs/example.com-key.pem;
root /var/www/html;
index index.html index.htm index.nginx-debian.html;
location / {
try_files $uri $uri/ =404;
}
}
Within the server { ... }
listening on port 443, add these headers:
add_header Strict-Transport-Security "max-age=31536000; includeSubDomains; preload";
add_header X-Frame-Options "SAMEORIGIN";
add_header Content-Security-Policy "default-src 'self'";
add_header Referrer-Policy "origin";
The complete HTTPS block:
server {
listen 443 ssl;
server_name example.com;
ssl_certificate /etc/ssl/certs/example.com.pem;
ssl_certificate_key /etc/ssl/certs/example.com-key.pem;
root /var/www/html;
index index.html index.htm index.nginx-debian.html;
add_header Strict-Transport-Security "max-age=31536000; includeSubDomains; preload";
add_header X-Frame-Options "SAMEORIGIN";
add_header Content-Security-Policy "default-src 'self'";
add_header Referrer-Policy "origin";
location / {
try_files $uri $uri/ =404;
}
}
Note
Always test your configuration before reloading:
nginx -t
nginx -s reload
Verify with curl:
curl --head https://example.com
HTTP/1.1 200 OK
Server: nginx/1.18.0 (Ubuntu)
Date: Wed, 12 Feb 2025 19:28:15 GMT
Content-Type: text/html
Content-Length: 8710
Last-Modified: Wed, 12 Feb 2025 18:42:19 GMT
Connection: keep-alive
ETag: "67acebb-2206"
Strict-Transport-Security: max-age=31536000; includeSubDomains; preload
X-Frame-Options: SAMEORIGIN
Content-Security-Policy: default-src 'self'
Referrer-Policy: origin
Accept-Ranges: bytes
Summary of Security Headers
Header | Purpose |
---|---|
Strict-Transport-Security | Enforce HTTPS connections |
X-Frame-Options | Prevent clickjacking |
Content-Security-Policy | Restrict resource loading to same origin |
Referrer-Policy | Control Referer header information |
Configuring NGINX as a Load Balancer
Now we’ll distribute traffic to two Apache backends and forward client information.
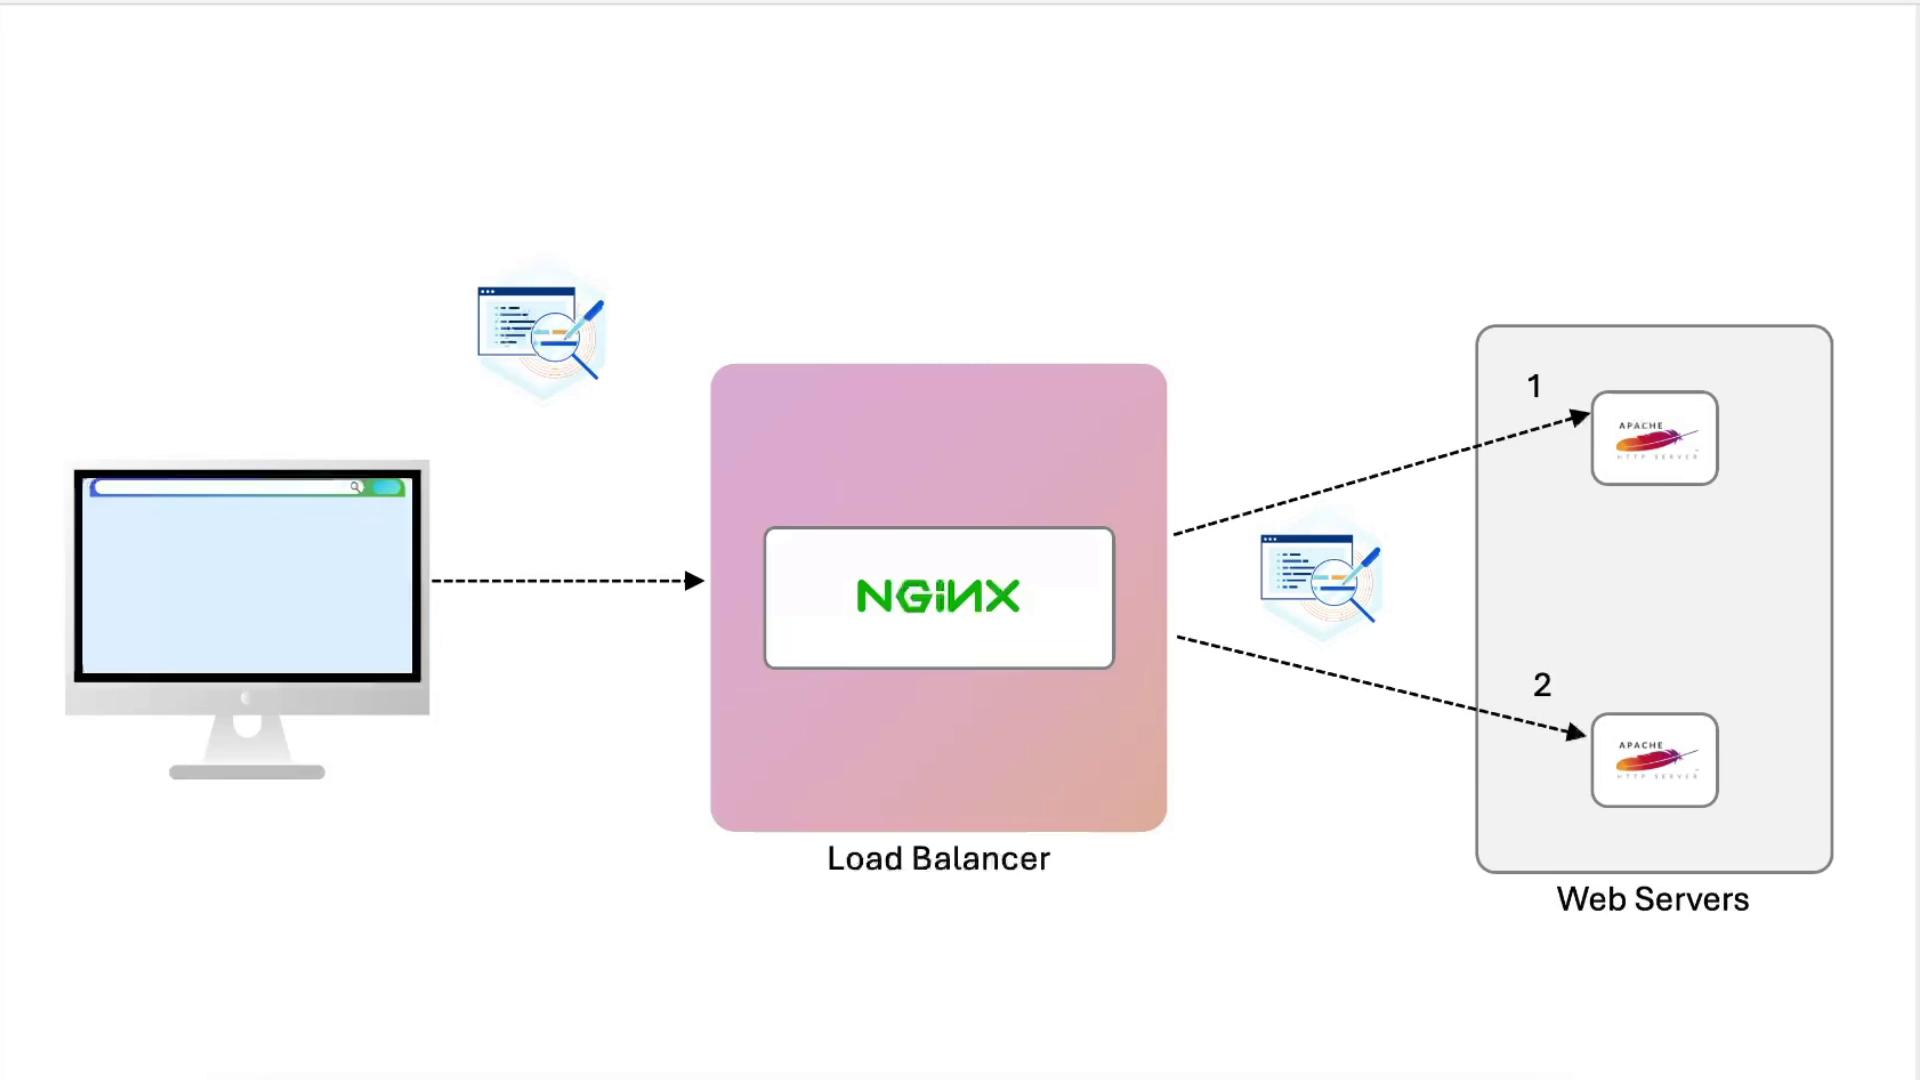
1. Define the Upstream
Add at the top of nginx.conf
or inside your site file:
upstream example {
server node01:443;
server node02:443;
}
2. Initial Proxy Test (No Headers)
Replace the location /
block:
location / {
proxy_pass https://example;
}
Reload NGINX and refresh. You’ll see alternating “Node01” and “Node02”, but Apache logs will record only the load balancer’s IP.
3. View Apache Access Logs
# On node01
tail -f /var/log/apache2/access.log
You’ll see entries like:
example.com:443 127.0.0.1 - - [12/Feb/2025:19:30:42 +0000] "GET / HTTP/1.0" 200 3621 ... "curl/7.81.0"
Passing Proxy Headers
Update the same location /
block to forward client data:
location / {
proxy_set_header X-Real-IP $remote_addr;
proxy_set_header Host $host;
proxy_set_header X-Forwarded-For $proxy_add_x_forwarded_for;
proxy_set_header X-Forwarded-Proto $scheme;
proxy_pass https://example;
}
Reload NGINX:
nginx -t
nginx -s reload
Warning
After changing log formats, always test Apache before restarting:
apachectl -t
systemctl restart apache2
4. Update Apache Log Format (on node01)
In /etc/apache2/apache2.conf
or your vhost:
LogFormat "%v:%p \"%{X-Real-IP}i\" \"%{X-Forwarded-For}i\" \"%{X-Forwarded-Proto}i\" %h %l %u %t \"%r\" %>s %b \"%{Referer}i\" \"%{User-Agent}i\"" combined
Reload Apache:
apachectl -t
systemctl restart apache2
5. Compare Logs
- node02 (unchanged): logs show only the load balancer’s IP.
- node01: logs include:
X-Real-IP
: immediate client IPX-Forwarded-For
: full proxy chainX-Forwarded-Proto
: original protocol
Example:
example.com:443 "192.231.70.4" "174.0.252.84, 34.117.152.159, 169.254.169.126, 192.168.1.144, 192.231.70.4" "https" 192.231.70.4 - - [12/Feb/2025:19:37:22 +0000] "GET / HTTP/1.0" 200 3621 "https://..." "Mozilla/5.0..."
Recap
- Tested default NGINX headers.
- Added security headers (
HSTS
,X-Frame-Options
,CSP
,Referrer-Policy
). - Configured NGINX as an SSL-terminating load balancer.
- Forwarded proxy headers (
X-Real-IP
,Host
,X-Forwarded-For
,X-Forwarded-Proto
). - Updated Apache
LogFormat
to capture these headers.
From here, explore authentication, caching, compression, and more.
Links and References
Watch Video
Watch video content
Practice Lab
Practice lab