Nginx For Beginners

Security

Demo Blocking Traffic

In this guide, you’ll learn how to:

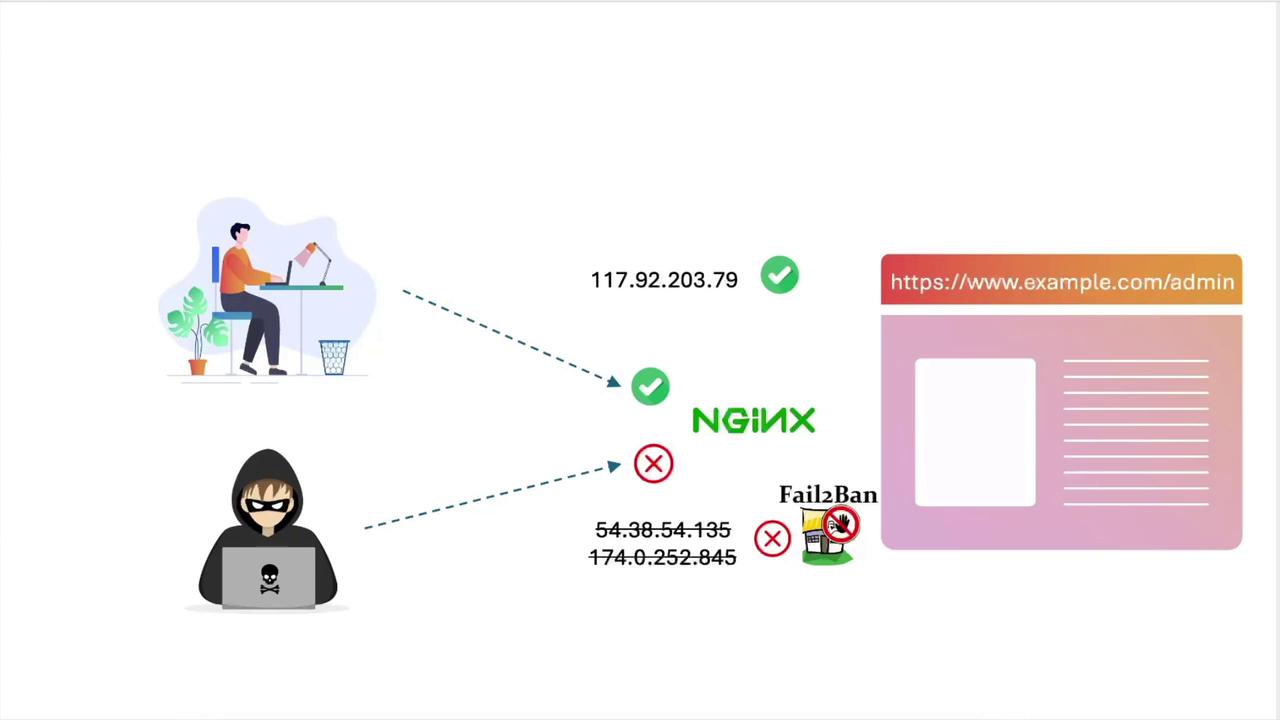
  • Configure NGINX to serve example.com over HTTP/HTTPS
  • Use allow/deny directives for static IP filtering
  • Automate bans on repeated auth failures with Fail2Ban

We’ll use:

  • An NGINX server on ports 80 & 443
  • Two clients: node01 (192.231.128.12) and node02 (192.231.128.3)

The image illustrates a security setup where a legitimate user is granted access to a website through NGINX, while a hacker is blocked by Fail2Ban.


Prerequisites

  • Ubuntu Server with NGINX installed
  • Root or sudo access to /etc/nginx and /etc/fail2ban
  • A self‐signed or valid SSL certificate for example.com

1. Configure NGINX for HTTPS and Basic Auth

Create or edit /etc/nginx/sites-available/example-https:

server {
    listen 80;
    server_name example.com;
    return 301 https://$host$request_uri;
}

server {
    listen 443 ssl;
    server_name example.com;

    ssl_certificate     /etc/ssl/certs/example.com.pem;
    ssl_certificate_key /etc/ssl/certs/example.com-key.pem;

    root /var/www/html;
    index index.html index.htm;

    add_header Strict-Transport-Security "max-age=31536000; includeSubDomains; preload";
    add_header X-Frame-Options "SAMEORIGIN";
    add_header Content-Security-Policy "default-src 'self'";
    add_header Referrer-Policy origin;

    location / {
        try_files $uri $uri =404;
    }

    location /admin {
        auth_basic           "Restricted Access";
        auth_basic_user_file /etc/nginx/conf.d/.htpasswd;
    }
}

Reload NGINX:

sudo nginx -t && sudo systemctl reload nginx

2. Test Connectivity from Clients

  1. On the NGINX server, find its IP:

    ip a
    # e.g., eth0: inet 192.231.128.10/24
    
  2. On node01 and node02, add to /etc/hosts:

    192.231.128.10 example.com
    

    Note

    Make sure no conflicting DNS entries exist for example.com.

  3. Run these tests on each node:

TestCommandExpected Response
HTTP → HTTPS redirectcurl http://example.com301 Moved Permanently
HTTPS (self-signed)curl https://example.comSSL certificate error
Skip cert validationcurl -k https://example.comHTML of index.html
Access /admin headercurl -k --head https://example.com/adminHTTP/1.1 401 Unauthorized

3. Block a Single IP with deny

To block node02 globally, edit the / location:

location / {
    deny 192.231.128.3/32;  # node02
    try_files $uri $uri =404;
}

Reload and verify:

  • node01 (192.231.128.12):
    curl -k --head https://example.com
    # HTTP/1.1 200 OK
    
  • node02:
    curl -k --head https://example.com
    # HTTP/1.1 403 Forbidden
    

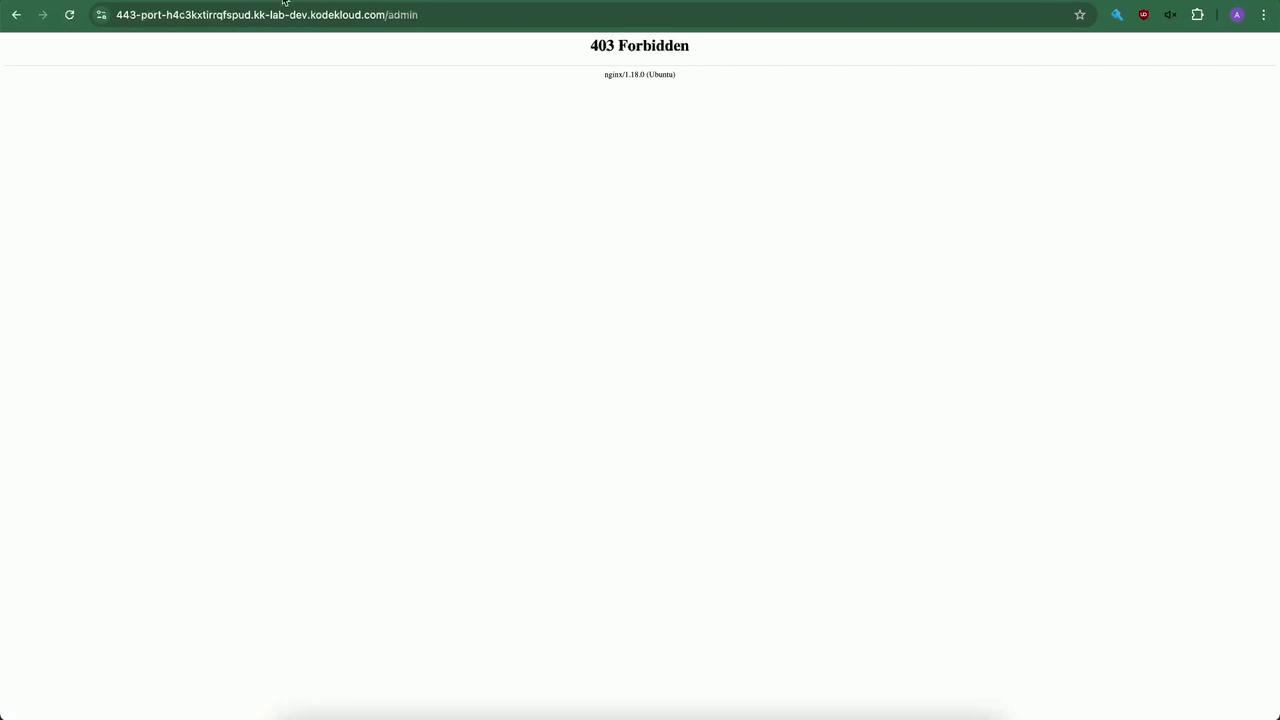
4. Restrict /admin to a Single Host

Allow only node01 to hit /admin:

location /admin {
    allow 192.231.128.12/32;  # node01
    deny all;
    auth_basic           "Restricted Access";
    auth_basic_user_file /etc/nginx/conf.d/.htpasswd;
}

Reload and test:

  • node02403 Forbidden
  • node01401 Unauthorized (prompt for credentials)

5. Allow a CIDR Range

To permit both nodes (in 192.231.128.0/24) and block everyone else:

location / {
    allow 192.231.128.0/24;
    deny all;
    try_files $uri $uri =404;
}

location /admin {
    allow 192.231.128.0/24;
    deny all;
    auth_basic           "Restricted Access";
    auth_basic_user_file /etc/nginx/conf.d/.htpasswd;
}

Reload NGINX:

sudo nginx -t && sudo systemctl reload nginx

External clients will now see:

The image shows a web page with a "403 Forbidden" error message, indicating access is denied. It also mentions "nginx/1.18.0 (Ubuntu)" as the server.


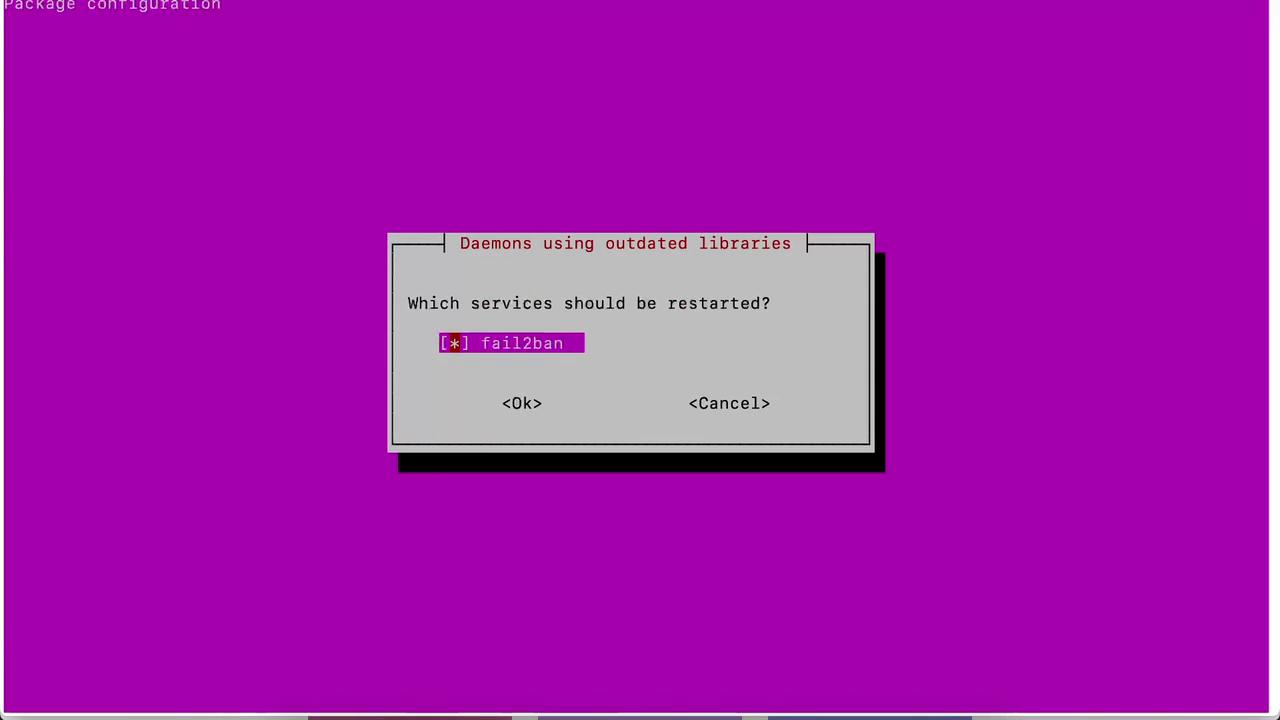
6. Automate Banning with Fail2Ban

Replace manual IP lists with automatic bans on repeated auth failures.

  1. Install Fail2Ban:

    sudo apt update
    sudo apt install fail2ban -y
    

    Warning

    If prompted to restart due to outdated libraries, choose Ok.

    The image shows a dialog box on a purple background, prompting the user to restart the "fail2ban" service due to outdated libraries, with options to select "Ok" or "Cancel."

  2. Copy the default jail configuration:

    sudo cp /etc/fail2ban/jail.conf /etc/fail2ban/jail.local
    
  3. Enable the nginx-http-auth jail in /etc/fail2ban/jail.local:

    [nginx-http-auth]
    enabled  = true
    port     = http,https
    filter   = nginx-http-auth
    logpath  = %(nginx_error_log)s
    maxretry = 1
    bantime  = 600
    
  4. Restart Fail2Ban:

    sudo systemctl restart fail2ban
    
  5. Verify the jail status:

    sudo fail2ban-client status nginx-http-auth
    

    You should see the jail enabled with no banned IPs initially.

  6. Trigger a ban by entering incorrect credentials in your browser:
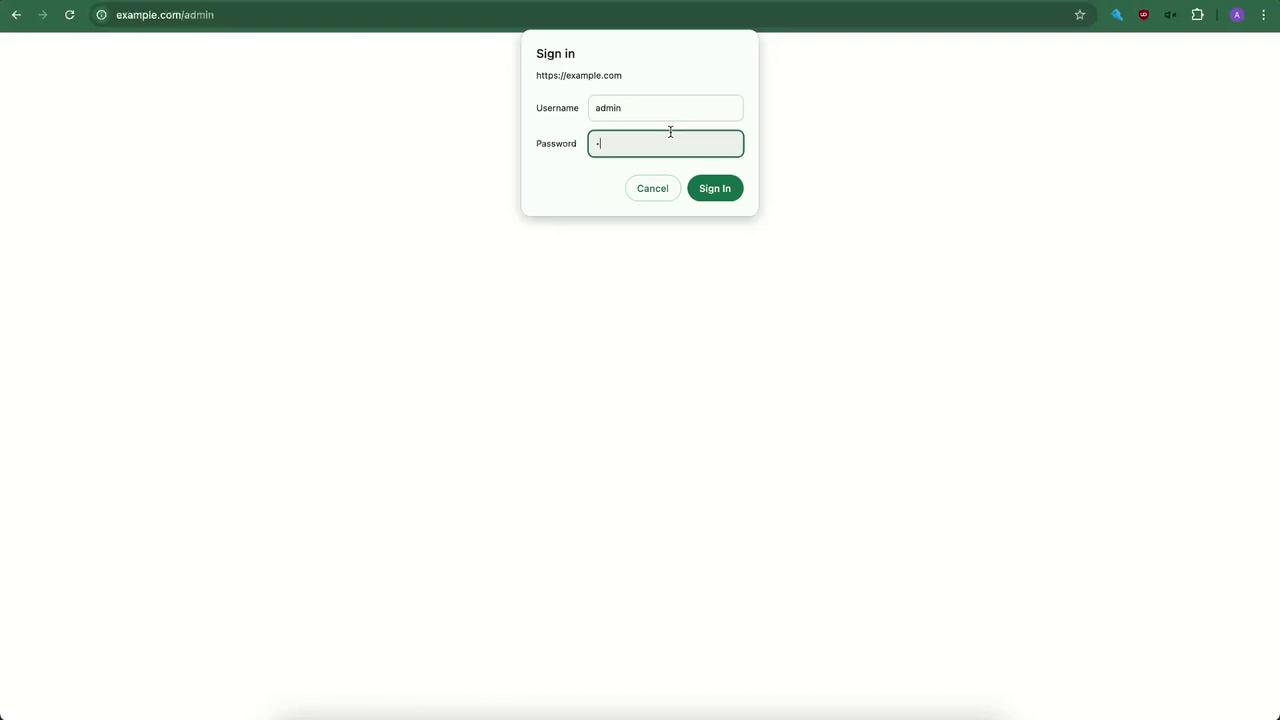
    The image shows a web browser displaying a login page for "example.com" with fields for a username and password, and buttons for "Cancel" and "Sign In."

    Then check:

    sudo fail2ban-client status nginx-http-auth
    

    Your client IP will appear in the “Banned IP list.”


With NGINX’s static allow/deny and Fail2Ban’s dynamic banning, you have a robust defense against unwanted access and brute-force attempts.

Watch Video

Watch video content

Practice Lab

Practice lab

Previous
Blocking Traffic