Why HTTPS Matters
1. Security
When you access a website via HTTPS, all communication between your browser and the server is encrypted. On an unencrypted connection (HTTP), anyone on the same network—such as a coffee shop Wi-Fi—could intercept your passwords, credit-card numbers, or personal details.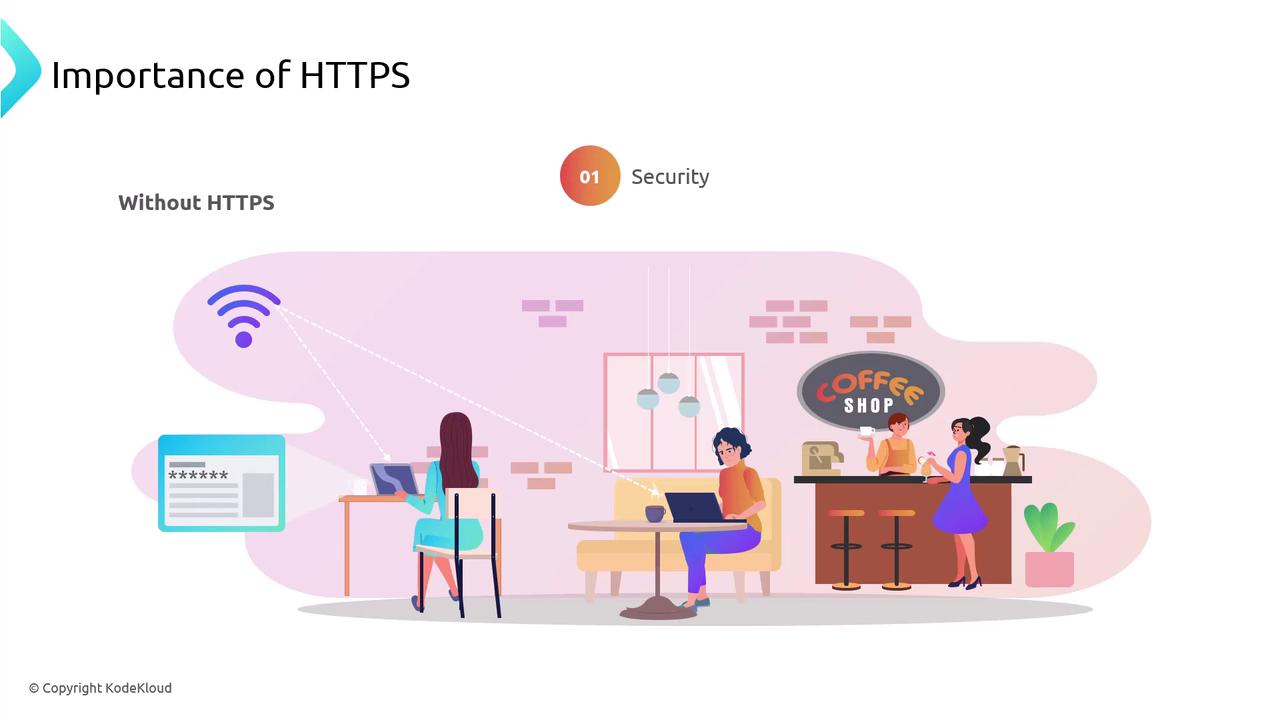
With HTTPS, intercepted data is encrypted and unreadable.

2. SEO Benefits
Search engines like Google prioritize secure sites in search rankings. Enabling HTTPS not only protects user data but also improves your site’s visibility and trustworthiness.
SSL and TLS Protocols
SSL (Secure Sockets Layer) and TLS (Transport Layer Security) are cryptographic protocols that secure data in transit. Although we still colloquially call them “SSL certificates,” modern sites use TLS under the hood.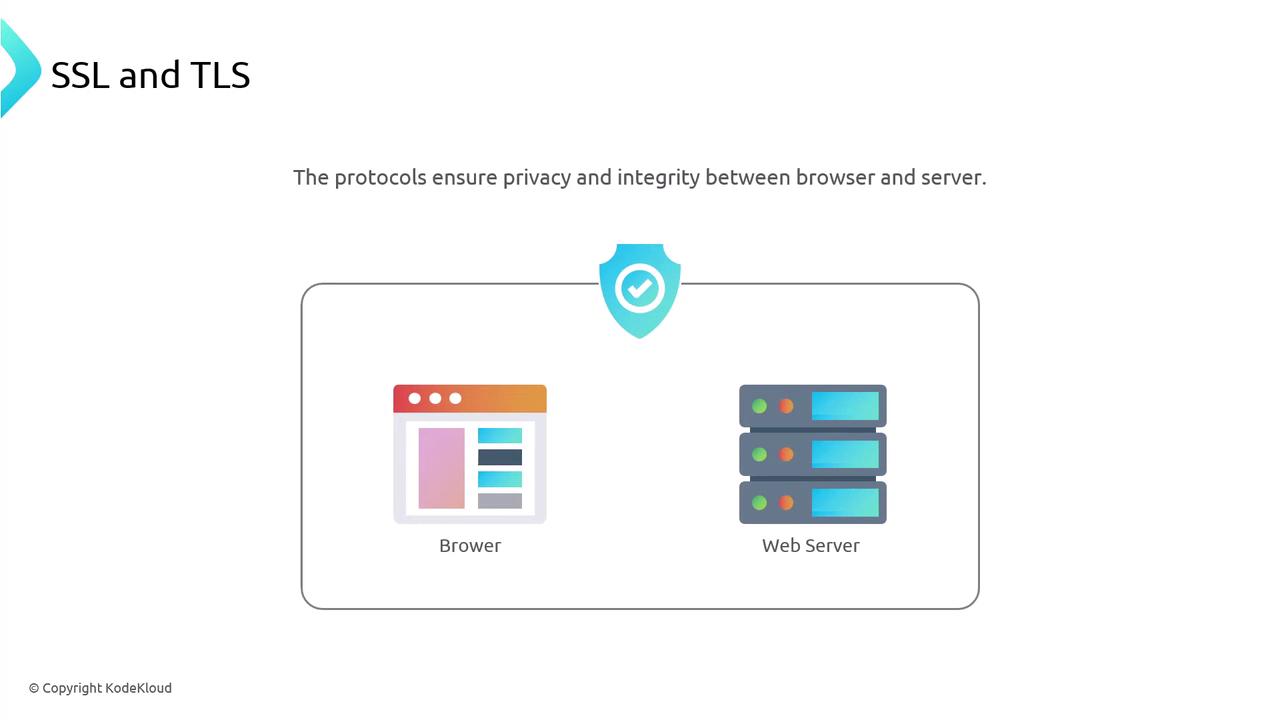
SSL vs TLS: A Quick Comparison
| Protocol | Status | Typical Use Case |
|---|---|---|
| SSL | Deprecated | Legacy or unsupported systems |
| TLS 1.2 | Widely Used | Production environments |
| TLS 1.3 | Recommended | Best performance and security |
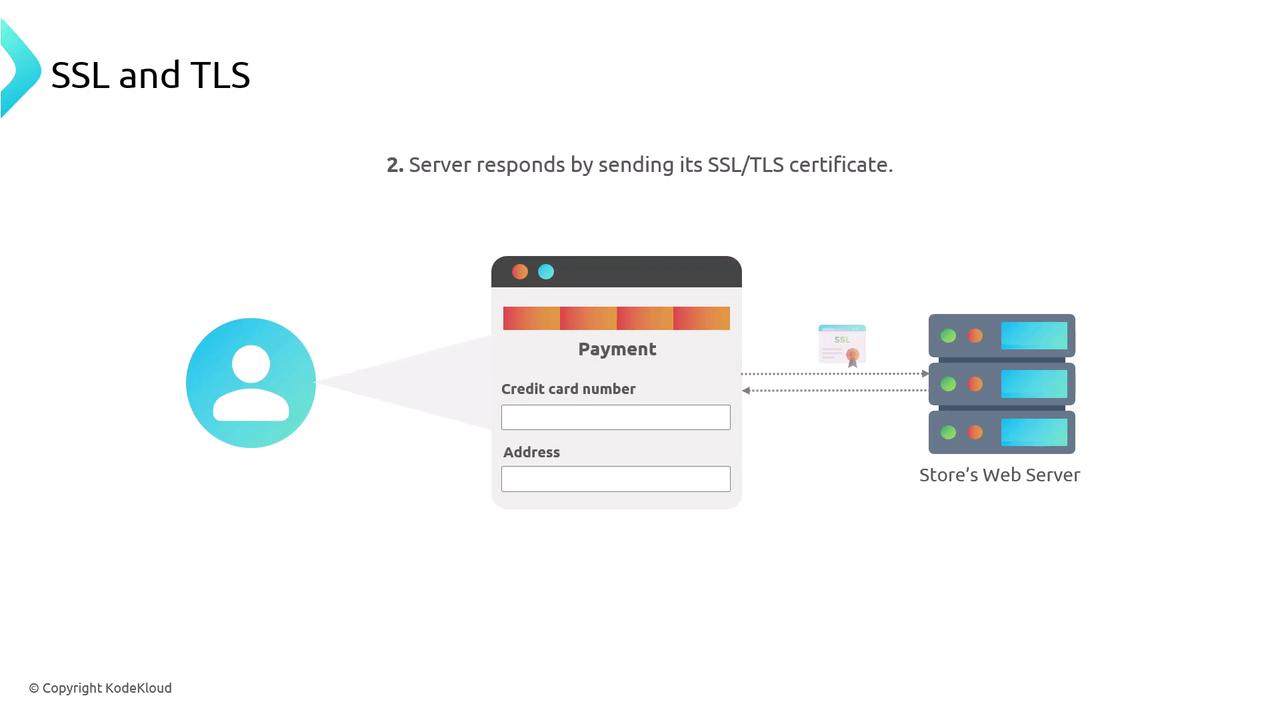
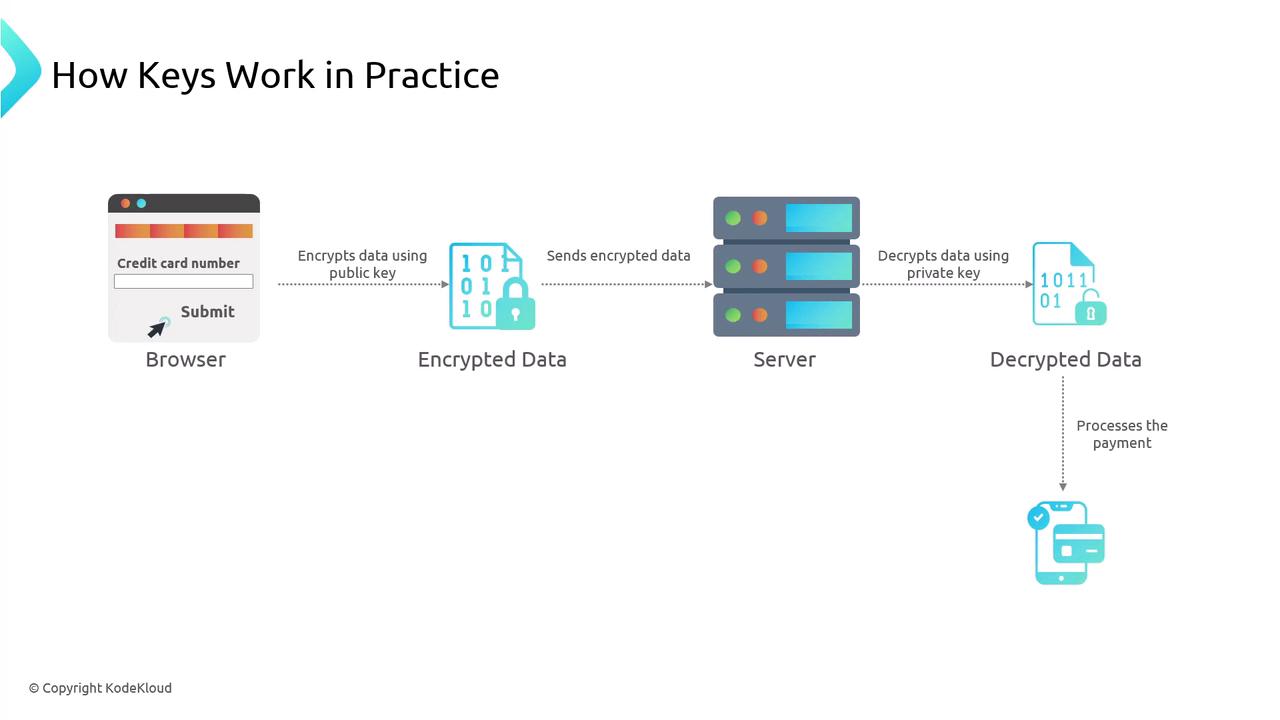
How TLS Works: A Checkout Example
Imagine you’re on an e-commerce checkout page and submit your name, address, and credit-card details. TLS protects this process in four steps:- Connection Initiation
Your browser connects to the server over HTTPS.

- Certificate Exchange
The server responds by sending its TLS certificate, which includes its public key and identity details.
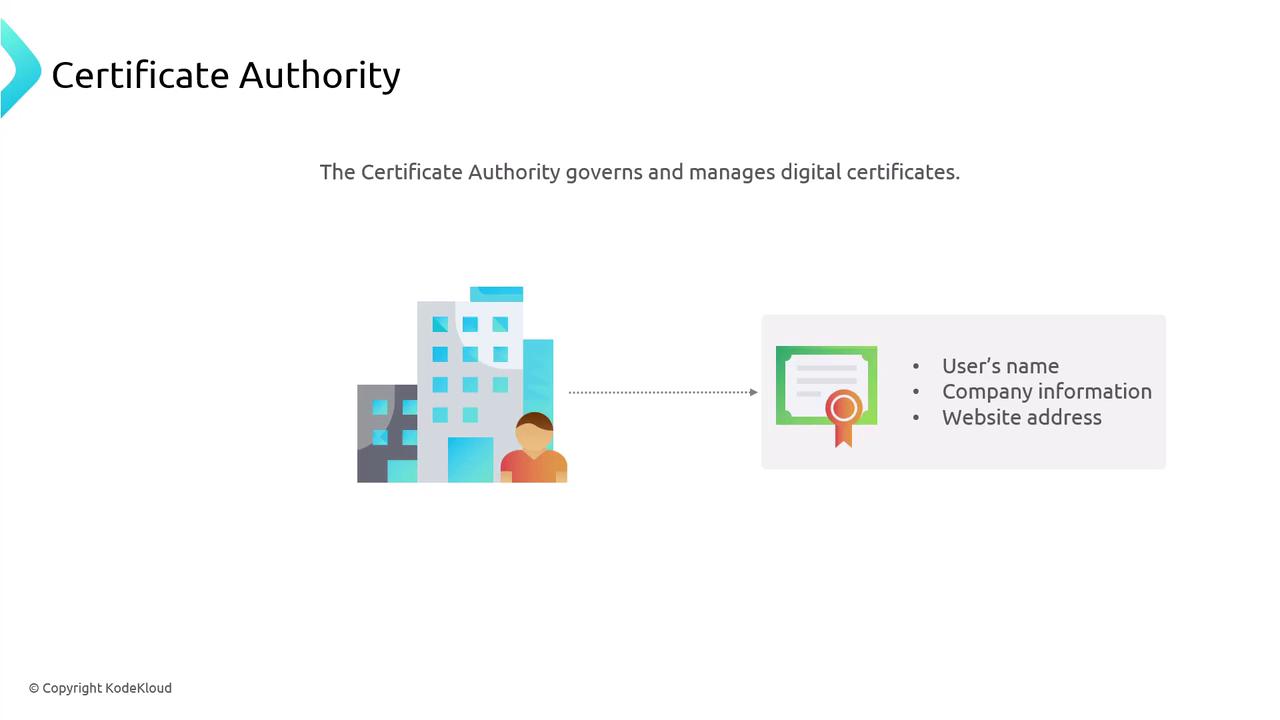
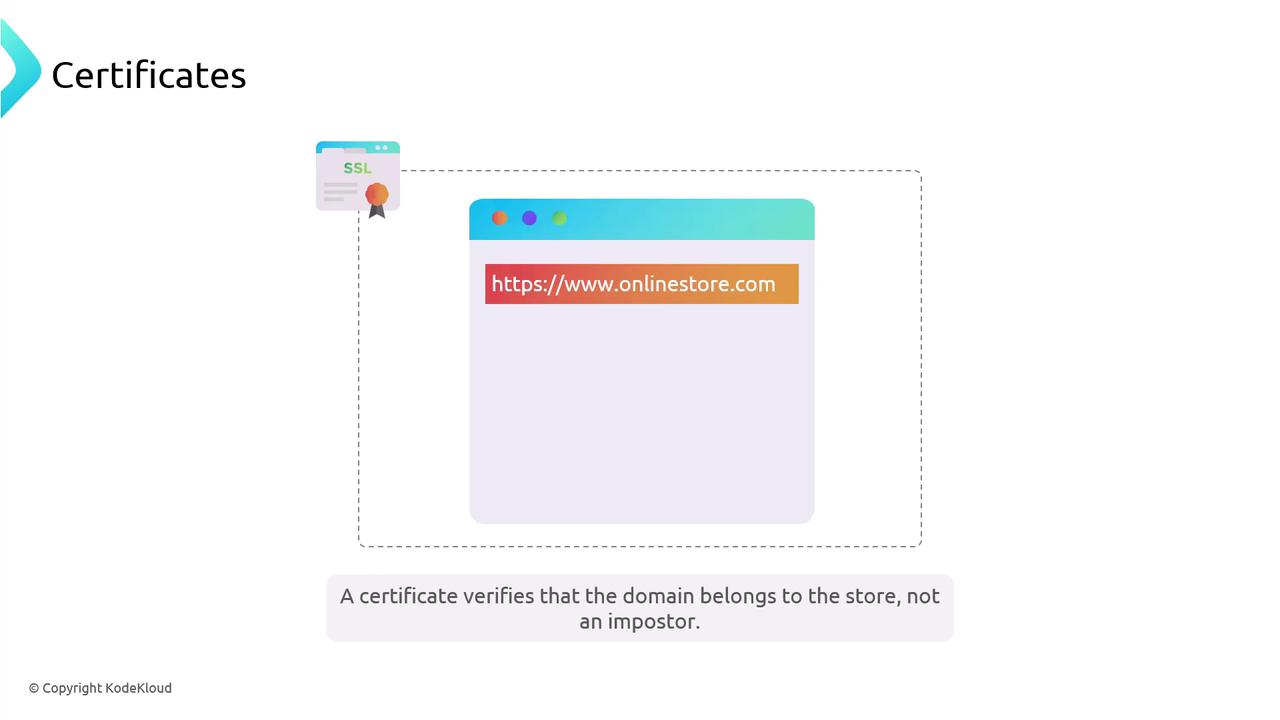
- Certificate Authority (CA)
A trusted CA—like Let’s Encrypt, DigiCert, or Comodo—verifies the domain owner and signs the certificate.
- Domain Verification
Your browser checks that the certificate matches the domain (e.g.,https://onlinestore.com), ensuring you’re communicating with the real site.
Asymmetric Encryption Explained
TLS employs asymmetric encryption (public-key cryptography), similar to SSH. A public key encrypts data, and only the corresponding private key can decrypt it.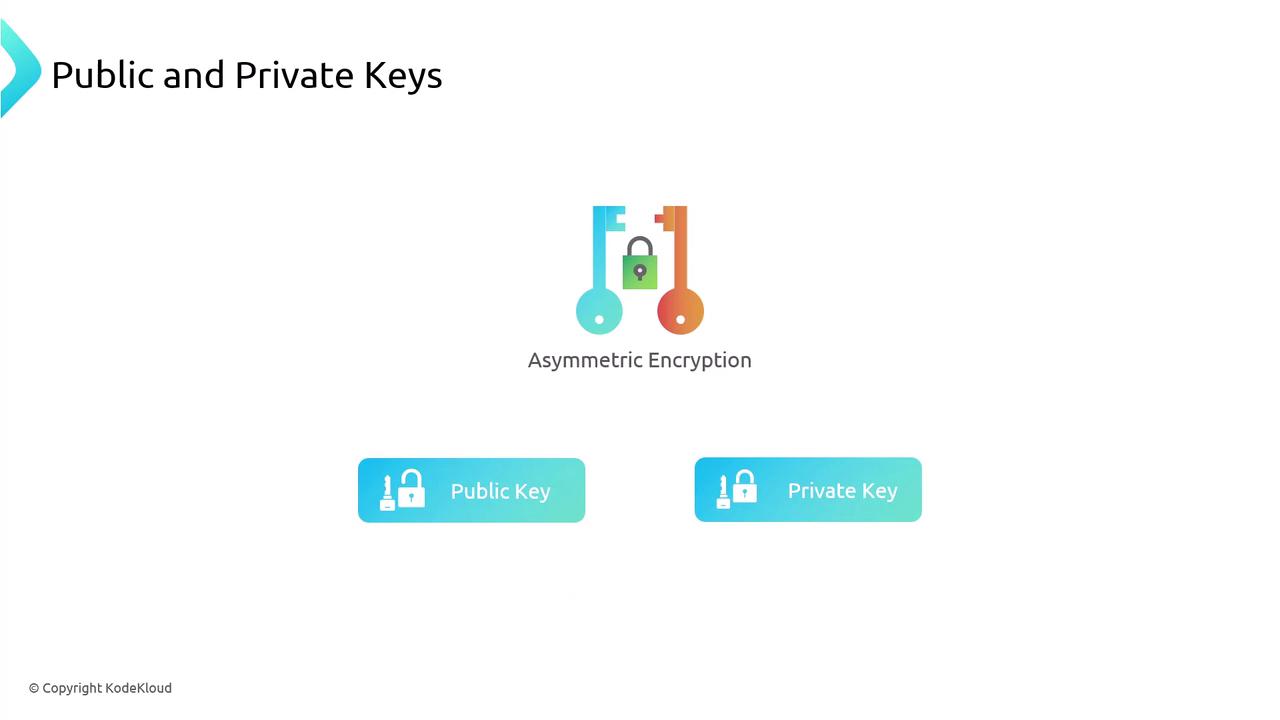
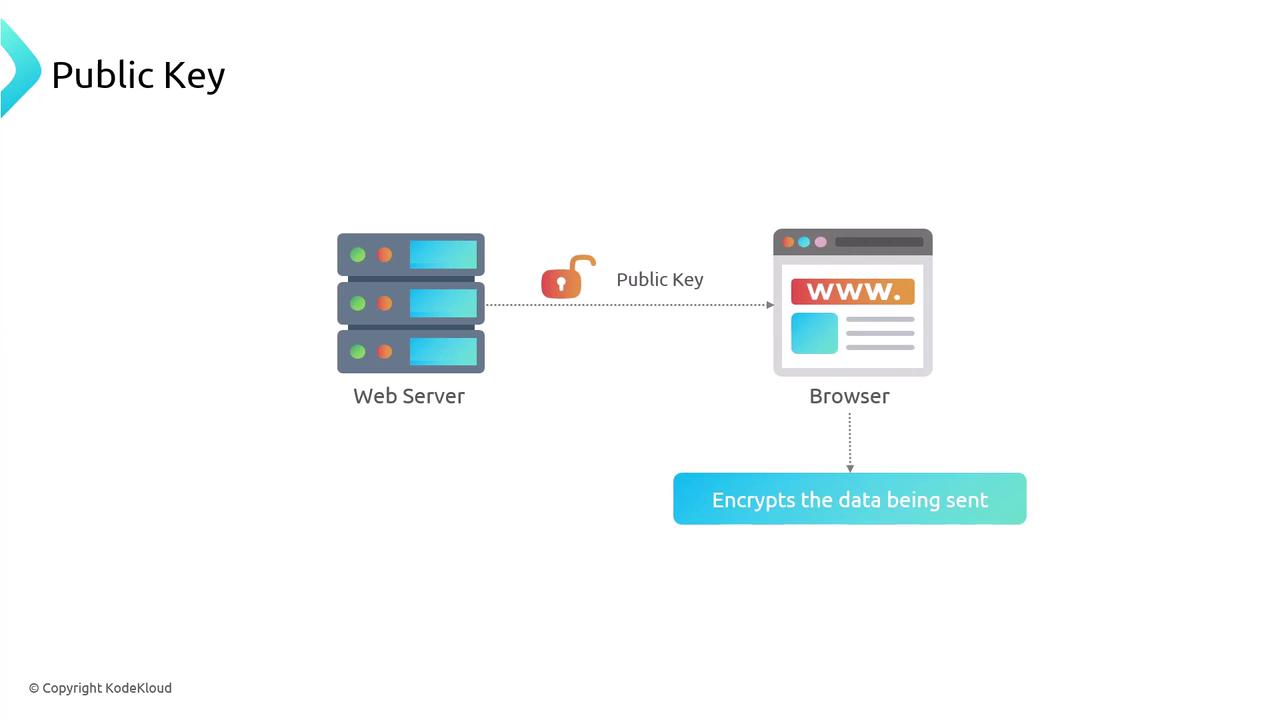
- The server publishes its public key (an “open padlock”) to your browser.
- Your browser encrypts sensitive data—like credit-card details—using that public key.
- The server applies its private key to decrypt the data, keeping it secure even if intercepted.
Obtaining TLS Certificates
Choose a tool and provider based on your environment:| Tool | Provider | Best For |
|---|---|---|
| Certbot | Let’s Encrypt | Free, automated production certs |
| mkcert | Self-signed | Local development and testing |
1. Let’s Encrypt + Certbot
Certbot is an ACME client that automates issuance and renewal of free TLS certificates from Let’s Encrypt.Certbot creates a daily cron job for automatic renewal. Ensure ports 80 and 443 are available.
/etc/letsencrypt/live/example.com/fullchain.pem/etc/letsencrypt/live/example.com/privkey.pem
2. mkcert (Self-Signed for Local Testing)
mkcert sets up a local CA and issues certificates trusted by your development machine. Not suitable for production.Self-signed certificates from
mkcert won’t be trusted by remote browsers or services. Use only for local development.
Configuring Nginx for HTTPS
Once you have your certificate and private key, update your Nginx server block to listen on port 443:https://honda.cars.com.