Learn the fundamentals of HCL, including syntax, creating resources, and essential Terraform commands for managing infrastructure configurations.
In this article, you’ll learn the fundamentals of HCL—the language used to define infrastructure with Terraform. We demonstrate HCL syntax, create a simple local file resource, and walk through essential Terraform commands to initialize, plan, and apply configurations.
HCL files consist of blocks and arguments. Blocks are defined using curly braces and contain key-value pair arguments that represent configuration data. In Terraform, each block describes a specific aspect of your infrastructure and lists the resources you wish to create. For instance, you might want to create a file on the local system where Terraform is installed.First, create a directory for your configuration file in the /root directory:
$ mkdir /root/terraform-local-file$ cd /root/terraform-local-file
Within this directory, create a configuration file (e.g., local.tf) and define a generic block structure:
Block Identification
The block starts with the resource keyword and is identified by curly braces. It consists of three parts:
Resource Type: local_file indicates that the local provider is used.
Resource Name:
The logical name pet uniquely identifies this resource.
Block Arguments:
These key-value pairs specify resource parameters. For example:
filename sets the absolute path /root/pets.txt where the file is created.
content provides the text content for the file.
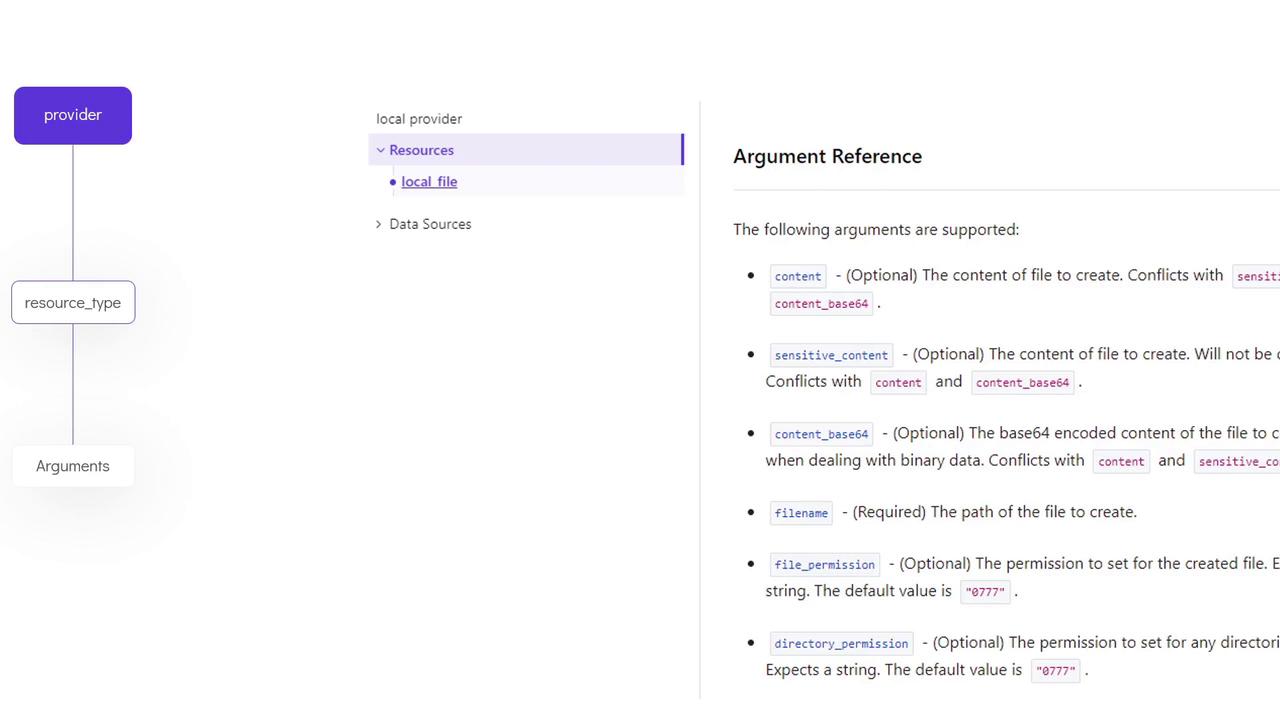
Resource Type Requirements
The local_file resource requires the arguments filename and content. When working with other providers such as AWS, Azure, or GCP, different resource types may require a different set of arguments. Consult Terraform’s documentation for details on the necessary arguments for each resource type.
Below are additional examples for other providers:
A typical Terraform workflow involves the following steps:
Write the Configuration File:
Create and edit your Terraform configuration file (e.g., local.tf).
Initialize the Working Directory:
This step checks your configuration file and downloads the necessary provider plugins.
$ terraform init
When running terraform init, Terraform identifies the use of the local provider based on your resource configuration.
Example output:
Initializing the backend...Initializing provider plugins...- Finding latest version of hashicorp/local...- Installing hashicorp/local v1.4.0...- Installed hashicorp/local v1.4.0 (signed by HashiCorp)The following providers do not have any version constraints in configuration,so the latest version was installed.To prevent automatic upgrades to new major versions that may contain breakingchanges, we recommend adding version constraints in a required_providers blockin your configuration, with the constraint strings suggested below.* hashicorp/local: version = "~> 1.4.0"Terraform has been successfully initialized!
Review the Execution Plan:
Use the terraform plan command to see the proposed actions before applying changes.
$ terraform plan
The output provides a diff-like summary showing what will be created, modified, or destroyed. For example, a plus symbol (+) next to the local_file.pet resource indicates that it will be created.Example excerpt:
An execution plan has been generated and is shown below.Resource actions are indicated with the following symbols: + createTerraform will perform the following actions: # local_file.pet will be created + resource "local_file" "pet" { + content = "We love pets!" + directory_permission = "0777" + file_permission = "0777" + filename = "/root/pets.txt" + id = (known after apply) }Plan: 1 to add, 0 to change, 0 to destroy.
Apply the Configuration:
Execute the following command to apply the configuration and create the resource:
$ terraform apply
Confirm the execution by typing yes when prompted.Example output:
An execution plan has been generated and is shown below.Resource actions are indicated with the following symbols: + createTerraform will perform the following actions: # local_file.pet will be created + resource "local_file" "pet" { + content = "We love pets!" + directory_permission = "0777" + file_permission = "0777" + filename = "/root/pets.txt" + id = (known after apply) }Plan: 1 to add, 0 to change, 0 to destroy.Do you want to perform these actions?Terraform will perform the actions described above.Only 'yes' will be accepted to approve.Enter a value: yeslocal_file.pet: Creating...local_file.pet: Creation complete after 0s [id=521c5c732c78cb42cc9531ecc7c0638c4a115b55]Apply complete! Resources: 1 added, 0 changed, 0 destroyed.
After applying the configuration, verify the creation of the file using the cat command or inspect the resource details with:
In this article, we explored the basics of HCL by creating our first Terraform resource. We discussed HCL syntax, detailed the configuration for a local file resource, and walked through the Terraform workflow—from initialization and planning to applying changes. Now it’s time to dive into hands-on labs and further your understanding of HCL and Terraform.Happy coding!