All right — let’s get the project started. In this guide you’ll go from zero to a running ADK agent: install required tools, scaffold a project, and wire up a simple helpdesk agent that responds in natural language. Although this demo uses Google Cloud IDE and the Google AI backend, the ADK is model-agnostic. You can swap in other LLM backends (or run locally) later.

What you’ll build

  • A minimal ADK “root agent” that runs against an LLM.
  • Local development setup (Python virtual environment).
  • A scaffolded project containing the agent, package init, and .env.
  • A quick run using the ADK runner and the ADK web UI for inspection.

Prerequisites

  • Python 3.8 or newer
  • If using the Google AI backend: a Google API key (create one in AI Studio)
Helpful links:

1) Create and activate a Python virtual environment

Mac / Linux:
python3 -m venv .venv
source .venv/bin/activate
Windows (PowerShell):
python3 -m venv .venv
.venv\Scripts\Activate.ps1
Example terminal session:
jeremy@MACSTUDIO ticketpro % python3 -m venv .venv
jeremy@MACSTUDIO ticketpro % source .venv/bin/activate
(.venv) jeremy@MACSTUDIO ticketpro %

2) Install the ADK package

Install the ADK Python package with pip:
pip install google-adk
You may see dependency installation output similar to:
Collecting google-adk
Installing collected packages: google-auth, protobuf, pydantic, ...

3) Scaffold a new ADK project

Use the ADK CLI to scaffold a new agent project:
adk create helpdesk_agent
The CLI will prompt for a model and backend. For this demo choose:
  • Model: gemini-2.5-flash
  • Backend: Google AI (not Vertex AI)
If you do not yet have an API key, follow the CLI prompt to create one in AI Studio. Example interactive prompts:
Choose a model for the root agent:
1. gemini-2.5-flash
2. Other models (fill later)
Choose model (1, 2): 1
1. Google AI
2. Vertex AI
Choose a backend (1, 2): 1

Don't have API Key? Create one in AI Studio: https://aistudio.google.com/apikey

Enter Google API key:
After completion the CLI lists the created files:
Agent created in /Users/jeremy/Repos/adkdemos/ticketpro/helpdesk_agent:
- .env
- __init__.py
- agent.py

(.venv) jeremy@MACSTUDIO ticketpro %

4) Inspect the scaffolded files

Here’s a quick reference for the files the scaffold creates:
FilePurposeNotes / Example
.envEnvironment flags and API key placeholderDO NOT commit real keys to source control
init.pyMakes the directory a Python packageTypically imports the agent module
agent.pyRoot agent definitionContains the Agent instance ADK will run
Examples and snippets below.
  • init.py
This file makes the directory a Python package and commonly imports the agent so the ADK runtime can discover it:
from . import agent
  • .env
The scaffold includes an .env file containing a flag for Vertex AI usage and a placeholder for your API key. Replace the placeholder with a secure secret (see callout below). Example .env (do not commit real keys to source control):
GOOGLE_GENAI_USE_VERTEXAI=0
GOOGLE_API_KEY=YOUR_GOOGLE_API_KEY
Store real API keys securely — use environment variables, a secret manager, or another safe credential store. Avoid committing keys to source control.
  • agent.py
The scaffolded agent is an LLM-only agent. The only required element in an ADK app is a “root agent” instance that the ADK runtime will import and run. A minimal LLM root agent looks like this:
from google.adk.agents.llm_agent import Agent

root_agent = Agent(
    model='gemini-2.5-flash',
    name="helpdesk_root_agent",
    description="Smart IT Helpdesk assistant that helps troubleshoot basic IT issues.",
    instruction=(
        "You are a friendly but efficient IT helpdesk assistant for an internal company.\n"
        "\n"
        "Goals:\n"
        "1. Quickly understand the user's problem.\n"
        "2. Ask one or two clarifying questions if needed.\n"
        "3. Give clear, step-by-step instructions they can follow.\n"
        "4. Keep answers concise and practical.\n"
        "\n"
        "Constraints for now:\n"
        "- You do NOT have access to tools yet.\n"
        "- Don't claim to check real systems.\n"
        "- Use phrases like 'Based on common IT practice...' instead of pretending.\n"
    ),
    tools=[]  # Tools will be added later
)
This instruction block guides the LLM’s tone, goals, and constraints. We intentionally set tools=[] for now — tools (e.g., account lookups, ticket creation, status checks) will be added in later lessons.

5) Run the agent with the ADK runner

Run the agent using the ADK runtime so it can locate and execute the root agent:
adk run helpdesk_root_agent
If you omit the agent name the CLI will report a missing argument:
usage: adk run [OPTIONS] AGENT
Error: Missing required argument: AGENT
Example run output (trimmed):
Log setup complete: /tmp/agents_log/agent.latest.log
Running agent helpdesk_root_agent, type exit to exit.
[user]: My VPN disconnects every 5 minutes
[helpdesk_root_agent]: That sounds frustrating! A frequent VPN disconnect can be caused by several issues.

To help narrow it down, could you tell me:
1. Which VPN software are you using (e.g., Cisco AnyConnect, FortiClient, OpenVPN)?
2. Are you connected via Wi-Fi or wired (Ethernet)?
[user]:
This is a plain LLM interaction — the same behavior you’d get from sending the same prompt to Gemini directly. The ADK advantage is the structured agent scaffold that’s ready to be extended with tools, traces, sessions, and a web UI.

6) Web UI

ADK includes a web interface (adk web) to interact with your agent in a browser. Use it to inspect traces, events, state, artifacts, sessions, and evals — very helpful for debugging and iterating quickly. You can use both the CLI and the web UI concurrently during development.
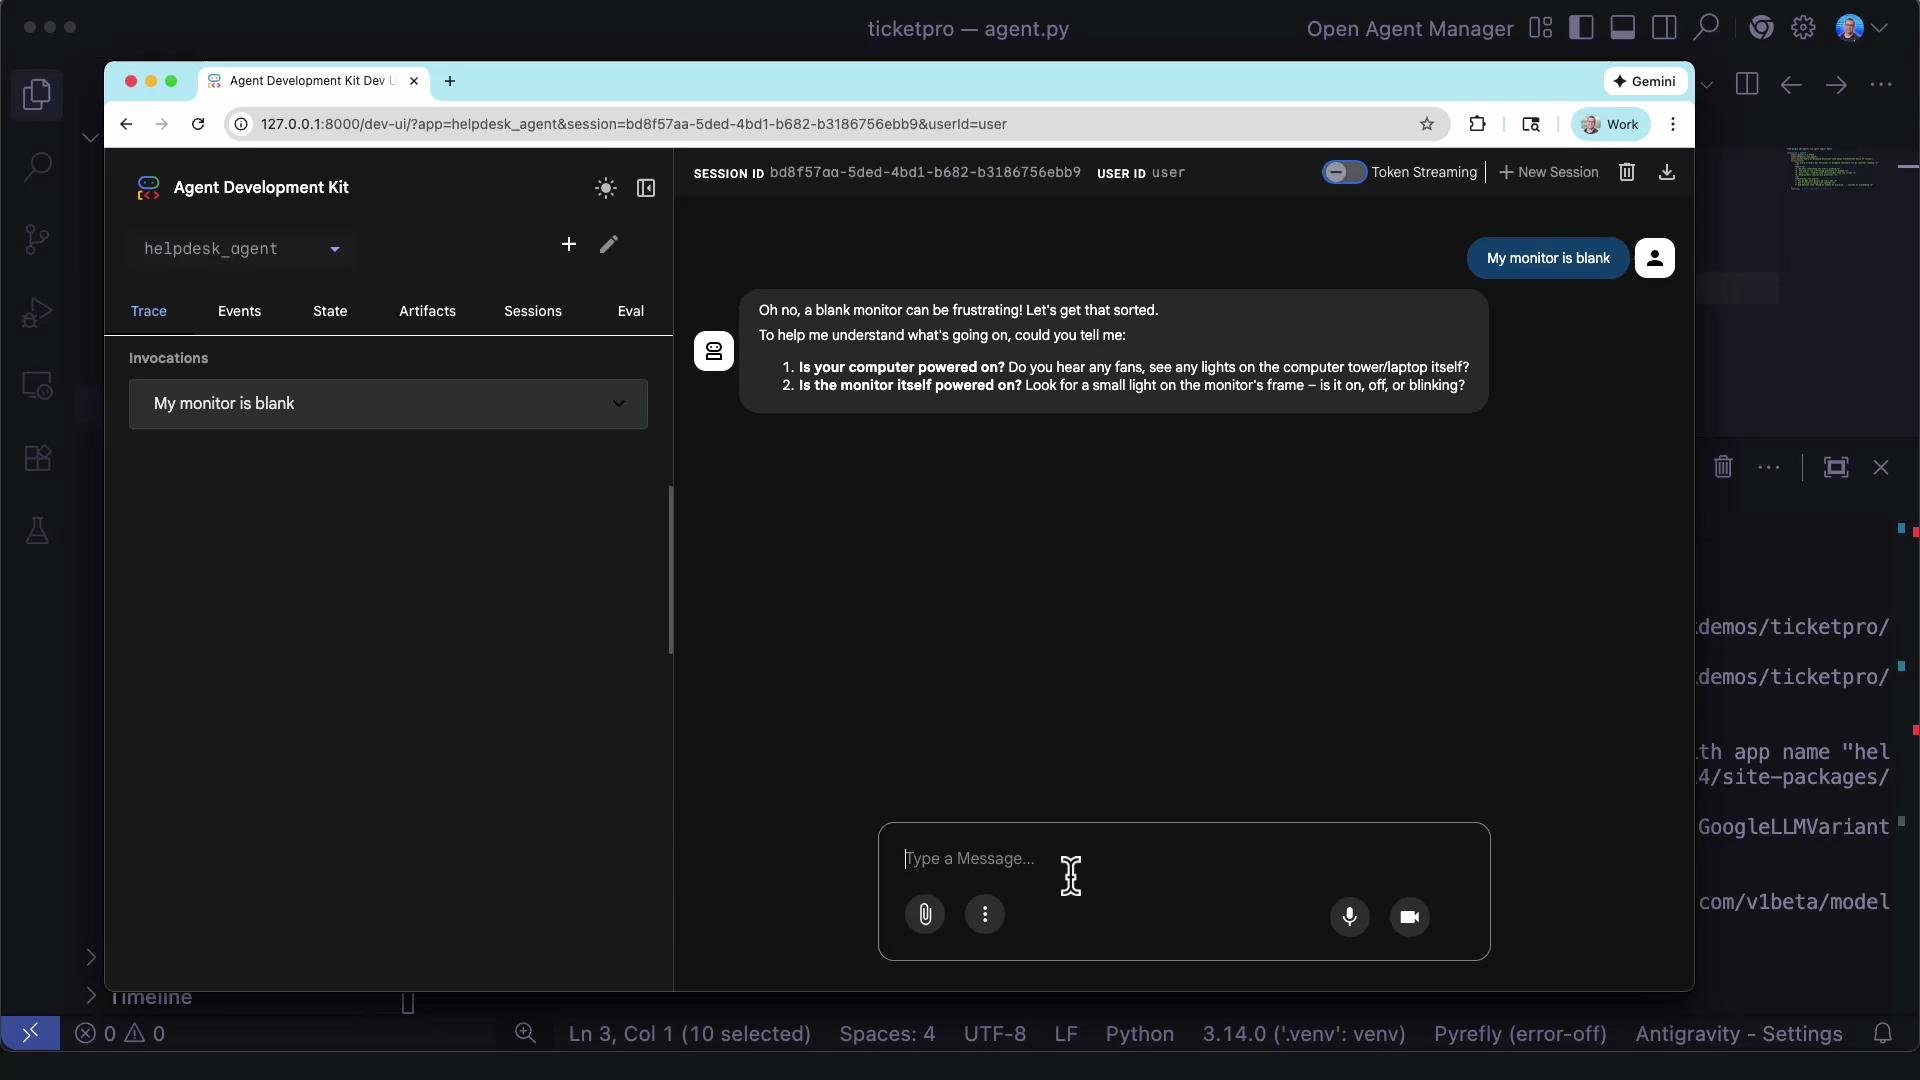
A dark-themed desktop screenshot of an "Agent Development Kit" web app showing a chat/helpdesk interface. The chat pane contains a user message "My monitor is blank" and an automated response asking troubleshooting questions.

Summary checklist

  • Created and activated a Python virtual environment.
  • Installed the google-adk package.
  • Scaffolded a helpdesk ADK project and inspected its files (.env, init.py, agent.py).
  • Configured the root_agent with goals, constraints, and a friendly instruction set.
  • Ran the agent via adk run to interact with the LLM.
  • Verified the web UI is available for interactive debugging and traces.
Next steps: add tools to give this agent real “powers” — for example, user account lookups, ticket creation, and system status queries. These will let the agent perform actions instead of only replying with general advice.