In this lesson you’ll get a hands-on walkthrough of AWS Identity and Access Management (IAM): creating users, groups, and roles, and attaching policies to control what identities can — and cannot — do. What you’ll learn:
  • Signing in (root vs IAM users)
  • Creating IAM users and granting console access
  • Demonstrating the default-deny model
  • Granting permissions (managed policies vs inline policies)
  • Using groups to simplify permission management
  • Creating and using roles (including sts:AssumeRole)
Never use the root user for daily operations. Keep root credentials secured, enable MFA, and only use root for account-level tasks that cannot be performed otherwise.

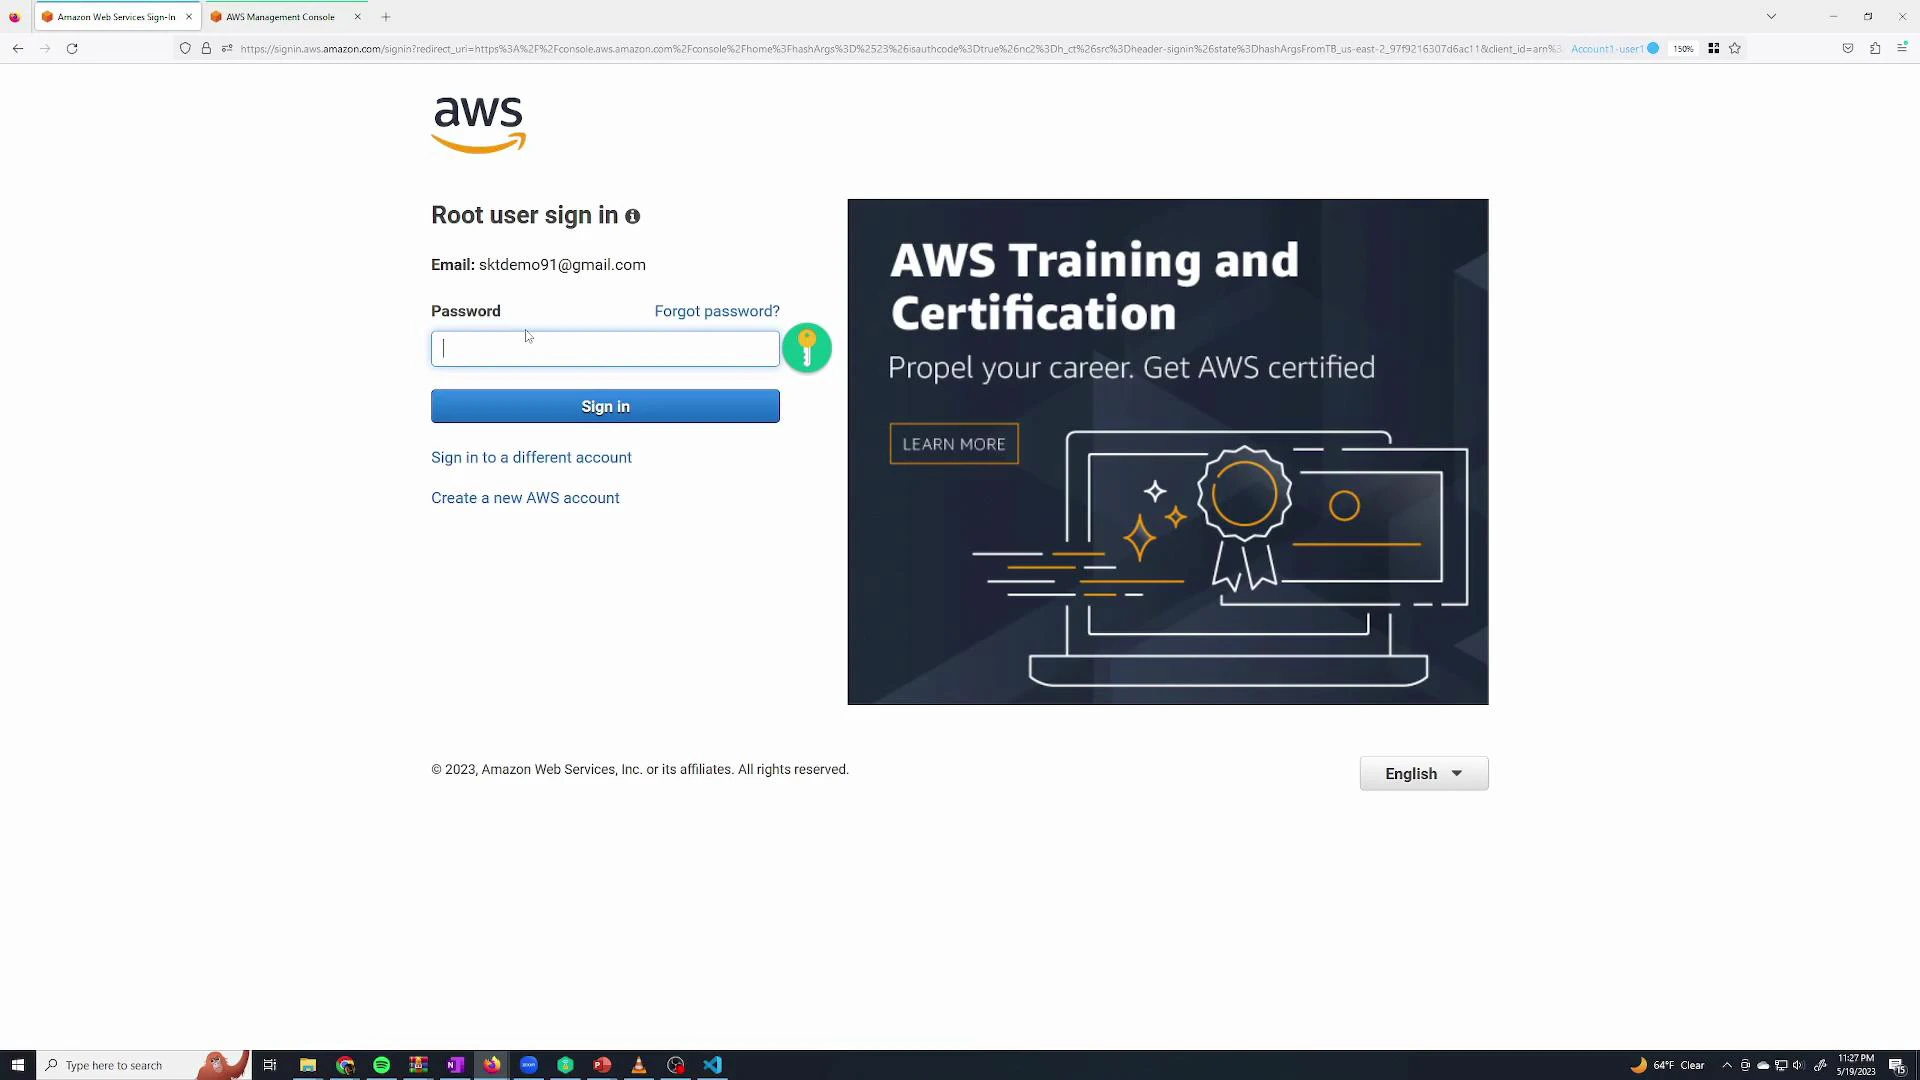
Signing in: root user vs IAM user

To sign in to the AWS Console go to aws.amazon.com/console and choose “Sign in to the Console”. There are two primary sign-in types:
Account typeSign-in credentialsTypical use case
Root userEmail used to register the AWS account + root password (and MFA if enabled)Account-wide management, billing, and actions that require root only
IAM userUsername and password created in IAM (or programmatic keys)Daily operations with scoped permissions
If you just created the account, sign in initially with the root email. After that, create scoped IAM users and avoid using root for routine tasks.
A screenshot of the AWS root user sign-in page showing an email address filled in, a password field and a "Sign in" button. The right side displays a large "AWS Training and Certification" advertisement.
Once signed in as root, create IAM users, grant least-privilege permissions, and enable MFA for high-privilege identities.

Opening IAM

Open the IAM console from the AWS Console search bar or from Recently visited services.
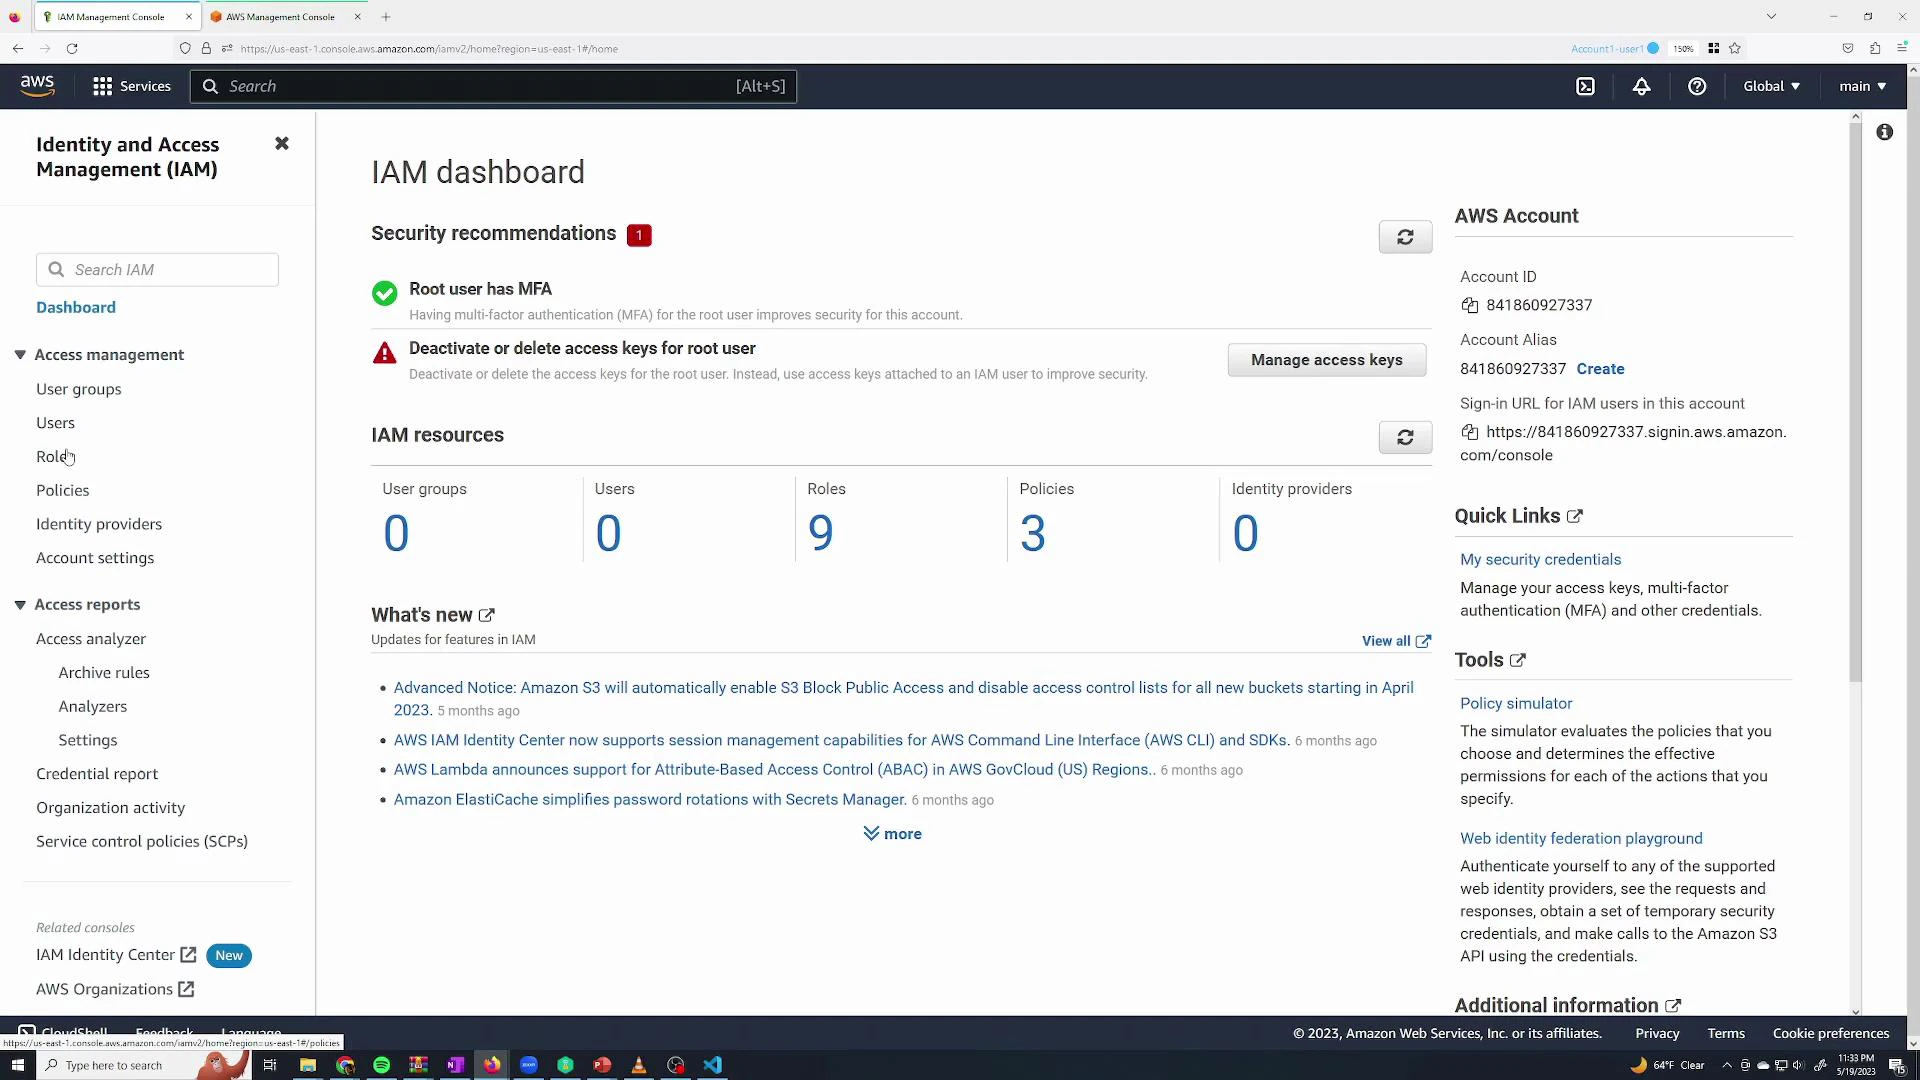
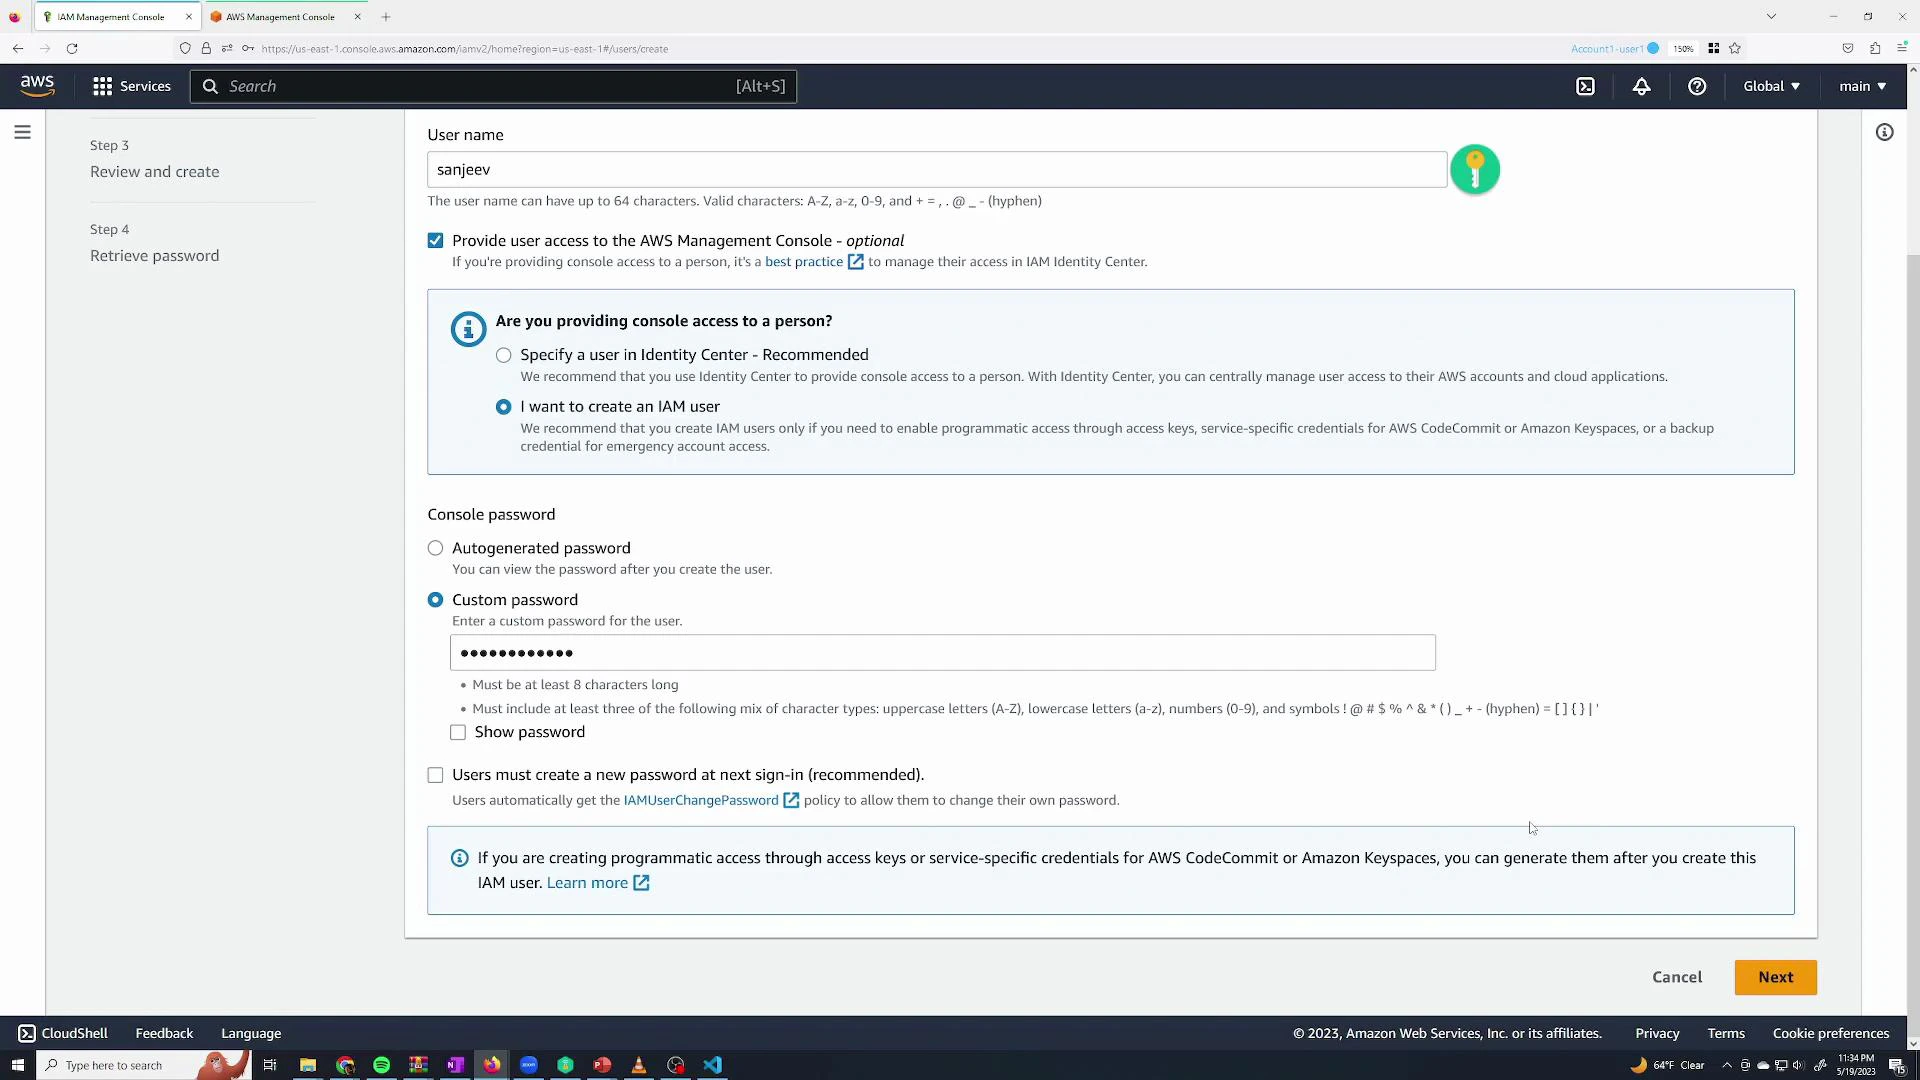
A screenshot of the AWS Identity and Access Management (IAM) dashboard showing security recommendations, IAM resource counts (user groups, users, roles, policies), and account/quick links on the right. The left side displays the IAM navigation menu with sections like Users, Roles, and Policies.

Create an IAM user

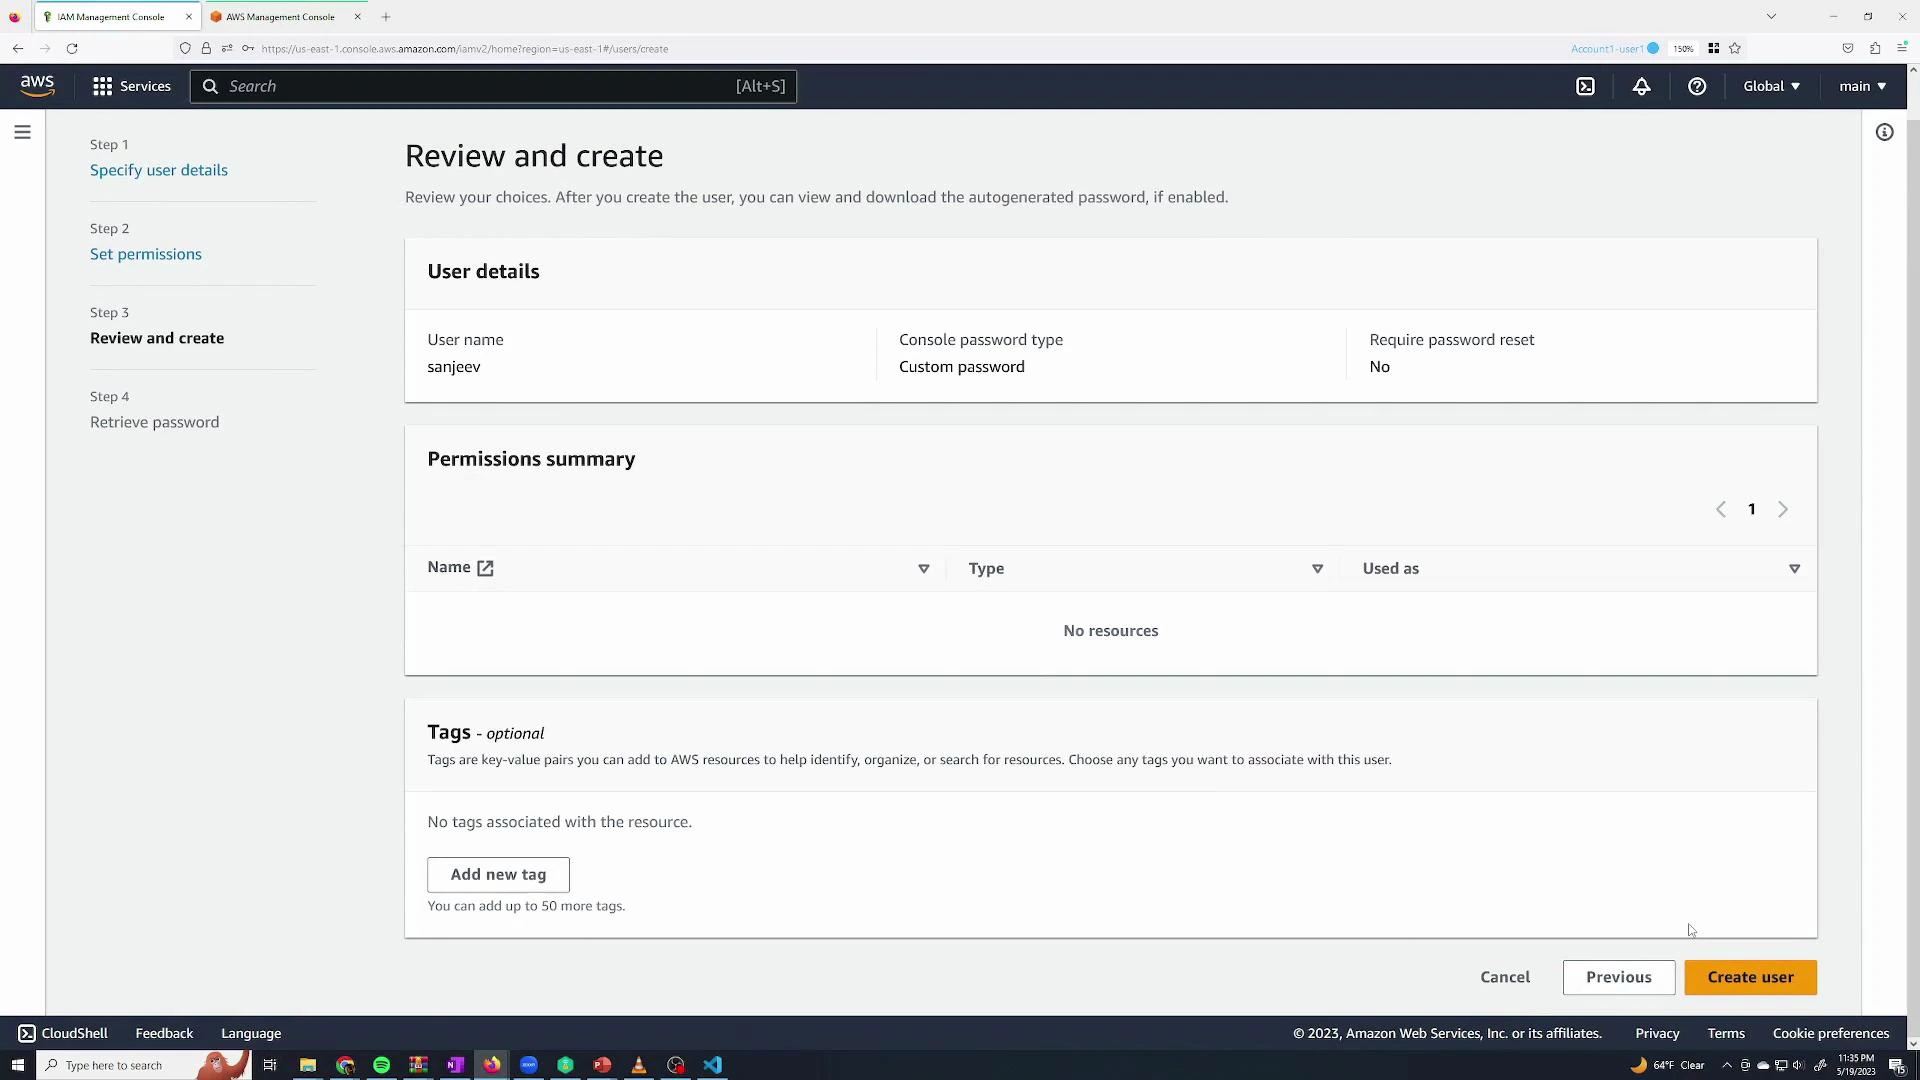
Navigate to IAM → Users → Add users. Provide a username and enable AWS Management Console access. You can let AWS auto-generate a password or set a custom one; optionally require the user to set a new password at first sign-in.
A screenshot of the AWS Identity and Access Management (IAM) console on the Users page showing no users listed. The interface shows options like "Add users," "Manage workforce users" (Identity Center), and navigation for user groups, roles, and policies.
Example: create a user named 
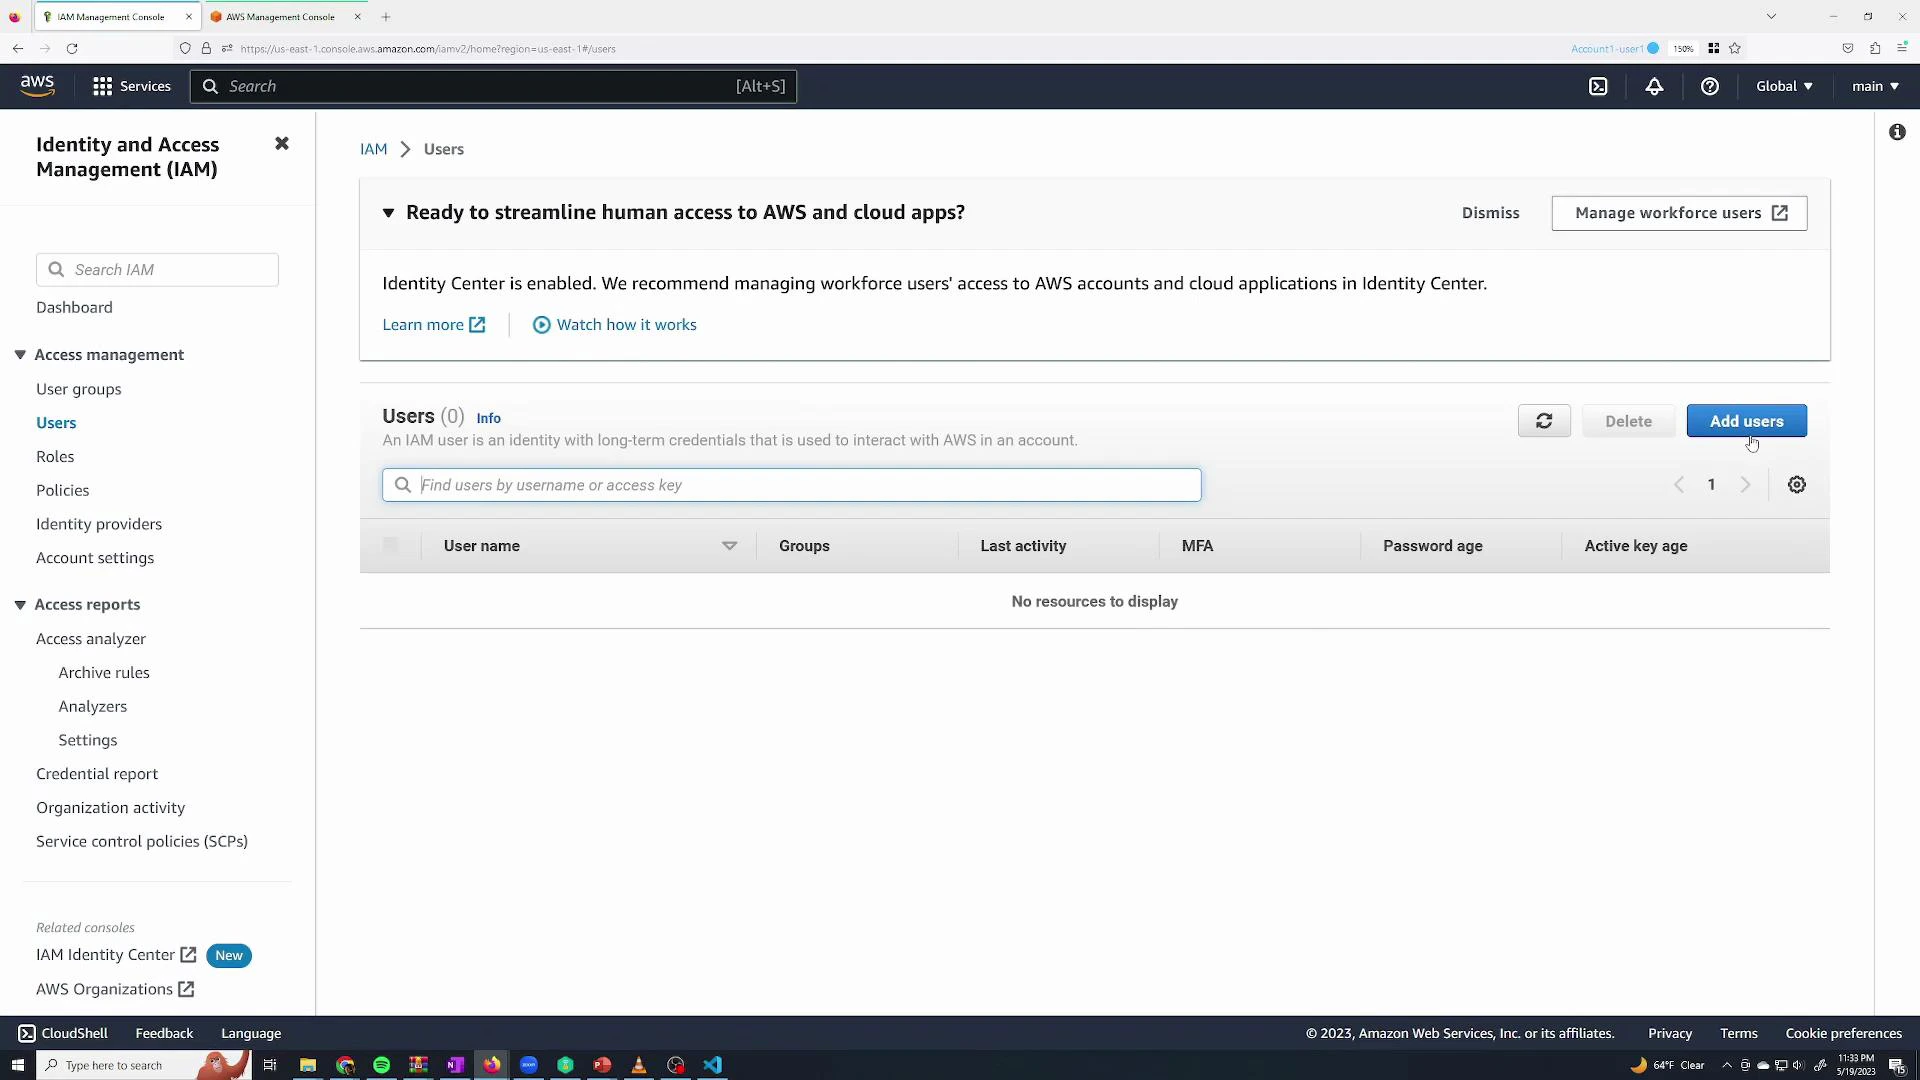
sanjeev and enable console access with a custom password. You can also skip attaching permissions at creation and assign them later.
A screenshot of the AWS IAM Management Console showing the "Create user" page with the username "sanjeev" entered. The page displays options for providing console access, choosing a custom password, and related password settings.
When creating a user you have three options for granting permissions:
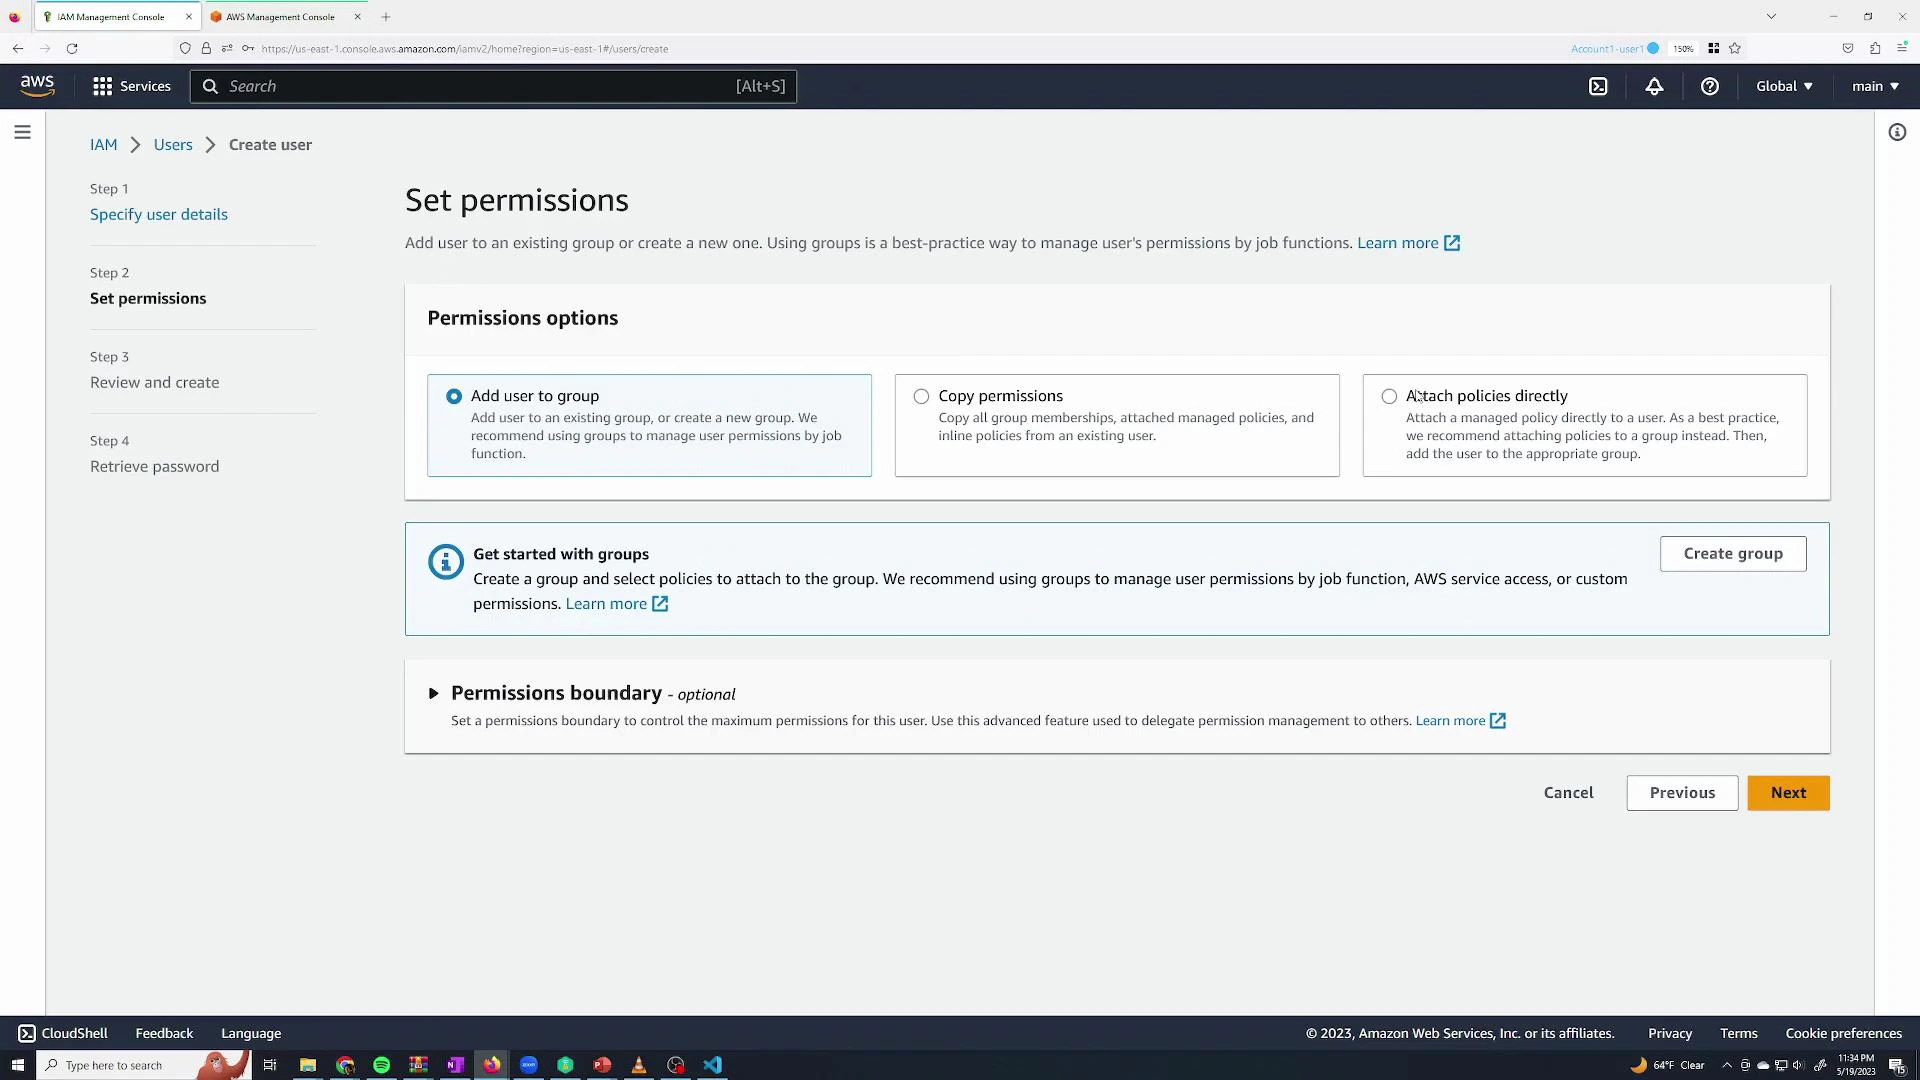
  • Add user to a group (user inherits group’s policies)
  • Copy permissions from an existing user
  • Attach policies directly to the user (inline or managed)
If you don’t attach any permissions, the user will have no access by default.
Screenshot of the AWS Management Console showing the IAM "Set permissions" page during user creation, with options to add the user to a group, copy permissions, or attach policies directly. The left sidebar shows the create-user steps and there are "Previous" and "Next" buttons at the bottom.
Review the user details and create the user.
A screenshot of the AWS IAM console on the "Review and create" screen for creating a user named "sanjeev." It shows user details, an empty permissions summary, an optional tags section, and buttons to cancel, go back, or "Create user."
After creation, the user appears in the Users list. By default they have no permissions and no MFA configured.

Signing in as an IAM user

From the Console sign-in, choose “IAM user” and provide the AWS account ID or alias, the IAM username, and the password. You can obtain the account ID from the root session → account dropdown.
A screenshot of the AWS sign-in page for an IAM user, showing fields for account ID, IAM user name, and password on the left. On the right is a promotional panel for "AWS AppSync" describing serverless GraphQL and pub/sub APIs.
If a user has no attached policies they will see a limited console and will be blocked from many operations.

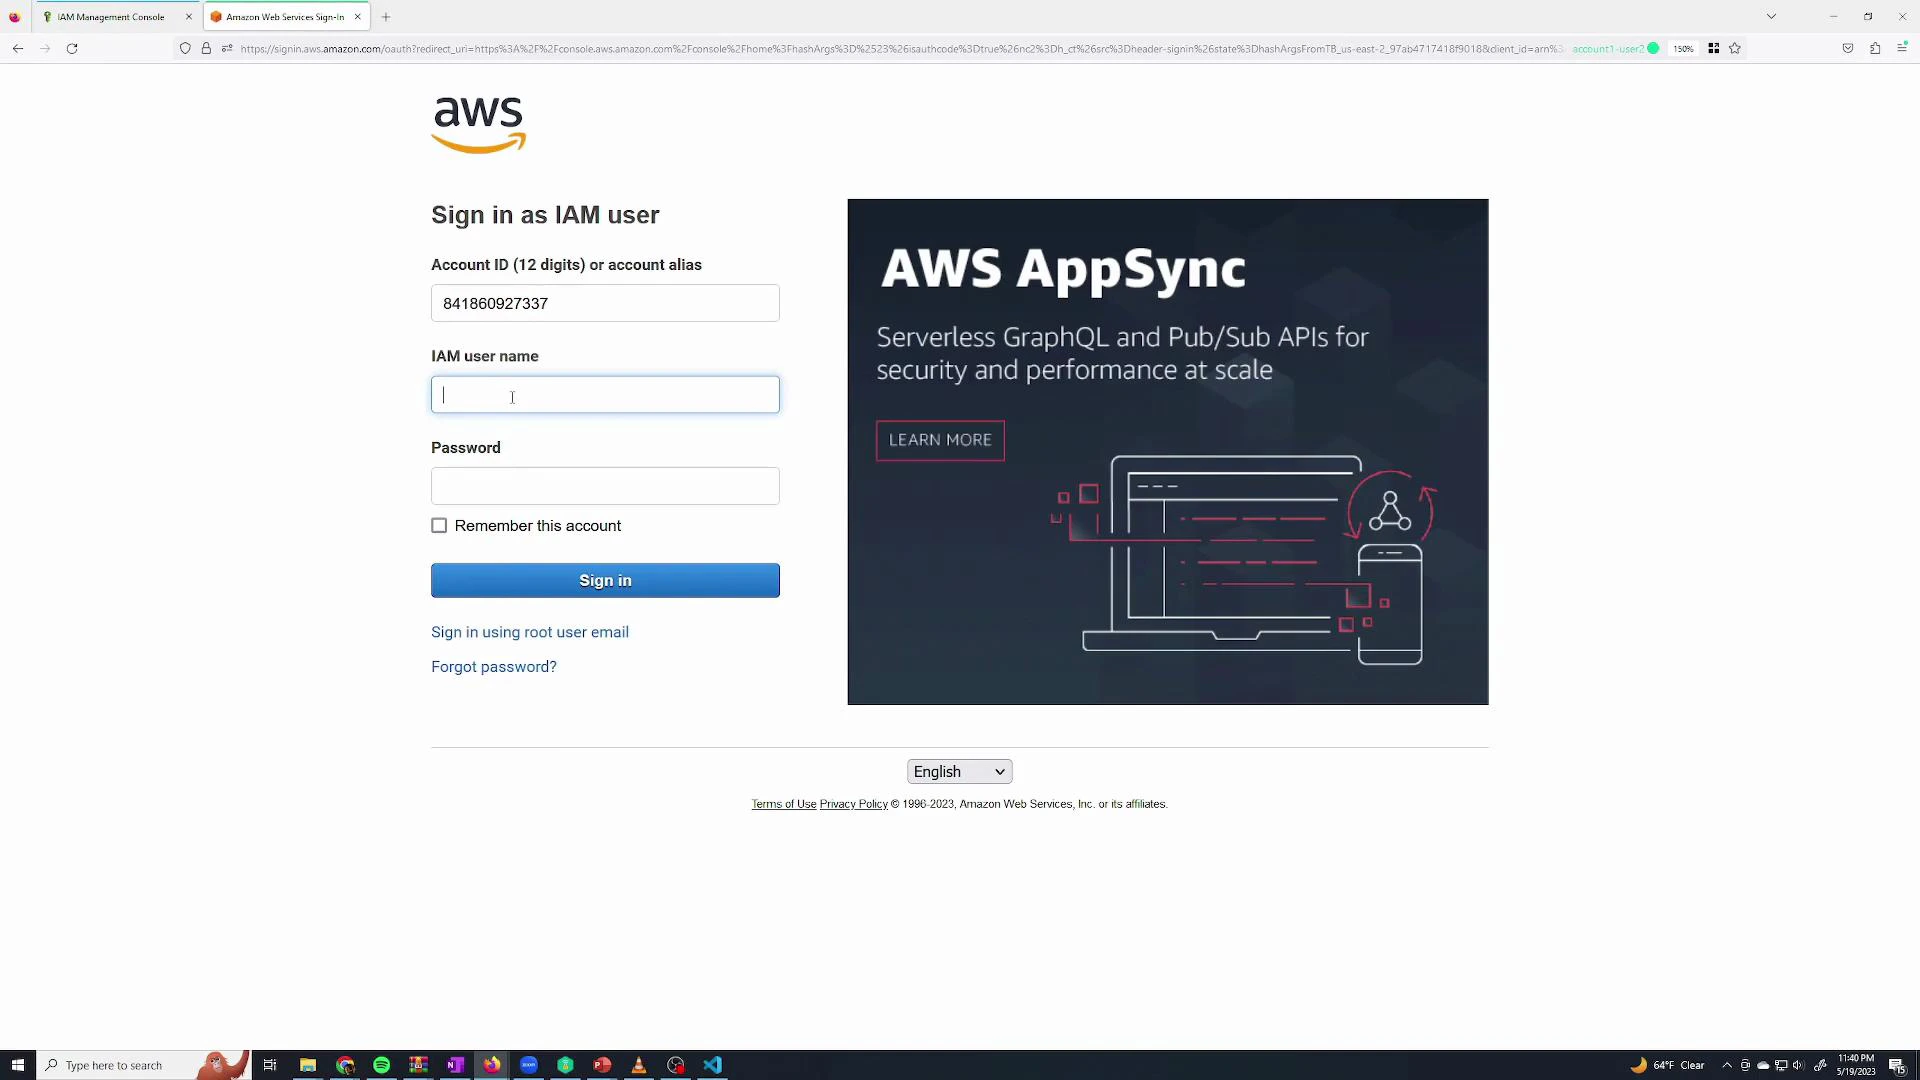
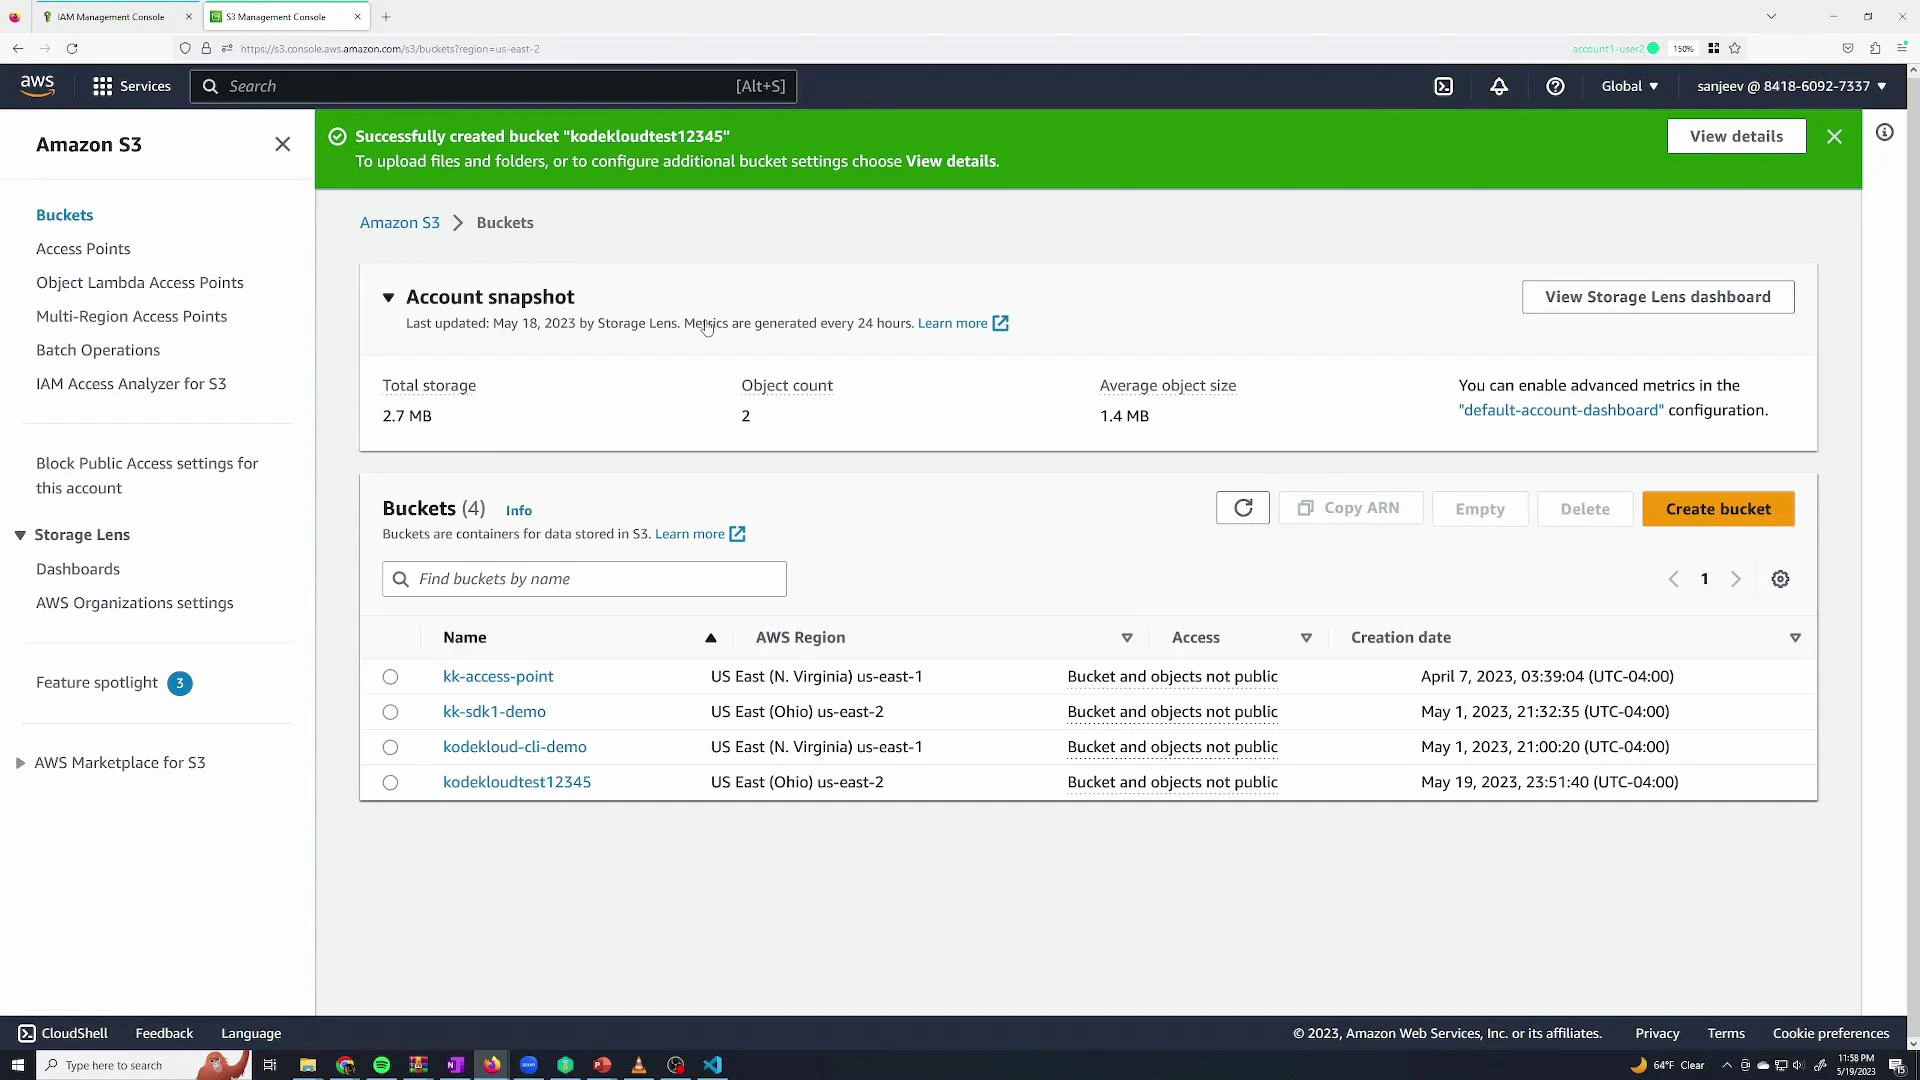
Demonstrate default-deny: try to create an S3 bucket

IAM follows a default-deny security model: unless a permission is explicitly allowed, it is denied. For example, a user without s3:CreateBucket will fail when attempting to create an S3 bucket.
A screenshot of the AWS S3 "Create bucket" page showing default encryption options (Amazon S3–managed keys vs KMS) with the bucket key enabled. A red error box at the bottom reads "Failed to create bucket — s3:CreateBucket permissions are required."
The console error shows s3:CreateBucket is required — a clear example of default-deny in action.

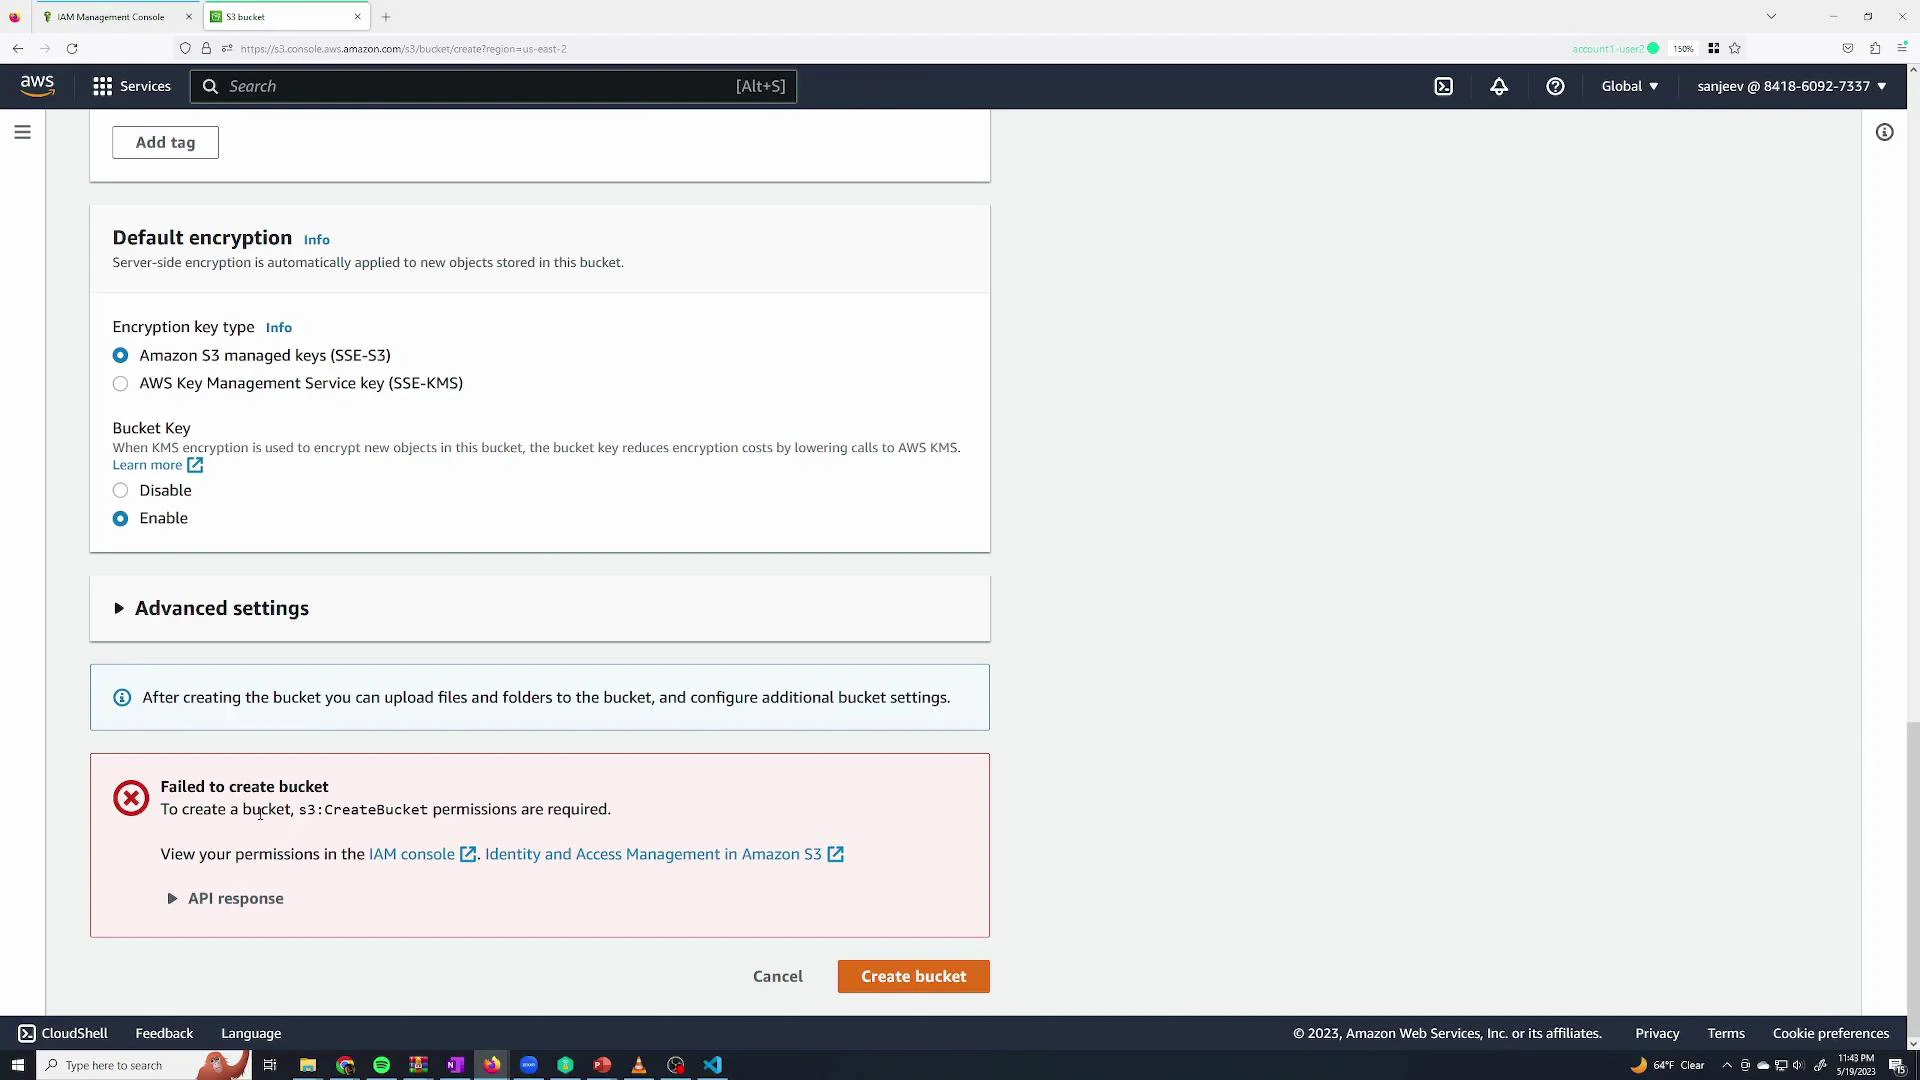
Grant permissions (must do this as root or an admin)

Sign back in as root (or as an admin user) to grant permissions. Open the user in IAM → Permissions → Add permissions. You can attach AWS managed policies (pre-built by AWS) or create custom policies.
Screenshot of the AWS IAM Management Console on the "Add user" permissions step, showing options to add/copy/attach policies and a searchable list of AWS-managed permission policies (e.g., AdministratorAccess).
The AWS-managed AdministratorAccess policy grants full access across the account. Conceptually it looks like:
{
  "Version": "2012-10-17",
  "Statement": [
    {
      "Effect": "Allow",
      "Action": "*",
      "Resource": "*"
    }
  ]
}
Attach AdministratorAccess to the user and save the changes.
A screenshot of the AWS Identity and Access Management (IAM) console showing the user "sanjeev" with console access enabled (without MFA) and an AdministratorAccess permissions policy attached. The left pane shows IAM navigation and the main pane shows user summary and permissions.
After attaching AdministratorAccess, the IAM user can list, create, and manage S3 buckets. A successful bucket creation shows a confirmation banner:
A screenshot of the Amazon S3 Management Console showing an account snapshot and a list of four S3 buckets. A green banner at the top indicates successful creation of the bucket "kodekloudtest12345."
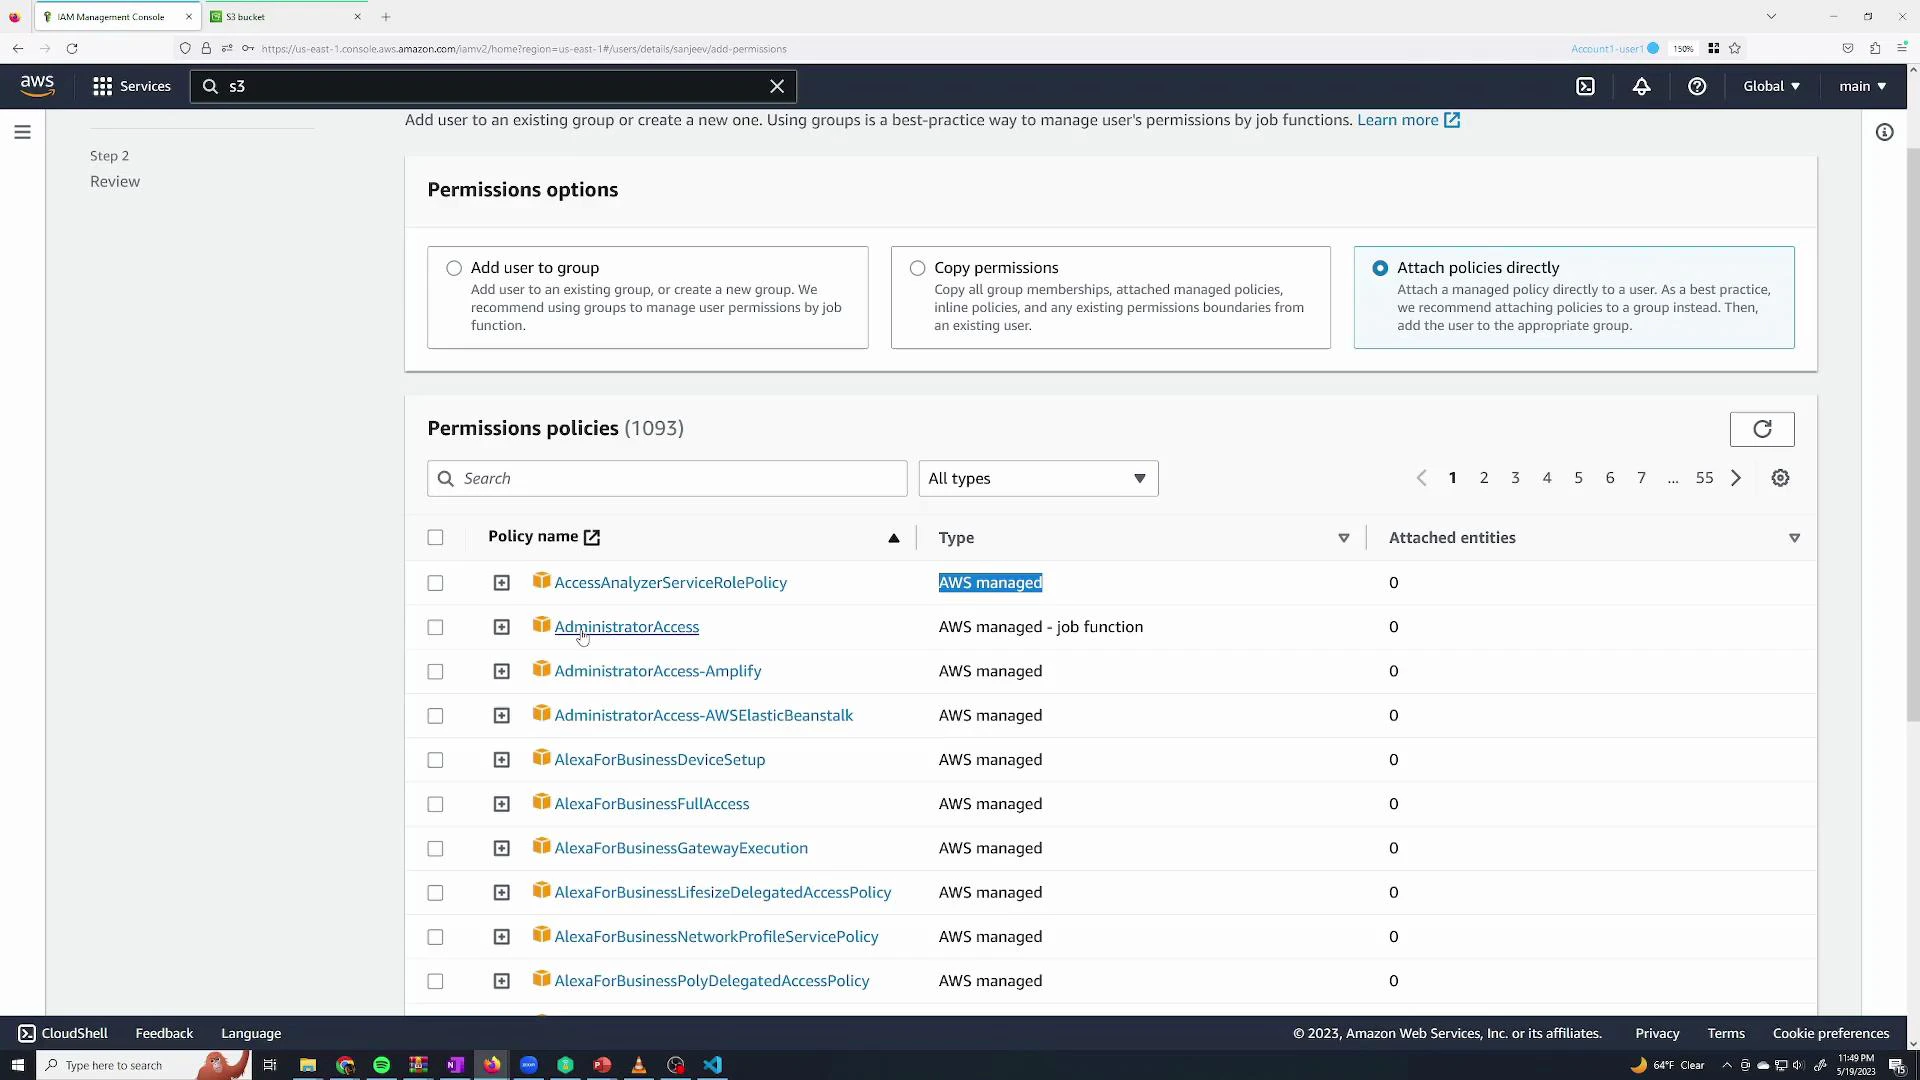
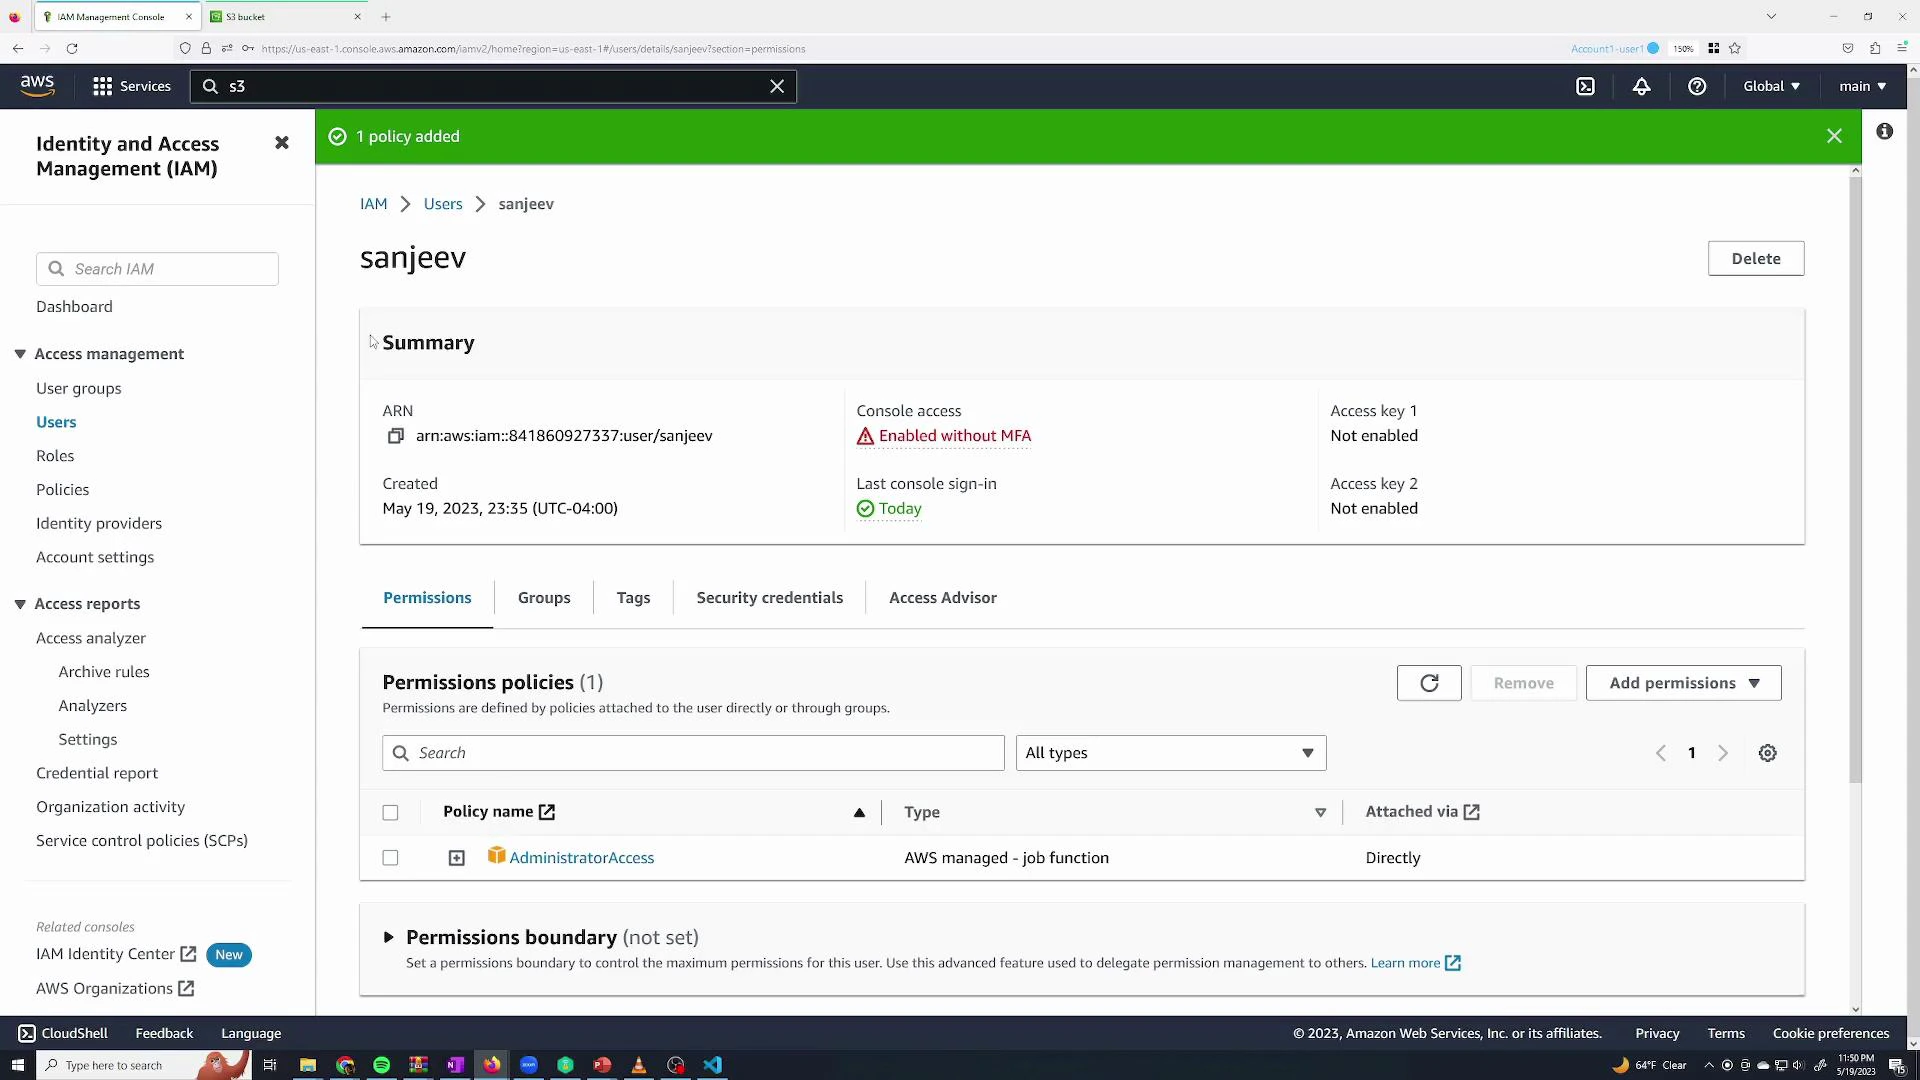
Follow the principle of least privilege: prefer specific managed policies or custom policies over AdministratorAccess. Grant only the permissions required for the task and enable MFA for privileged accounts.

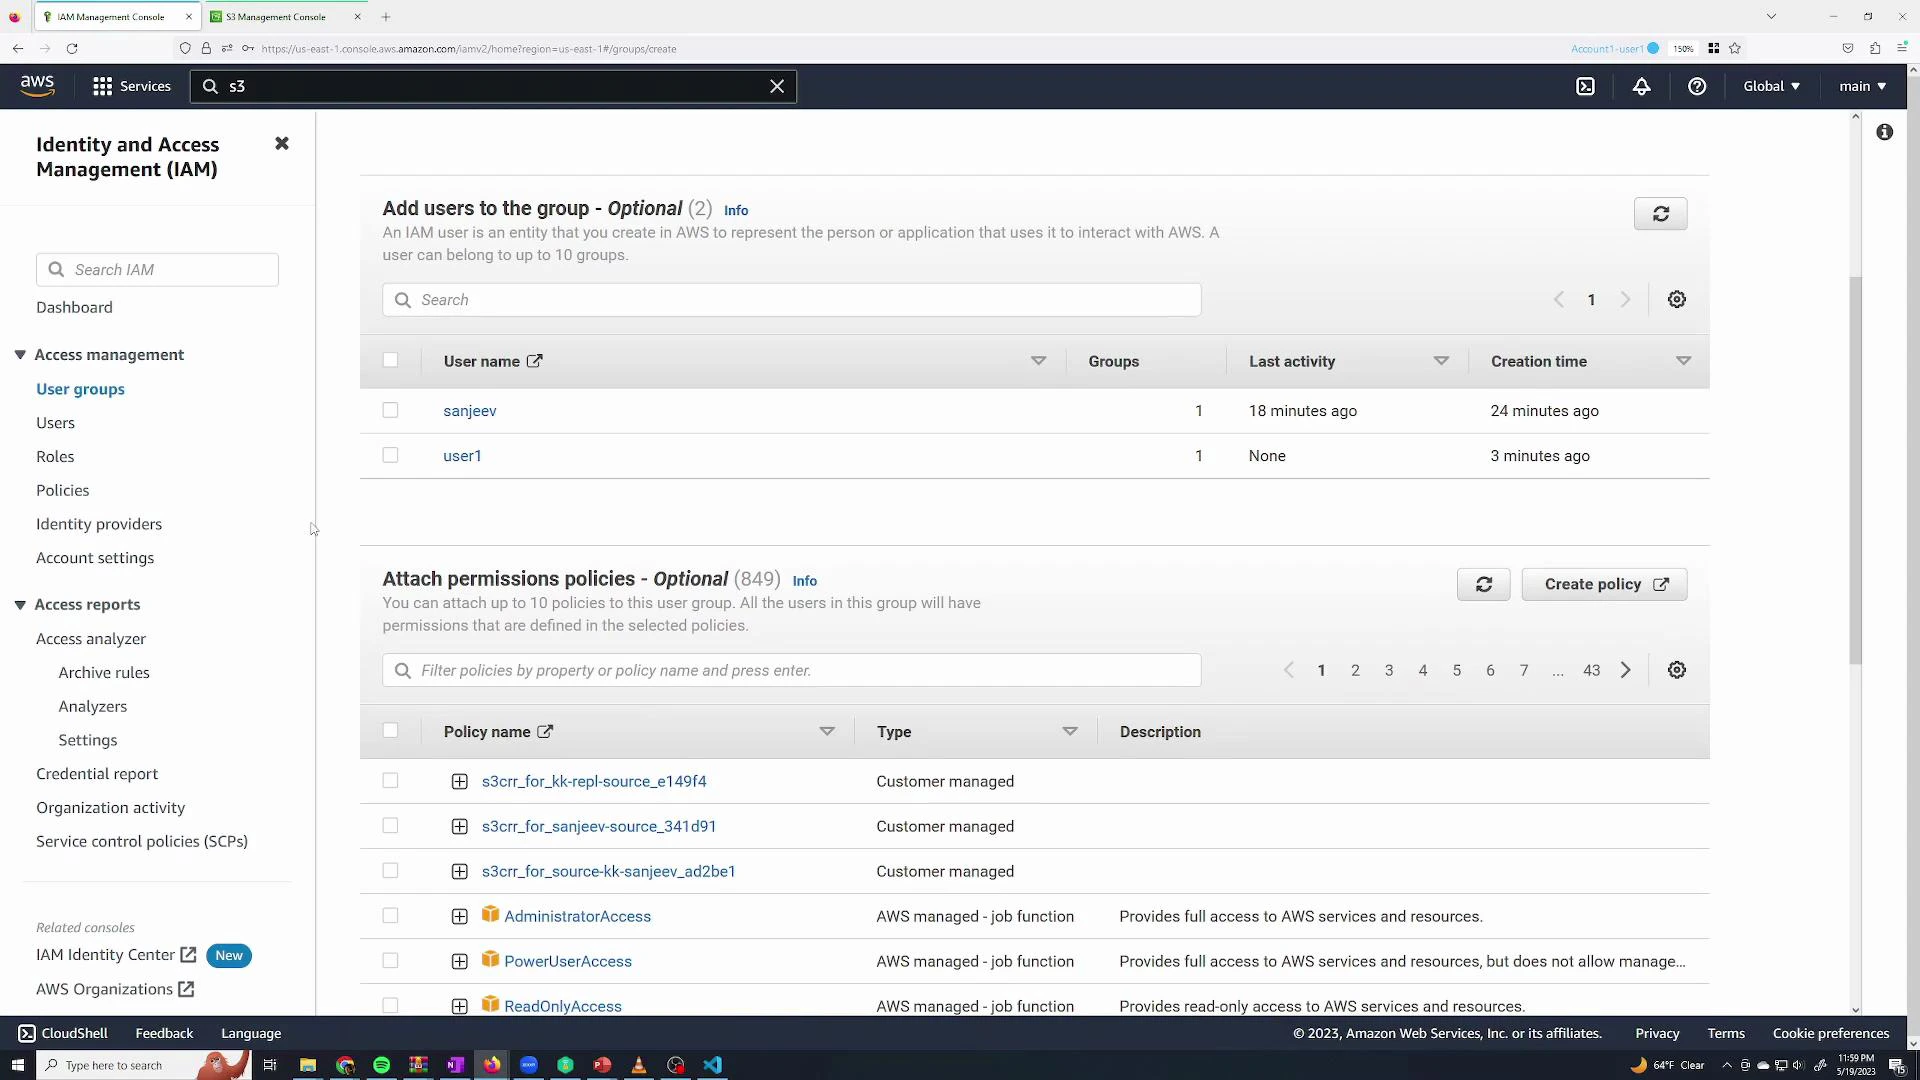
Use groups to simplify permission management

When multiple users need the same permissions, assign those permissions to a group rather than attaching policies to each user individually. Users inherit group policies automatically, and membership can be changed quickly.
A screenshot of the AWS Identity and Access Management (IAM) console showing the Users page with two IAM accounts listed and columns for last activity, MFA, password age, and active key age. The left sidebar displays navigation items like User groups, Roles, Policies, and Access reports.
Create a group called 
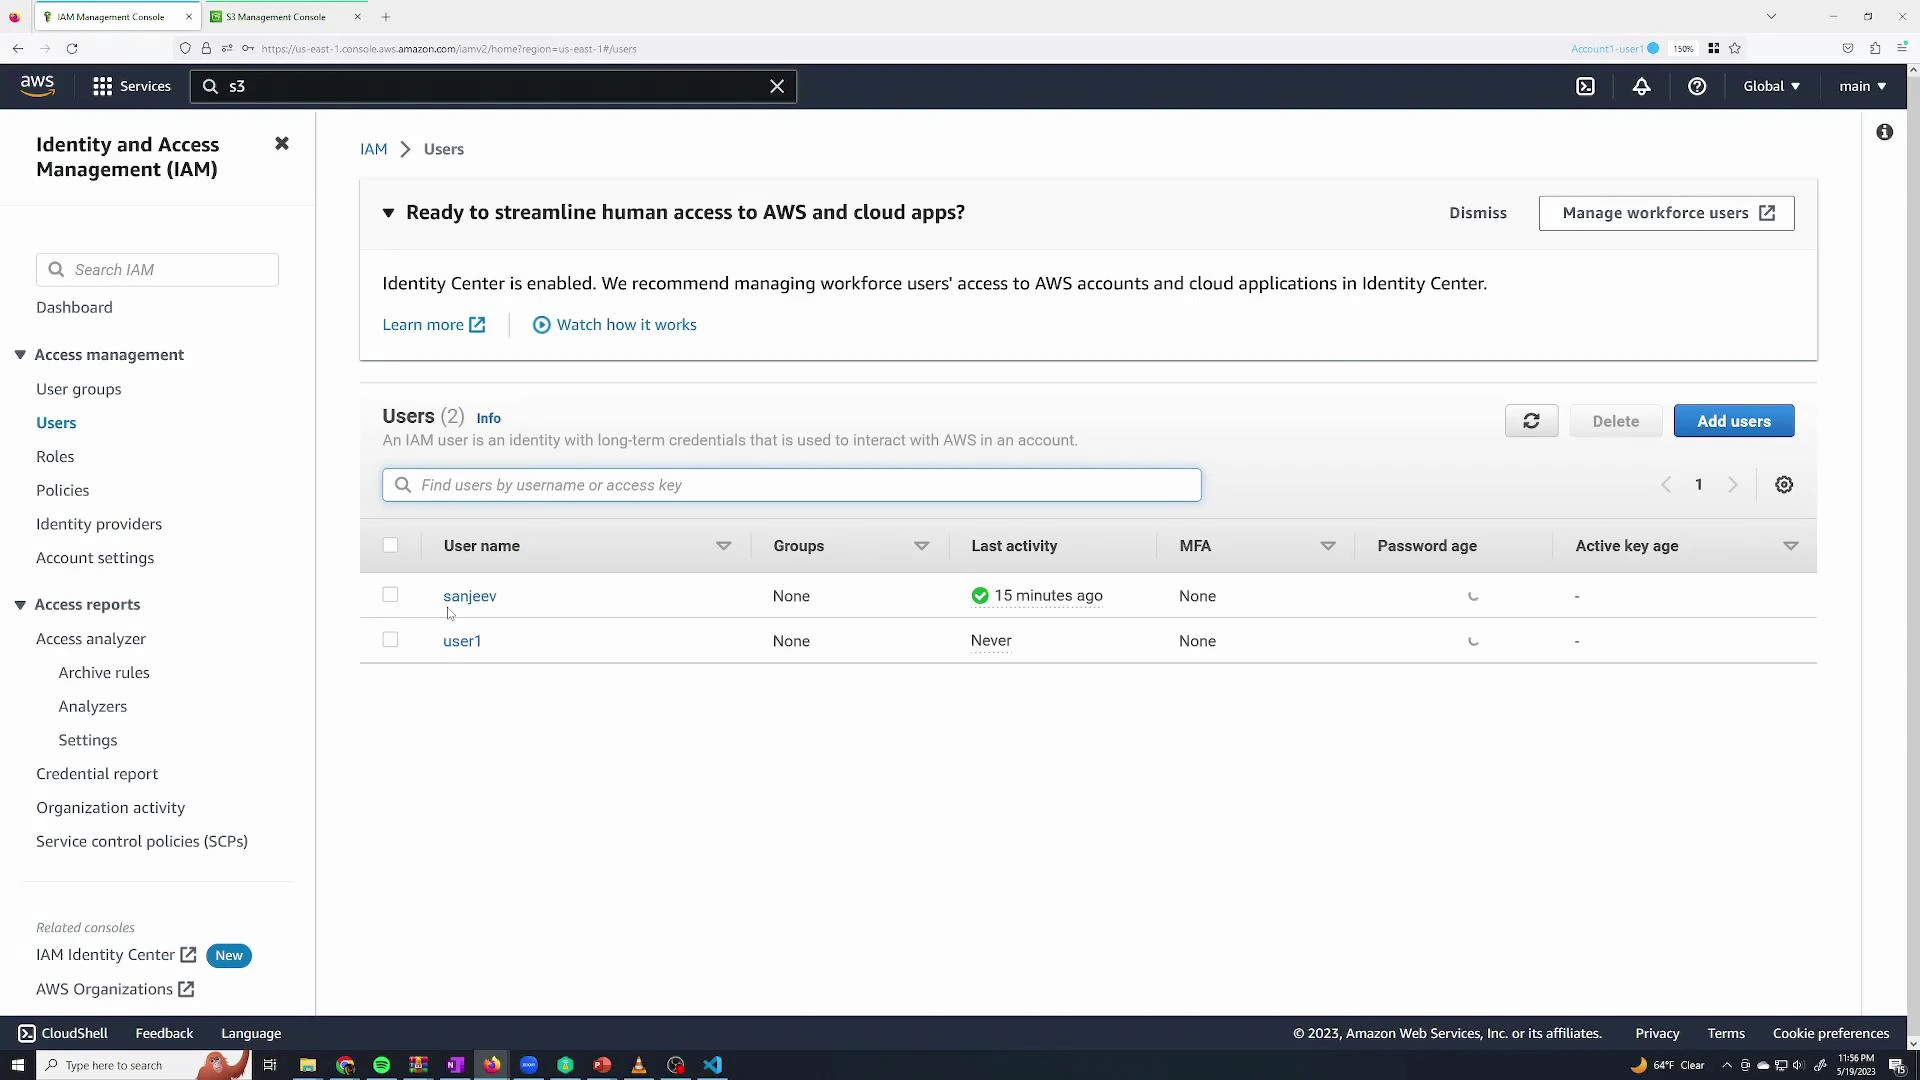
admin, attach AdministratorAccess to it, and add your admin users to the group. The user Permissions tab will show the policy as “Attached from group admin.”

Read-only / monitoring group
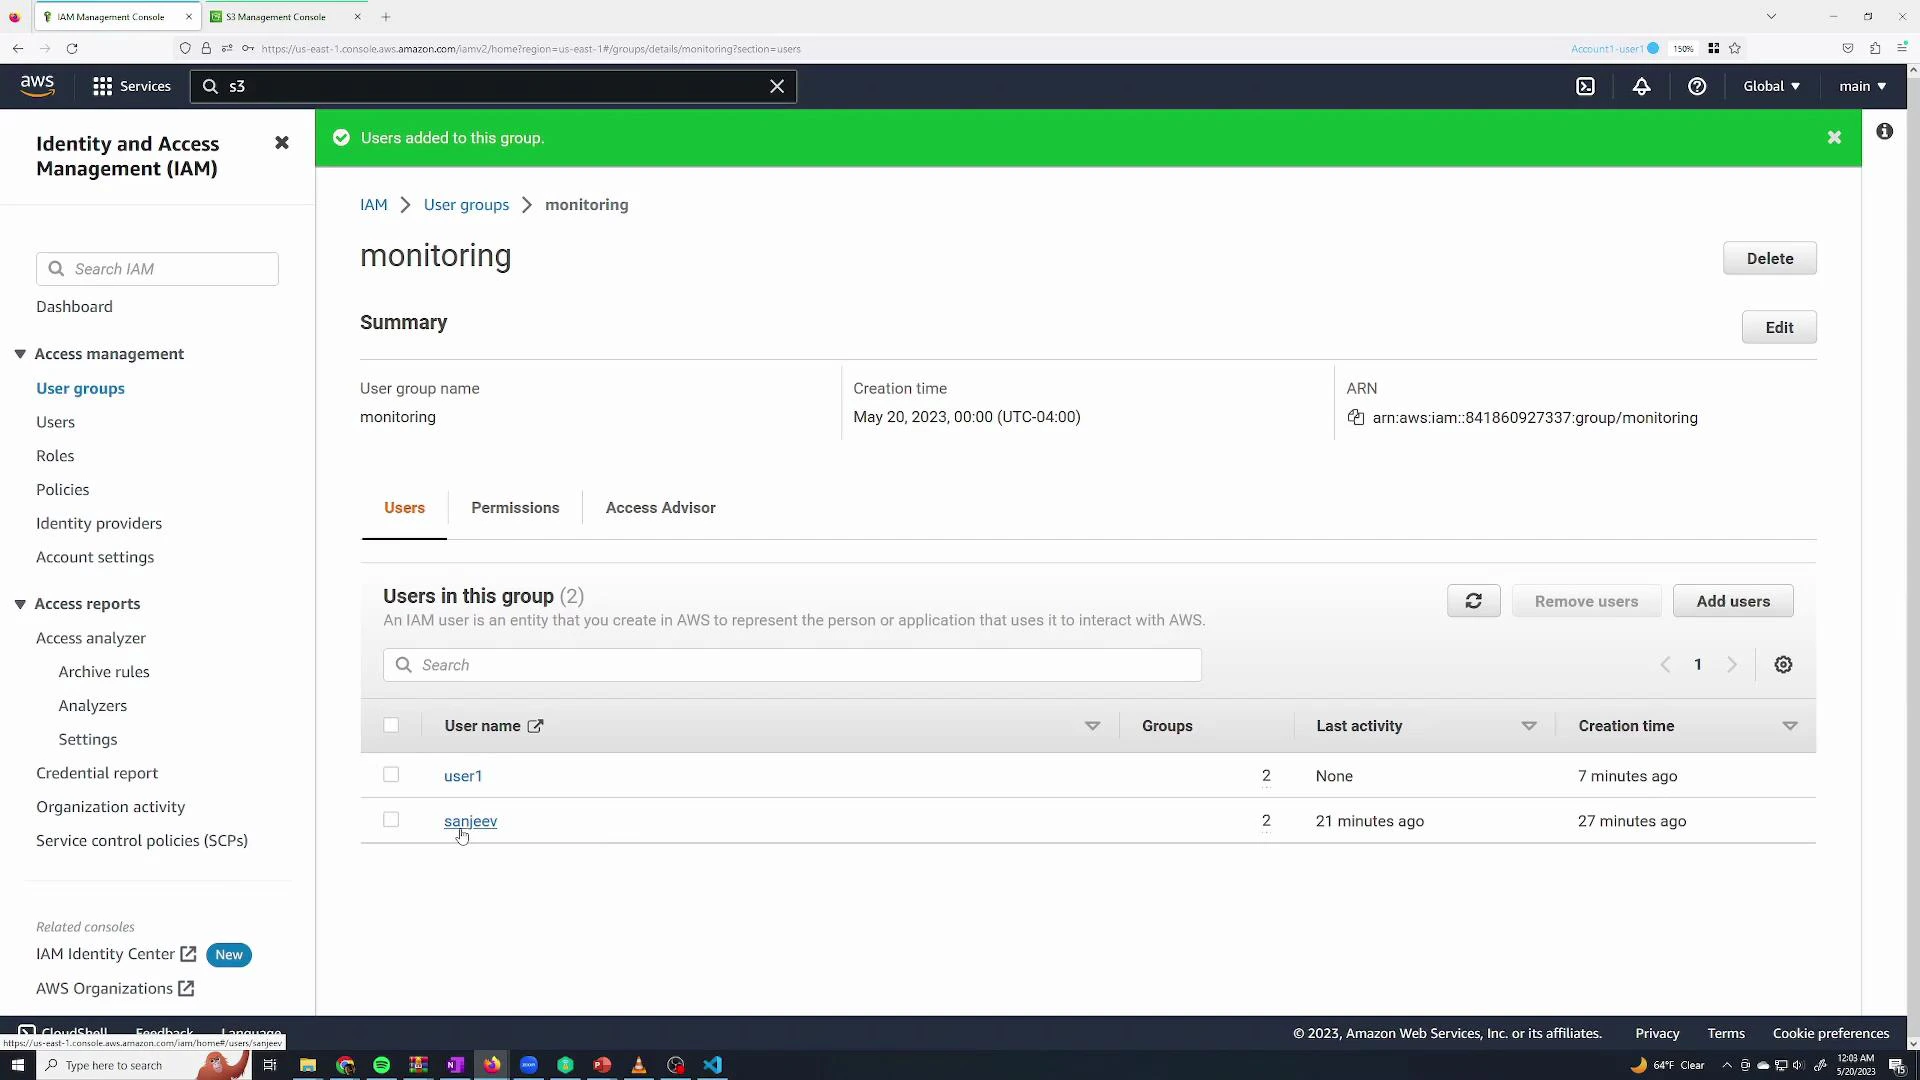
Create a monitoring group for users who only need read-only access. Attach the managed policy ReadOnlyAccess to this group — it allows list and read operations (actions that start with Get, List, Describe, Search).
A screenshot of the AWS Identity and Access Management (IAM) console showing the "User groups" page with two users listed ("sanjeev" and "user1") and a section for attaching permission policies. The left sidebar displays IAM navigation items while the main panel shows group membership, last activity, creation time, and available policies.
Read-only policies include many actions such as:
"acm:Get*",
"acm:List*",
"amplify:GetApp",
"amplify:ListApps",
"apigateway:GET",
"appconfig:GetApplication",
"appconfig:ListApplications",
...
Add user1 and sanjeev to the monitoring group. Permissions are additive: a user can belong to multiple groups and will inherit the union of all group permissions.
A screenshot of the AWS Identity and Access Management (IAM) console showing the "monitoring" user group summary with two users listed (user1 and sanjeev) and their last activity and creation times. The left sidebar shows IAM navigation and a green banner at the top indicates users were added to the group.
If you remove a user from 
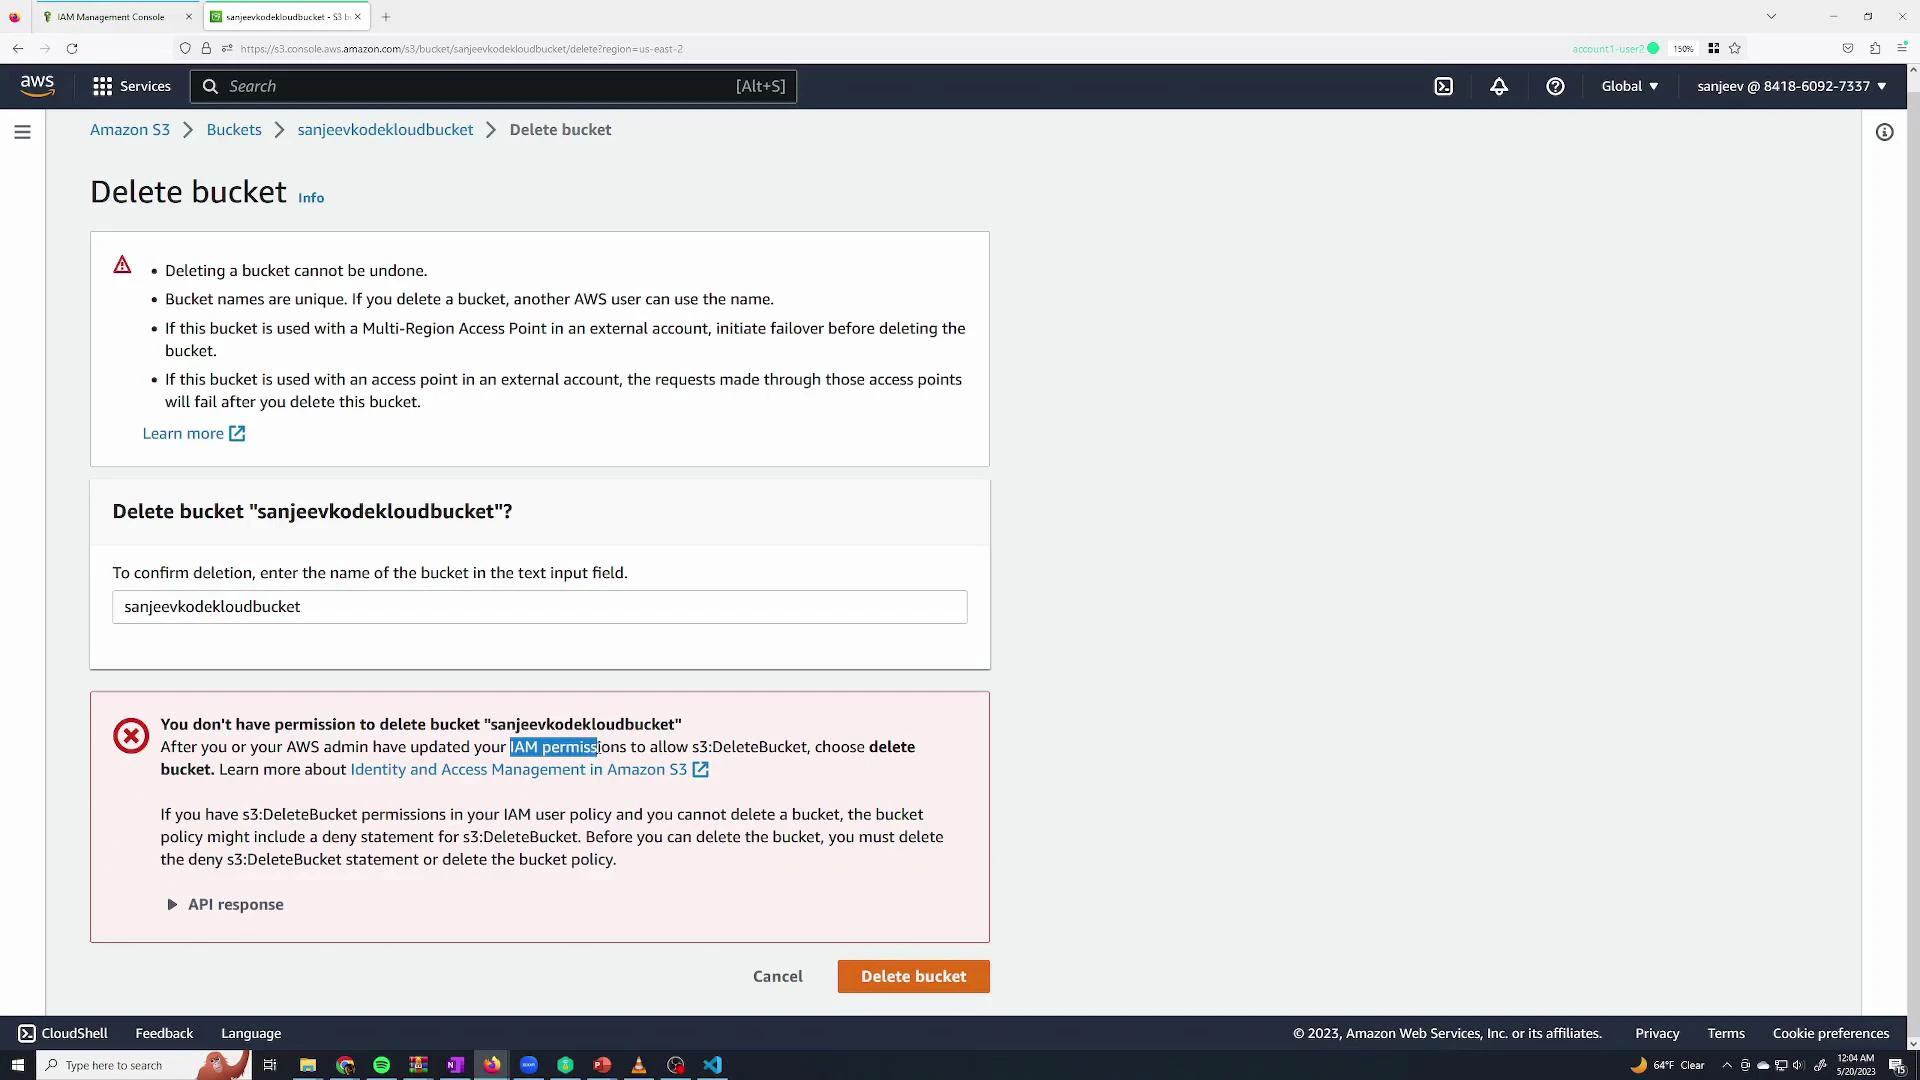
admin and leave them only in monitoring, they will be prevented from destructive actions like s3:DeleteBucket:
A screenshot of the AWS S3 console on the "Delete bucket" page showing a prompt to confirm deletion of the bucket "sanjeevkodekloudbucket" and a red error message saying the user lacks permission to delete it. The page includes instructions about IAM permissions, a text input to enter the bucket name, and "Cancel" and "Delete bucket" buttons.

Roles: temporary permissions and cross-entity access

Roles provide temporary credentials and are used for:
  • Short-lived elevation for a user (auditors, engineers with limited time-bound tasks)
  • Service principals (EC2, Lambda, ECS tasks) needing AWS access
  • Cross-account access where identities from another AWS account assume a role
Create a role at IAM → Roles → Create role and select the trusted entity:
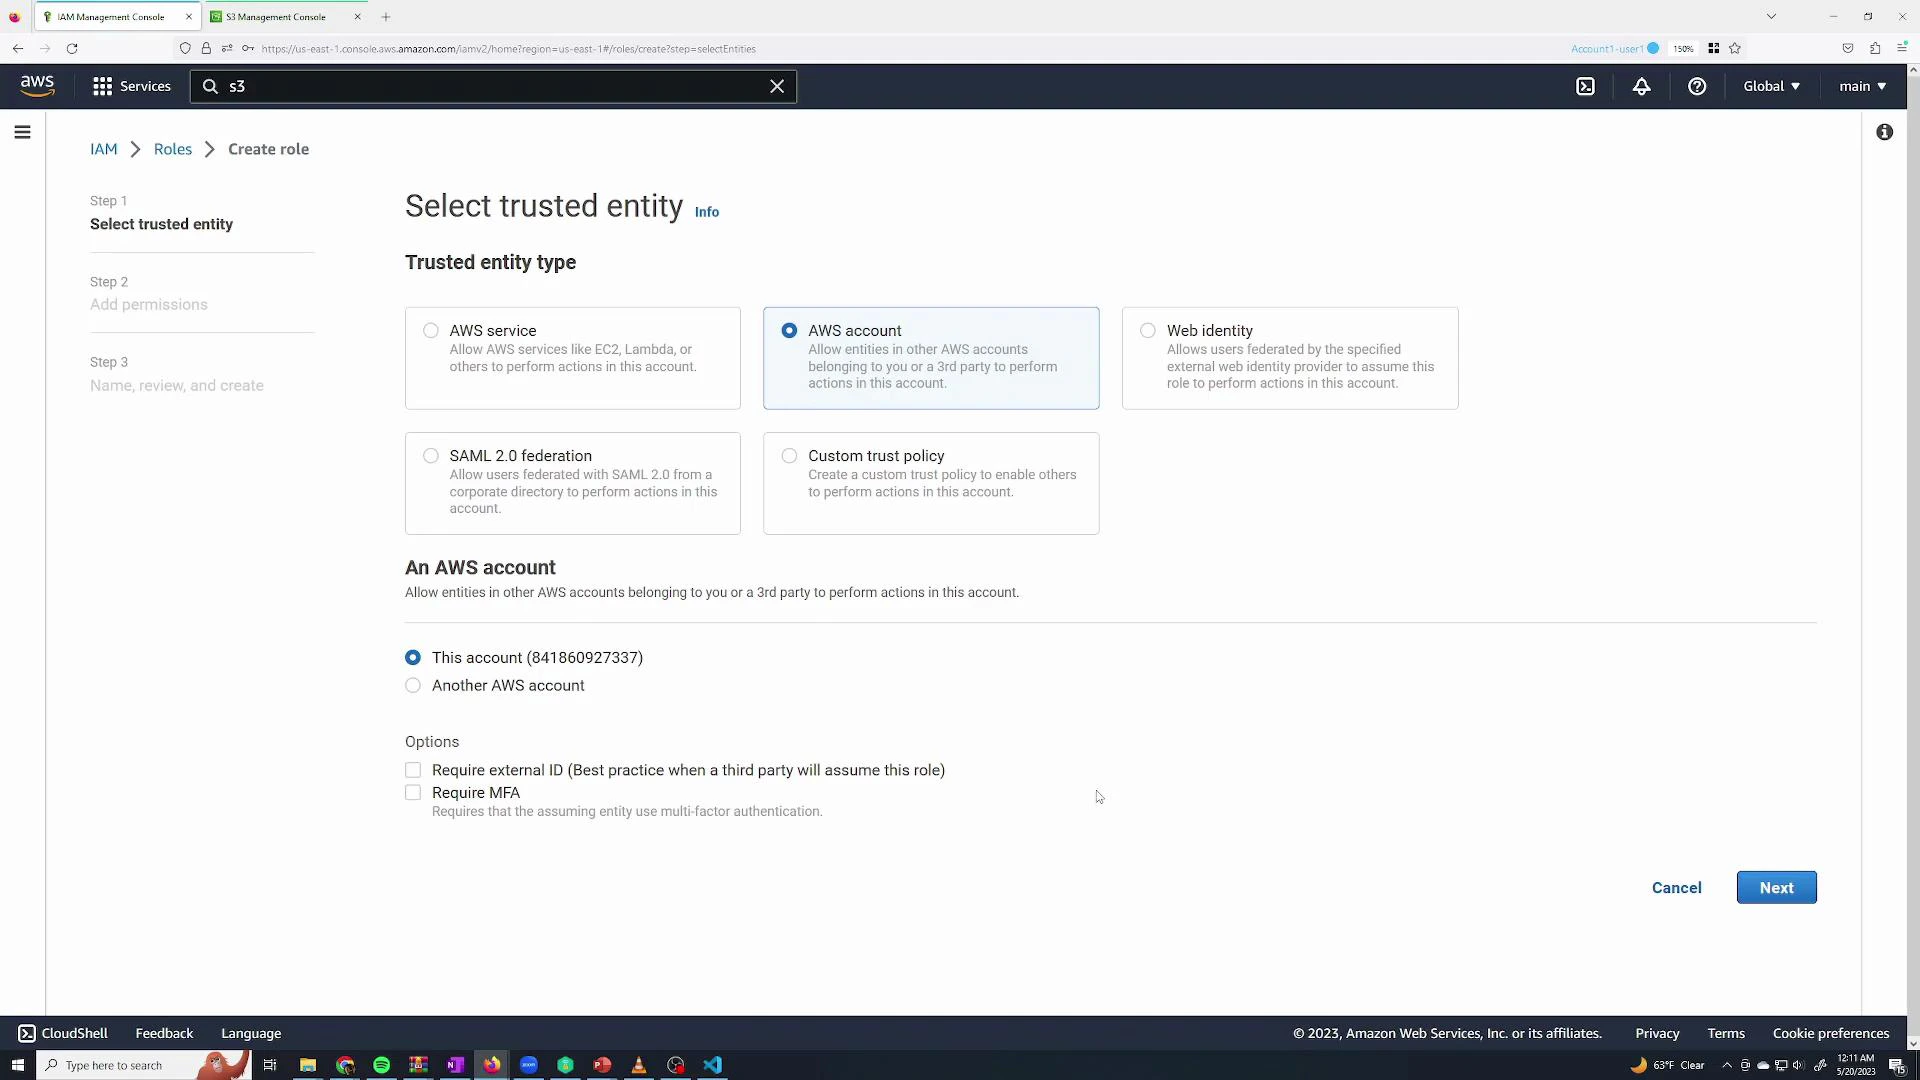
  • AWS service (for service principals like EC2)
  • Another AWS account (for cross-account access)
  • This AWS account (to allow IAM users/roles in your account to assume it)
Screenshot of the AWS IAM console on the "Select trusted entity" step of creating a role, with the "AWS account" option selected and "This account" radio button checked. The page shows options like AWS service, Web identity, SAML 2.0, and Custom trust policy, with Cancel and Next buttons at the bottom.
Example: create a role that grants full S3 access and allow users in this account to assume it. Attach the managed policy AmazonS3FullAccess to the role.
A screenshot of the AWS IAM Management Console on the "Add permissions" step, showing a filtered list of S3-related permission policies. The list includes entries like AmazonS3FullAccess and AmazonS3ReadOnly with descriptions and checkboxes for selection.
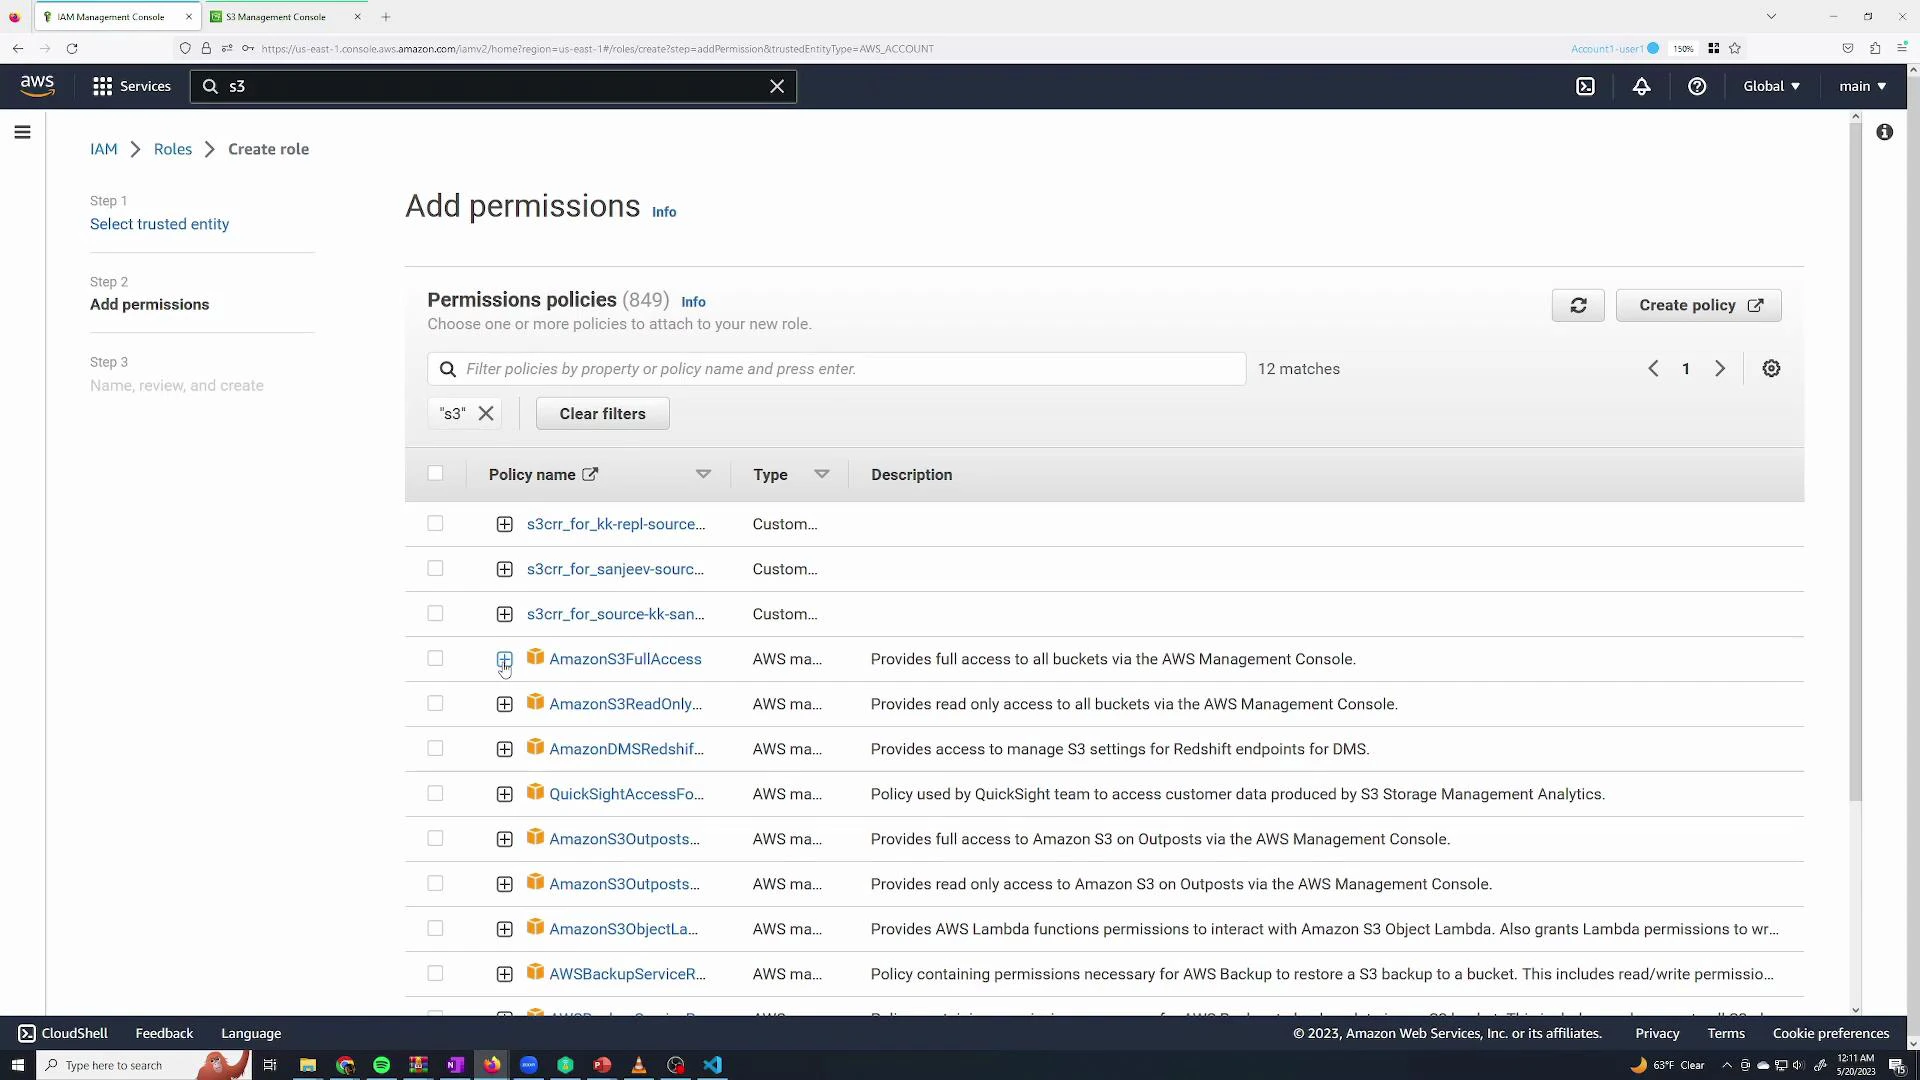
AmazonS3FullAccess conceptually looks like:
{
  "Version": "2012-10-17",
  "Statement": [
    {
      "Effect": "Allow",
      "Action": [
        "s3:*",
        "s3-object-lambda:*"
      ],
      "Resource": "*"
    }
  ]
}
Name the role (for example, S3FullAccess) and create it.
A screenshot of the AWS Identity and Access Management (IAM) console on the Roles page, showing a list of IAM roles (e.g., AWSServiceRoleForRDS, rds-monitoring-role, S3FullAccess) and their trusted entities. A green success banner at the top reads "Role S3FullAccess created."

Restrict who can assume the role

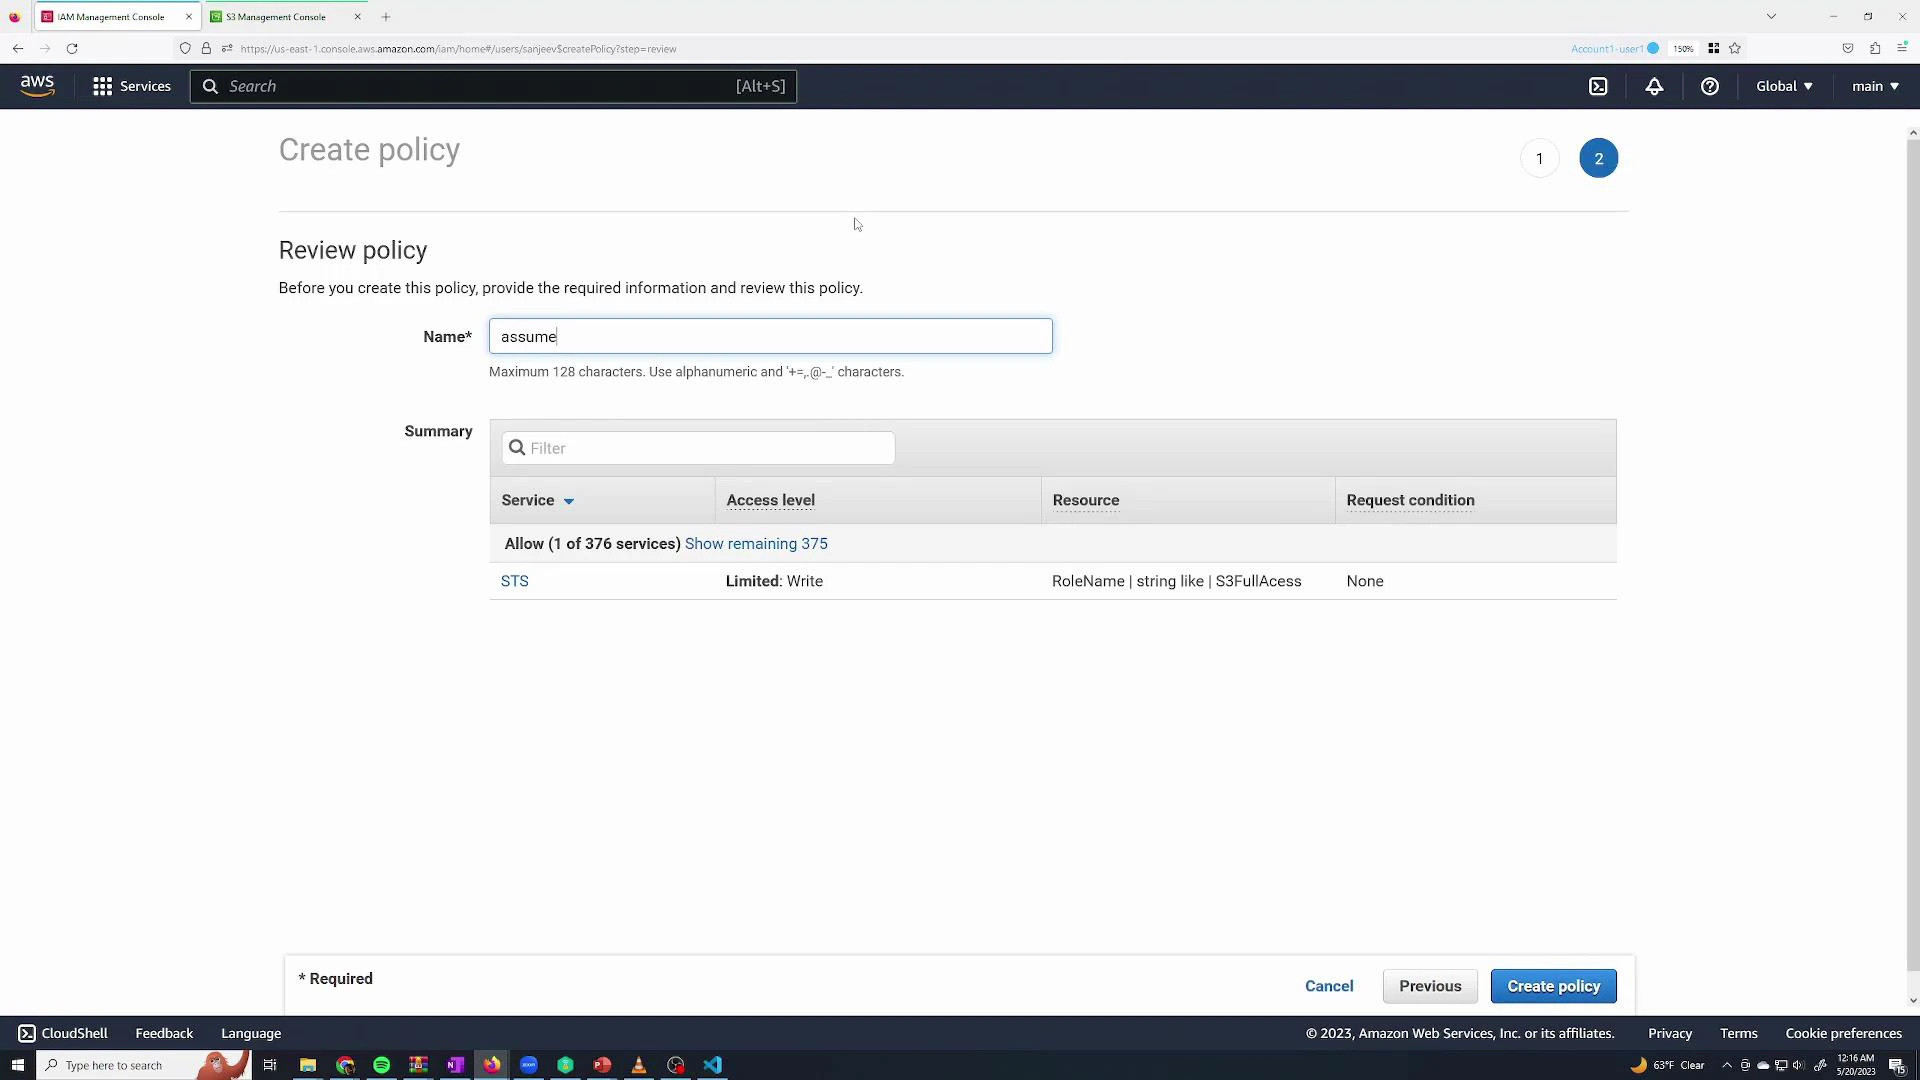
A created role does not automatically let every user assume it. Two things must be in place:
  1. The role’s trust policy must trust the principal (account, user, or role) that will assume it.
  2. The principal must have an IAM policy that allows the sts:AssumeRole action on the role resource ARN.
Create (or attach) an inline policy that allows sts:AssumeRole on the role’s ARN:
A screenshot of the AWS Management Console showing the IAM "Create policy" visual editor with the STS service selected and the AssumeRole action checked. The interface highlights that you must specify the role resource ARN and optional request conditions.
Example JSON policy granting assume permission:
{
  "Version": "2012-10-17",
  "Statement": [
    {
      "Sid": "AllowAssumeS3FullAccess",
      "Effect": "Allow",
      "Action": "sts:AssumeRole",
      "Resource": "arn:aws:iam::841860927337:role/S3FullAccess"
    }
  ]
}
Give the policy a name such as 
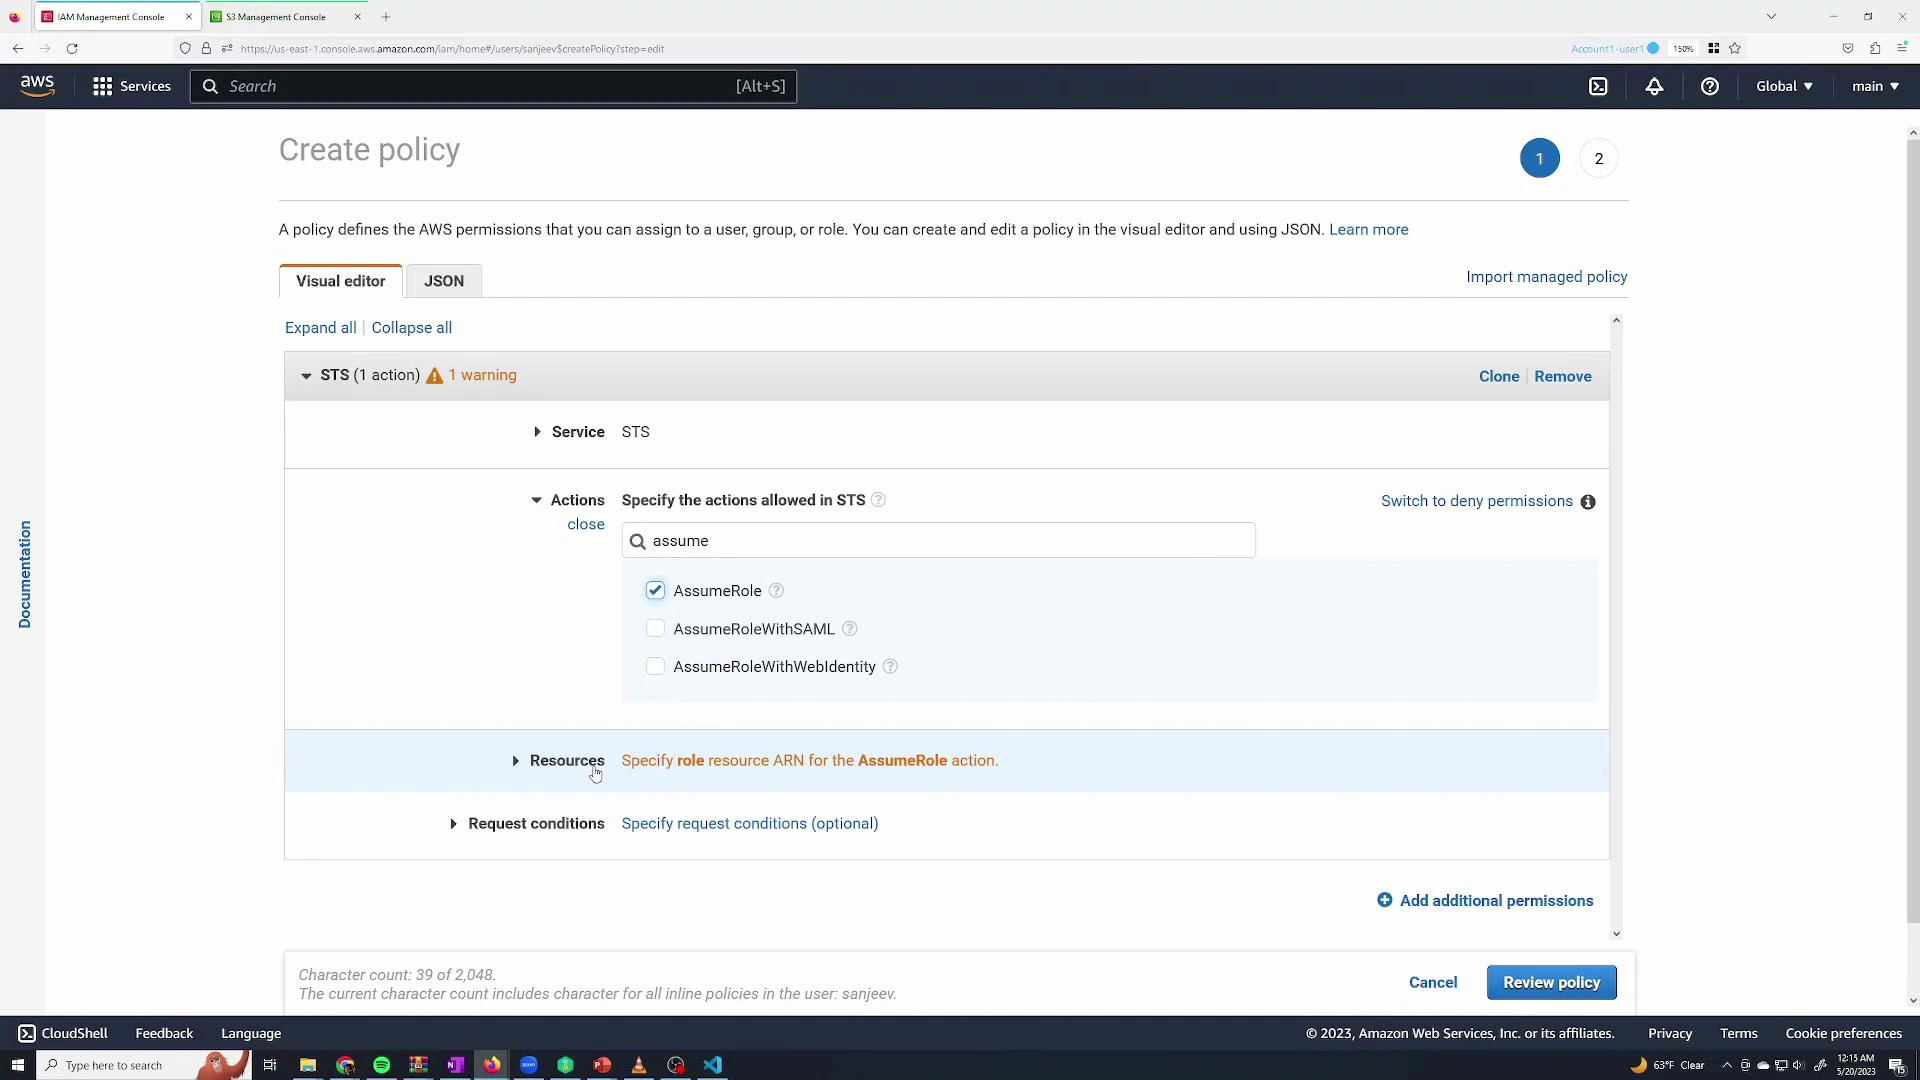
AssumeS3Access and attach it to the user or group that should be able to assume the role.
A screenshot of the AWS IAM "Create policy" review page showing a policy name field (filled with "assume") and a summary table listing an STS permission with a resource condition referencing a RoleName like "S3FullAccess." The bottom right shows navigation buttons including "Previous" and "Create policy."

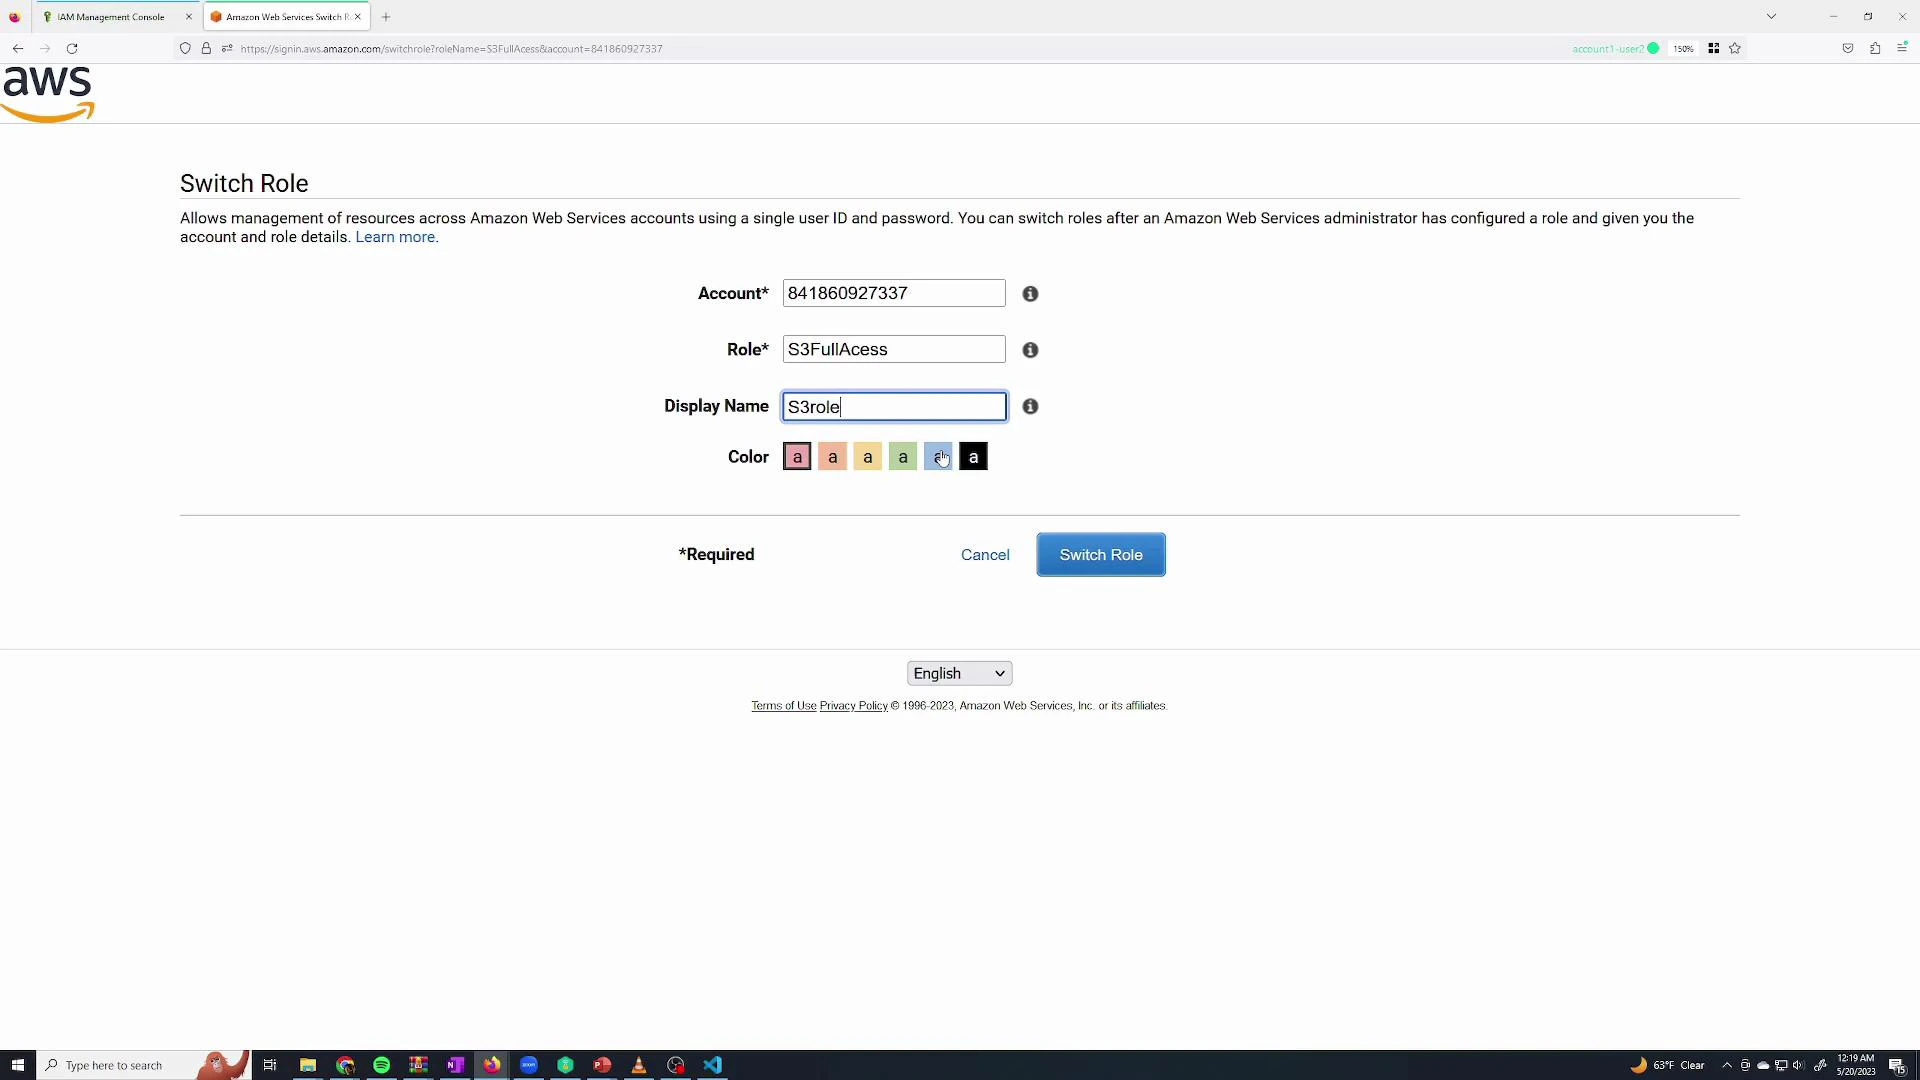
Assume the role (console)

To switch into the role from the console use the role’s “Switch role” link. The URL or link pre-fills the account and role name so the user can switch into the role and receive its permissions temporarily.
A screenshot of the AWS Identity and Access Management (IAM) console showing details for an IAM role named "S3FullAccess." It displays the role's ARN, creation date, maximum session duration, and the attached AmazonS3FullAccess permission policy.
Paste the Switch Role link while signed in as the IAM user, provide a display name (cosmetic), and switch into the role.
A browser window showing the AWS "Switch Role" page with fields for Account, Role (S3FullAccess), and a Display Name set to "S3role", plus color options and a "Switch Role" button. The page is inside a desktop screen with taskbar icons visible at the bottom.
While the role is active the console displays a badge indicating the assumed role. The user can then perform role-allowed actions (for example, deleting an S3 bucket). When finished, switch back to the original identity to restore prior permissions.
A screenshot of the Amazon S3 Management Console showing an account snapshot and a list of S3 buckets. A green banner at the top announces a bucket was successfully deleted, and bucket names, regions, access settings and creation dates are visible.

Summary

  • Root user: Full account access. Protect it — enable MFA and avoid using it for daily tasks.
  • IAM user: Starts with no permissions (default-deny); you must explicitly grant permissions via policies.
  • Managed policies: Pre-built by AWS and useful for common roles (AdministratorAccess, AmazonS3FullAccess, ReadOnlyAccess).
  • Groups: Attach policies to groups to manage many users at once — users inherit group permissions.
  • Roles: Provide temporary credentials for short-term tasks or service-to-service access. To allow role assumption, grant sts:AssumeRole to specific principals and ensure the role’s trust policy trusts them.
Useful links and references: You now know how to create users and groups, attach policies, and create and assume roles to control and delegate access in AWS.

Watch Video

Practice Lab