This article explores authentication and authorization in Kubernetes, detailing user access, permissions, and various authorization mechanisms like RBAC and external tools.
In this lesson, we explore how authentication allows individuals or machines to gain access to a cluster and how authorization subsequently defines what actions they can perform within that cluster. Once a user gains access, authorization ensures they only have the appropriate permissions for their role. For example, a cluster administrator can view various objects such as Pods, Nodes, and Deployments:
Copy
kubectl get podsNAME READY STATUS RESTARTS AGEnginx 1/1 Running 0 53skubectl get nodesNAME STATUS ROLES AGE VERSIONworker-1 Ready <none> 5d21h v1.13.0worker-2 Ready <none> 5d21h v1.13.0kubec
Administrators have full control, allowing them to create or delete objects like Pods or Nodes. As the cluster scales and more users—including administrators, developers, testers, or external applications like monitoring tools and Jenkins—access the system, it is critical to provide only the access level necessary for each user’s role. For instance, developers might be limited to deploying applications without the ability to modify the overall cluster configuration.Below is an example demonstrating operations executed with limited permissions:
Copy
kubectl get podsNAME READY STATUS RESTARTS AGEnginx 1/1 Running 0 53skubectl get nodesNAME STATUS ROLES AGE VERSIONworker-1 Ready <none> 5d21h v1.13.0worker-2 Ready <none> 5d21h v1.13.0kubectl delete node worker-2Node worker-2 Deleted!
In contrast, attempting similar operations without sufficient privileges results in the following responses:
Copy
kubectl get podsError from server (Forbidden): pods is forbidden: User "Bot-1" cannot list "pods"kubectl get nodesError from server (Forbidden): nodes is forbidden: User "Bot-1" cannot get "nodes"kubectl delete node worker-2Error from server (Forbidden): nodes "worker-2" is forbidden: User "developer" cannot delete resource "nodes"
When sharing a cluster across different organizations or teams using namespaces, authorization restricts users to their designated namespaces. Kubernetes supports multiple authorization mechanisms, including:
Node Authorization
Attribute-Based Authorization
Role-Based Access Control (RBAC)
Webhook Authorization
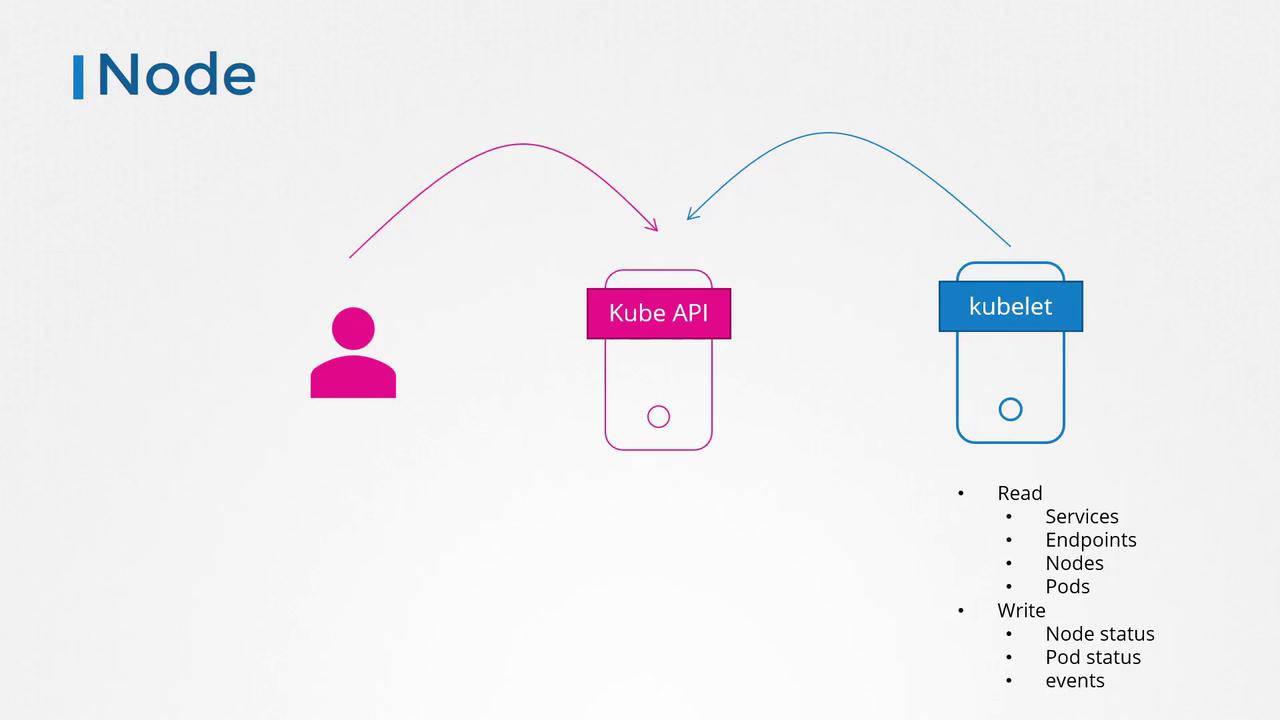
The Kubernetes API Server is the central component accessed by both management users and internal components, such as kubelets, which retrieve and report metadata about services, endpoints, nodes, and pods. The communication between a kubelet and the API server is illustrated in the diagram below:
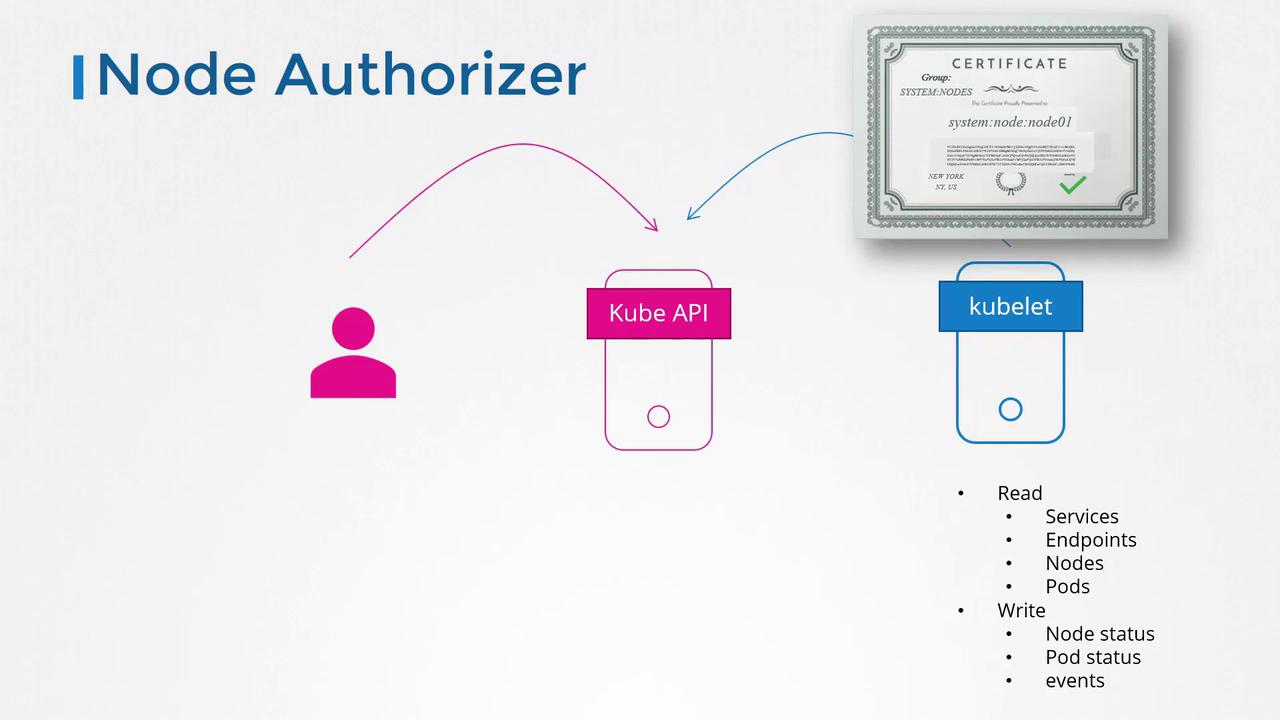
Requests from kubelets—typically using certificates with names prefixed by “system:node” as part of the system:nodes group—are authorized by a special component known as the node authorizer. The following diagram explains the authorization process for kubelet requests:
Kubernetes supports several authorization strategies to meet diverse security requirements. Always select the most appropriate mechanism for your cluster’s needs.
Attribute-based authorization associates specific users or groups with a defined set of permissions. For example, you can grant a user called “dev-user” permissions to view, create, and delete pods. This is achieved by creating a policy file in JSON format and passing it to the API server. Consider the following example policy file:
Each time security requirements change, you must manually update this policy file and restart the Kube API Server. This manual process can be tedious and set the stage for more streamlined methods such as Role-Based Access Control (RBAC).
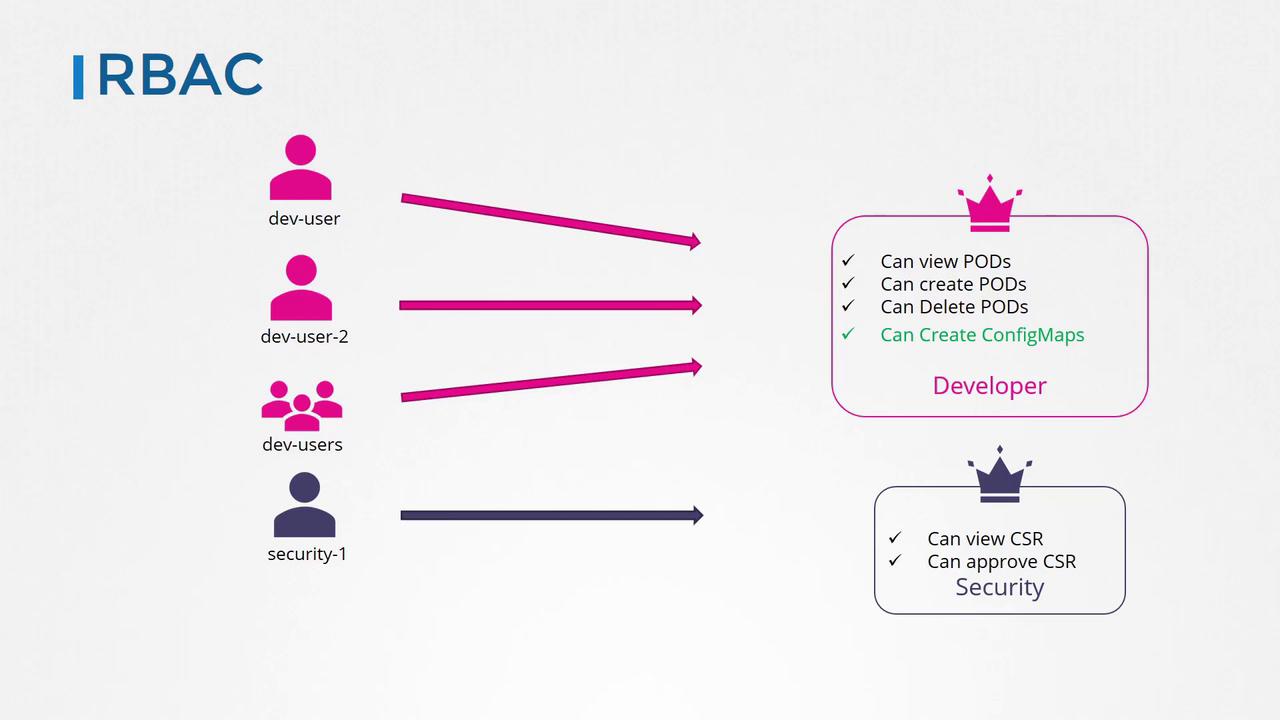
RBAC simplifies user permission management by defining roles instead of directly associating permissions with individual users. For example, you can create a “developer” role that encompasses only the necessary permissions for application deployment. Developers are then associated with this role, and modifications in user access can be handled by updating the role, affecting all associated users immediately.RBAC is considered the standard method for managing access within a Kubernetes cluster. The diagram below provides a visual representation of RBAC across different roles:
Further details on RBAC will be discussed in upcoming lessons.
If you prefer managing authorization externally rather than with built-in Kubernetes mechanisms, third-party tools like Open Policy Agent (OPA) are an excellent choice. OPA can handle both admission control and authorization by processing user details and access requirements sent via API calls from Kubernetes. Based on OPA’s response, access is either granted or denied.
Kubernetes also supports two basic authorization modes:
AlwaysAllow: Permits all requests without performing any authorization checks.
AlwaysDeny: Denies all requests.
These modes are configured using the authorization-mode option on the Kube API Server and are crucial when determining which authorization mechanism is active. In cases where no mode is specified, AlwaysAllow is used by default.Below is an example configuration using AlwaysAllow:
You can also specify a comma-separated list of multiple authorization modes. For example, to configure node authorization, RBAC, and webhook authorization, set the parameter as follows:
When multiple modes are configured, each request is processed sequentially in the order specified. For example, a user’s request is first evaluated by the node authorizer. If the request does not pertain to node-specific actions and is consequently denied, it is then passed to the next module, such as RBAC. Once a module approves the request, further checks are bypassed and the user is granted access.
This lesson provided an in-depth look at authorization in Kubernetes—from basic attribute-based policies to advanced RBAC and external mechanisms. Choosing the right authorization methods is essential for securing your cluster while ensuring users have only the permissions they need.
That concludes this lesson on authorization. Stay tuned for further exploration of role-based access controls and other advanced authorization mechanisms.