

Before you begin, ensure that you have VS Code and the required Python libraries installed. This guide assumes you have the necessary setup to run MLflow and execute Python scripts.
1. Setting Up MLflow
Begin by launching the MLflow UI. Open the terminal in VS Code and run:2. Generating Synthetic Data
If you haven’t already generated the synthetic data, run the provided script. This script simulates health insurance claims, including some injected anomalies. Create a file namedsynthetic_health_claims.py and add the following content:
3. Creating and Running the ML Experiment
In this section, you’ll train an ML model to perform anomaly detection using the Isolation Forest algorithm and log experiment details to the MLflow server.Step 3.1: Model Training Script
Create a file namedisolation_model.py with the following content:
4. Validating the Experiment in MLflow
Once the script finishes running, refresh your browser where the MLflow UI is open. You should now see the “Health Insurance Claim Anomaly Detection” experiment, complete with parameters, metrics, and the model artifact.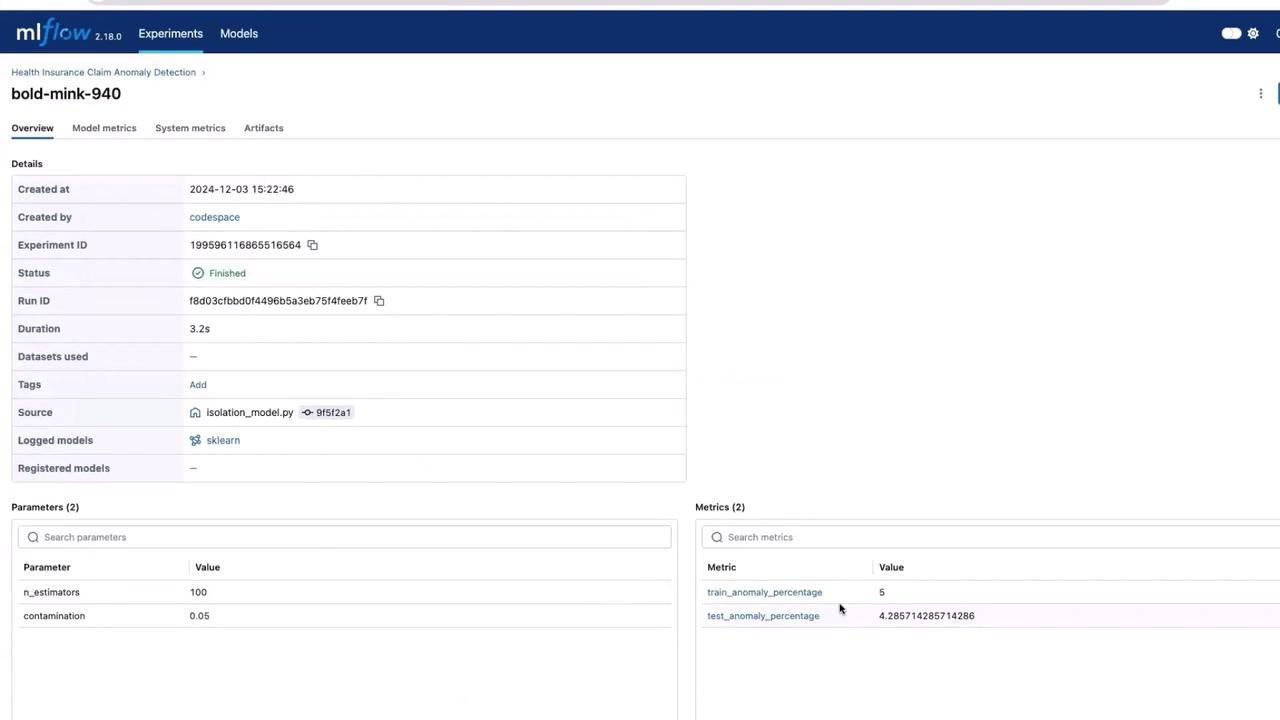
5. Next Steps
In a production setting, your model may undergo multiple iterations and rigorous testing before deployment. For this demo, we directly use the output from this experiment. The logged model artifact, which might be stored as a pickle file or another format, can be downloaded from the MLflow UI and integrated further. The next phase typically involves building a service around the model using frameworks like BentoML. For more detailed information on BentoML, refer to the BentoML Documentation.Thank you for reading this guide on setting up the MLflow server and running your ML experiment. For additional resources, check out the following links: Happy experimenting!