This tutorial demonstrates how to enhance your IDE with Cursor AI’s web search and local documentation features for improved development efficiency.
In this tutorial, we’ll show how to supercharge your IDE with Cursor AI’s in-editor web search and local documentation features. By embedding search and docs directly in your coding environment, you can streamline development, boost productivity, and avoid context switching.
With Cursor AI, you can submit web queries from your terminal or editor, using your project files as context. For instance, try:
What is the best way to implement JWT authentication in Flask?
Cursor will fetch relevant articles, snippets, and code samples without leaving your IDE. Here’s a complete Flask example illustrating JWT authentication, refresh tokens, and token revocation:
from flask import Flask, jsonify, requestfrom flask_jwt_extended import ( JWTManager, create_access_token, create_refresh_token, jwt_required, get_jwt_identity)from datetime import timedeltaapp = Flask(__name__)app.config["JWT_SECRET_KEY"] = "your-secret-key" # Use a secure random key in productionapp.config["JWT_ACCESS_TOKEN_EXPIRES"] = timedelta(hours=1)jwt = JWTManager(app)# In-memory token blacklistblacklist = set()@app.route("/login", methods=["POST"])def login(): username = request.json.get("username") password = request.json.get("password") # Replace with real credential validation if username != "test" or password != "test": return jsonify({"msg": "Bad username or password"}), 401 access_token = create_access_token(identity=username) refresh_token = create_refresh_token(identity=username) return jsonify(access_token=access_token, refresh_token=refresh_token), 200@app.route("/protected", methods=["GET"])@jwt_required()def protected(): current_user = get_jwt_identity() return jsonify(logged_in_as=current_user), 200@app.route("/refresh", methods=["POST"])@jwt_required(refresh=True)def refresh(): current_user = get_jwt_identity() new_access_token = create_access_token(identity=current_user) return jsonify(access_token=new_access_token), 200@jwt.token_in_blocklist_loaderdef check_if_token_revoked(jwt_header, jwt_payload): jti = jwt_payload["jti"] return jti in blacklist # Check against your blacklist storageif __name__ == "__main__": app.run(debug=True)
Always store JWT_SECRET_KEY in environment variables or a secure vault in production to protect against token forgery.
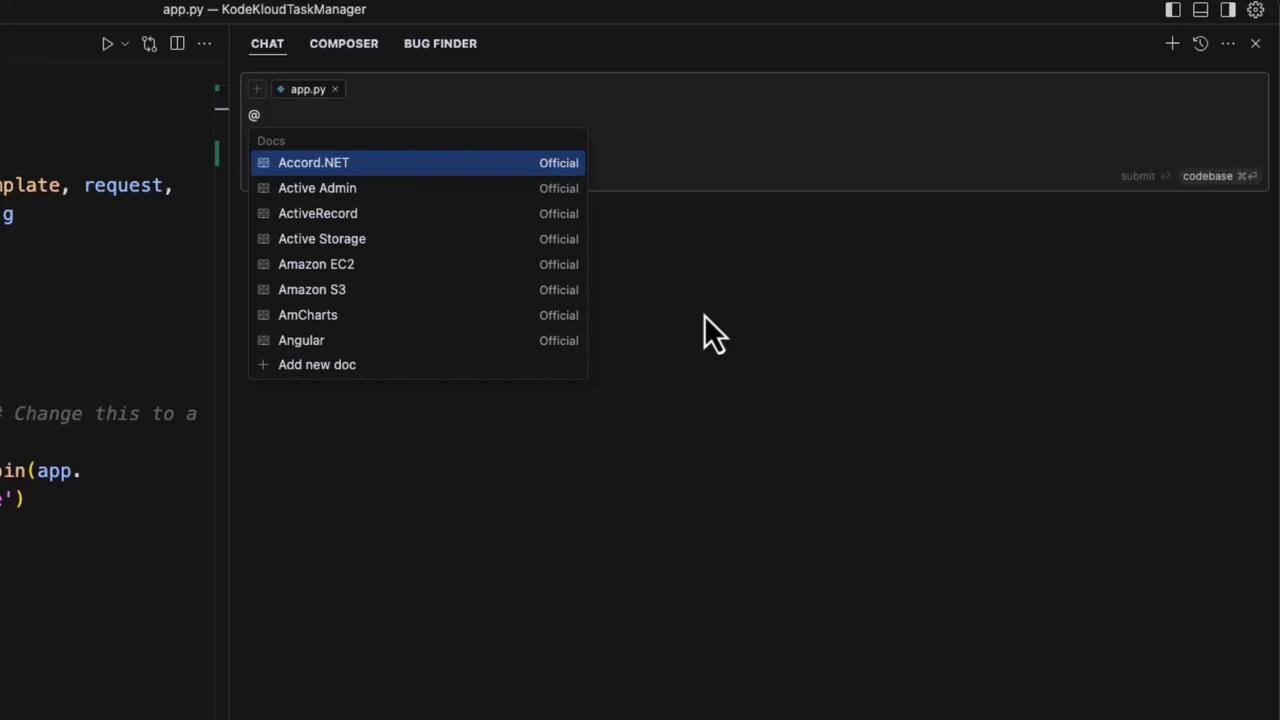
Cursor AI embeds your local documentation—Flask, PyTorch, Python, Pytest, and more—into a dedicated sidebar. You can navigate topics or ask questions like “How do you implement meta tags in a Flask application?” and get immediate answers drawn from your project’s source docs.
For example, Cursor might generate this base.html meta tag template:
<!DOCTYPE html><html lang="en"><head> <meta charset="UTF-8"> <meta name="viewport" content="width=device-width, initial-scale=1.0"> <!-- Default meta tags --> <title>Default Title</title> <meta name="description" content="Default description for your site"> <!-- Open Graph / Facebook --> <meta property="og:type" content="website"> <meta property="og:url" content="{{ request.url }}"> <meta property="og:title" content="Default Title"> <meta property="og:description" content="Default description for your site"> <meta property="og:image" content="{{ url_for('static', filename='images/default-image.jpg', _external=True) }}"> <!-- Twitter --> <meta name="twitter:card" content="summary_large_image"> <meta name="twitter:title" content="Default Title"> <meta name="twitter:description" content="Default description for your site"> <meta name="twitter:image" content="{{ url_for('static', filename='images/default-image.jpg', _external=True) }}"></head><body></body></html>
You can then integrate these meta tags into your Flask routes: