

1. Create Database (Standard vs Easy)
Open the AWS Management Console, search for RDS, and choose Create database. You can pick:- Easy (Simple) create — applies opinionated defaults and speeds up creation.
- Standard create — exposes all configuration options for full control.

2. Engine selection and version
Select the database engine you want — choose PostgreSQL for a Postgres instance. Then select the engine version; the default is suitable in most cases unless you need a specific release for compatibility or features.3. Templates and intended use
RDS offers templates that preconfigure many settings:
Select the template that matches your workload — we used Dev/Test for this lesson.
4. Instance configuration (compute)
RDS instances run on instance classes that resemble EC2 types. Pick an instance class that matches your CPU, memory, and network requirements — the console shows vCPU, RAM, and network throughput for each option.
5. Storage
Choose a storage type and the initial size. You can enable storage autoscaling so RDS grows storage as required up to a maximum you define. Storage options (General Purpose SSD, Provisioned IOPS, etc.) vary by cost and performance.
6. Connectivity, networking, and optional compute helper
Decide whether to provision an associated compute resource for quick connectivity tests (optional). Choose the VPC and subnets where the DB instance should run — you can use the default VPC or supply a custom network.
- Set Public access to
Nofor production (keeps the instance in private subnets). Set toYesonly for temporary testing and ensure strong security rules. - Choose a DB subnet group and optionally specify an Availability Zone or leave it as No preference for AWS to pick.
7. Security groups and public access
Create or reuse a security group to control inbound traffic. For local testing, add a rule to allow your client IP on the PostgreSQL port (5432 by default). For production, restrict access to known application subnets or a bastion host.
8. Additional configuration
Under Additional configuration you can:- Change the default port (
5432). - Select authentication methods (password,
IAMauthentication). - Enable enhanced monitoring, performance insights, backups, encryption, and set backup retention windows.
9. Instance available — find connectivity details
After the instance status changes to Available, open the DB instance details. Note theEndpoint (host) and Port — you’ll use these, together with the master username and password, to connect from a client.

psql -h <your-rds-endpoint> -U postgres -p 5432 -d postgres
<your-rds-endpoint> with the value shown in the console.
10. Connect using pgAdmin
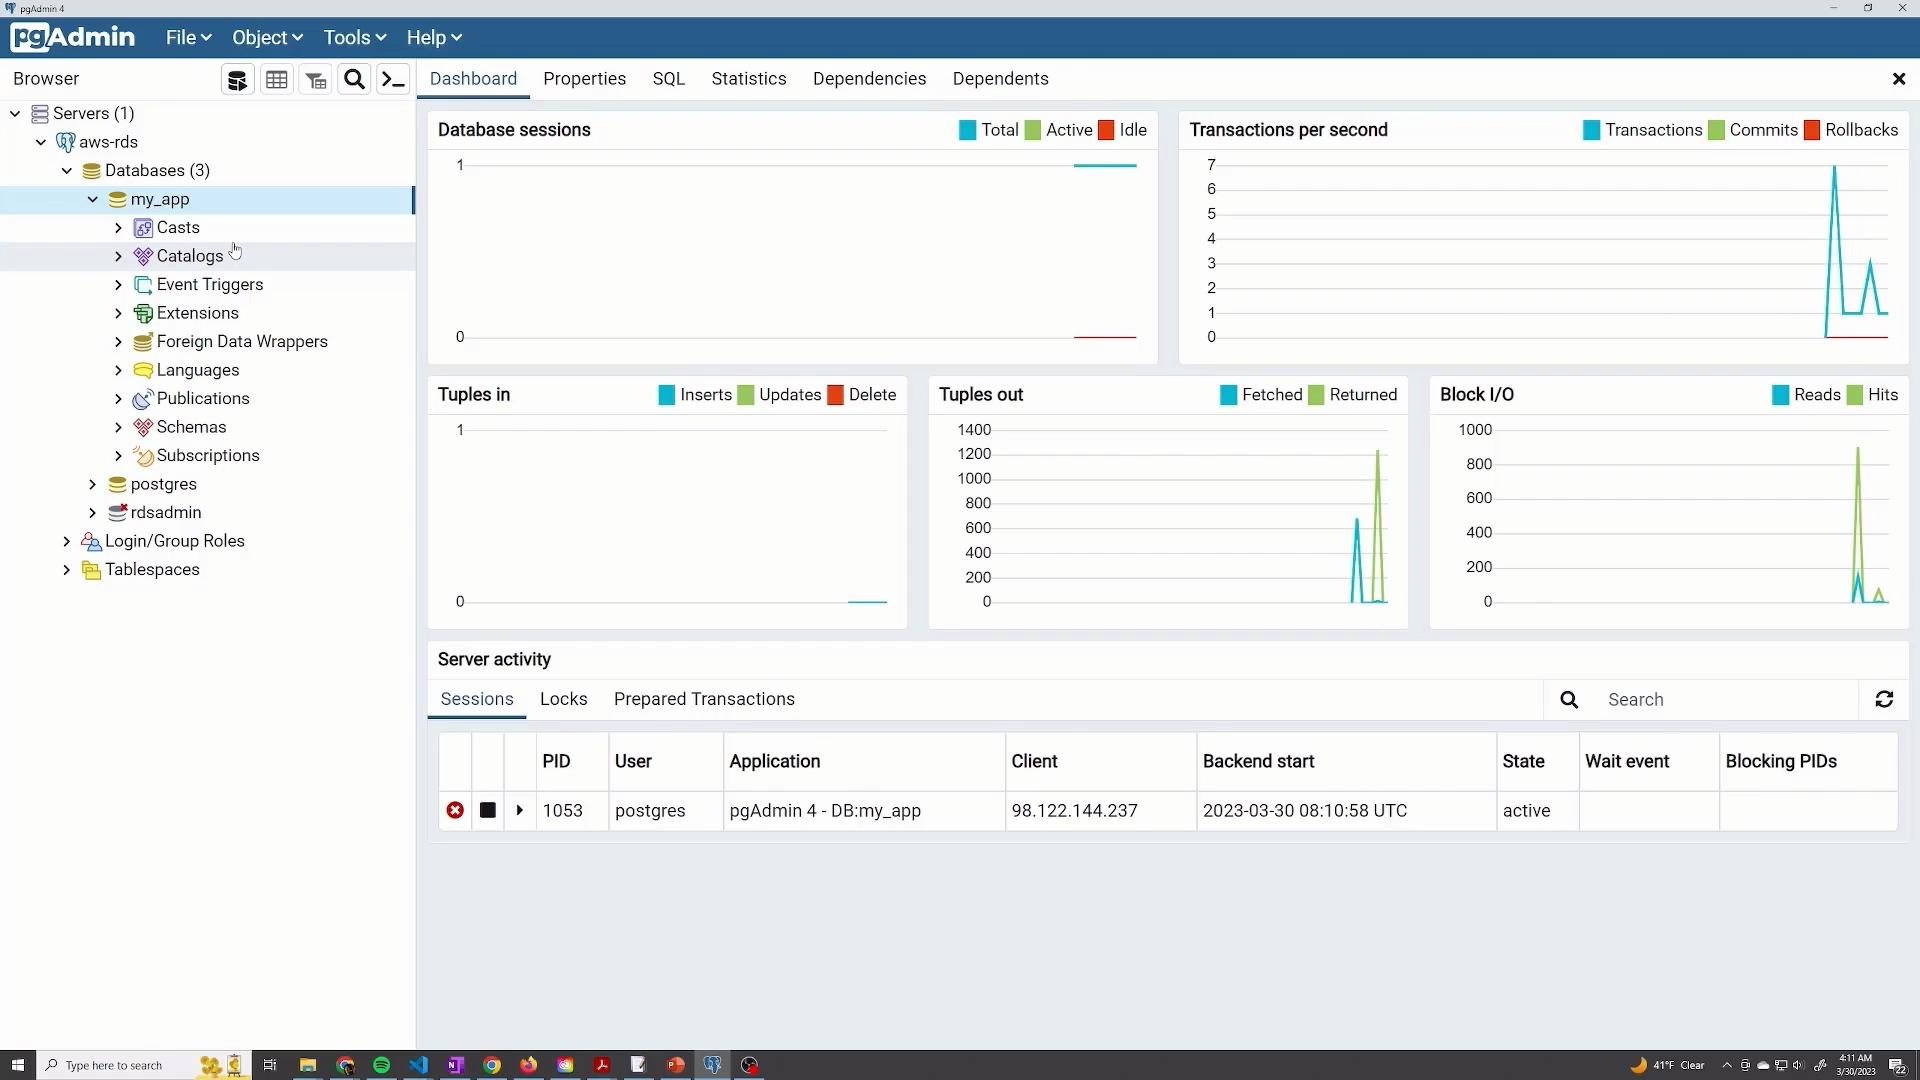
You can connect with GUI tools such as pgAdmin. Create a new server entry and supply:- Host: the RDS endpoint (paste from the console)
- Port:
5432(or your custom port) - Maintenance DB: typically
postgres - Username: the master username (e.g.,
postgres) - Password: the password you set

Do not use the master account credentials for application connections. Create an application-specific database user with the minimum required privileges. For production, use
IAM authentication or a secrets manager such as AWS Secrets Manager to store and rotate credentials securely.11. Modify or delete the instance
- To change instance settings later, choose Modify in the RDS console to update instance class, storage, backup windows, maintenance windows, and more.
- To remove the instance, choose Delete. The console will prompt whether to create a final snapshot and whether to retain automated backups — for production systems, create and retain snapshots or export data before deletion.
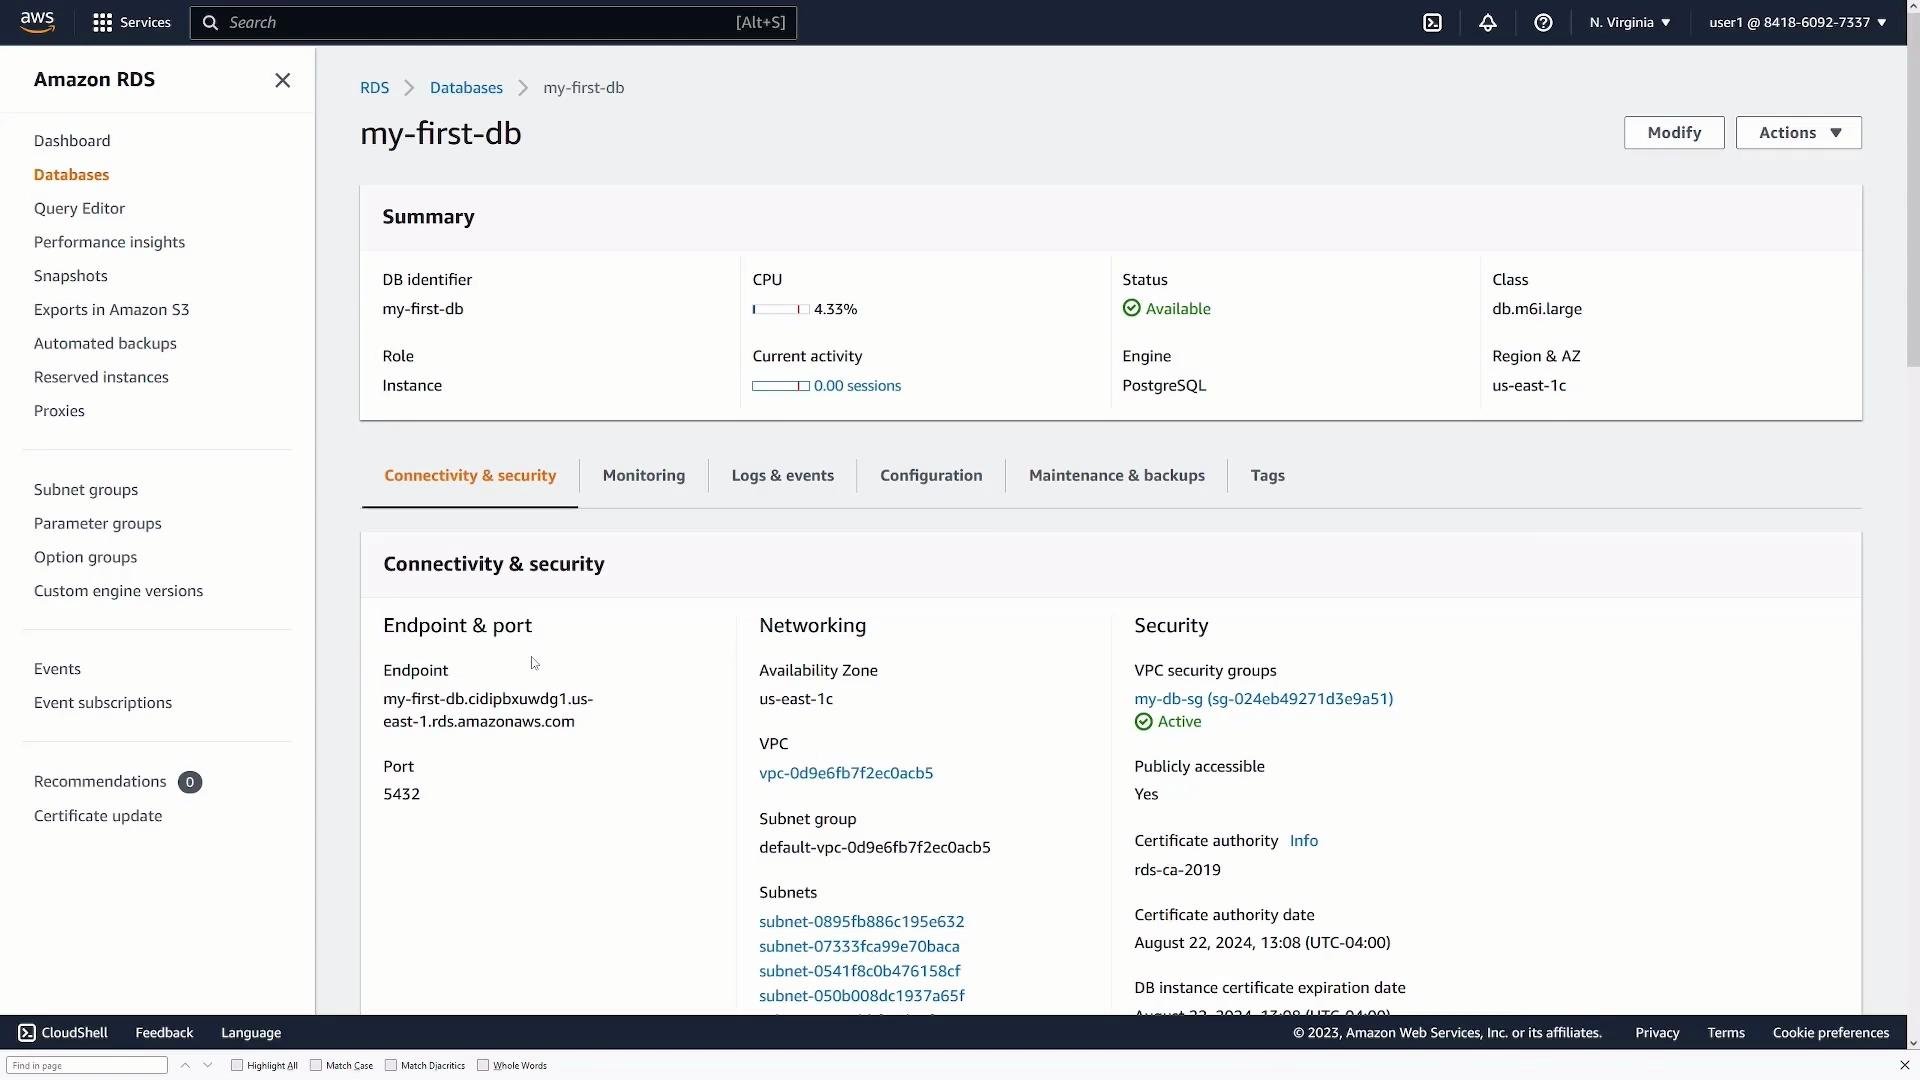
If you enable public access, ensure your security group only allows trusted IP addresses on the database port. Exposing a database to the public internet without strict controls increases the risk of unauthorized access.
