

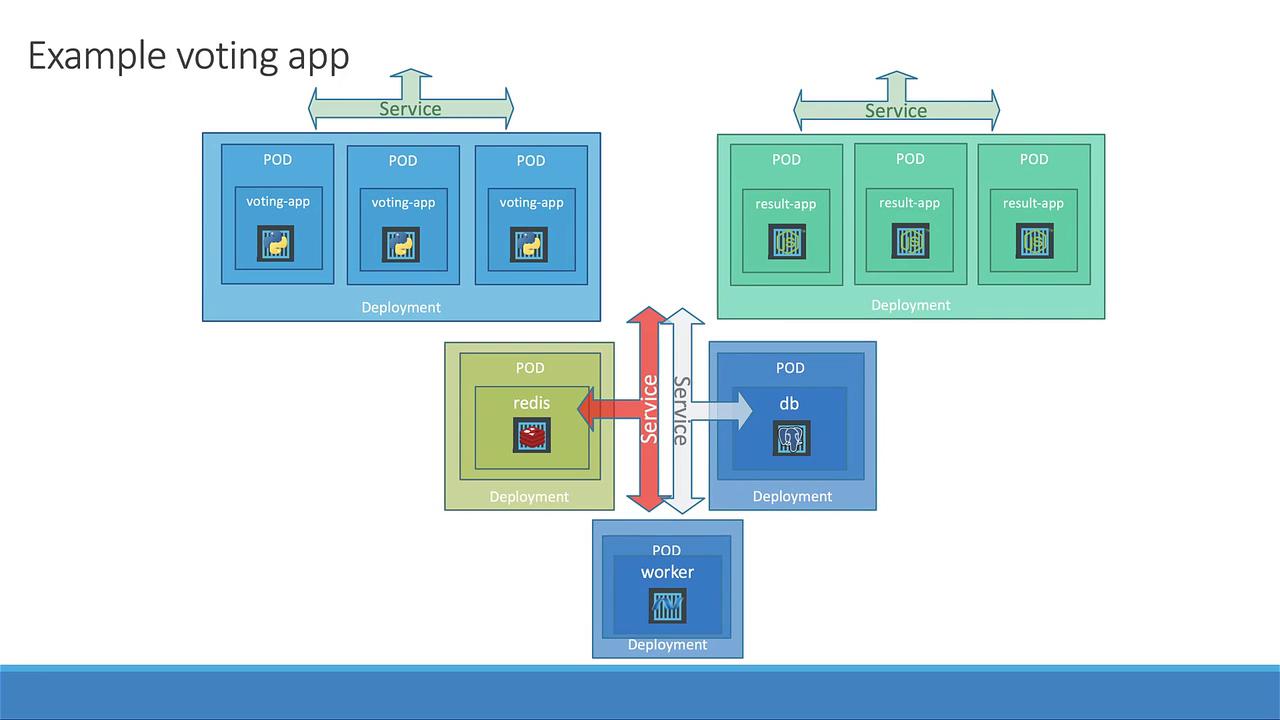
Deploying individual Pods limits your ability to easily increase the number of service instances or update the container image without downtime. Using Deployments streamlines these processes.
Voting App Deployment
We begin by defining a basic Pod for the voting app:votingapp-deployment.yaml) based on this pod template. Adjust the API version to apps/v1, change the kind to Deployment, and add the selector and replicas fields:
Redis Deployment
Begin with the original Redis Pod definition:redis-deploy.yaml) using the same template as the voting app deployment. Update the component names, labels, and container details accordingly:
PostgreSQL Deployment
Transform the PostgreSQL Pod into a Deployment. First, consider the original PostgreSQL Pod definition with environment variables:postgres-deploy.yaml). Ensure that the selector matches the Pod template labels:
Worker App Deployment
For the worker application, start with its Pod definition:worker-app-deploy.yaml). Update the names, labels, and selectors as required:
Result App Deployment
Similarly, convert the result application from a Pod to a Deployment. Create the fileresult-app-deploy.yaml, update the names and labels from the original Pod definition, and ensure that the template matches the selector criteria.
Your project directory should now include files similar to the following:
Deploying on Kubernetes
Before creating the new Deployments and Services, ensure that any previously created resources are removed. Verify by running:Creating the Voting App Deployment
Deploy the voting app using the command below:Deploying Redis, PostgreSQL, and Their Services
First, deploy Redis and its service:Deploying Worker and Result Applications
Deploy the worker application (which does not have an associated Service):Accessing the Front-End Applications
Use Minikube to retrieve the URLs for the voting and result services:Scaling the Voting App Deployment
Scaling the voting application is straightforward with Deployments. For example, to increase the number of voting app replicas from one to three, run:This lesson demonstrates how Kubernetes Deployments simplify application management by enabling effortless scaling, rolling updates, and high availability. Happy deploying, and see you in the next lesson!