

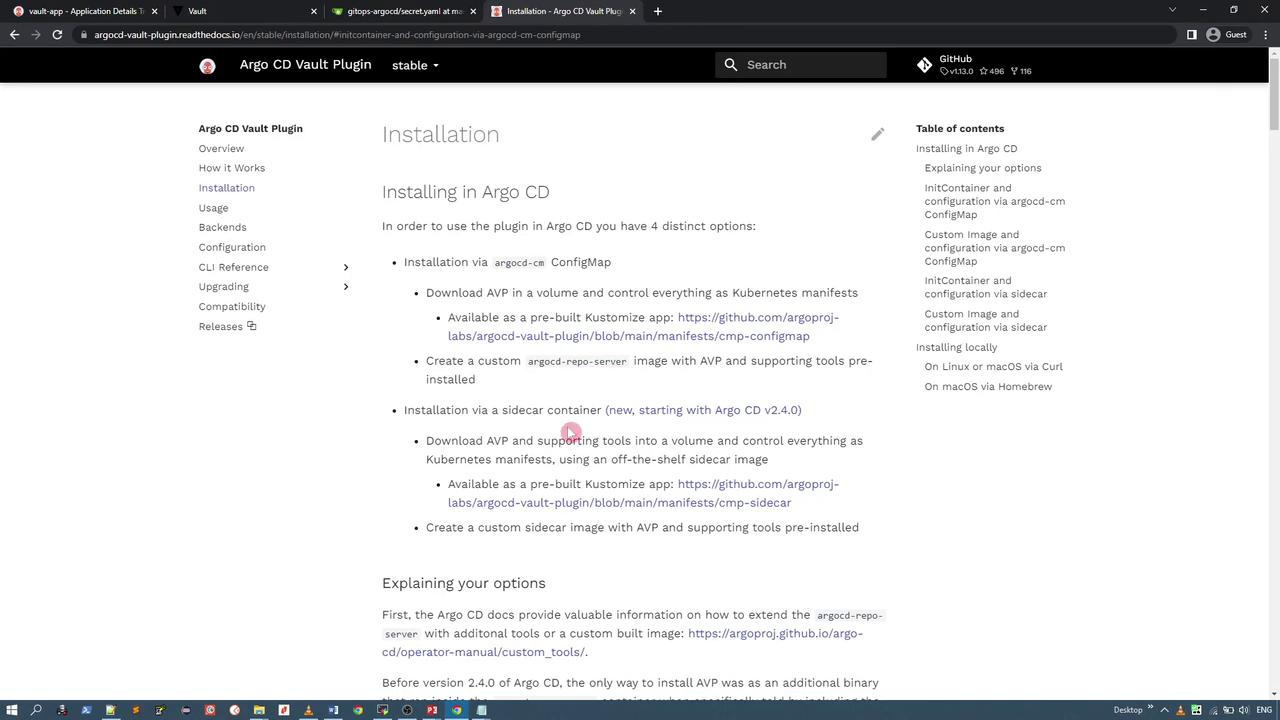
1. Repository Server Deployment Configuration
The first step is to modify the ArgoCD repo server deployment. This configuration uses an initContainer that downloads the Vault plugin and makes it available to the main container through a shared volume.Initial Deployment Example
custom-tools. The initContainer called download-tools downloads the Vault plugin using wget, sets executable permission with chmod +x, and moves it to the shared volume.
Detailed InitContainer Example
For clarity, here is an alternative snippet that highlights the initContainer setup:/custom-tools/, which the repo server container will later mount.
2. Plugin Installation Using a Dockerfile
If you prefer embedding the plugin into a custom image, use a Dockerfile similar to the example below. This approach avoids using an initContainer by baking the Vault plugin directly into your image.Embedding the plugin in your custom image can simplify deployment in environments where using an initContainer is less desirable.
3. Configuring the Config Management Plugin
Once the Vault plugin binary is available, update the ArgoCD ConfigMap to instruct ArgoCD on how to invoke the plugin for manifest generation. Add the following configuration in your ConfigMap:argocd-vault-plugin generate ./ during the reconciliation process.
4. Updating the Repo Server Deployment with Vault Plugin Credentials
Below is a revised ArgoCD repo server deployment example. This configuration includes a secret reference for Vault credentials and updates the Vault plugin version to 1.7.1. Ensure that the environment variable is correctly defined as AVP_VERSION.kubectl edit deployment argocd-repo-server -n argocd, the repo server downloads the Vault plugin and processes manifests containing Vault annotations.
5. Creating an Application Using Vault Secrets
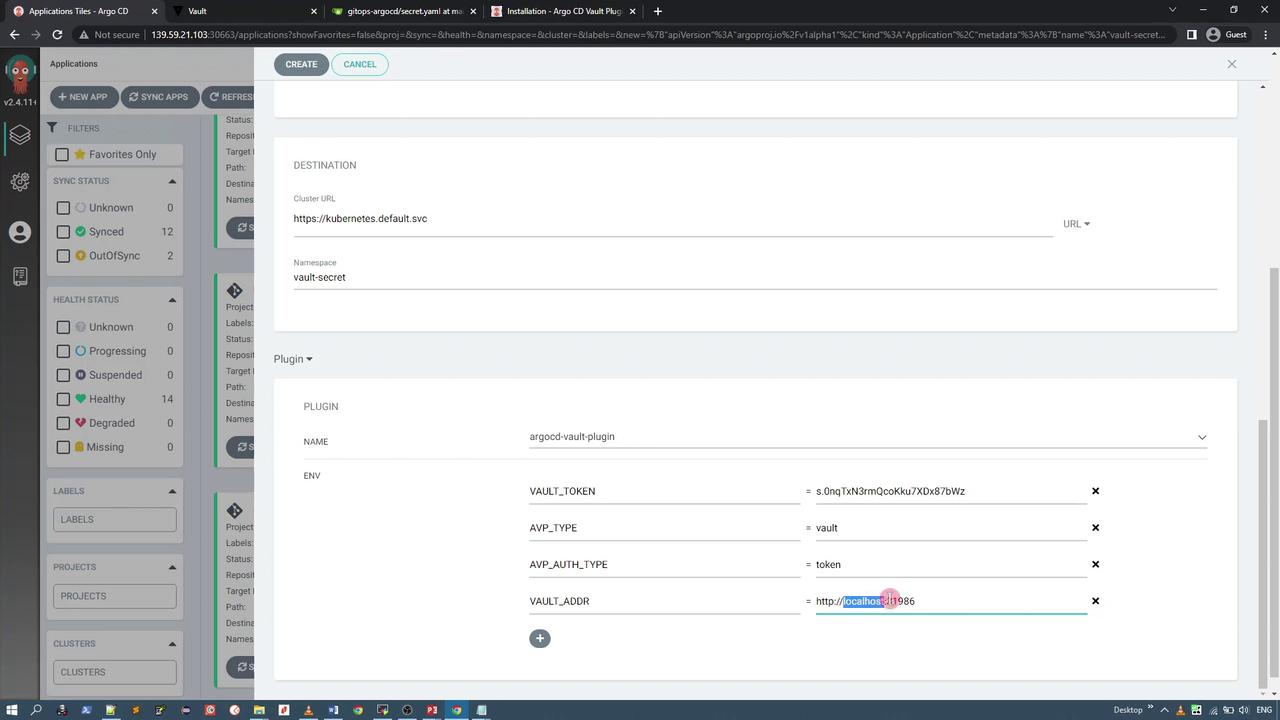
To use the Vault plugin, enable it within your ArgoCD application. In the ArgoCD UI, create a new application (e.g., Vault Secret App Demo) within the default or demo project. Configure the sync policy to manual and let the target namespace be automatically created.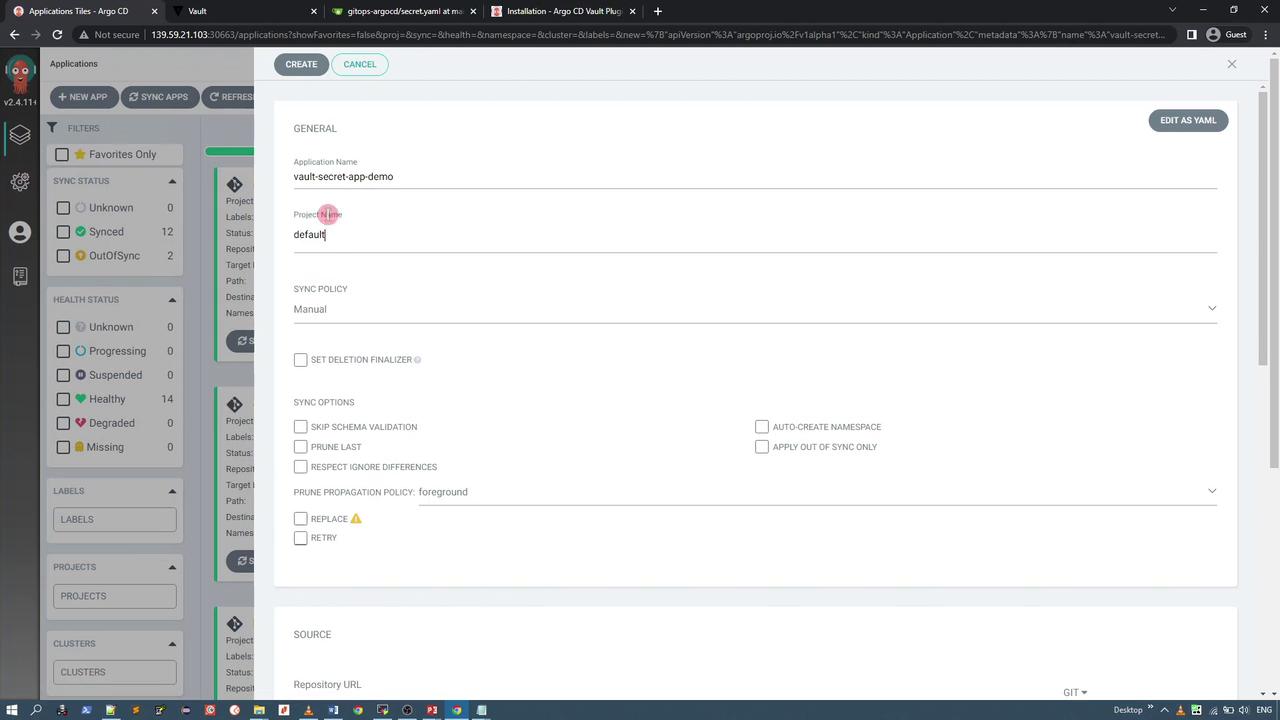
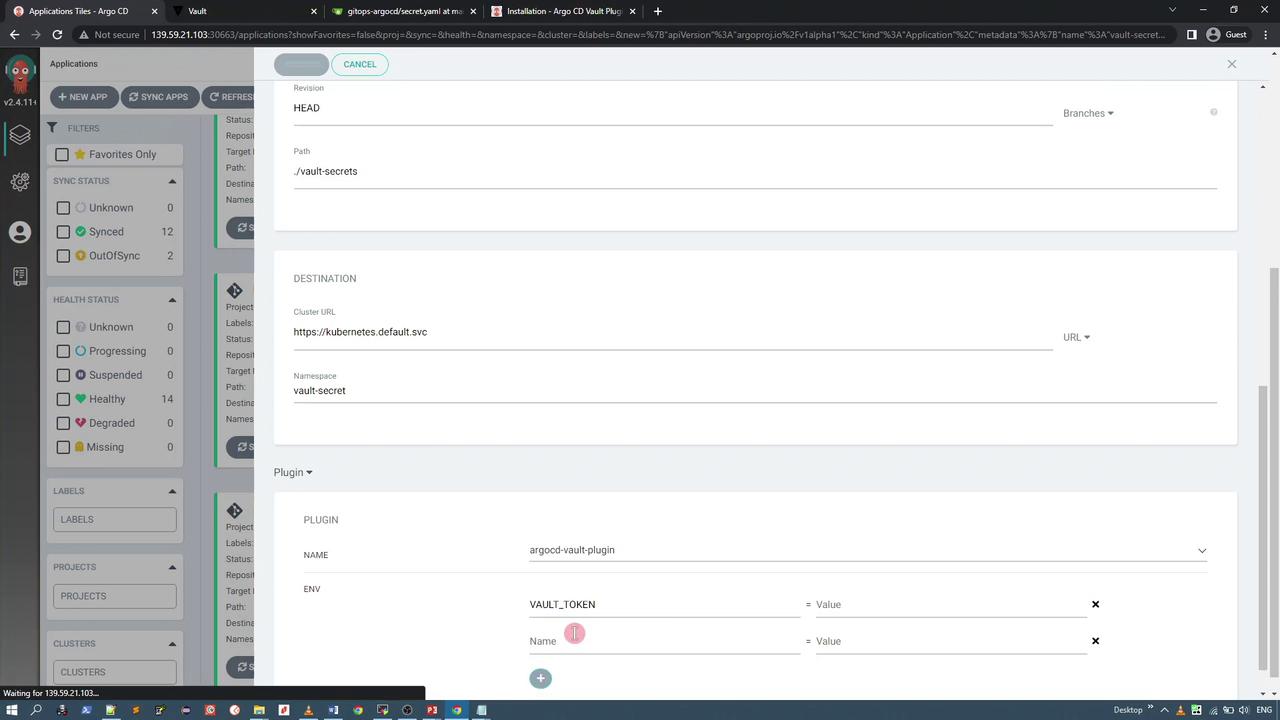
- AVP_TYPE: vault
- AVP_AUTH_TYPE: token
- VAULT_ADDR: e.g., http://vault-app.vault-demo.svc.cluster.local:8200
- VAULT_TOKEN: (Your Vault token)
6. Verifying the Application Deployment
After deploying your application, check the ArgoCD dashboard to ensure that the application status is synced and healthy.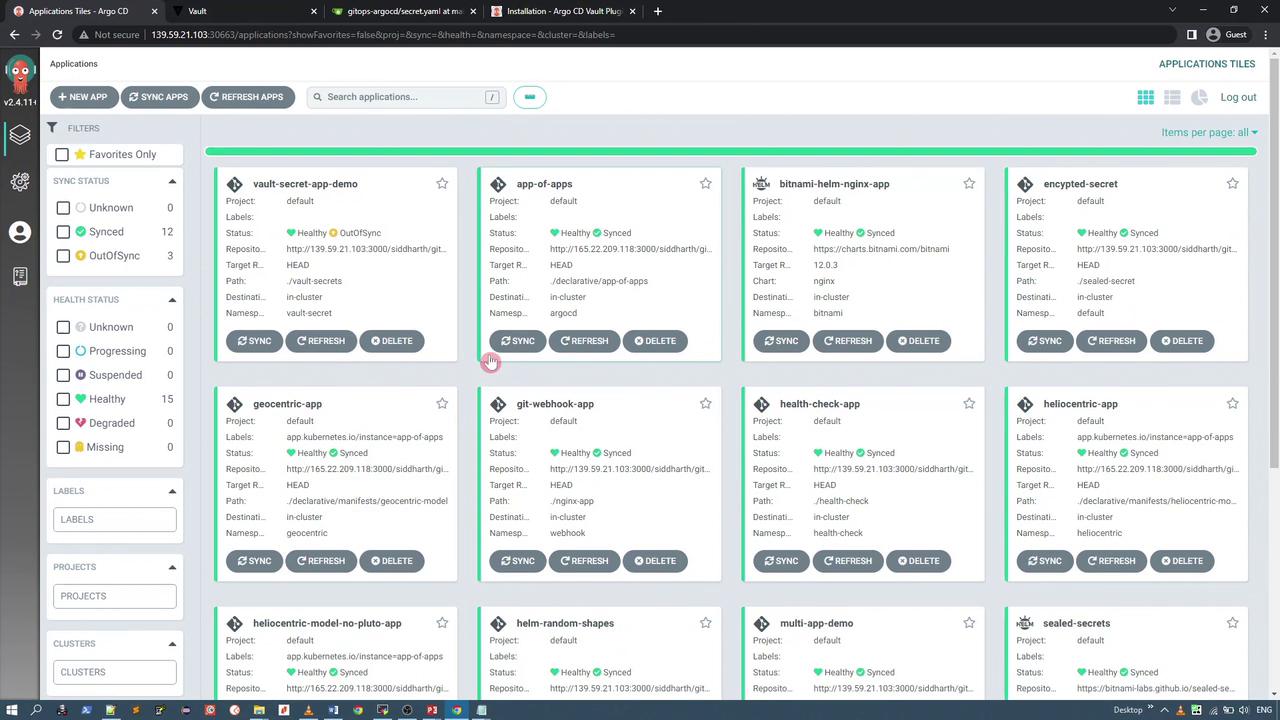
<secret-name> and <key>:
7. Additional CLI Configuration
You can perform further adjustments using the command line. For example, edit the repo server deployment or ConfigMap with these commands:vault.env):
vault.env file may look like this:
Always double-check your Vault credentials and make sure that all environment variables are correctly configured to ensure secure secret management.
Conclusion
In this lesson, we demonstrated how to integrate HashiCorp Vault with ArgoCD using the Vault plugin. The key steps included:- Modifying the ArgoCD repo server deployment to download the plugin via an initContainer.
- Optionally baking the plugin into a custom Docker image.
- Configuring the ArgoCD ConfigMap to register and invoke the plugin.
- Creating an application with Vault annotations so that the plugin fetches the secret data from Vault.
- Verifying the application’s deployment using both the ArgoCD dashboard and CLI tools.