

- Creating a custom subnet in your VPC
- Provisioning a VPC-native GKE cluster with IP aliasing
- Deploying a simple HTTP server
- Exposing it via Ingress backed by a NEG
- Viewing the resulting Load Balancer and NEGs
- Scaling the deployment and validating load balancing
1. Create a custom subnet
First, create a/24 subnet in the default VPC in us-west1:
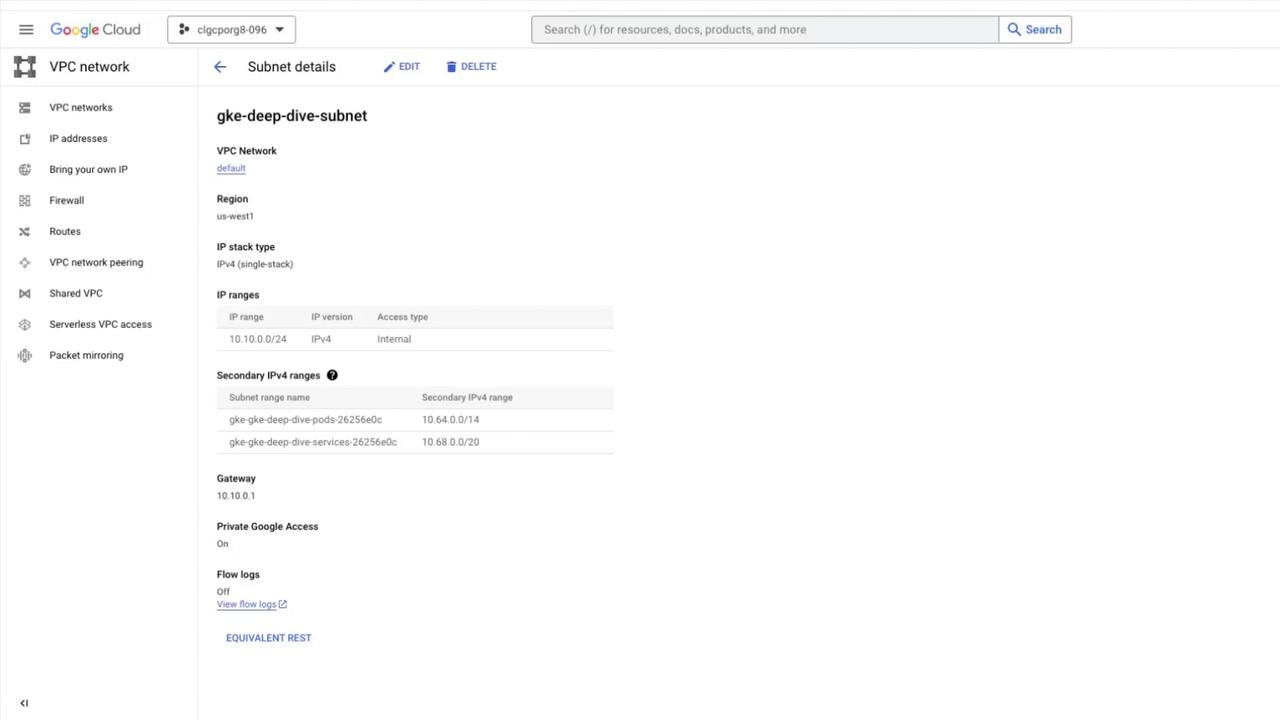
Choose a CIDR range that doesn’t overlap with your existing networks. This subnet will host both Pods and Services via secondary IP ranges.
2. Provision a VPC-native GKE cluster
Set your Compute region and zone, then create a GKE cluster with IP aliasing enabled on the custom subnet:Cluster provisioning typically takes 10–15 minutes. Verify that two secondary IP ranges (for Pods and Services) appear under your subnet.
3. Deploy the HTTP server application
We’ll deploy a basic HTTP server that responds with its Pod hostname.3.1 Deployment manifest
Create a file namedgke-deep-dive-app.yaml:
3.2 Service manifest
Expose the Deployment as a ClusterIP Service annotated for NEGs. Save asgke-deep-dive-svc.yaml:
3.3 Ingress manifest
Creategke-deep-dive-ing.yaml to route HTTP traffic via Ingress:
An EXTERNAL-IP may take a few minutes to appear. Wait until it’s provisioned before testing.
3.4 Resource manifest overview
4. View Load Balancer and NEG
In the Cloud Console, go to Network services > Load balancing. You’ll see an HTTP(S) Load Balancer created for your Ingress: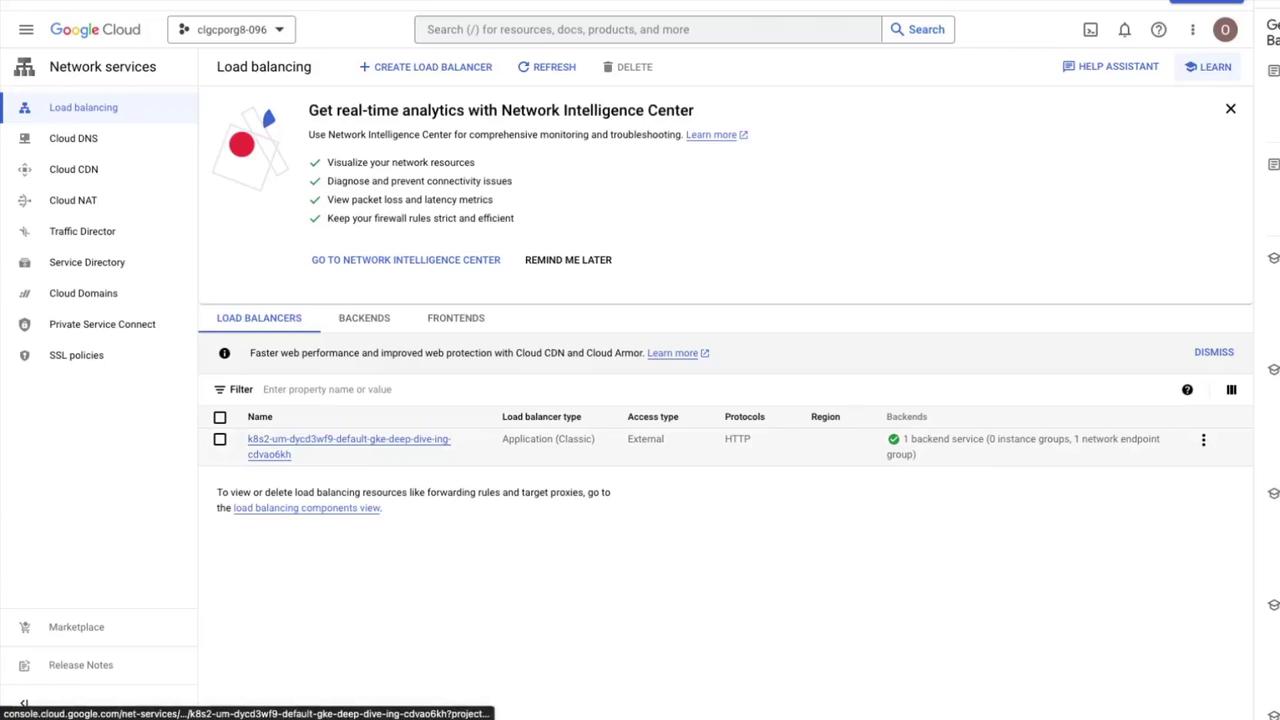
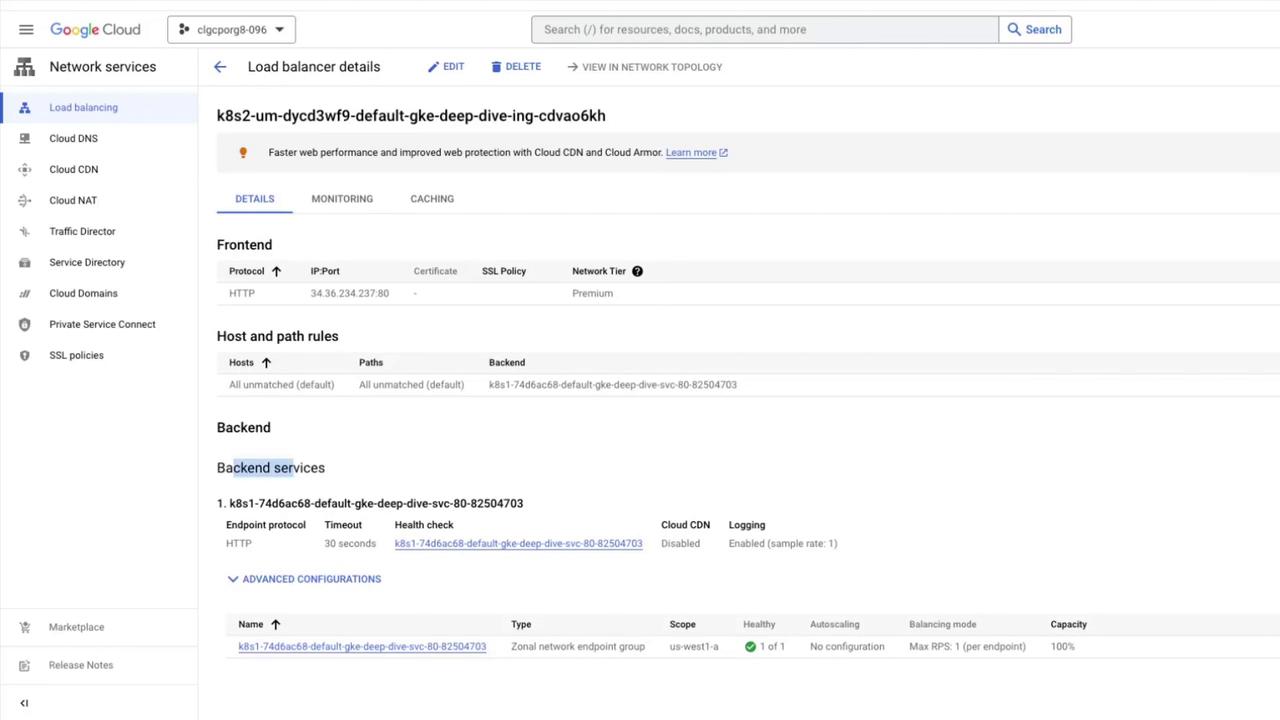
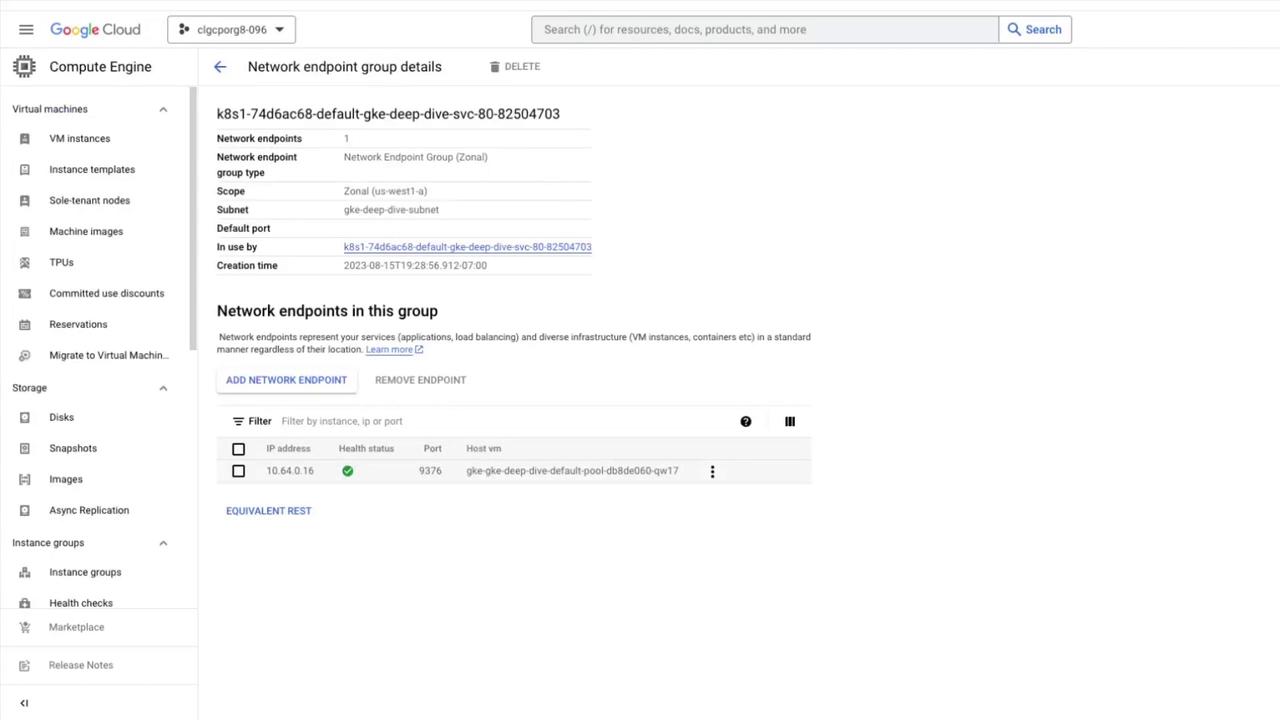
5. Scale and verify load balancing
Increase the Deployment to three replicas:Links and References
- GKE documentation
- Kubernetes Ingress Guide
- Network Endpoint Groups
- VPC-Native Clusters (IP Aliasing)
- Google Cloud Console – Load Balancing