Learn to create and configure a Jenkins pipeline using the Blue Ocean graphical editor for improved continuous integration.
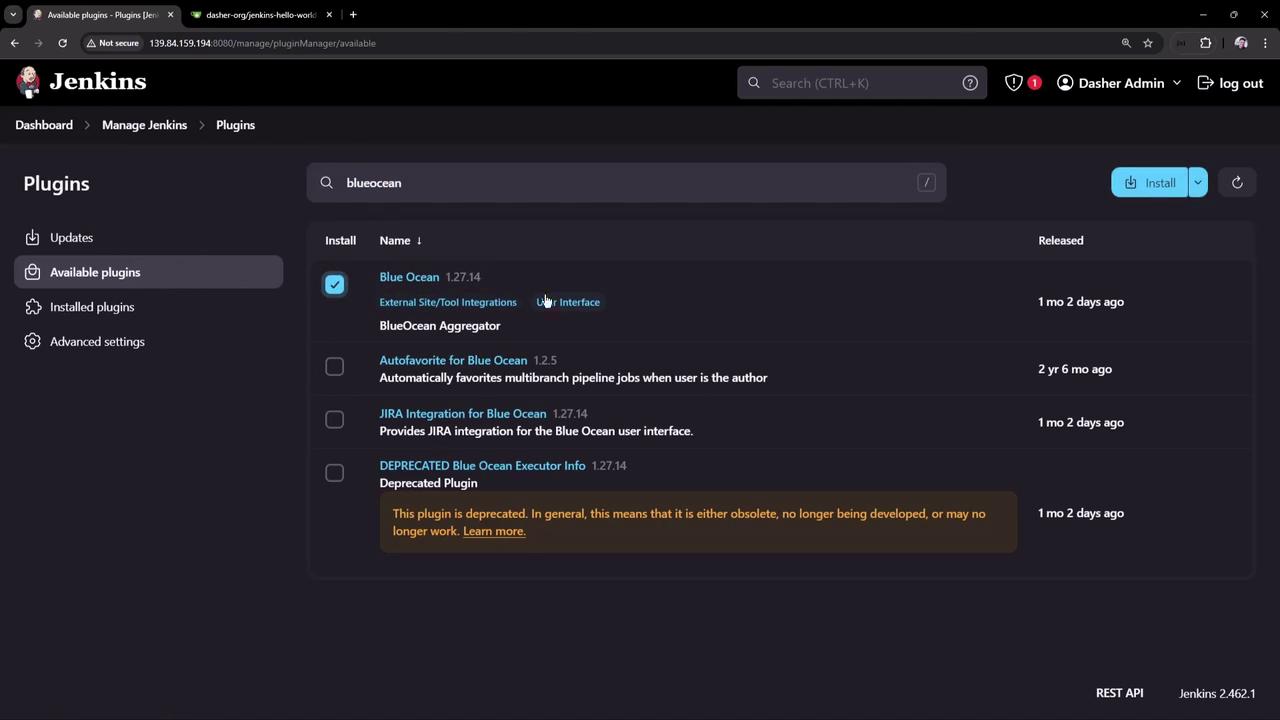
In this tutorial, you’ll learn how to create and configure a Jenkins pipeline using the Blue Ocean graphical editor for an enhanced continuous integration experience.To get started, access your Jenkins instance and navigate to the plugins management page. Search for “Blue Ocean” and install the plugin. Blue Ocean bundles modern plugins that revamp the Jenkins user interface, focusing on simplifying pipeline creation and management.
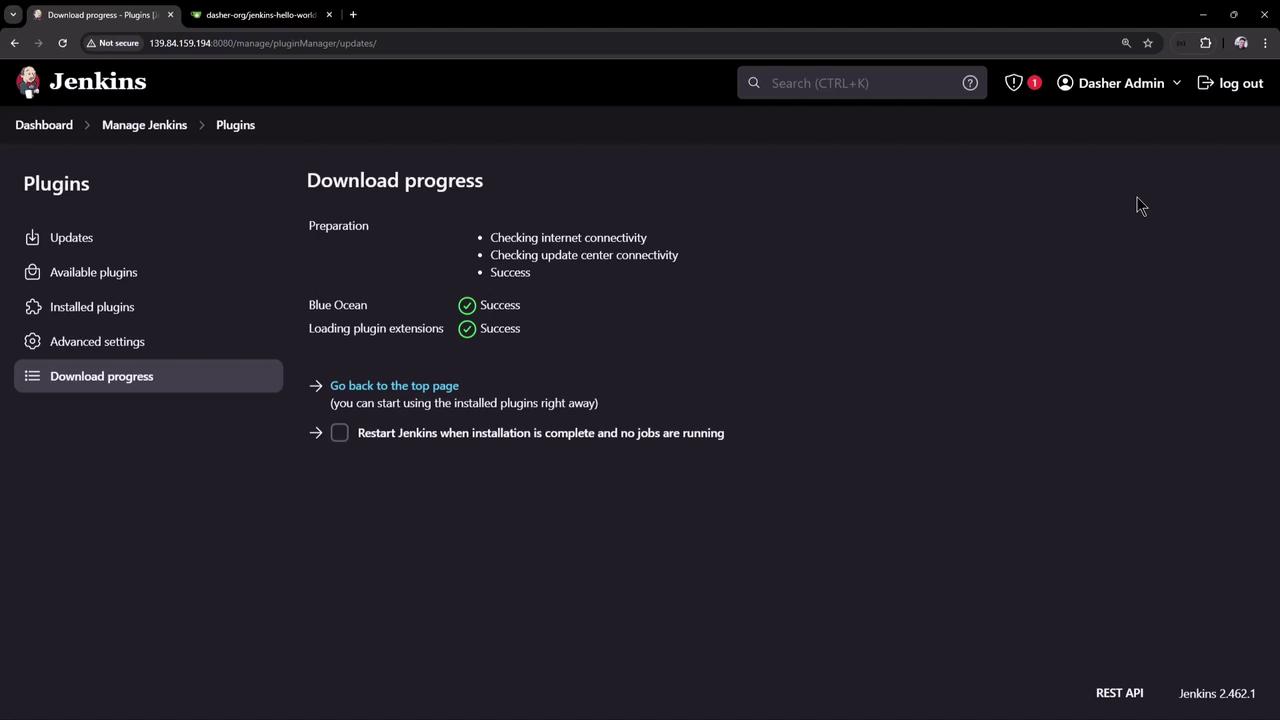
After the installation is complete, your main dashboard will reveal an “Open Blue Ocean” option. This view not only refreshes the visualization of your pipelines but also offers an easy switch-back to the classic interface with a simple arrow icon.
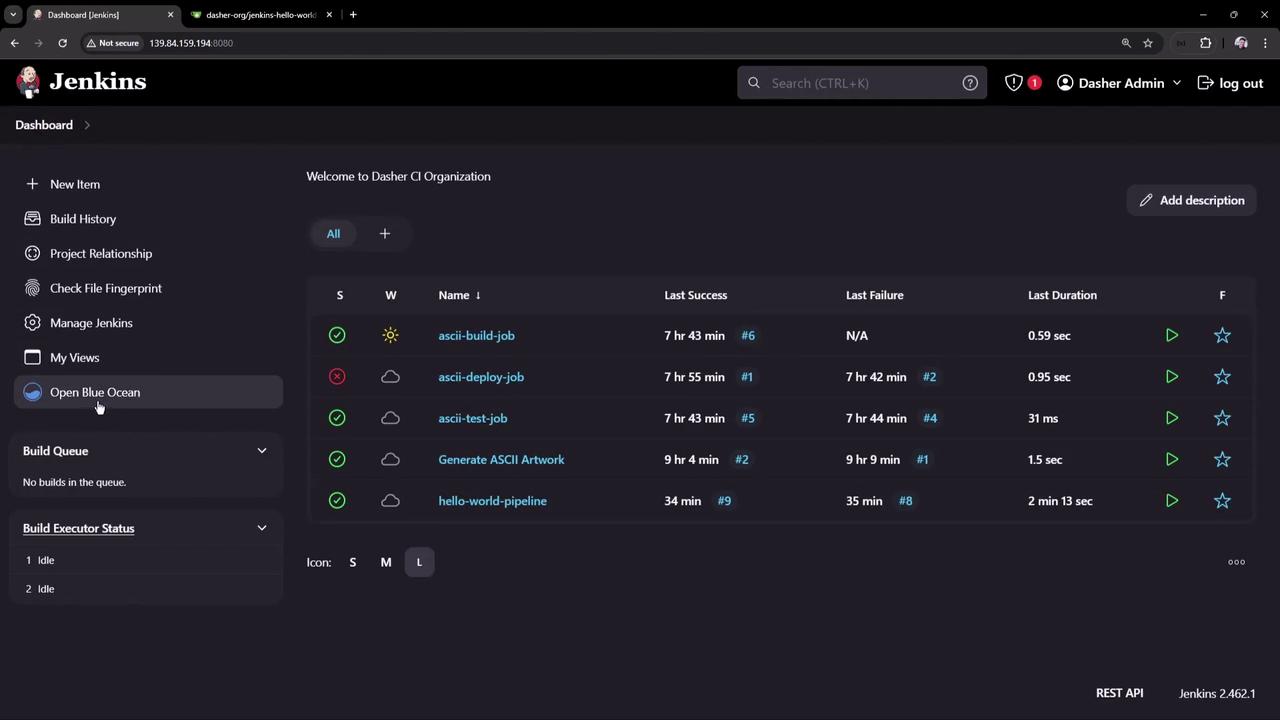
The Jenkins dashboard now displays a list of jobs with their statuses, including details such as last success, failure, and duration. The sidebar gives you access to options like “Build History” and the new “Open Blue Ocean” view.
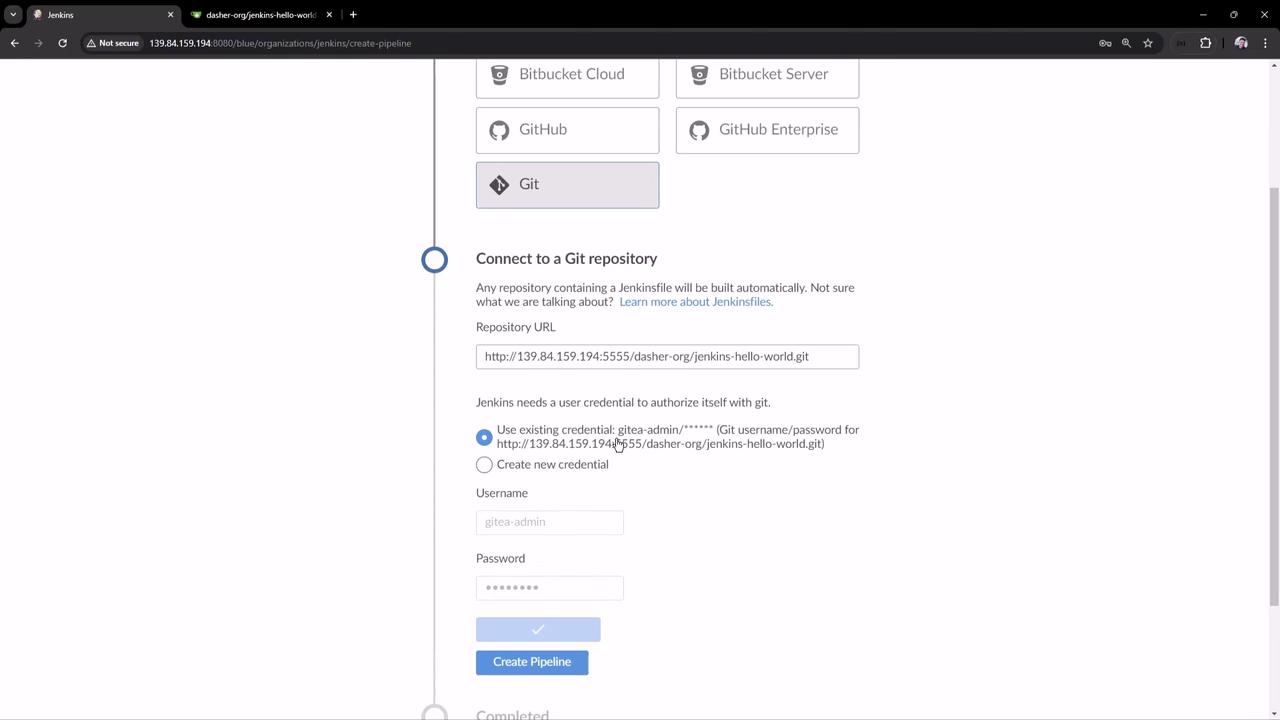
To create a new pipeline, click on the “New Pipeline” button. The first step integrates Blue Ocean with your Source Control Management (SCM) tool. Jenkins supports popular SCM platforms, including GitHub, Bitbucket, and GitHub Enterprise.If you plan to use GitHub, select the Git option, paste your repository URL, and enter your GitHub credentials (e.g., user “GitHub-admin”). Jenkins leverages the credential binding plugin to securely store these credentials.
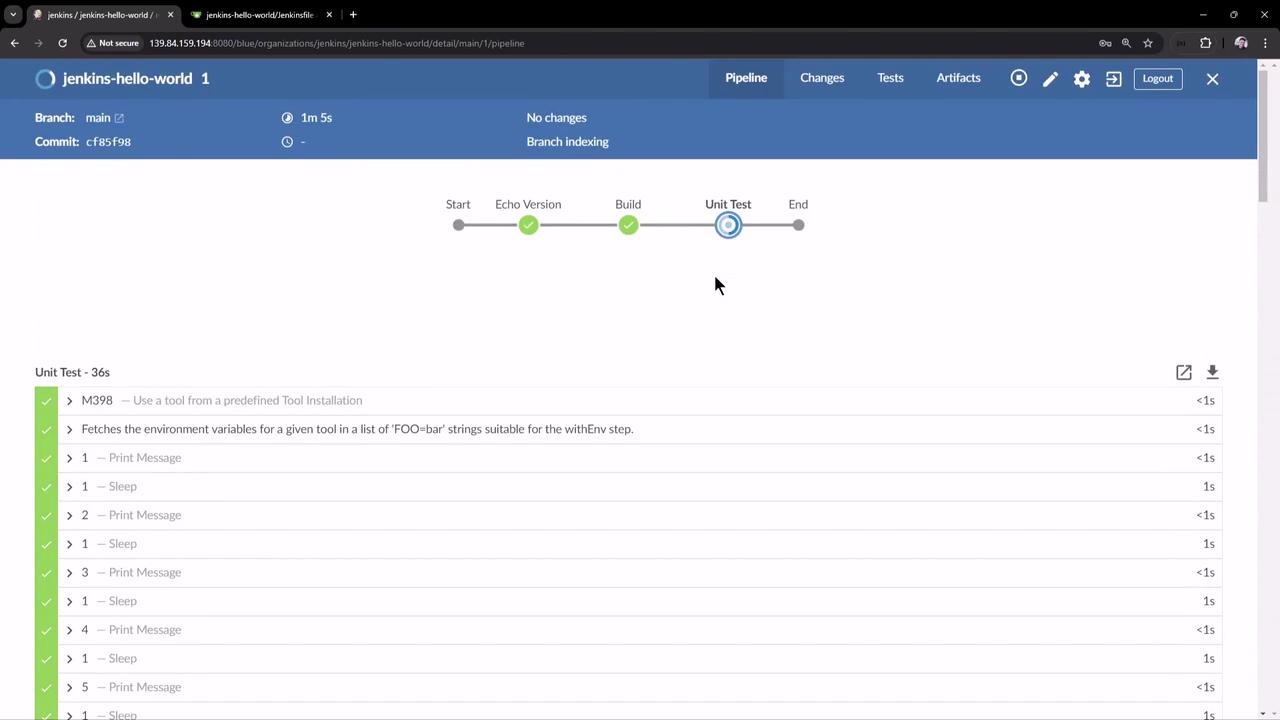
Once authentication is complete, Jenkins scans your GitHub repository for branches that contain a Jenkinsfile. If found, the pipeline triggers automatically; if not, you will be prompted to create one. In our example, the repository already includes a Jenkinsfile with multiple stages such as “Unit Test.”In the Jenkinsfile example below, the “Unit Test” stage incorporates a loop that introduces a 60-second delay before proceeding:
stage('Build') { steps { // Get some code from a Gitea repository // git branch: 'main', url: 'http://139.84.159.194:5555/dasher-org/jenkins-hello-world.git' // Run Maven Package CMD sh 'mvn clean package -DskipTests=true' }}stage('Unit Test') { steps { script { for (int i = 0; i < 60; i++) { echo "${i + 1}" sleep 1 } } sh 'mvn test' }}
After saving the pipeline configuration, Blue Ocean presents all build steps, including “Echo Version,” “Build,” and “Unit Test,” along with real-time logs on a single page. You might need to wait a moment as the stages complete.
Additional details such as the branch that triggered the build, build duration, commit ID, and a summary of changes are readily available within the interface.
By clicking the pencil icon, you can edit the pipeline directly in the Blue Ocean interface. This feature lets you modify commands or shell scripts for any stage. For instance, you can adjust the “Unit Test” stage as follows:
for (int i = 0; i < 60; i++) { echo "${i + 1}"}
Press Ctrl S (or Command S on macOS) to save any changes, which are then updated in your Jenkinsfile.Below is an updated snippet of the Jenkinsfile with modifications for archiving artifacts and processing test results:
Below is the complete updated Jenkinsfile incorporating all modifications:
pipeline { agent any tools { // Install the Maven version configured as "M398" and add it to the path. maven 'M398' } stages { stage('Echo Version') { steps { sh 'echo Print Maven Version' sh 'mvn -version' } } stage('Build') { steps { // Get code from Git repository git branch: 'main', url: 'http://139.84.159.194:5555/dasher-org/jenkins-hello-world.git' sh 'mvn clean package -DskipTests=true' archiveArtifacts 'target/hello-demo-*.jar' } } stage('Unit Test') { steps { sh 'mvn test' junit(testResults: 'target/surefire-reports/TEST-*.xml', keepProperties: true, keepTestNames: true) } } }}
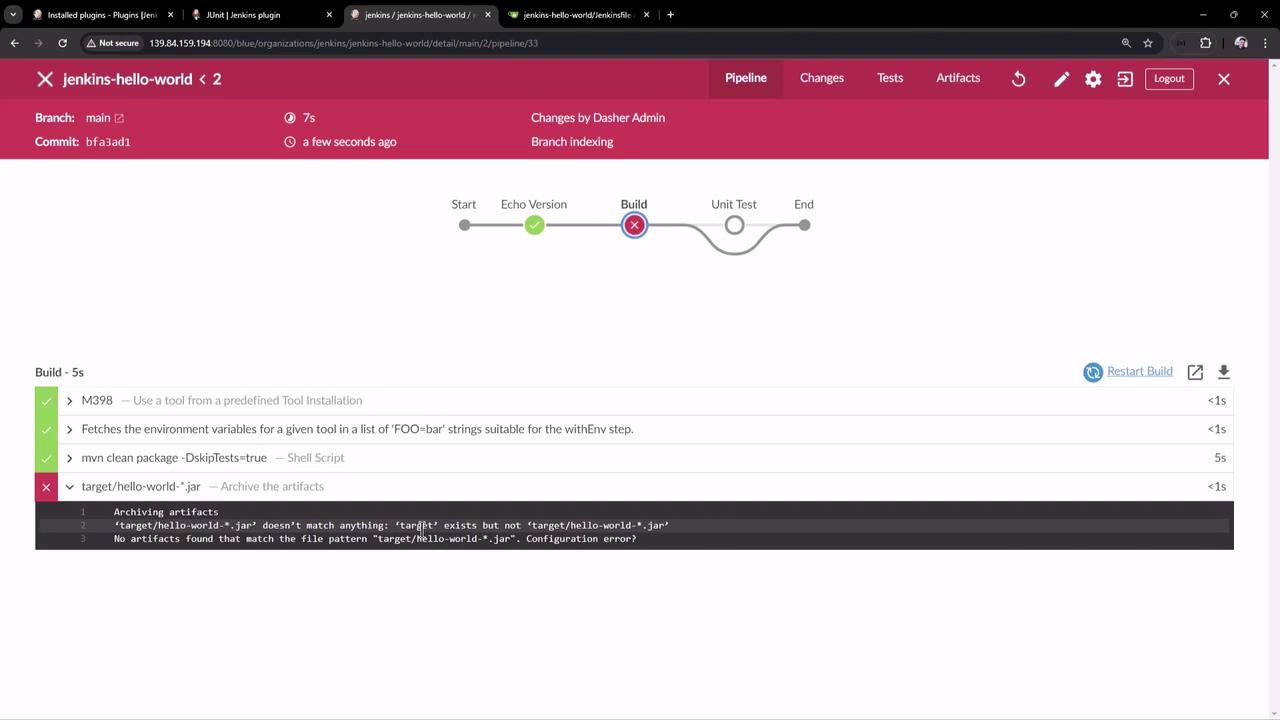
After saving and committing the Jenkinsfile, Jenkins will trigger a new build. A commit message like “Added artifact archive for build stage and JUnit reports” is recorded automatically. In case the artifact pattern does not match (for instance, using hello-world instead of hello-demo), update the Jenkinsfile accordingly.Inspect the Jenkins logs to ensure that the Maven build produces the JAR file and that the unit tests run successfully.
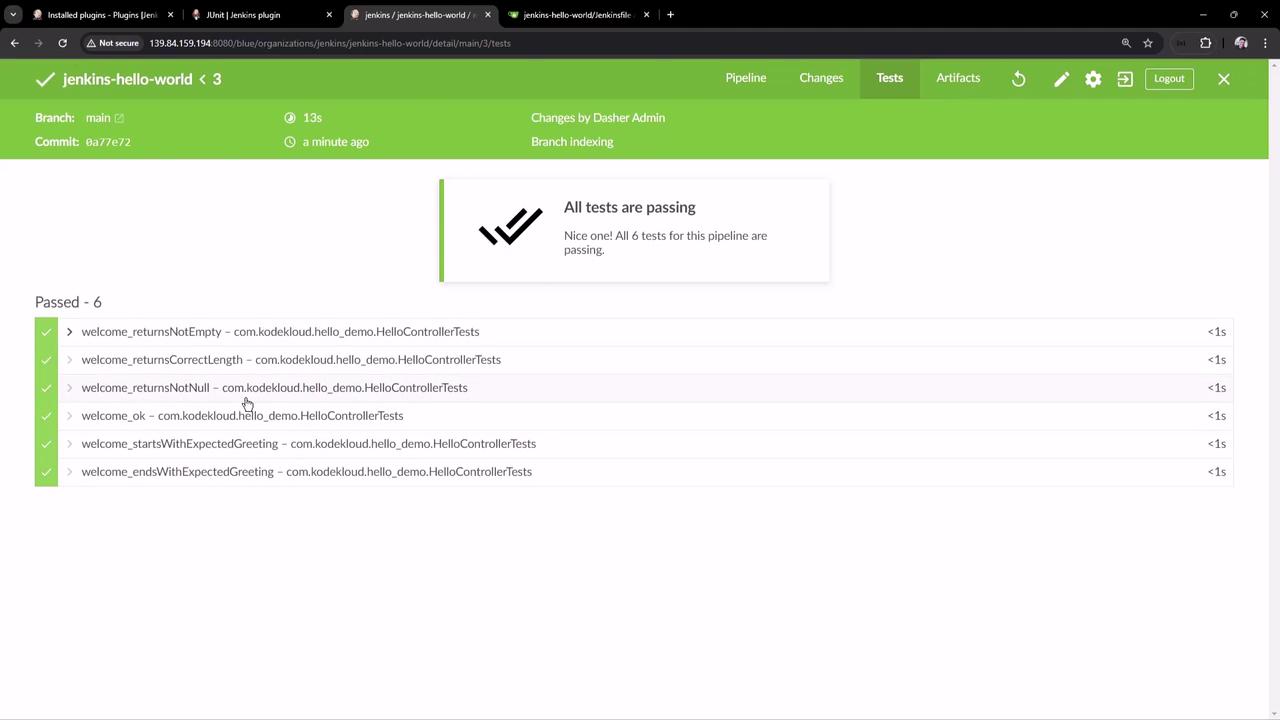
After updating the file path to match the correct artifact name and re-running the build, the process completes successfully and executes the unit tests:
mvn clean package -DskipTests=true
and
mvn test
The JUnit plugin then displays test results alongside options for downloading artifacts.
This lesson demonstrated how you can leverage the Blue Ocean plugin to efficiently create, configure, and visualize Jenkins pipelines. The intuitive interface makes it easy to edit your pipeline, update the Jenkinsfile, and archive both build artifacts and test reports.
The classic Jenkins UI remains available for inspecting build history and tracking test result trends over time.
Happy building and continuous integration with Jenkins!