Explains MCP servers for connecting external services to LLM workflows, discovering and configuring integrations in an IDE and marketplace, with security and workspace configuration guidance
In this lesson we’ll explore MCP servers — a flexible, consistent way to connect external services to your LLM workflows. MCP servers expose a common protocol so language models and tools can interact with APIs, databases, observability systems, calendars, and other services. Because they standardize communication, MCP servers make it easy to mix APIs, LLMs, and tooling in a single, predictable interface.There is a large catalogue of MCP servers available. Popular examples include Perplexity Research (excellent for web research), Supabase (hosted databases), Prometheus Query (metrics), Cost Explorer, and many utility tools like Dice Rollers. You can add engines such as Perplexity Research to improve research capabilities or install small tooling servers for utility tasks.
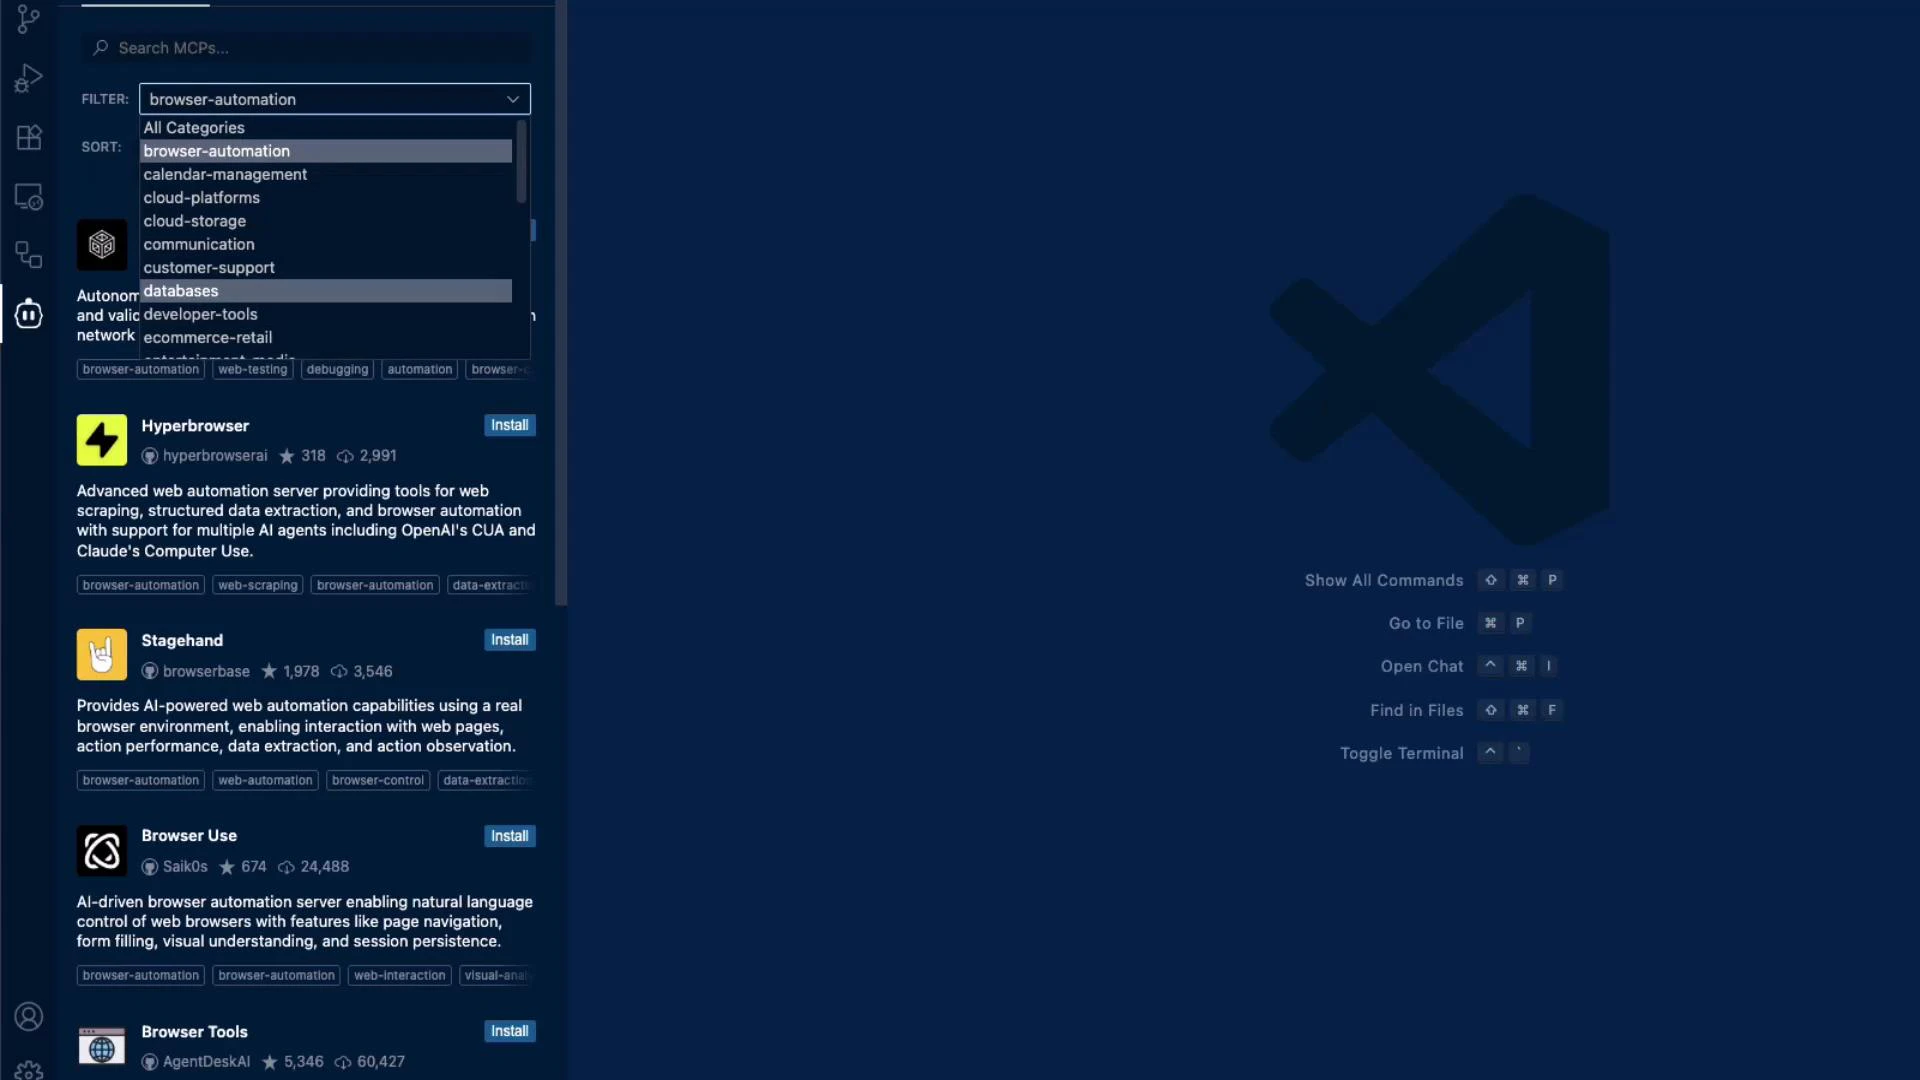
Browse and search the MCP servers list inside the IDE to find the integrations you need. Use the search box to locate specific providers (Slack, Google Calendar, Supabase, etc.) and install them directly from the extensions pane. Searching by provider name or keyword helps you quickly locate servers that match your workflow.You can also filter by category to narrow results — for example, choose “Browser Automation” when you need end-to-end testing or scraping capabilities.
MCP Server categories make discovery straightforward. Common categories include Browser Automation, Calendar Management, Cloud Platforms, Communication, Developer Tools, Databases, and Observability. Use the table below to quickly identify where common MCP servers fit:
Category
Use cases
Examples
Browser Automation
Web scraping, E2E testing, UI automation
Hyperbrowser, Stagehand
Calendar Management
Read/write calendar events, scheduling
Google Calendar MCP
Cloud Platforms
Cloud APIs, resource management
AWS, GCP, Azure MCPs
Communication
Messaging, notifications
Slack, Teams MCPs
Developer Tools
Code search, task automation
Task Manager, CI integrations
Databases
Query and manage data
Supabase, Neo4j MCPs
Observability
Metrics, logs, tracing
Prometheus Query, Cost Explorer
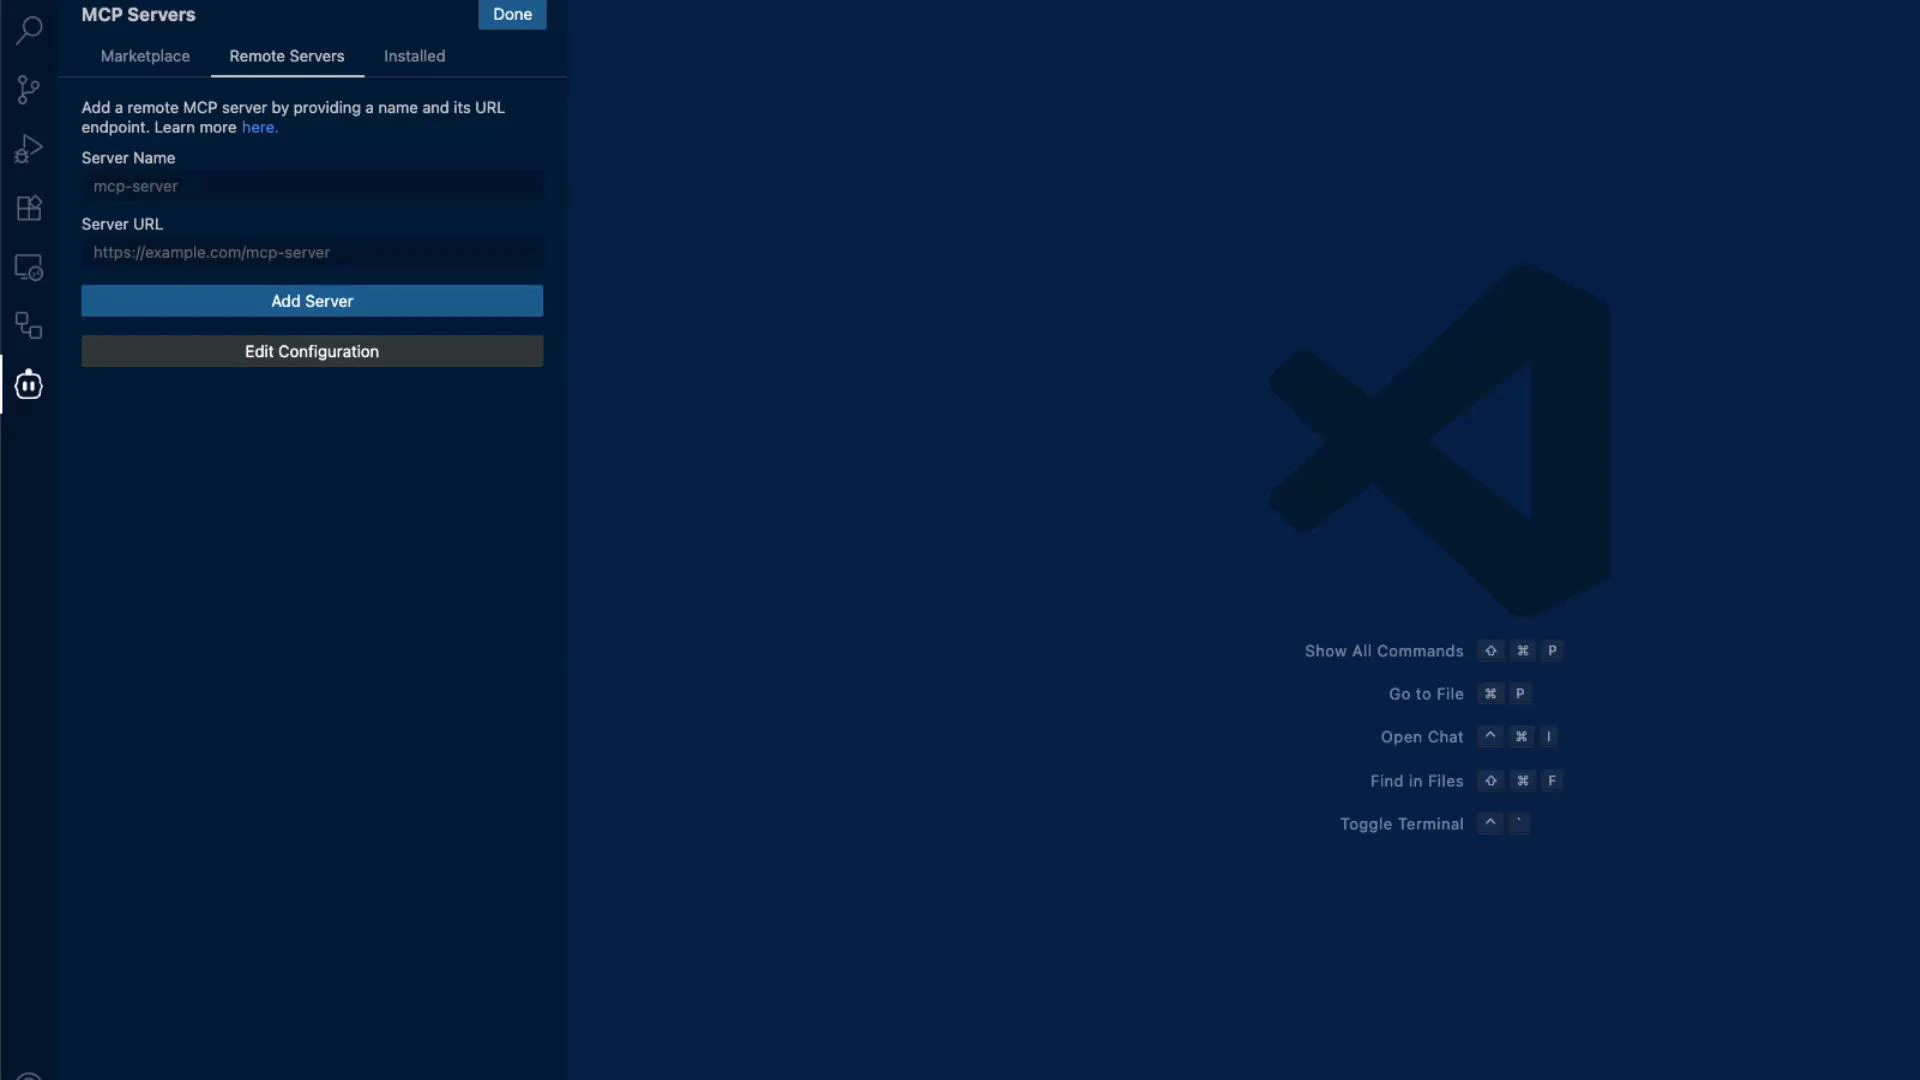
You can add a remote MCP server manually by entering the server’s name and URL in the IDE — useful for private, self-hosted, or organization-specific endpoints.
When configuring MCP servers at the workspace level, add an mcpServers section to your workspace configuration. This registers server names, endpoints, and keys so your tools and workflows can call them consistently. A minimal workspace example:
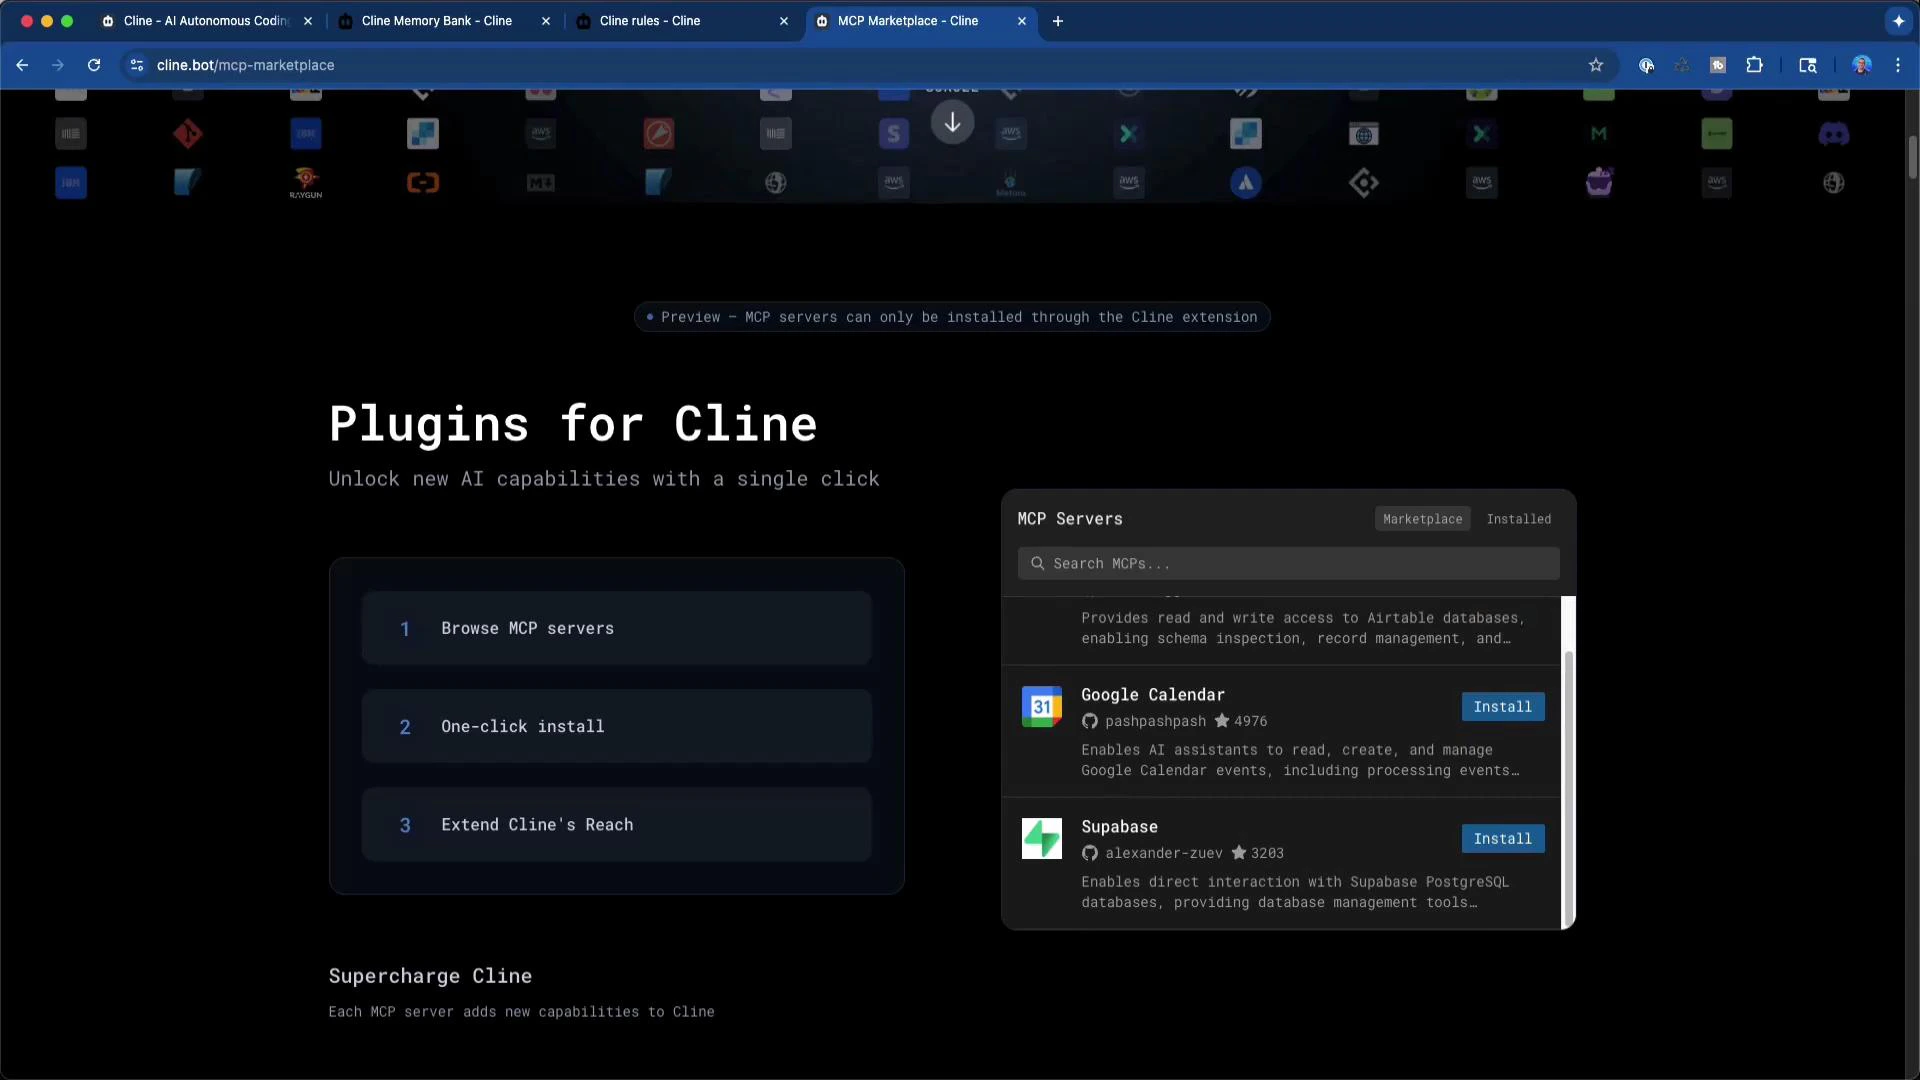
From the IDE you can view installed MCP servers, add new ones, or remove integrations. Many MCP servers are installed directly from the extension view, but you can also browse and install servers via the Cline Marketplace on the website.
From the marketplace you can preview MCP server details, read usage and configuration instructions, and copy snippets for workspace configuration. This is helpful for discovery and for ensuring you have the required credentials and scopes before adding a server.
Use the marketplace to preview MCP servers and review integration documentation before adding them to your workspace — it helps ensure you configure required credentials and scopes correctly.
Security is critical when adding remote MCP servers. Follow these best practices:
Only add endpoints you trust; validate the host and certificate.
Store API keys and secrets in secure vaults or environment variables, not in public repositories.
Limit scope and permissions of tokens to the minimum required.
Use network controls (VPCs, IP allowlists) for self-hosted MCP endpoints.
Be careful when adding remote MCP servers: ensure the endpoint is trusted, use secure credentials, and verify network exposure. Do not expose sensitive API keys in public repositories or shared workspace files.
Quick checklist before adding an MCP server:
Verify provider documentation and required credentials.
Confirm required OAuth scopes or API key permissions.
Test the endpoint in a staging workspace before using in production.
MCP servers standardize how LLMs and tools access external services, making integrations predictable and reusable.
Discover servers via the IDE, filter by category, or browse the Cline Marketplace.
Add private or self-hosted servers via the workspace mcpServers configuration and follow security best practices when registering endpoints and credentials.