npm start encounters compilation issues:
- Click “Get started for free”.
- An external authorization page opens for connecting your account.
- After authorization, a dashboard shows usage and billing details.
Key workspace toggles
The Cline sidebar exposes several permission toggles that affect how the assistant interacts with your workspace:- Auto-approve — allow Cline to accept and apply its own suggestions automatically.
- Allow read — permit Cline to read project files you attach to a task.
- Allow edit — permit Cline to modify project files when applying fixes.
- Execute safe commands — allow Cline to run predefined “safe” commands in your terminal.
Be cautious enabling “Execute safe commands”. On Windows and with some project setups (for example, Python virtual environments like venv or conda), Cline may run installation commands outside your intended environment. That can cause failures and generate additional API calls and costs. It’s recommended to keep automatic execution off and run commands yourself when using environments you manage manually.
Quick reference: toggles and recommendations
| Toggle | What it does | Recommendation |
|---|---|---|
| Auto-approve | Automatically accepts and applies generated changes | Use only in trusted projects or CI-like contexts |
| Allow read | Lets Cline read files/folders you attach | Enable to provide accurate context; limit file set to necessary files |
| Allow edit | Lets Cline modify files directly | Use cautiously; prefer review before applying in new projects |
| Execute safe commands | Runs pre-approved terminal commands (e.g., install, start) | Keep off for manual environments (venv, conda, WSL) |
Main input and context management
The central input area is where you type tasks and instructions. Use the@ syntax to attach context items (files, folders, terminal logs) so Cline can make accurate suggestions. Slash commands make workflow faster:
Two primary context types affect results and token usage:
- Conversation context — message history in the task thread. Long histories can dilute the LLM’s focus.
- Project/file context — files and folders you attach. More files = more tokens used.
Use
/smolto condense conversation context and reduce token consumption while keeping essential details.
/reportbug command can open a GitHub issue directly from the extension.
API provider and model selection
Cline lets you select the API provider and model used for generation. Open the provider dropdown to choose from options like Cline’s default, OpenRouter, Anthropic, Claude, LM Studio, and others. From the same area you can review billing/usage and pick the desired model.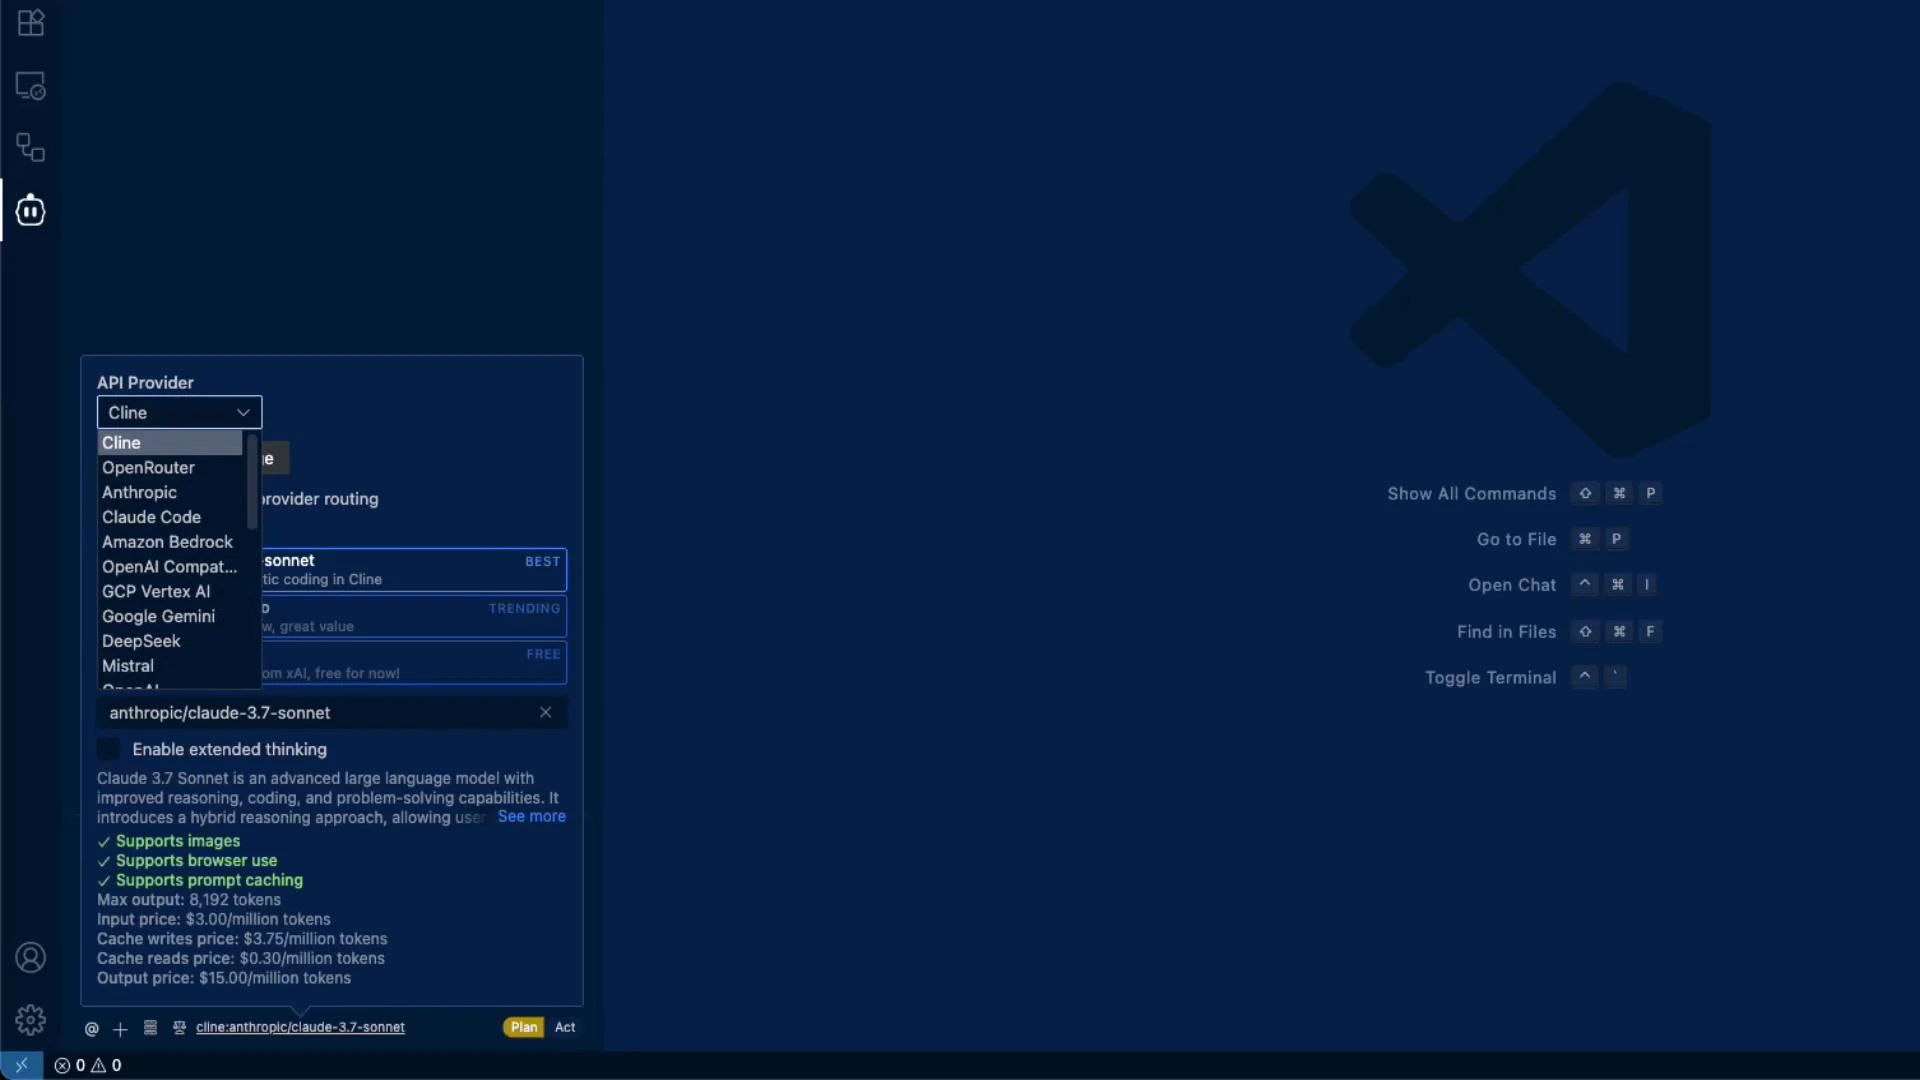
What we’ll build in this lesson series
This lesson covers initial workspace setup and shows features you’ll use while building a small project: a casting number lookup tool.- Purpose: enter a casting number found on an engine and return details such as motor model and production year.
- Workflow highlights: attaching files for context, creating tasks, configuring models, and using Cline’s suggestions to iterate quickly.
Links and references
- Visual Studio Code — Download & Docs
- VS Code Extensions Marketplace
- Cline — check the extension page in your editor’s marketplace for the latest docs and release notes.