In this lesson we stop a running MCP server, add a new MCP tool (crypto_price), inspect the tool, build the MCP server image, deploy the server and a declarative agent, then interact with the agent via the KAgent UI. The steps below follow the same sequence used in the video; examples and commands are included for reproducibility.

1. Stop the running MCP server

Terminate the running MCP server with Ctrl+C in the terminal where it’s running.

2. Add a new tool using kmcp

Tools must use snake_case names (for example: crypto_price). Add the tool to your KMCP project with:
kmcp add tool crypto_price /root/crypto-price-mcp
This creates the tool registration file(s) inside your project. Verify the generated tool configuration in the project directory — the registration file is what agents query for tool discovery. Quick command reference
ActionCommand / Example
Add toolkmcp add tool crypto_price /root/crypto-price-mcp
Build imagekmcp build --project-dir /root/crypto-price-mcp -t kodekloud/kmcp-server:bitcoin --platform linux/amd64
Copy tool filecp /root/crypto_price.py /root/crypto-price-mcp/src/tools/crypto_price.py
Check agentkubectl get agent -n kagent

3. MCP protocol and tool discovery (overview)

  • When an AI agent connects to the MCP server it queries for available tools.
  • The MCP server returns metadata for each tool: name, description, parameters, return type, etc.
  • Agents rely heavily on the tool’s function docstring (included in the MCP response) to understand usage, parameters and expected return values.
  • Use the decorator @mcp.tool() to register a Python function as an MCP-invokable tool.

4. Example: simple MCP tool implementation

Place this template under src/tools/crypto_price.py in the MCP project:
# /root/crypto-price-mcp/src/tools/crypto_price.py
"""Crypto price tool for MCP server.
"""

from core.server import mcp
from core.utils import get_tool_config

@mcp.tool()
def crypto_price(message: str) -> str:
    """Crypto_price tool implementation.

    This is a template function. Replace this implementation with your tool logic.
    """
    # Get tool-specific configuration from kmcp.yaml
    config = get_tool_config("crypto_price")

    # Basic example implementation — replace with actual logic
    prefix = config.get("prefix", "echo: ")
    return f"{prefix}{message}"
Note: This template shows how to register a tool with @mcp.tool() and access per-tool configuration through get_tool_config().

5. A robust crypto price tool (CoinGecko)

Below is a fuller example that calls CoinGecko’s simple price API, includes a thorough docstring (agents parse this), basic validation, error handling, and returns a structured dictionary:
# /root/crypto-price-mcp/src/tools/crypto_price.py
"""Crypto price tool for MCP server.
"""

import requests
from core.server import mcp
from core.utils import get_tool_config

@mcp.tool()
def get_crypto_price(symbol: str = "bitcoin", currency: str = "usd") -> dict:
    """Fetch the current live price for a cryptocurrency.

    Args:
        symbol: Cryptocurrency ID as used by CoinGecko (e.g., 'bitcoin', 'ethereum', 'cardano').
        currency: Target currency (e.g., 'usd', 'eur', 'gbp', 'aud').

    Returns:
        dict: On success, returns:
            {
                "symbol": "<symbol>",
                "currency": "<CURRENCY>",  # uppercased
                "price": <numeric_price>
            }
        On failure, returns:
            { "error": "<error message>" }
    """
    # Normalize inputs
    symbol = (symbol or "bitcoin").strip().lower()
    currency = (currency or "usd").strip().lower()

    # Allow overriding URL via kmcp.yaml tool config
    config = get_tool_config("crypto_price")
    base_url = config.get("coingecko_url", "https://api.coingecko.com/api/v3/simple/price")

    url = f"{base_url}?ids={symbol}&vs_currencies={currency}"

    try:
        resp = requests.get(url, timeout=10)
        resp.raise_for_status()

        data = resp.json()
        price = data.get(symbol, {}).get(currency)

        if price is None:
            return {"error": f"No price data found for '{symbol}' in '{currency}'"}

        return {
            "symbol": symbol,
            "currency": currency.upper(),
            "price": price,
        }
    except requests.exceptions.Timeout:
        return {"error": "Request timed out. Please try again."}
    except requests.exceptions.RequestException as e:
        return {"error": f"Request failed: {str(e)}"}
    except Exception as e:
        return {"error": f"Unexpected error: {str(e)}"}
Provide detailed docstrings: agents parse the docstring to learn the tool’s parameters, behavior and return format. Clear examples and error cases make tool usage more reliable and reduce unexpected behavior from LLM agents.

6. Copy the tool file into the project

If you implemented the tool outside the project tree, copy it into the MCP project tools folder:
cp /root/crypto_price.py /root/crypto-price-mcp/src/tools/crypto_price.py

7. Run the MCP Inspector to validate the tool

Start the MCP Inspector script (example name in this environment: run-mcp-inspector). The Inspector exposes a web UI and prints a proxy address plus a session token; use the token to authenticate in the UI. Example Inspector output (truncated):
⚙️ Proxy server listening on 127.0.0.1:6277
🔑 Session token: 0be785d11375863681ffb7f833b31887ce1a75ae37920bc62f438343214b8b0e
🔍 MCP Inspector is up and running at http://127.0.0.1:6274 🚀
Open the Inspector URL, authenticate with the printed session token, and confirm that get_crypto_price appears in the Tools list.
A screenshot of a developer web UI (MCP Inspector v0.15.0) showing a Tools panel with a hand cursor over a "get_crypto_price" entry and other tool items like "echo." The left side shows configuration settings and the right pane prompts to "Select a tool," with a history list below.

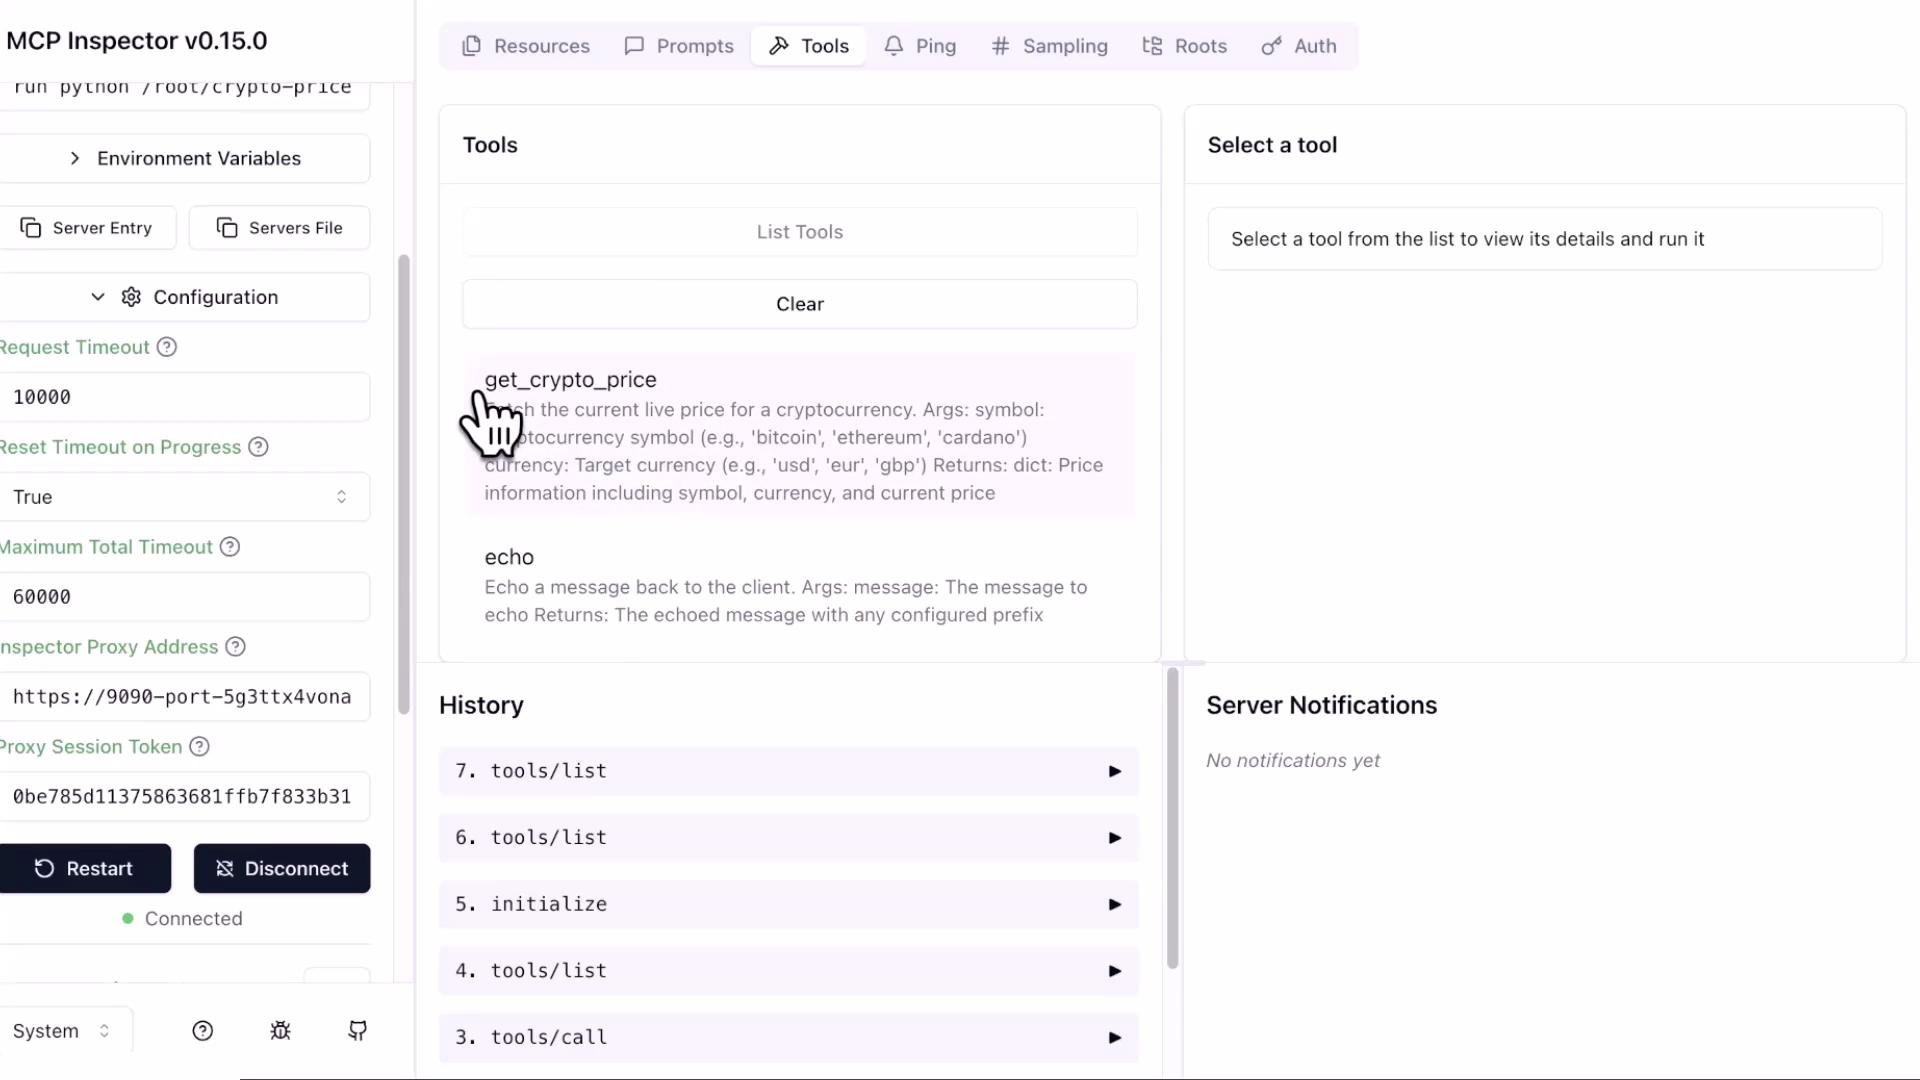
8. Run the tool from the Inspector

  • Select get_crypto_price.
  • Default inputs: symbol: bitcoin, currency: usd.
  • Click “Run tool” to invoke the MCP server and retrieve the live price.
Example Inspector response (JSON):
{
  "symbol": "bitcoin",
  "currency": "USD",
  "price": 87742
}

9. Package the MCP server into a Docker image

Build the MCP server image using the kmcp build command from your project directory:
kmcp build --project-dir /root/crypto-price-mcp \
  -t kodekloud/kmcp-server:bitcoin \
  --platform linux/amd64
Build logs will show Docker layers and an exported image. Example truncated output:
#24 exporting to image
#24 writing image sha256:1df91f67cb9a... done
#24 naming to docker.io/kodekloud/kmcp-server:bitcoin done
✓ Successfully built Docker image: kodekloud/kmcp-server:bitcoin
Tip: Use the --platform flag to control the target CPU architecture (e.g., linux/amd64, linux/arm64) when cross-building.

10. Deploy the MCP server to Kubernetes

Apply the provided Kubernetes manifest for the MCP server (included in the exercise). After applying, verify the MCP server pod is running and that the MCPServer resource reports an accepted/ready state.

11. Deploy the declarative agent that uses the MCP server

Apply the declarative agent manifest (for example crypto-price-agent.yaml). The declarative Agent references the MCPServer and lists the tool names the agent can invoke. Example agent manifest:
apiVersion: kagent.dev/v1alpha2
kind: Agent
metadata:
  name: crypto-price-agent
  namespace: kagent
spec:
  declarative:
    modelConfig: default-model-config
    stream: true
    systemMessage: |-
      You're a helpful agent, made by the kagent team.

      # Instructions
      - If user question is unclear, ask for clarification before running any tools
      - Always be helpful and friendly
      - If you don't know how to answer the question DO NOT make things up, tell the user "Sorry, I don't know how to answer that" and ask them to clarify the question further
      - If you are unable to help, or something goes wrong, refer the user to https://kagent.dev for more information or support.

      # Response format:
      - ALWAYS format your response as Markdown
      - Your response will include a summary of actions you took and an explanation of the result

      - If you created any artifacts such as files or resources, you will include those in your response as well
    tools:
      - mcpServer:
          apiGroup: kagent.dev
          kind: MCPServer
          name: crypto-price-mcp
          toolNames:
            - echo
            - get_crypto_price
          type: McpServer
description: crypto price agent
type: Declarative
Verify the agent is ready:
kubectl get agent -n kagent
Expected output (example):
NAME               TYPE         READY   ACCEPTED
crypto-price-agent Declarative  True    True

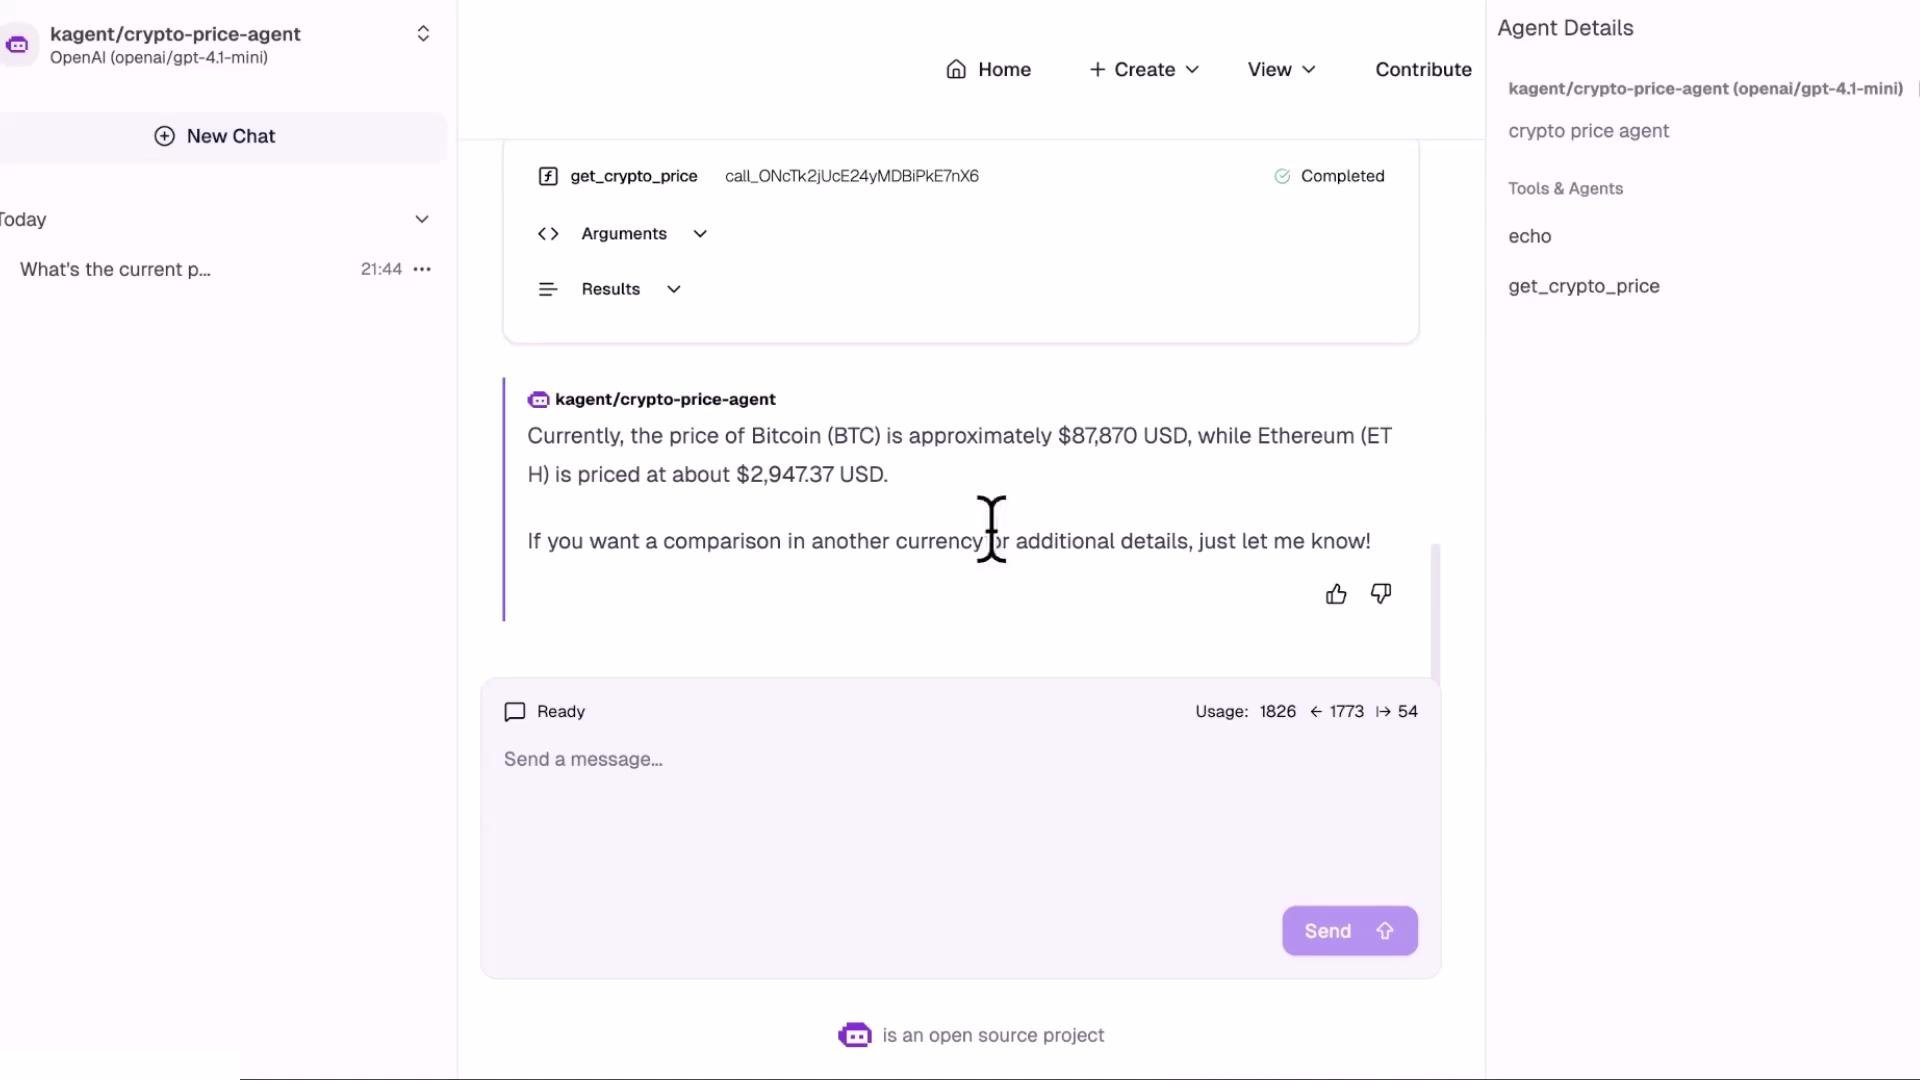
12. Interact with the agent via KAgent UI

Open the KAgent UI, select crypto-price-agent, and ask natural-language questions such as:
  • “What’s the current price of Bitcoin?”
  • “What’s the current price of Ethereum in USD?”
  • “Compare the price between Bitcoin and Ethereum.”
The declarative agent will call the MCP server tool get_crypto_price, aggregate results and return a Markdown-formatted reply summarizing the results and actions taken. Example: a response listing Bitcoin at ~87,870USDandEthereumat 87,870 USD and Ethereum at ~2,947.37 USD.
A screenshot of a chat interface showing a "crypto-price-agent" response that lists Bitcoin at about 87,870 USD and Ethereum at about 2,947.37 USD. The page also shows chat controls, a sidebar with "New Chat," and agent details/tools.

Notes and best practices

  • Provide clear, example-rich docstrings — agents parse them to determine how to call your tool.
  • Validate and normalize inputs (e.g., lowercase symbol/currency) before calling external APIs.
  • Add timeouts and robust exception handling for network calls.
  • Return structured results (not freeform text) so agents can programmatically use the returned values.
  • Allow configurable endpoints and timeouts via kmcp.yaml so deployments can override defaults.
That’s all for this lesson — see you in the next one.

Watch Video