

- Environment setup for the lab
- Conceptual MCP architecture and how it maps to agents
- Task 1: Run a simple MCP server (Calculator)
- Task 2: Connect an agent to MCP tools
- Task 3: Orchestrate multiple MCP servers and aggregate tools
- Next steps and references
Environment — create the virtual environment and install dependencies
Create or activate your virtual environment, then install the required packages: LangGraph (workflow framework), LangChain (core model abstractions), and the MCP adapters for model integration and servers. Environment setup (bash)MCP architecture — conceptual overview
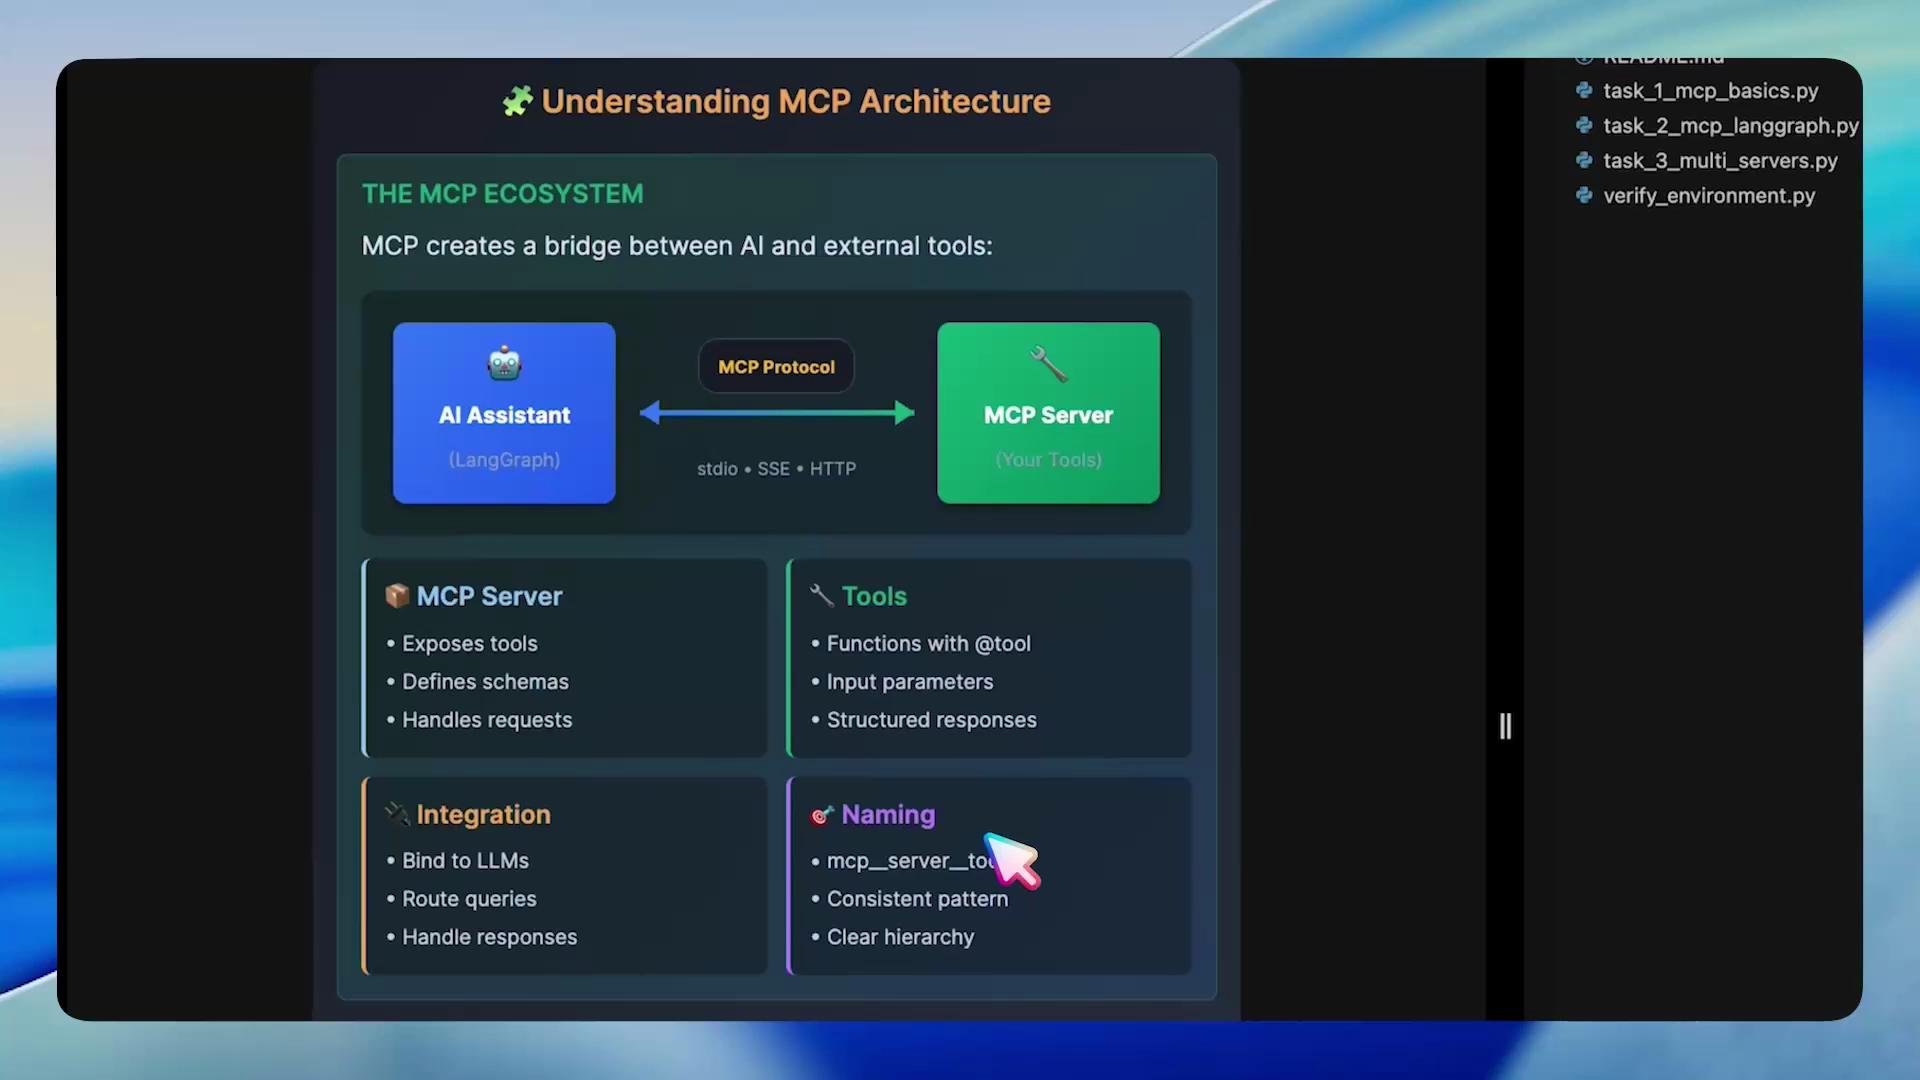
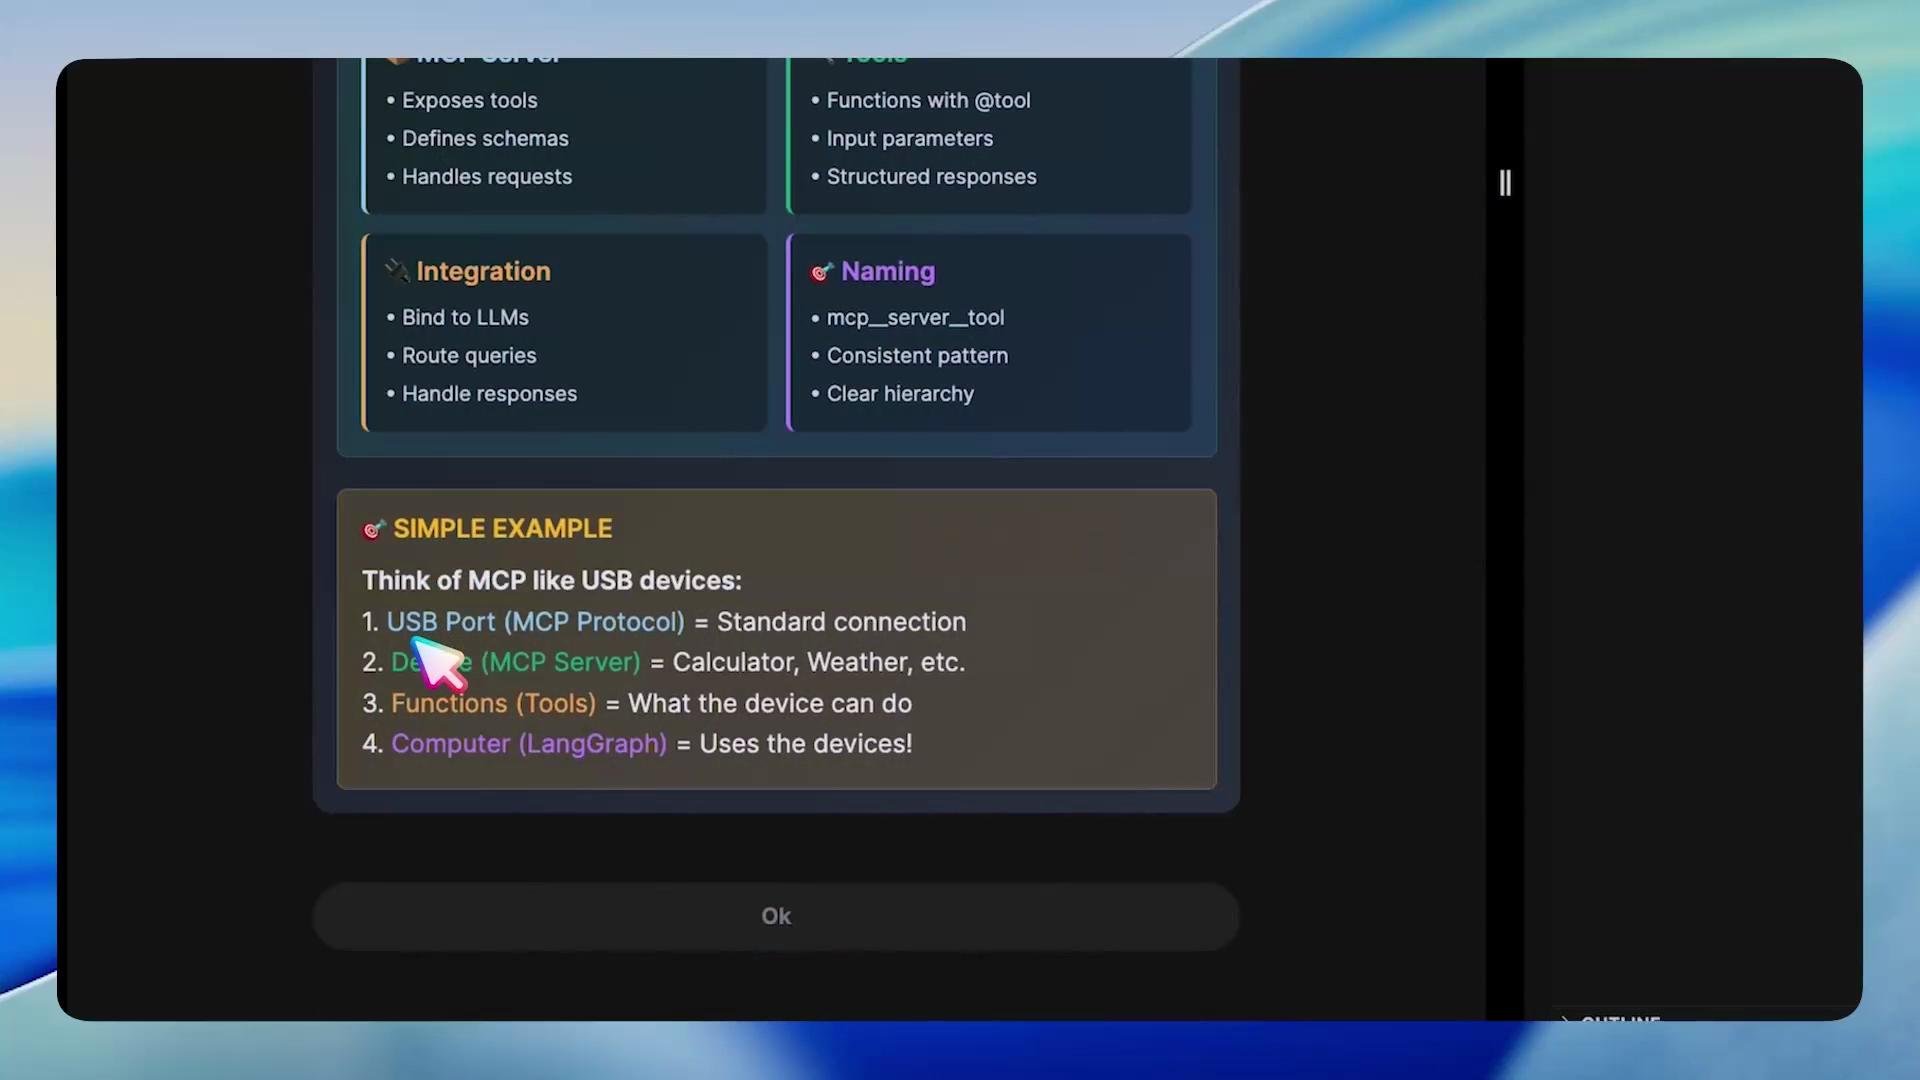
MCP bridges an AI assistant built with LangGraph to external tools and services. The high-level flow:- The MCP server registers tools and publishes their schemas.
- A client connects to the server and fetches tool definitions.
- A LangGraph (or LangChain-style) agent receives those tools and decides when to call them.
- When invoked, the MCP client routes the tool call to the server and returns a structured response.
Task 1 — MCP basics: build a Calculator server
Create a simple MCP server named “Calculator” that exposes calculator tools (add, multiply). Servers can be run using stdin/stdout transport for local testing or via SSE/HTTP for networked deployments. Example server script (completed):- Use Python type hints for parameters and return types; they generate structured schemas consumed by clients.
- Keep logs inside tools for easier debugging (print statements or structured logging).
- Choose the appropriate transport: stdin/stdout is easiest for local tests; SSE/HTTP is suitable for distributed clients.
Keep the server terminal open while clients connect. If you stop the server, the agent will no longer be able to reach the tools.
Task 2 — Integrate MCP tools with a LangGraph agent
Connect the Calculator server to a LangGraph (or LangChain-style) agent. The client obtains tools via client.get_tools(), and the agent is created with those tools so it can choose when to call them (for example, using a ReAct-style agent). Example async integration (completed):- The agent uses tool schemas to decide whether invoking a tool is appropriate.
- Non-math queries that require general knowledge should be handled by the model directly without tool calls.
Task 3 — Multi-server orchestration (Calculator + Weather)
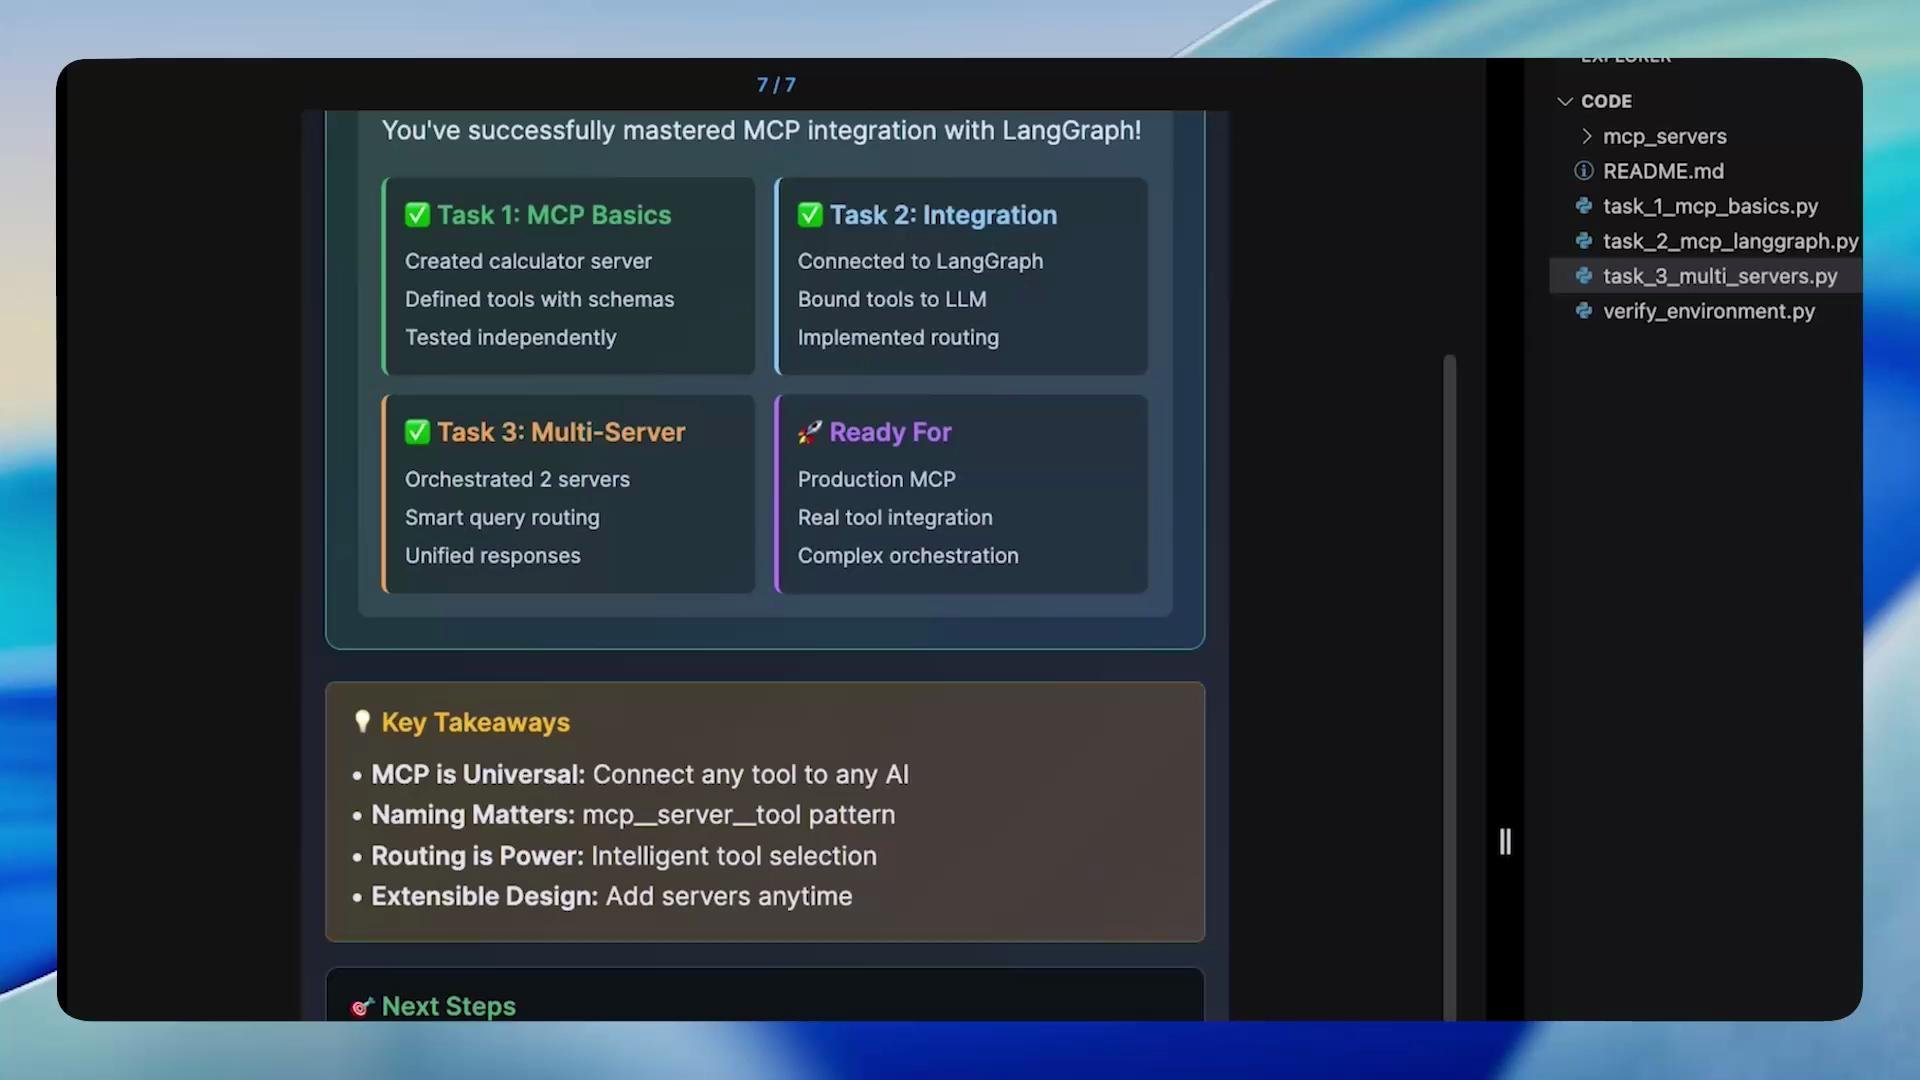
Scale the system by connecting multiple MCP servers (for example, Calculator and Weather). A MultiServerMCPClient or equivalent gathers tools from all servers; the agent is then built with the aggregated toolset so it can route requests to the right service. Example multi-server orchestration (cleaned and completed):- Use a consistent naming convention (for example, prefix tools with the server name) so tools from different servers do not collide.
- Monitor ListToolsRequest and CallToolRequest logs to trace cross-server calls.
- Start with read-only tools when exposing external systems (APIs, DBs) and gradually add write capabilities with proper access control.
Deeper explorations and next steps
Once you are comfortable with MCP basics and multi-server orchestration, extend MCP to expose:- Databases (query/update operations)
- External REST APIs (wrapped as typed tools)
- File systems (search, read, write)
- Human-in-the-loop endpoints (approval workflows)
- Expose structured tools on an MCP server.
- Fetch tools from the client (client.get_tools()).
- Build an agent (create_react_agent or similar) that orchestrates tool calls as needed.
This concludes the lesson. Experiment with exposing new resources and creating safe, auditable human-in-the-loop flows.
Links and references
- LangChain course (overview)
- LangGraph documentation (refer to your project docs or README for LangGraph usage)
- MCP adapters (installed via pip as part of this lab)