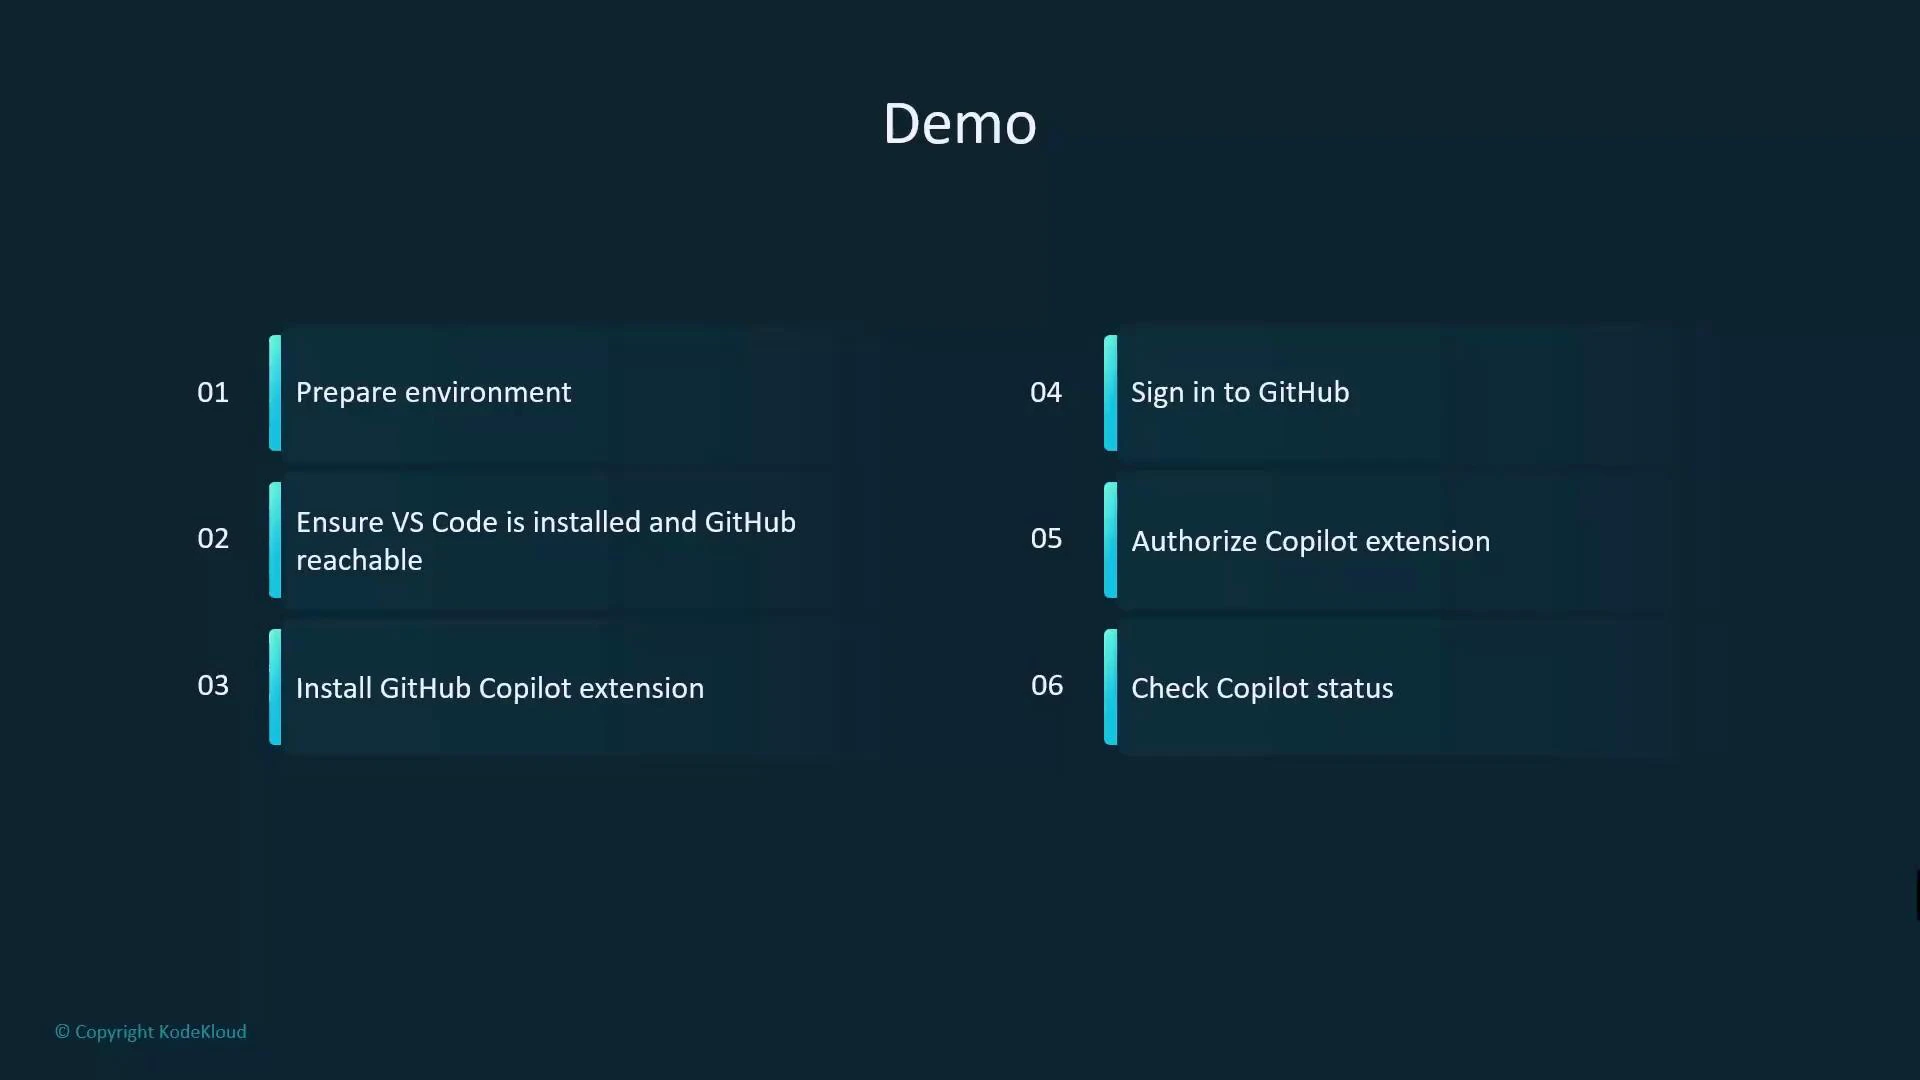
- You have a RHEL VM with a GUI and network access to GitHub.
- VS Code is installed on the VM (or you can install it before starting).
- You have a GitHub account (Copilot may require a subscription or access entitlement).
- Confirm VS Code is installed and the VM can reach GitHub.
- Install the GitHub Copilot extension in VS Code (and Copilot Chat if you want conversational assistance).
- Sign in to GitHub from VS Code and authorize the Copilot extension.
- Validate Copilot status and test inline completions and Copilot Chat.
- Create a sample Ansible playbook and run it against a simple inventory to confirm end-to-end flow.
| Step | Action | Where / Command |
|---|---|---|
| 1 | Open VS Code | GUI on the RHEL VM |
| 2 | Open Extensions view | Ctrl+Shift+X in VS Code |
| 3 | Install Copilot | Search “GitHub Copilot” in Extensions |
| 4 | Sign in and authorize | Browser-based GitHub OAuth flow |
| 5 | Verify running status | VS Code status bar shows Copilot signed in |
| 6 | Create project and test | Create folder, add playbook, run ansible-playbook |
- Launch VS Code on the VM.
- Open the Extensions view (Ctrl+Shift+X).
- Search for “Copilot” and install the official “GitHub Copilot” extension. For conversational chat, also install “GitHub Copilot Chat” and ensure your GitHub account has Chat access.
- After installing, sign in with your GitHub account and authorize the extension via the browser prompt.
- Confirm Copilot is running (status appears in the VS Code status bar).
- Create a project folder, add a playbook file, and test inline suggestions and Copilot Chat.
- Open VS Code on the RHEL VM.
- Go to the Extensions view (Ctrl+Shift+X).
- Search for “GitHub Copilot” and click Install on the official extension. If you want natural-language, conversational assistance, also install “GitHub Copilot Chat” (the chat extension is separate).
- After installation VS Code will prompt you to sign in. If you see a Copilot sign-in button in the status bar, click it to launch the browser-based GitHub OAuth flow. Approve the requested permissions to authorize the extension.
- After completing the browser flow, return to VS Code and confirm the status bar shows Copilot as signed in and active.
- Verify inline completions by editing a file: Copilot will show context-aware suggestions as you type. Accept with Tab (or Enter/right-arrow depending on your editor keybindings).
- If you installed Copilot Chat and your account has access, open the Copilot Chat pane to ask questions in natural language and get code snippets, explanations, and examples.
Make sure your VM has network access to GitHub and that you are signed in. Copilot requires connectivity to GitHub’s services and a Copilot-enabled account or subscription—without these, suggestions and chat will not work.
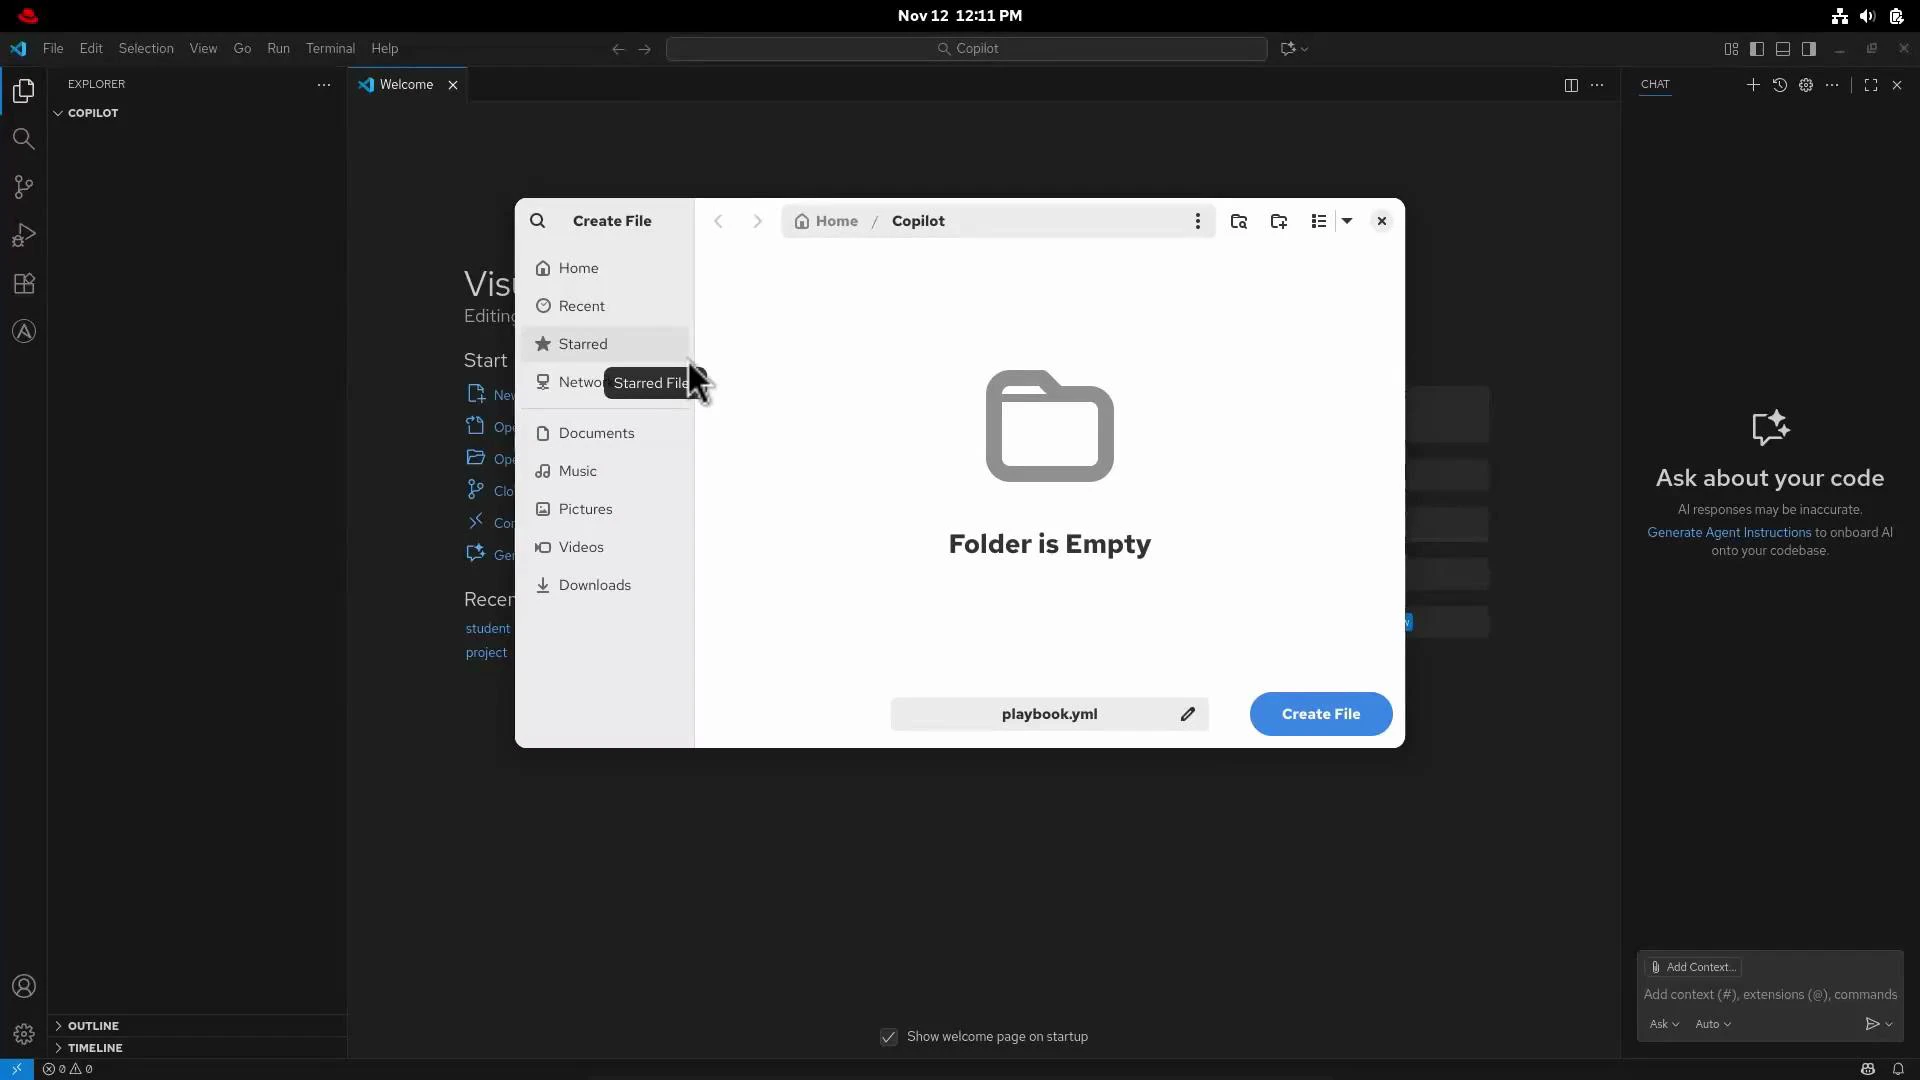
- Create a folder named Copilot and open it in VS Code.
- Inside that folder create a new file named playbook.yml.
- If you installed the Copilot Chat extension and have access, open the chat pane and ask plain-language questions like:
- “How do I create a user using Ansible on a server called Server A?”
- Copilot Chat will typically return a sample playbook (similar to the example above), the inventory snippet, and the ansible-playbook command — ready to copy and run.
- GitHub Copilot extension (VS Code Marketplace): https://marketplace.visualstudio.com/items?itemName=GitHub.copilot
- GitHub Copilot Chat (VS Code Marketplace): https://marketplace.visualstudio.com/items?itemName=GitHub.copilot-chat
- VS Code documentation: https://code.visualstudio.com/docs
- Ansible documentation: https://docs.ansible.com/
You must be signed in to GitHub and have network access to GitHub for Copilot to provide suggestions. A Copilot subscription or access entitlement may be required depending on your account.