

Running the Flask Server and Testing with Postman
Once the Flask server is running usingflask run, open Postman Essentials and follow these steps:
- Select an Image: For this test, we use an image of the Northern Lights.
- Set the Parameters: In Postman, create a new request with the following details.
Additional Upload Function Verification
The following snippet shows an alternative version of the upload function. This version first checks if the ‘image’ key exists, then validates the file extension and content:Testing with a JPEG File
For a JPEG file upload, the request might look like this:Testing with a PNG File
After selecting a PNG image (e.g.,book.png), setting the quality parameter to 100 should display an acceptable image. However, reducing quality to 5 will result in poor output:
Testing with Another JPEG File
Similarly, testing with another JPEG file (coolgirl.jpeg) confirms that the quality adjustments work as expected:
Testing with a GIF File
When attempting to upload a GIF file, you may see a “failed to decode image” error. This outcome is expected because OpenCV’s imdecode function does not support GIF images:Since our application does not support GIF images, you will consistently see error messages for such files. For handling GIFs, consider using Pillow as recommended by BlackboxAI and Tabnine.
Enhanced Quality Parameter Validation
Below is an updated version of the upload function with improved quality parameter validation. This version ensures that the quality parameter is present and within the allowed range (0–100). If the parameter is omitted or invalid, an error message is returned:Final Version of the Flask Route
The final structure of our Flask route, incorporating all improvements, is shown below: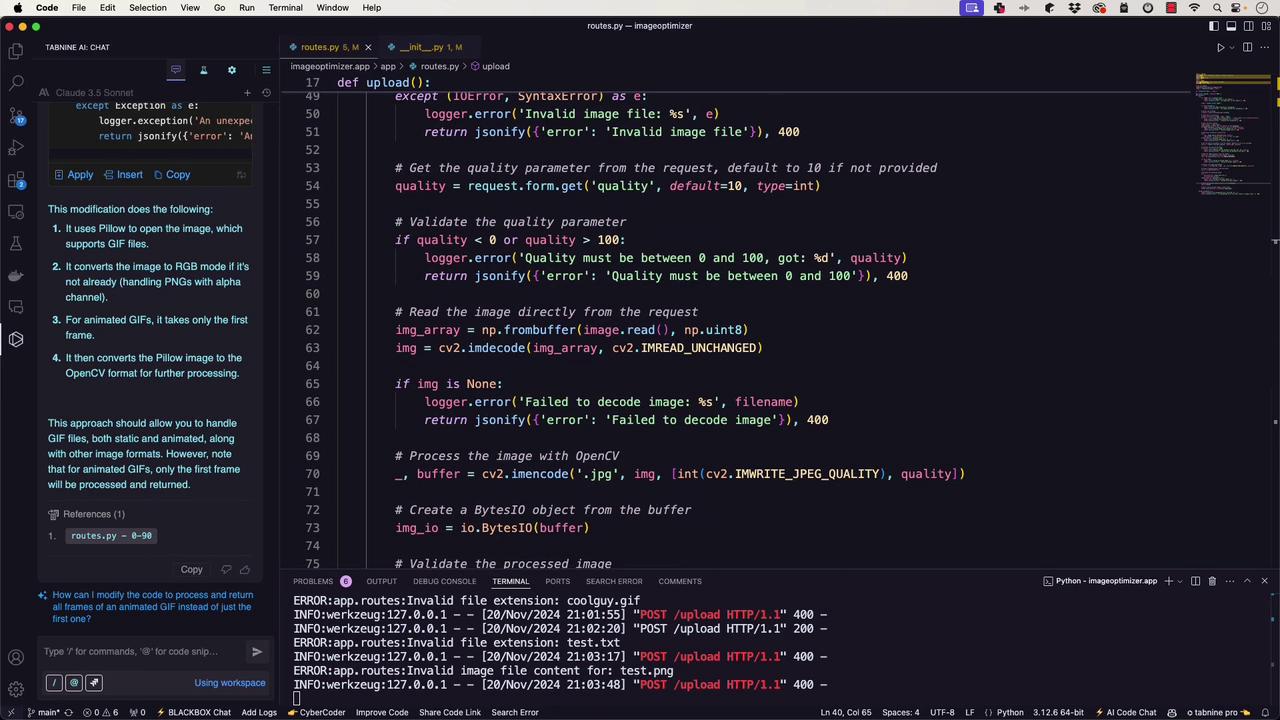
When testing, check the API logs to see messages such as:
- “Quality parameter is missing”
- “Failed to decode image”
- HTTP status codes 200 or 400 depending on the test scenario.