Host-Only Networking
A host-only network is ideal when you need communication between VMs and your host machine without exposing the VMs to the external network. Consider a scenario where your physical machine has an IP of 192.168.1.10 on an external LAN, and you provision several VirtualBox VMs. By default, these VMs lack network connectivity and IP addresses, meaning they cannot interact with each other or external systems. To facilitate internal communication:- Create a host-only network on your host machine. For example, set the network IP range to 192.168.5.0.
- When the virtual interfaces of your VMs attach to this network, they are assigned IP addresses within this range (such as 192.168.5.2, 192.168.5.3, etc.).
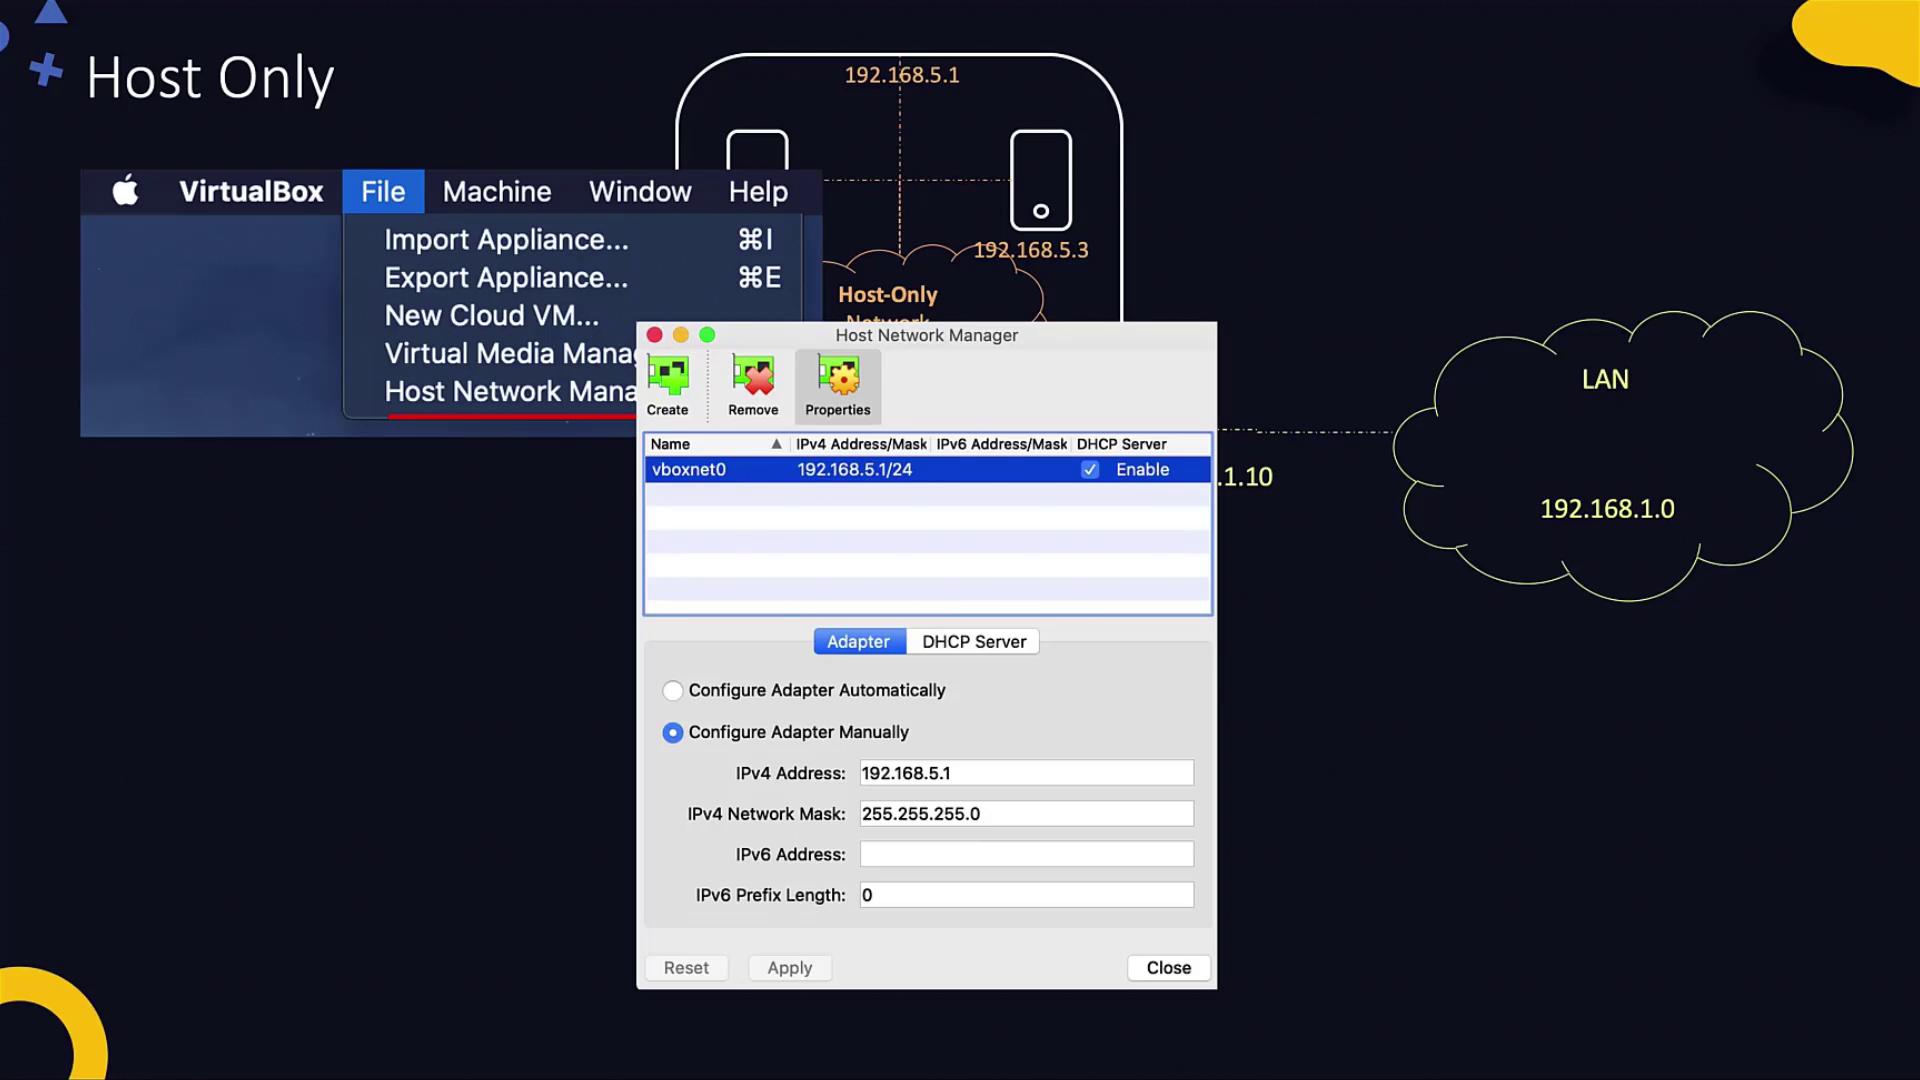
- VirtualBox also creates a virtual interface on the host (e.g., vboxnet0) with an IP like 192.168.5.1.
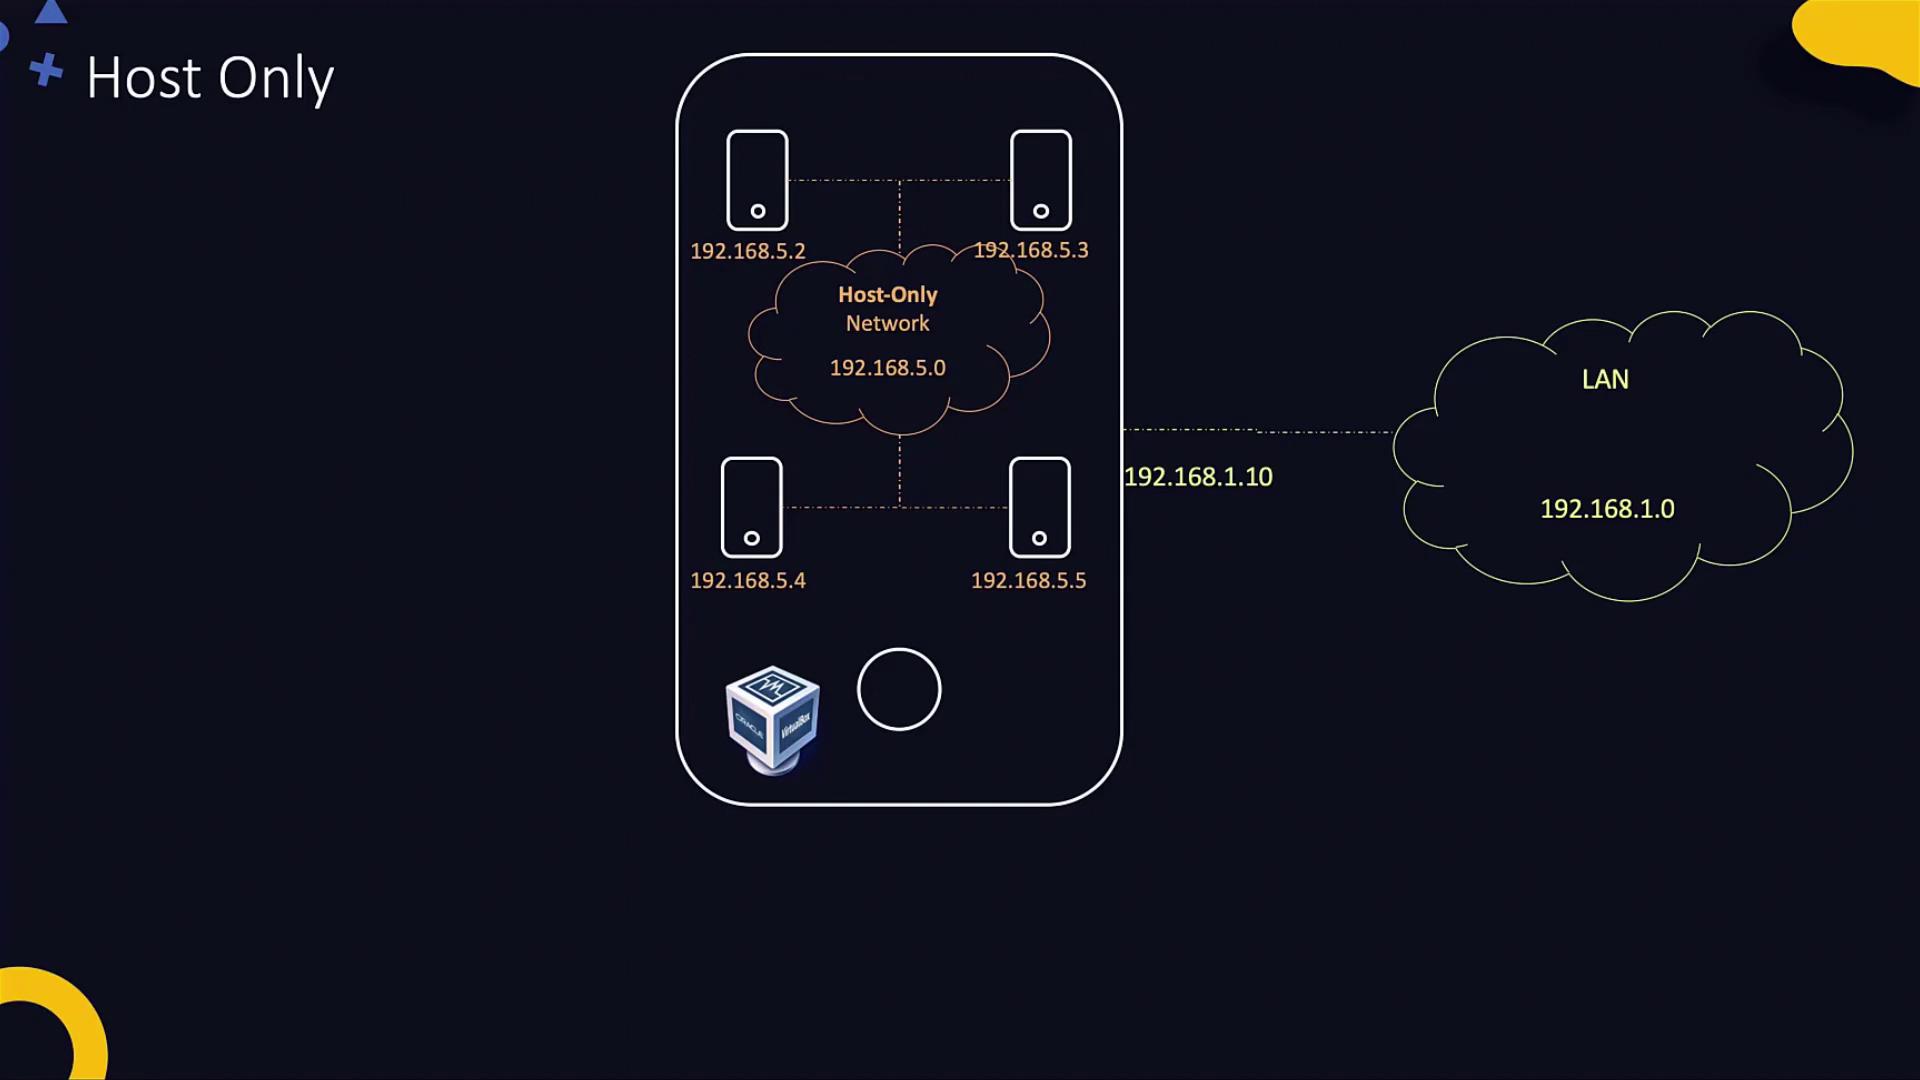
A host-only network confines communication to the host and associated VMs, providing a secure way to test configurations without external network exposure.
- On macOS, go to File → Host Network Manager (similar options exist for Windows and Linux).
- Click the “Create” button to establish a new host-only network.
- Attach each VM’s network adapter to this host-only network through the VM settings.
- With DHCP enabled on the host-only network, VMs automatically receive an appropriate IP address.
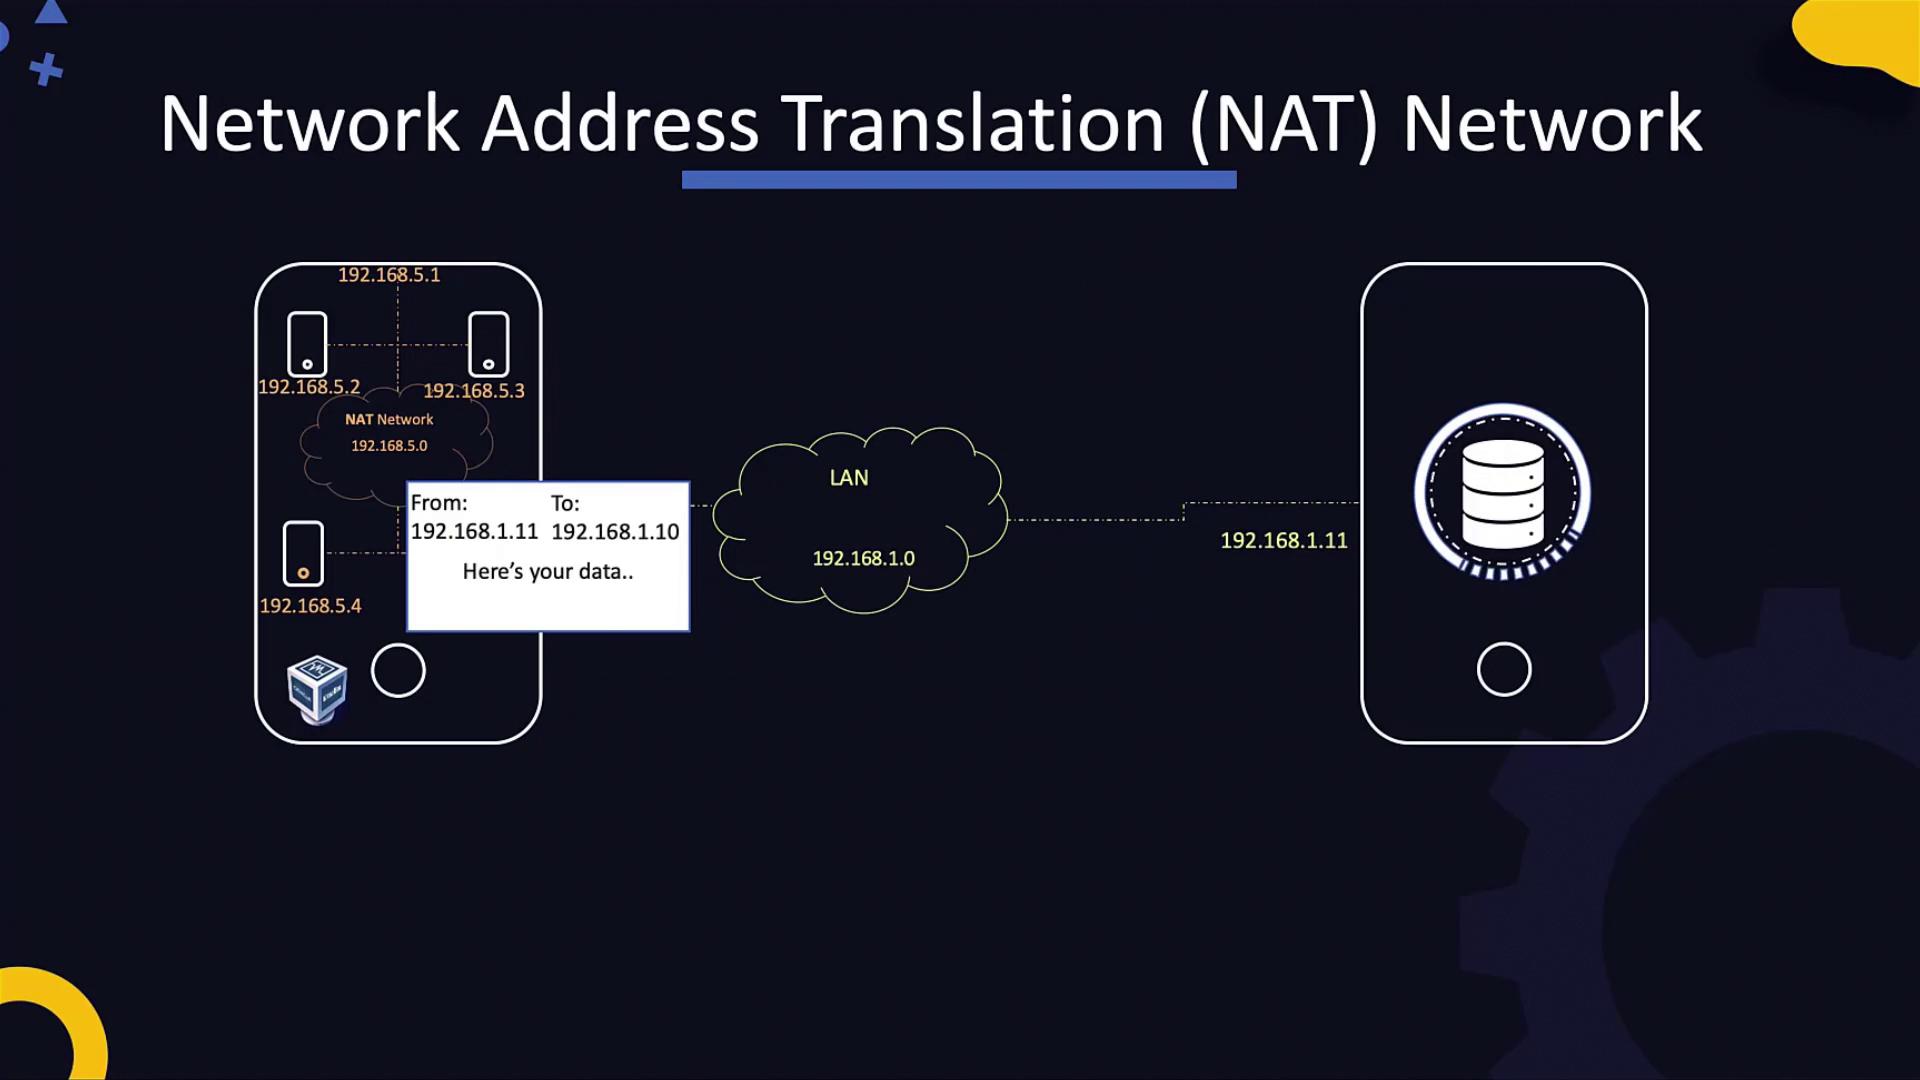
NAT Networking
In some scenarios, VMs need the ability to access external systems, such as when a host machine (with an IP like 192.168.1.10) runs a service hosted at 192.168.1.11. While a host-only network restricts VMs to internal communication, a NAT (Network Address Translation) network allows VMs to access external resources. When a VM on a NAT network sends a request to an external system, the NAT engine on the host modifies the source IP to match its own. When data returns, the NAT engine reassigns the destination IP back to the VM.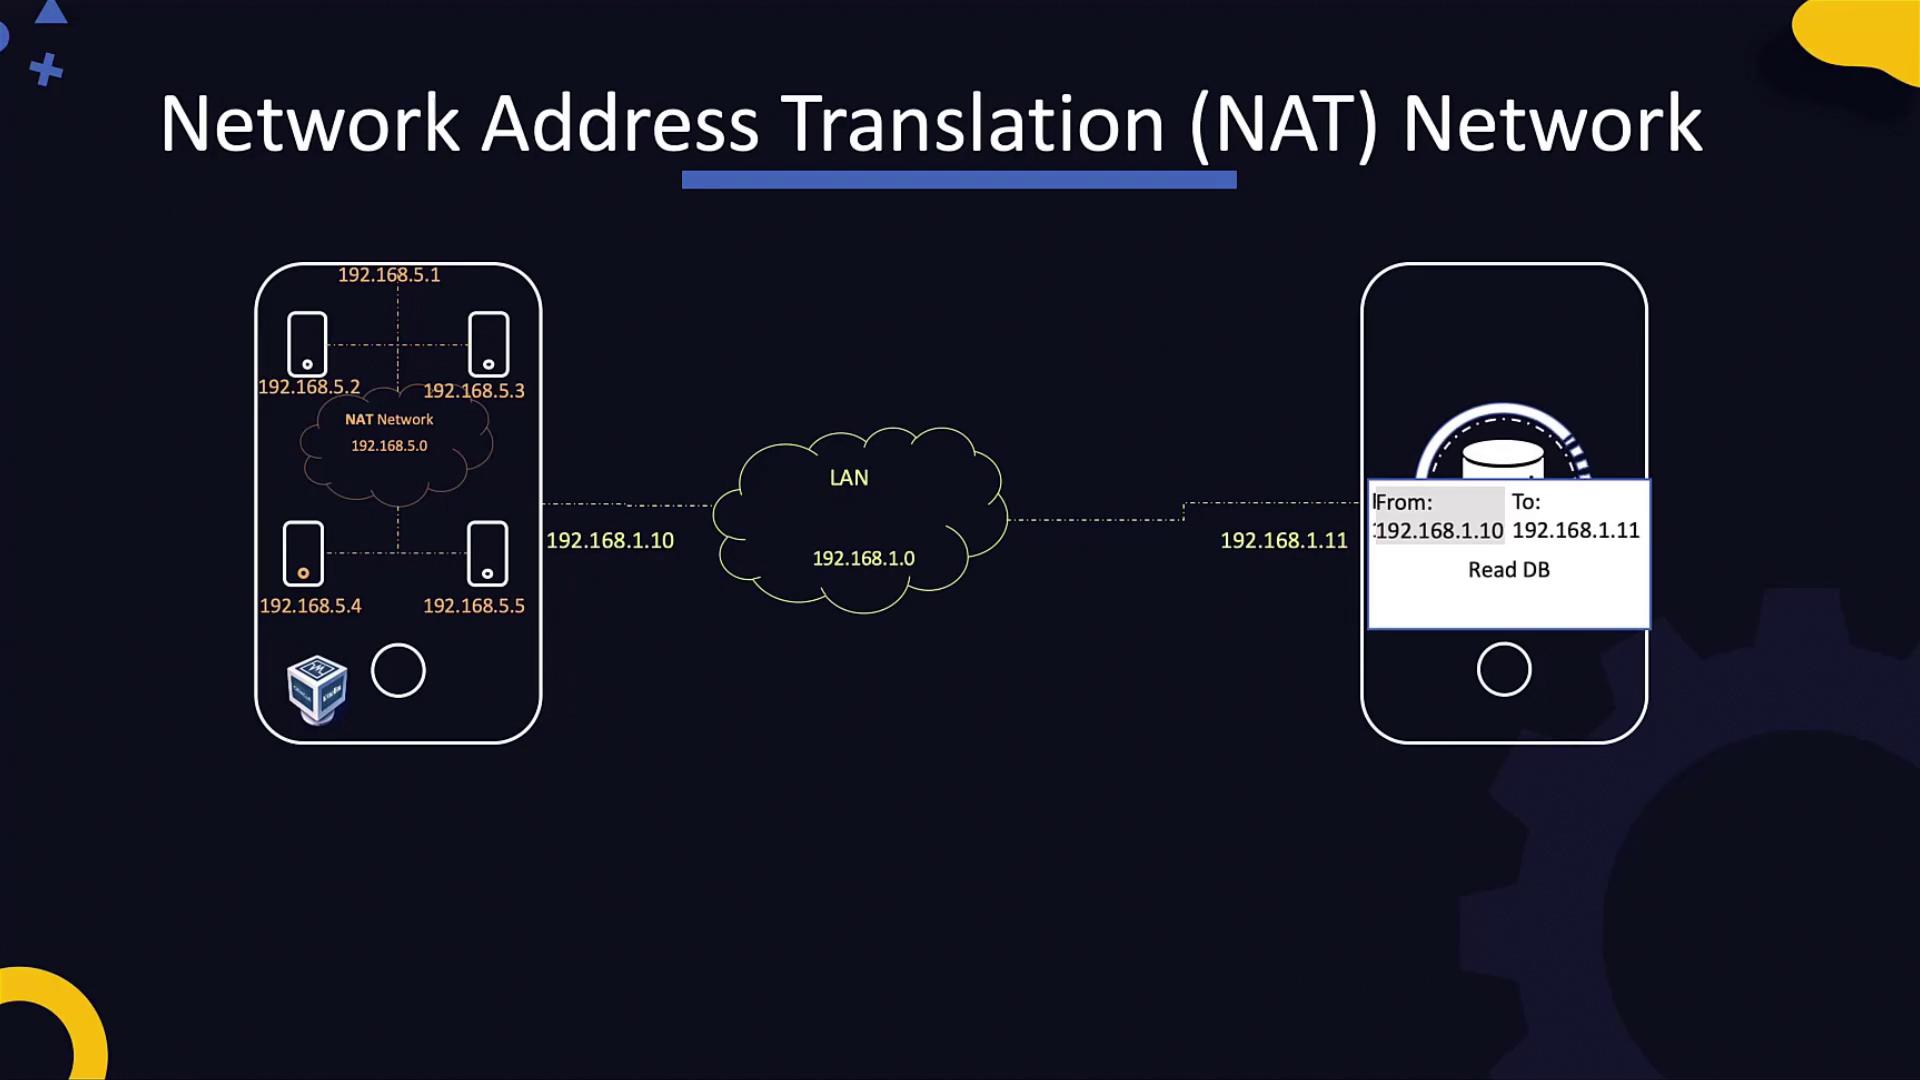
- Open VirtualBox Preferences and select the Network tab.
- Under NAT Networks, click the plus (+) button to create a new NAT network.
- In the VM’s Network settings, set the adapter type to “NAT Network” and select the network you created.
- NAT (default): Each VM is isolated; they can access the external network but not each other.
- NAT Network: All VMs share the same NAT engine, allowing communication between VMs on the same network.
Bridged Networking
Bridged networking is used when a VM needs to appear as a separate machine on the physical LAN—ideal for hosting services like a web server. With bridged mode, the VM connects directly to the LAN and receives an IP address from the network’s DHCP server (e.g., 192.168.1.12 or 192.168.1.13), just like any other physical host.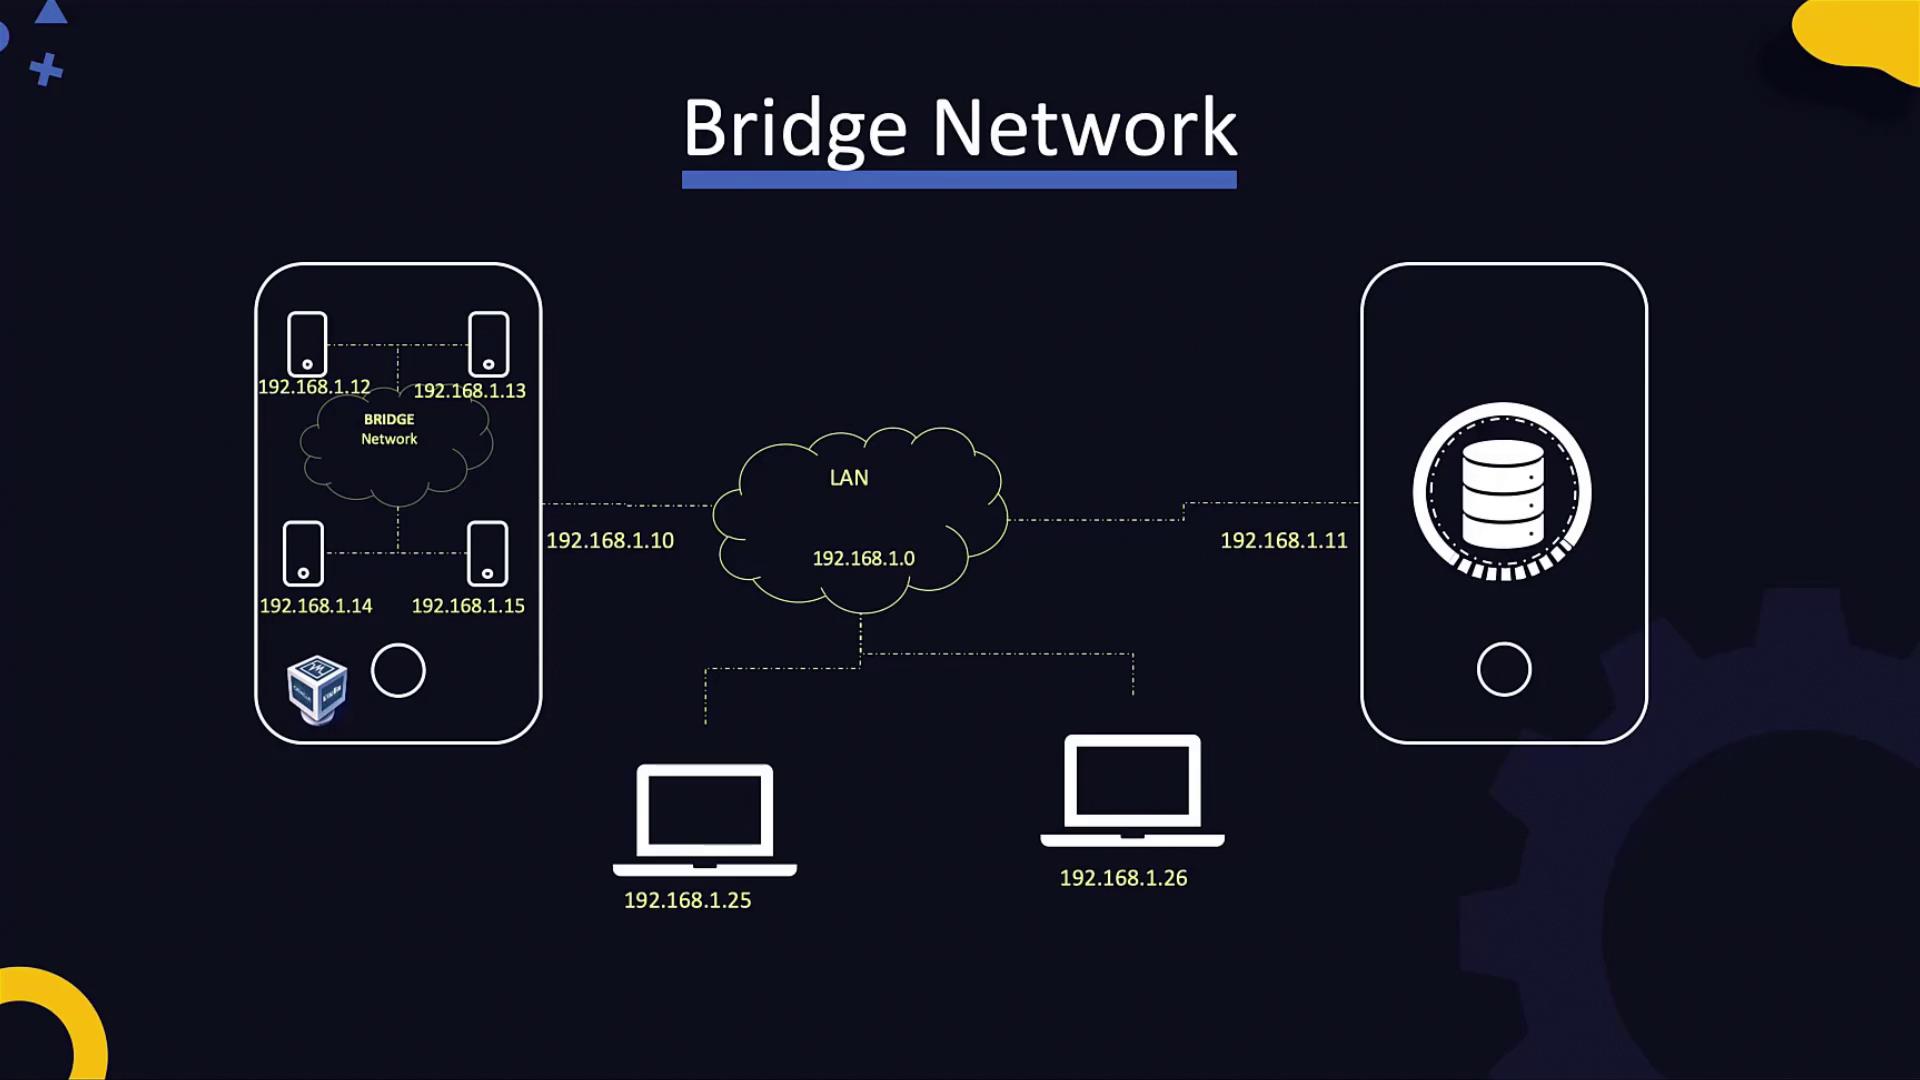
Internet Connectivity and IP Forwarding
VMs configured with NAT (or NAT Network) automatically receive internet connectivity if the host machine has internet access. In bridged mode, since the VM is recognized as a standard network host, internet connectivity is handled in the same way as for any physical machine on the LAN. However, VMs on a host-only network are isolated from external networks. To allow these VMs to access the internet, you can configure IP forwarding on the host machine. This process essentially converts your host into a router, directing traffic from the host-only network to the external network.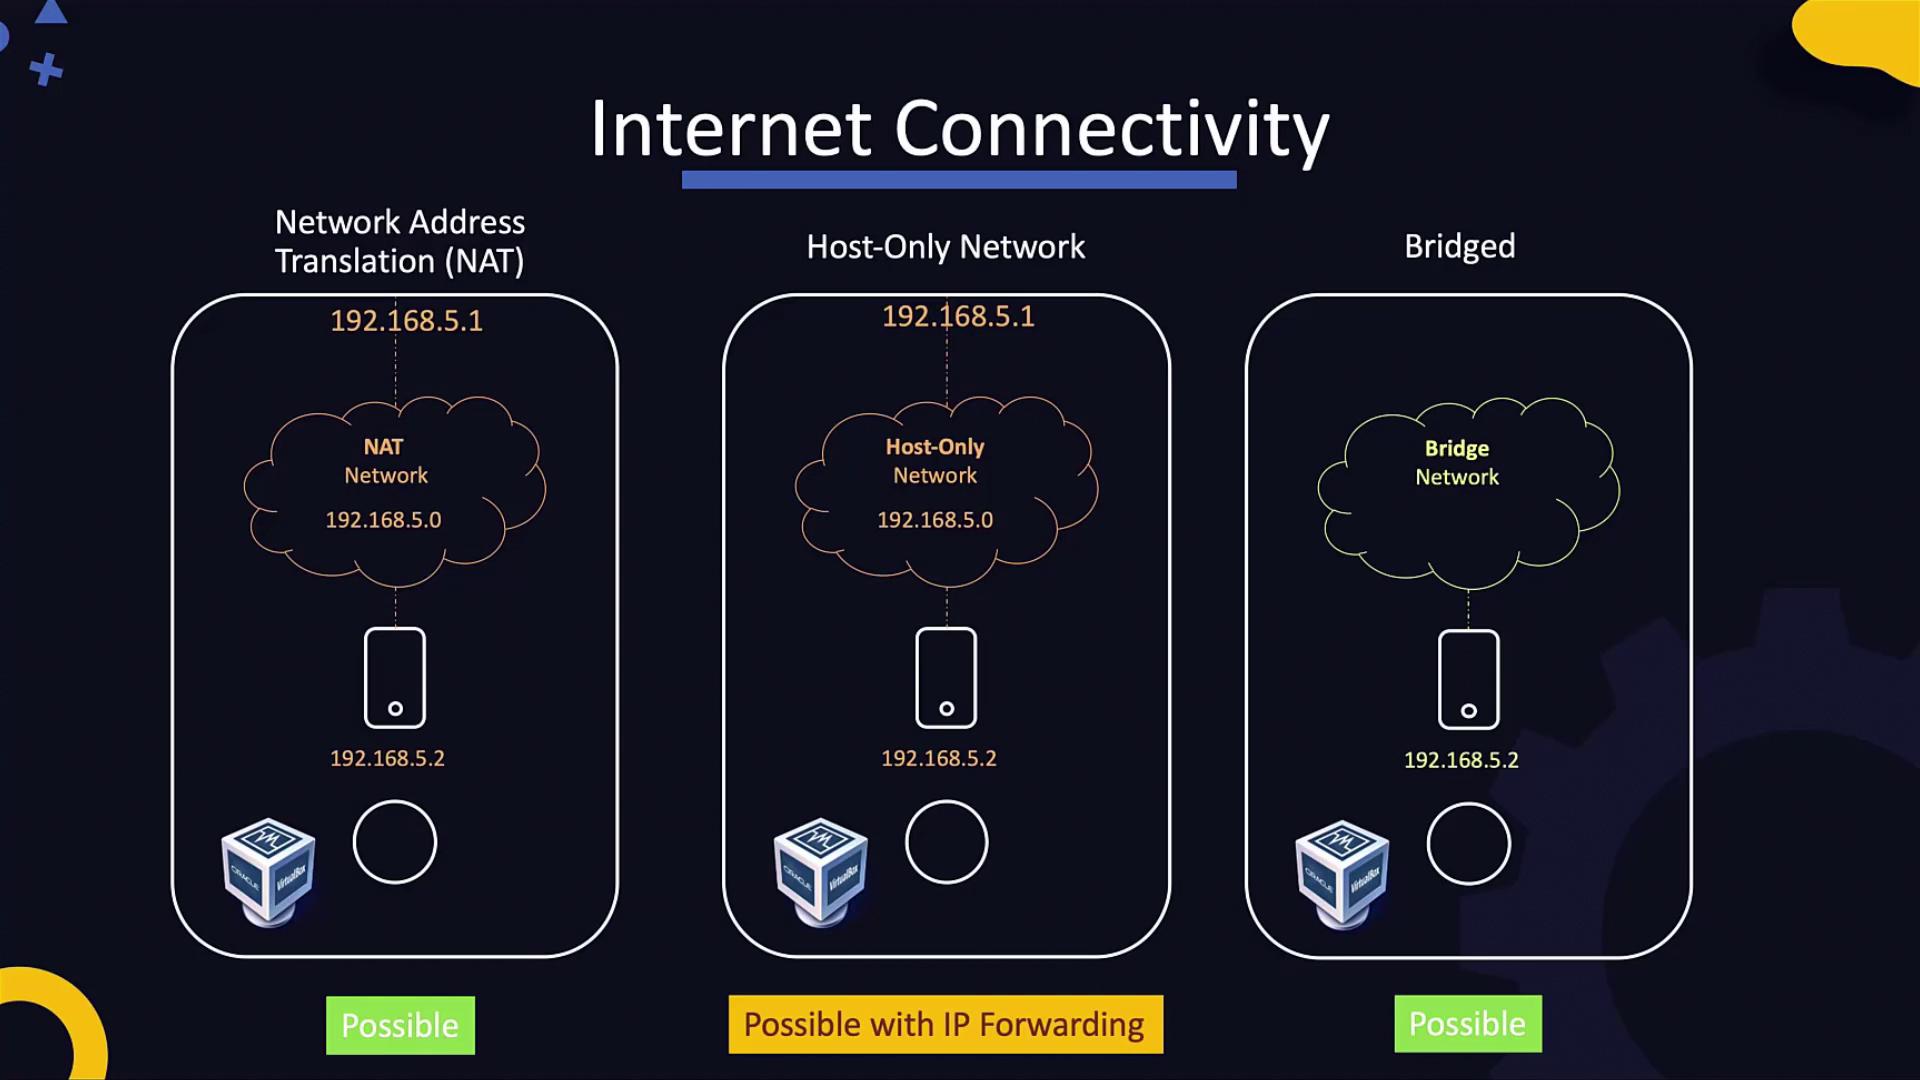
Port Forwarding
Port forwarding in VirtualBox allows you to map a port on the host machine to a port on the guest VM. This is especially useful when running services such as a web server or SSH on a VM that uses NAT. For example, if a web server is running on port 80 in the VM, you can configure port forwarding so that requests to port 80 on the host are redirected to port 80 on the VM. A common use case for port forwarding is SSH. You can map port 22 on the VM (the standard SSH port) to a different port on the host (such as 2222). This means you can SSH into the host at port 2222, and the connection will be forwarded to the VM: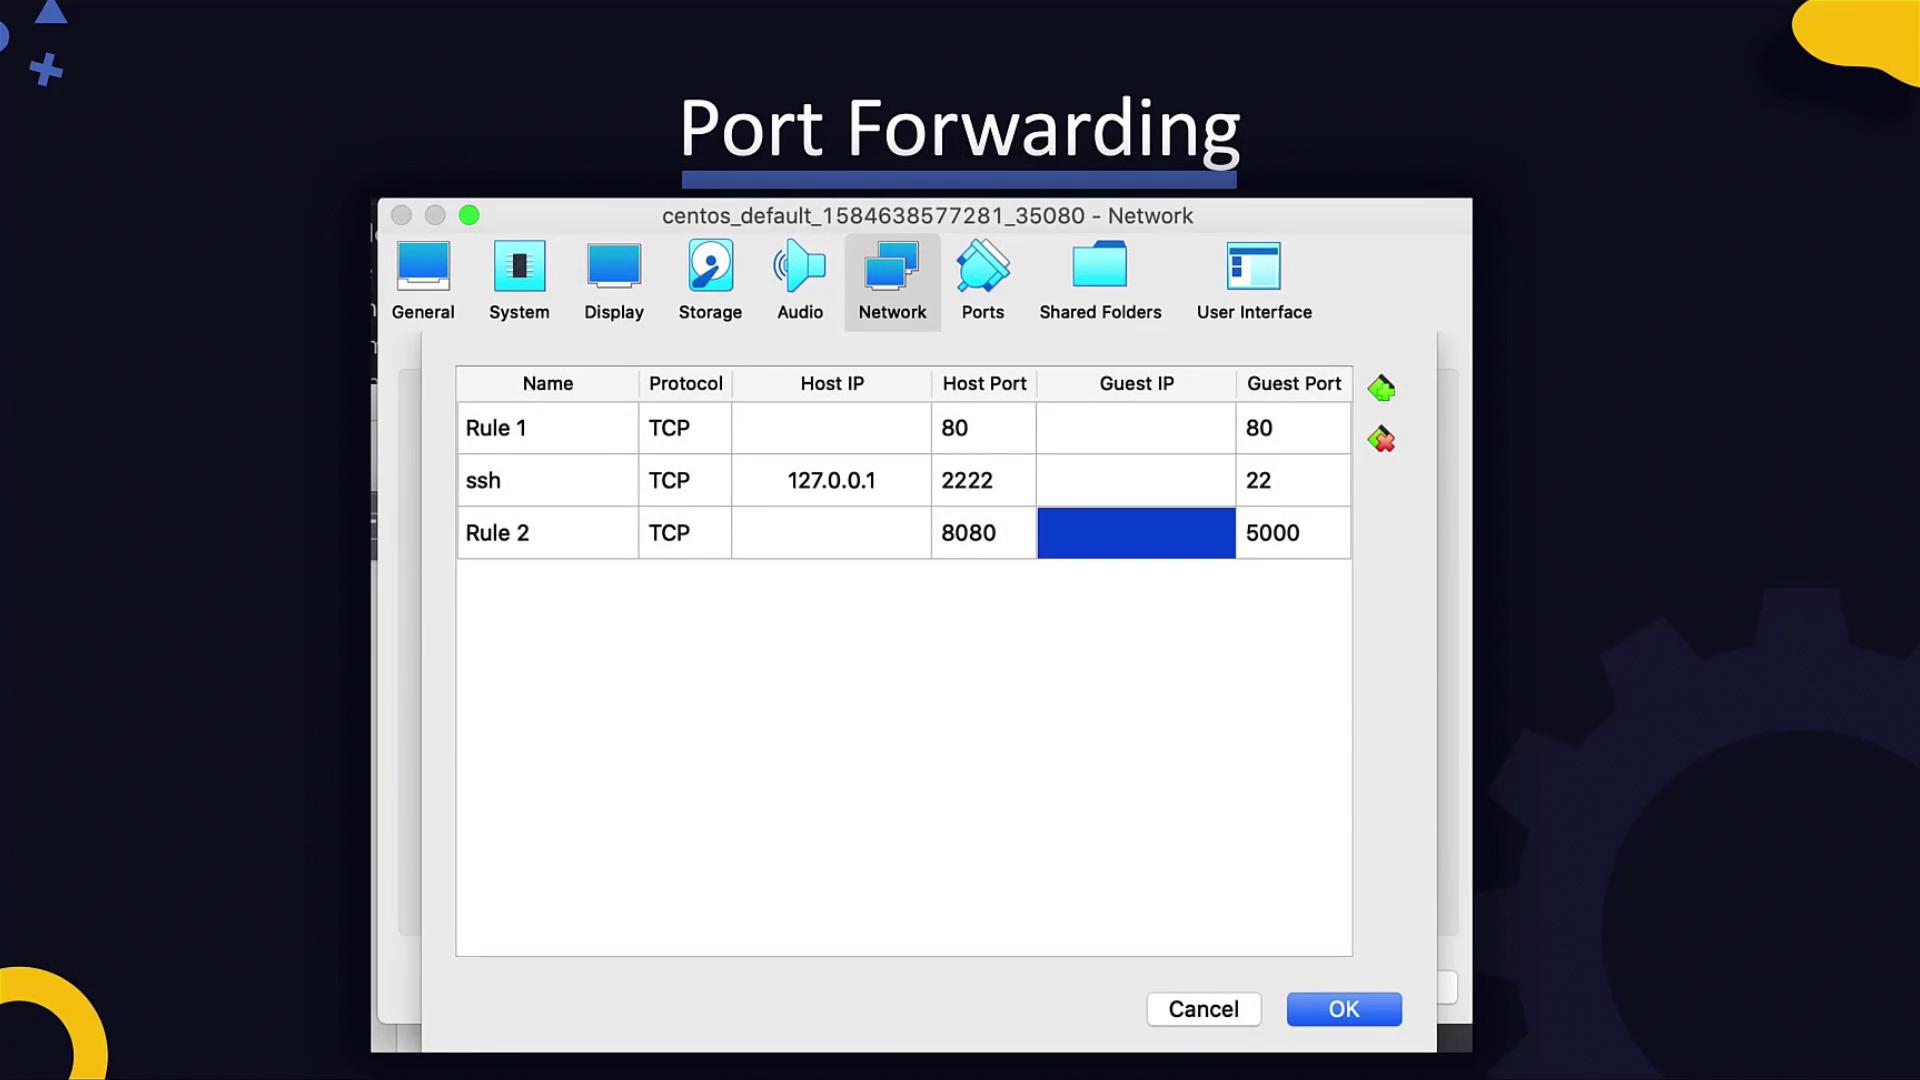
That concludes our exploration of VirtualBox networking. With these insights, you are now better prepared to diagnose connectivity issues, select the correct networking mode, and configure settings based on your environment’s needs. Happy networking, and see you in the next lesson! For more detailed information on networking concepts and VirtualBox settings, be sure to explore additional resources such as VirtualBox Documentation and Networking Basics.