

• What distinguishes the localhost (127.0.0.1) from a server’s public IP address?
• Why might a system fail to reach a web server running on another host?
• When both a web server and a database server are deployed, why might communication between them fail? This guide demystifies these concepts so you can troubleshoot and resolve network issues with confidence.
Network Interfaces and IP Addresses
Every computer—whether it’s a laptop or a server—features one or more network interfaces (adapters). Examples include wired Ethernet and wireless (Wi-Fi) adapters. When your device connects to a network, each interface receives its own IP address. For instance, connecting your laptop to a network switch with an Ethernet cable might assign it an IP address like 10.0.2.15. To view details about your network interfaces, run:Ports and Application Endpoints
Every network interface supports up to 65,535 ports. Think of ports as unique communication endpoints that allow services like web servers to operate concurrently. For example, a Python Flask web server listens on port 5000 by default. You can change the port by specifying it during the application’s runtime. Consider the following simple Flask application:Binding to 127.0.0.1 ensures that your application is secure and only accessible from your own machine during development.
The Loopback Interface and Local Testing
Every host includes a built-in virtual interface known as the loopback interface, which always uses the IP address 127.0.0.1. When you access 127.0.0.1 (or “localhost”), you are communicating with your own system. Importantly, traffic sent to this address does not leave your computer. To check the loopback interface details, run: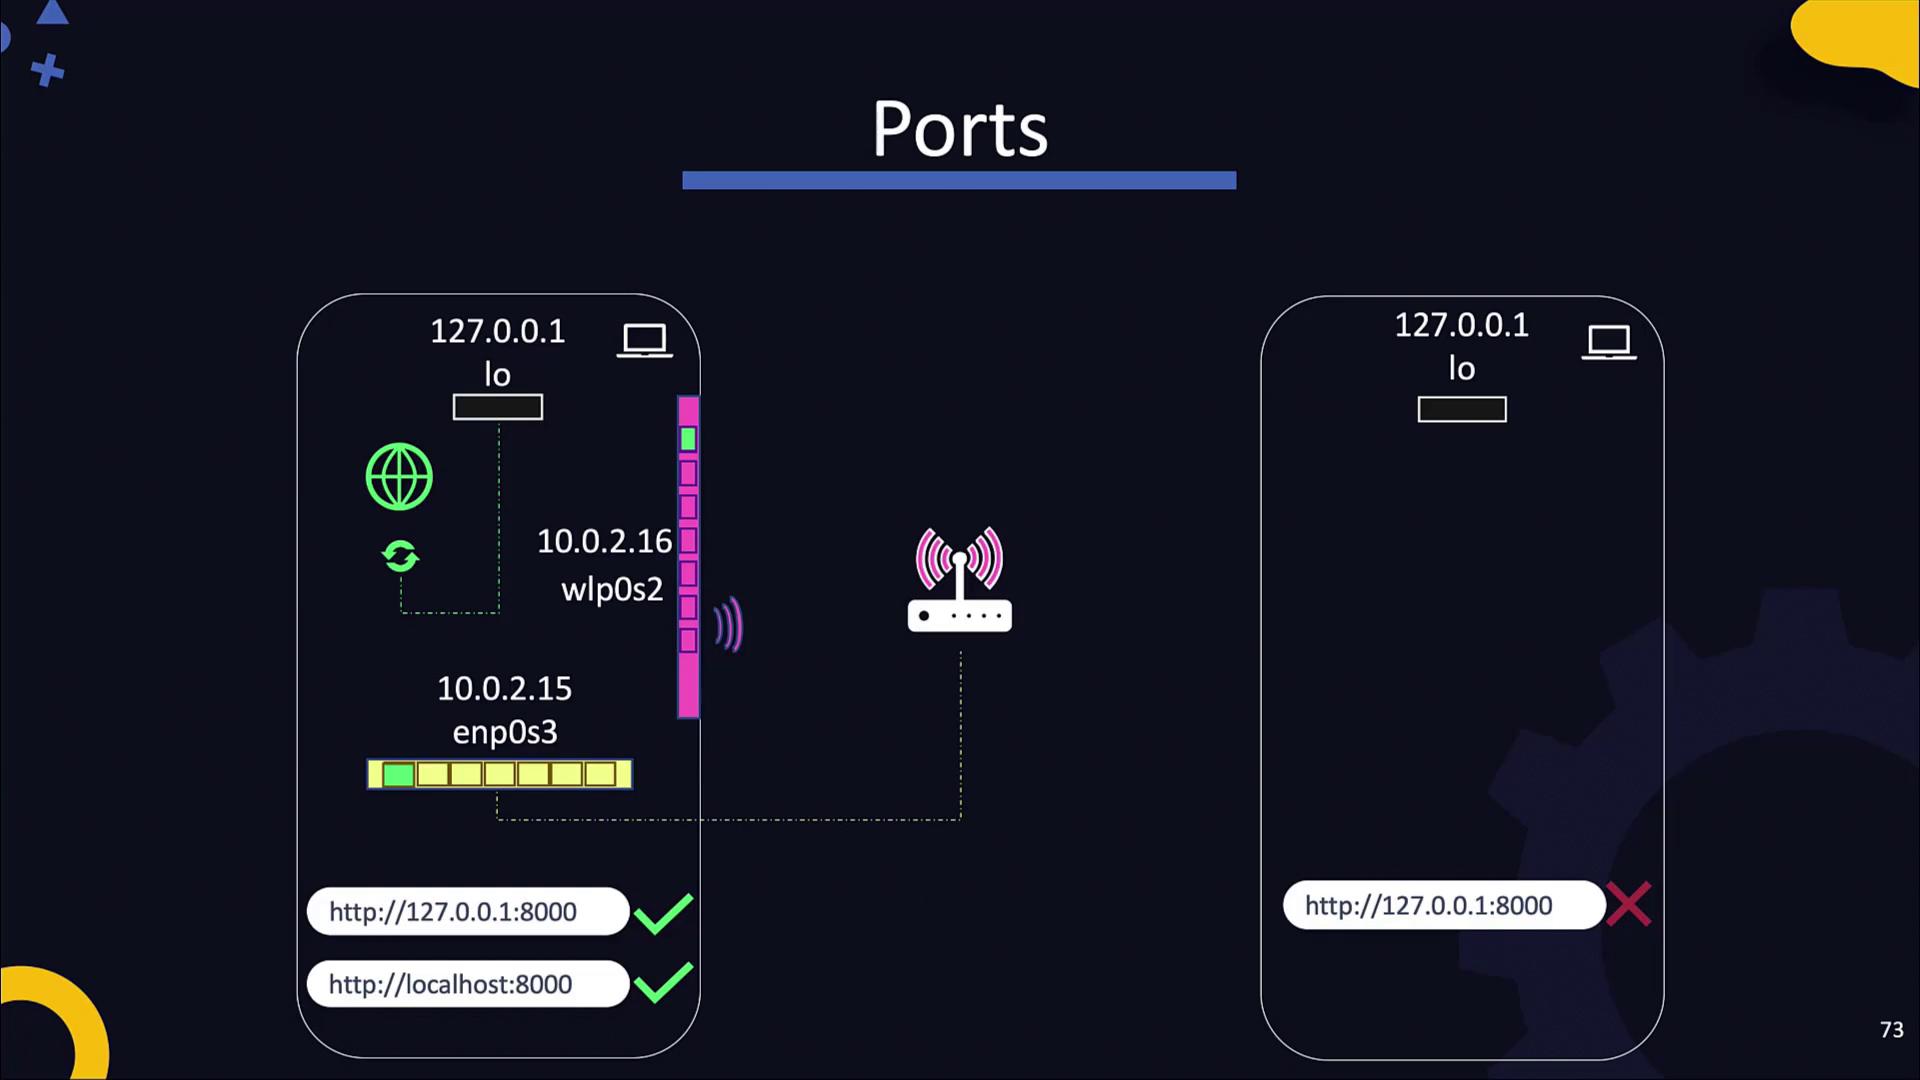
Remember: The loopback interface (127.0.0.1) is strictly for local testing. Accessing it from a different host will lead to connection errors.
That concludes this lesson on IP addresses and ports. Practice using different network configurations to solidify your understanding, and explore related topics in subsequent lessons. Happy coding!