Learn to configure a Jenkins pipeline for deploying a Dockerized application to a Kubernetes cluster using AWS EKS, covering credentials, pipeline creation, and troubleshooting.
In this lesson, you’ll learn how to configure a Jenkins pipeline to deploy a Dockerized application to a Kubernetes cluster using AWS EKS. The guide covers setting up Jenkins credentials, creating the pipeline, reviewing the Jenkinsfile, and troubleshooting file permission issues with the kubeconfig file.
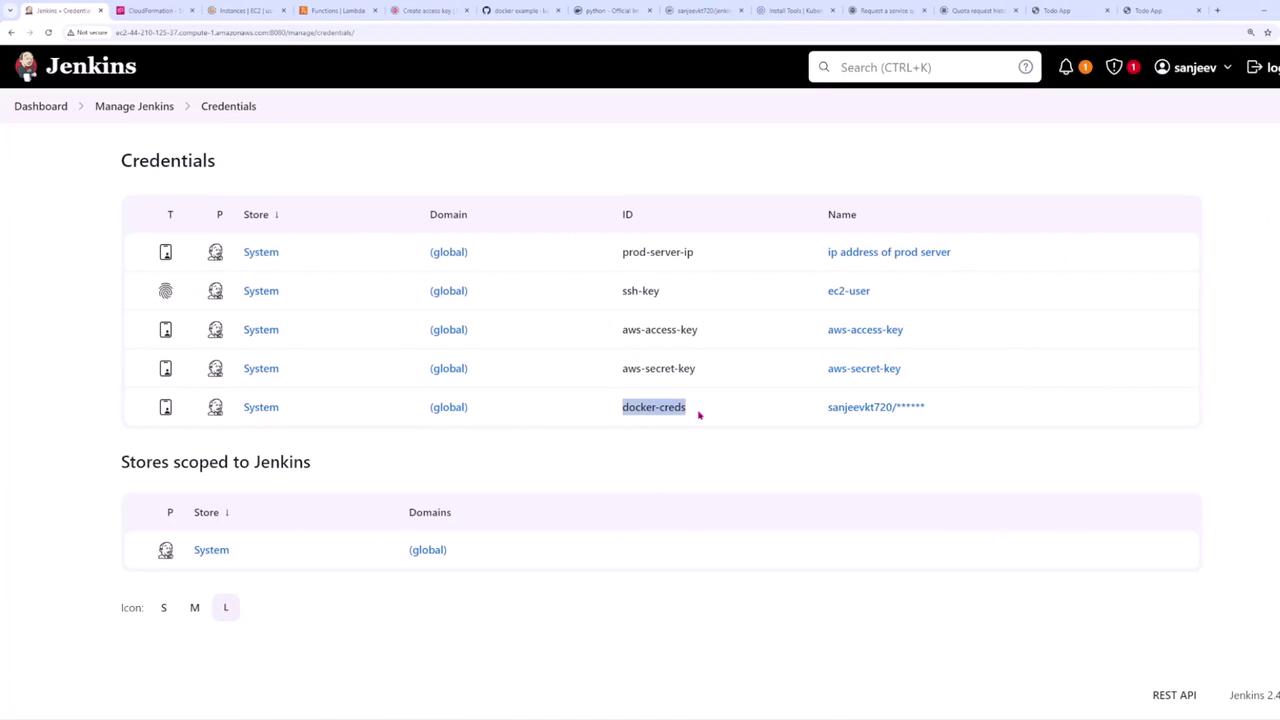
Begin by navigating to Manage Jenkins → Credentials. Note that Docker credentials are preconfigured. You now need to create a credential for the kubeconfig file, which typically resides in your home directory at .kube/config.
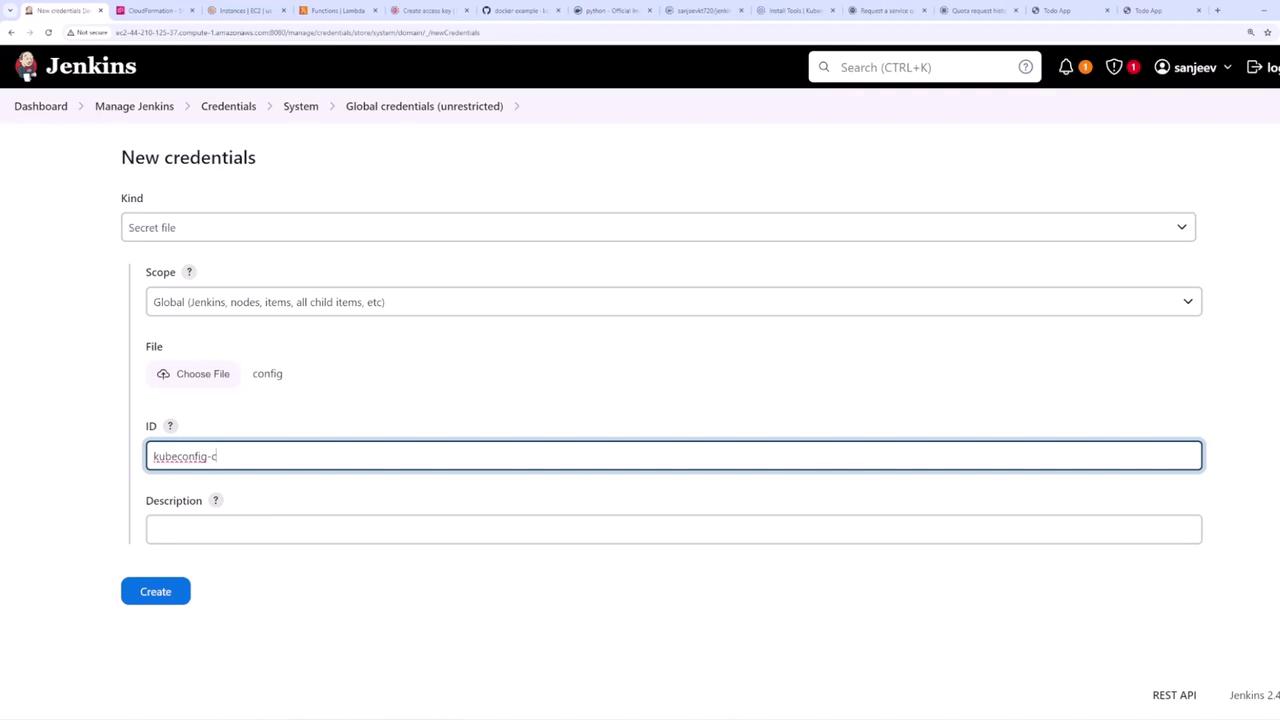
Click on Add Credentials. Choose the credential type “Secret file”. For the file field, enter the full path (for example, /home/username/.kube/config) and assign a credential ID such as kubeconfig-credentials-id.
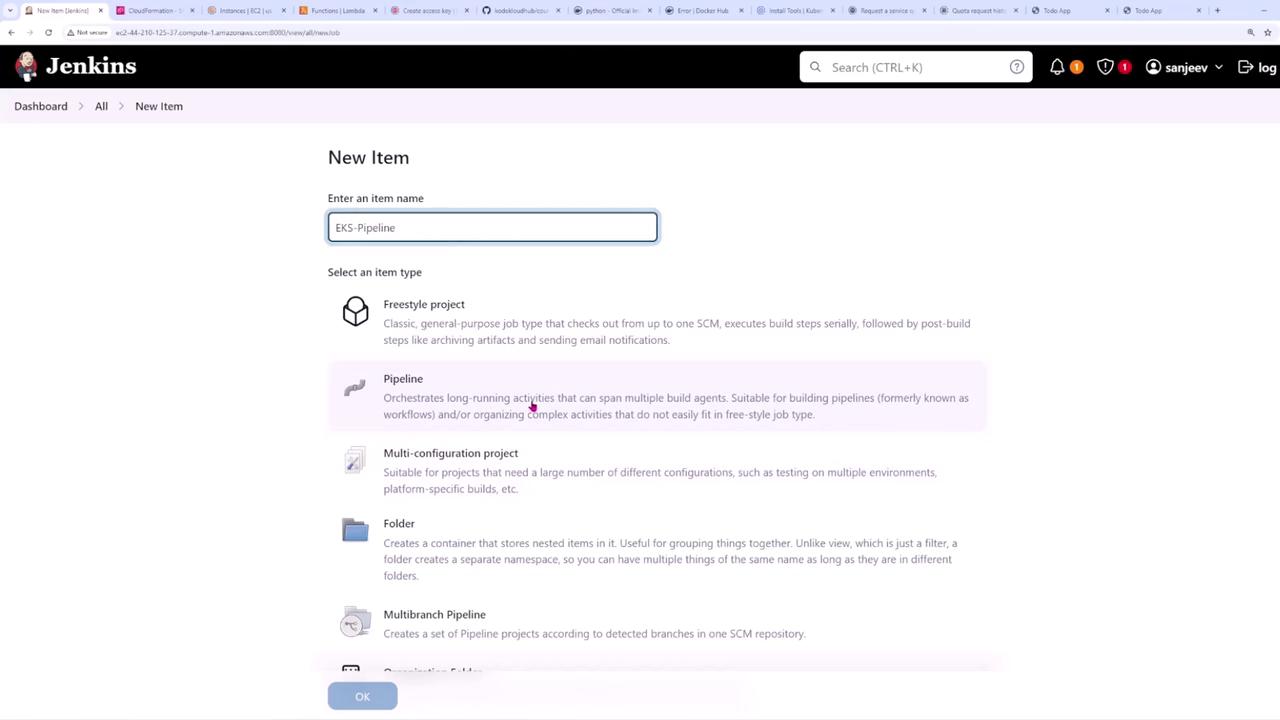
Next, set up a new pipeline project. Click on New Item, give it a name (for example, “Amazon EKS Pipeline”), and select Pipeline as the project type.
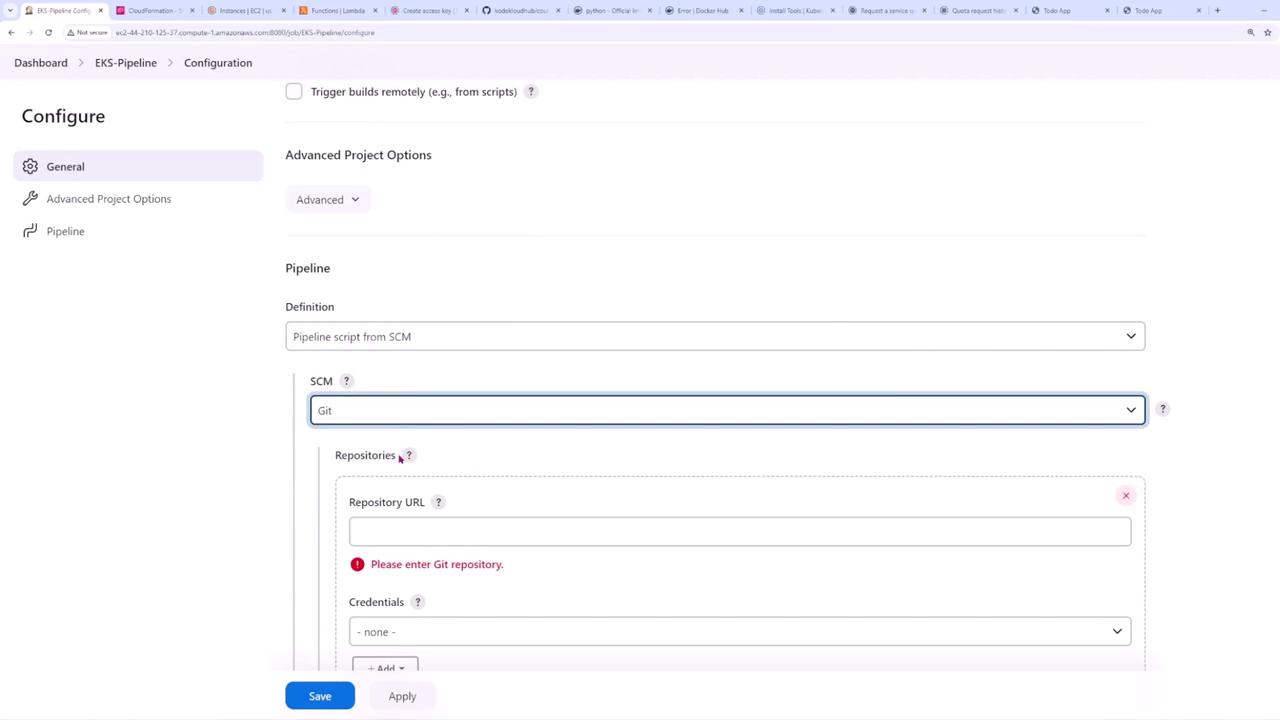
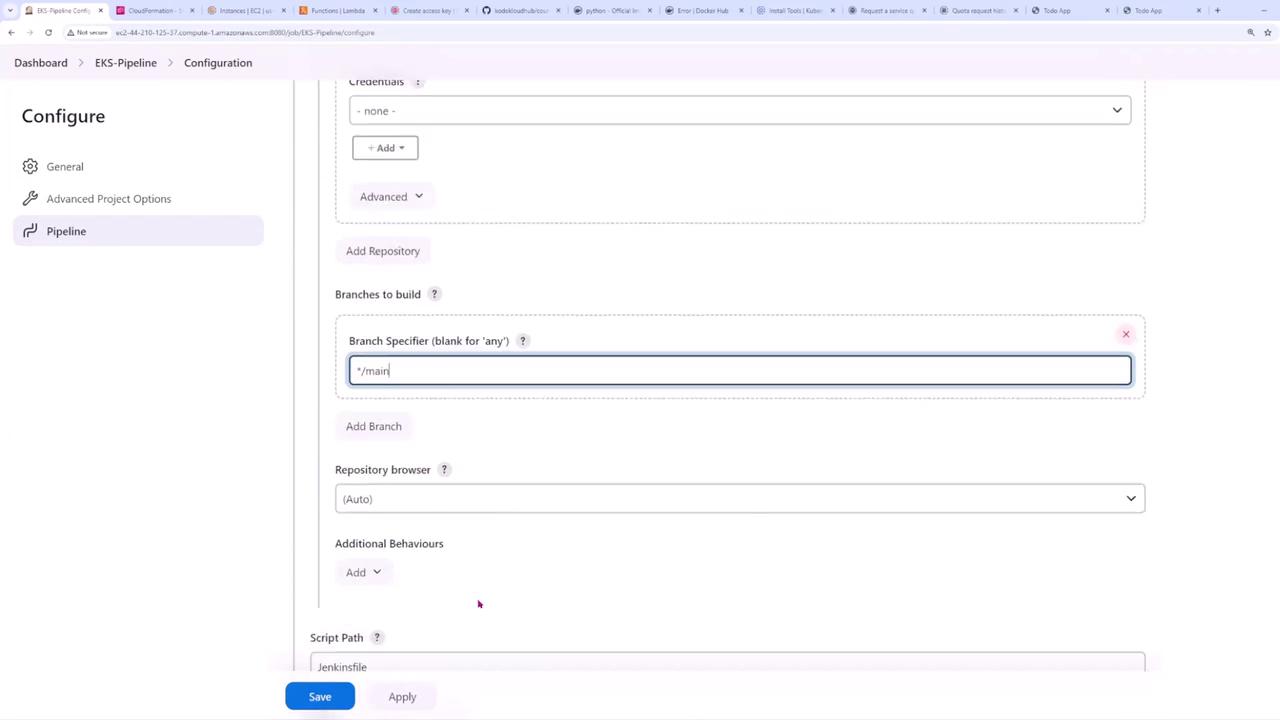
Configure the job by enabling the GitHub hook trigger for Git SCM polling. Under the pipeline configuration, select “Pipeline script from SCM” and set the SCM option to Git. Enter your Git repository URL and select the branch (in this example, main).
The Jenkinsfile outlines the environment variables and defines various stages for building, testing, and deploying your application. It includes credentials for the kubeconfig file and AWS keys, which are necessary for working with Amazon EKS.Below is the enhanced Jenkinsfile that includes stages for environment setup (with troubleshooting for kubeconfig permissions), testing, Docker Hub login, image building and pushing, and deployments to both staging and production clusters.
pipeline { agent any environment { IMAGE_NAME = 'sanjeevkt720/jenkins-flask-app' IMAGE_TAG = "${IMAGE_NAME}:${env.GIT_COMMIT}" KUBECONFIG = credentials('kubeconfig-credentials-id') AWS_ACCESS_KEY_ID = credentials('aws-access-key') AWS_SECRET_ACCESS_KEY = credentials('aws-secret-key') } stages { stage('Setup') { steps { // List kubeconfig file permissions for troubleshooting. sh 'ls -la $KUBECONFIG' // Adjust file permissions if necessary. sh 'chmod 644 $KUBECONFIG' sh 'ls -la $KUBECONFIG' // Install Python dependencies. sh 'pip install -r requirements.txt' } } stage('Test') { steps { sh 'pytest' } } stage('Login to Docker Hub') { steps { withCredentials([usernamePassword(credentialsId: 'docker-creds', usernameVariable: 'USERNAME', passwordVariable: 'PASSWORD')]) { sh 'echo $PASSWORD | docker login -u $USERNAME --password-stdin' echo 'Docker login successful' } } } stage('Build and Push Docker Image') { steps { sh 'docker build -t $IMAGE_TAG .' echo 'Docker image built successfully' sh 'docker image ls' sh 'docker push $IMAGE_TAG' echo 'Docker image pushed successfully' } } stage('Deploy to Staging') { steps { // Switch Kubernetes context to the staging cluster. sh 'kubectl config use-context user@staging.us-east-1.eksctl.io' sh 'kubectl config current-context' // Update the staging deployment image. sh "kubectl set image deployment/flask-app flask-app=$IMAGE_TAG" // Retrieve service endpoint and run acceptance tests. script { def service = sh(script: "kubectl get svc flask-app-service -o jsonpath='{.status.loadBalancer.ingress[0].hostname}:{.spec.ports[0].port}'", returnStdout: true).trim() echo "Service endpoint: ${service}" sh "k6 run -e SERVICE=${service} acceptance-test.js" } } } stage('Deploy to Production') { steps { // Switch Kubernetes context to the production cluster. sh 'kubectl config use-context user@prod.us-east-1.eksctl.io' sh 'kubectl config current-context' // Update the production deployment image. sh "kubectl set image deployment/flask-app flask-app=$IMAGE_TAG" } } }}
Key highlights of this Jenkinsfile:
Setup: Lists and updates kubeconfig file permissions to ensure Jenkins has write access. It then installs the required Python dependencies.
Test: Runs the test suite using pytest.
Login to Docker Hub: Authenticates with Docker Hub using stored credentials.
Build and Push Docker Image: Builds the Docker image, verifies it by listing images, and then pushes it to Docker Hub.
Deploy to Staging: Switches to the staging Kubernetes context, updates the deployment’s image, retrieves the service endpoint, and runs acceptance tests with K6.
Deploy to Production: Switches the Kubernetes context to production and updates the deployment with the new image.
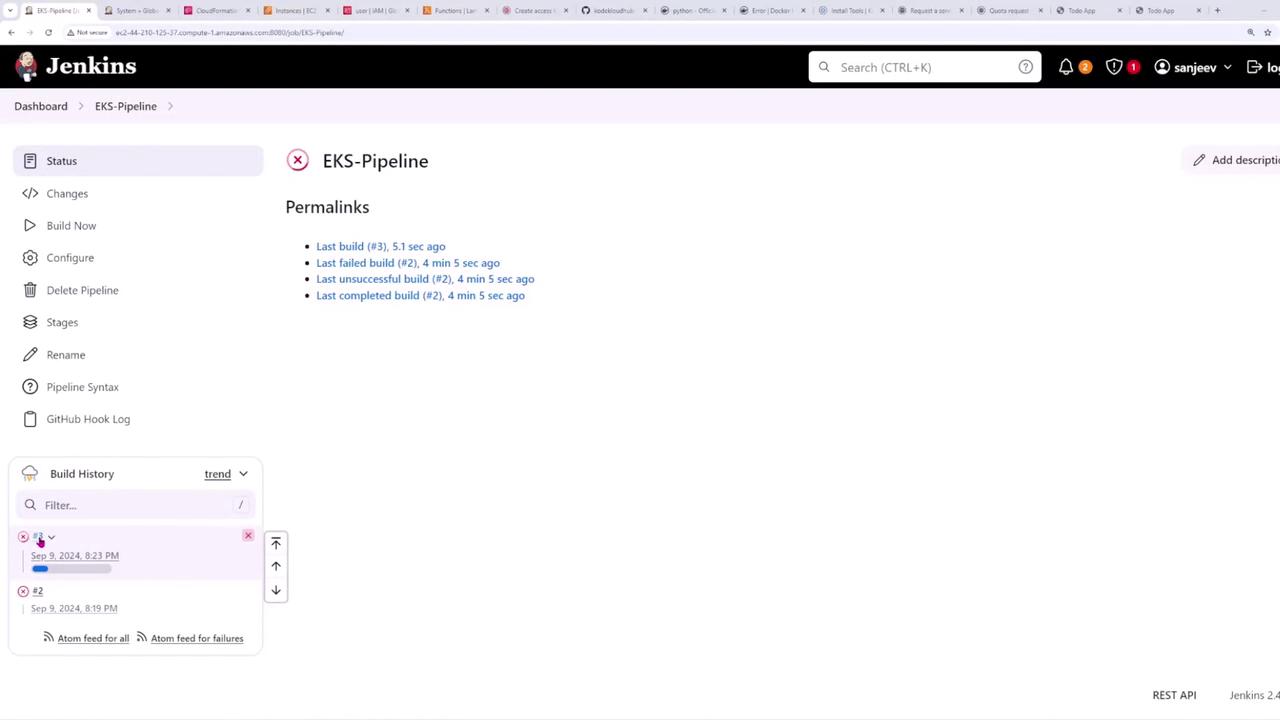
During one of the builds, a file permission error occurred when attempting to change the Kubernetes context, indicating that the kubeconfig file was not writable. To resolve this issue, the Jenkinsfile was enhanced with diagnostic commands that:
List the kubeconfig file permissions using ls -la $KUBECONFIG.
Adjust file permissions with chmod 644 $KUBECONFIG.
Confirm the updated permissions before proceeding.
Review the Jenkins build output to verify that the permissions have been updated successfully. Once the permissions are correct, subsequent commands (such as switching contexts with kubectl config use-context) will execute without error.
After successfully deploying the initial version, you may update your application code. For example, consider the following HTML snippet for a simple Todo App (version 1):
When you update the app to a new version (e.g., version 2) and push the changes to Git, a new build will be triggered. Once the build completes successfully, verify that both the staging and production environments reflect the updated version.By following these steps, you can implement a robust Jenkins pipeline that automates the build, testing, and deployment of a Dockerized application on Kubernetes using Amazon EKS. This streamlined pipeline also addresses common permission issues, ensuring a smooth continuous delivery workflow.
Automating the deployment with Jenkins reduces manual errors and accelerates your development pipeline, helping you achieve faster delivery cycles while maintaining consistency across environments.