RAID Levels Overview
Below are the most commonly used RAID levels along with their characteristics and use cases.RAID Level 0 (Striped Array)
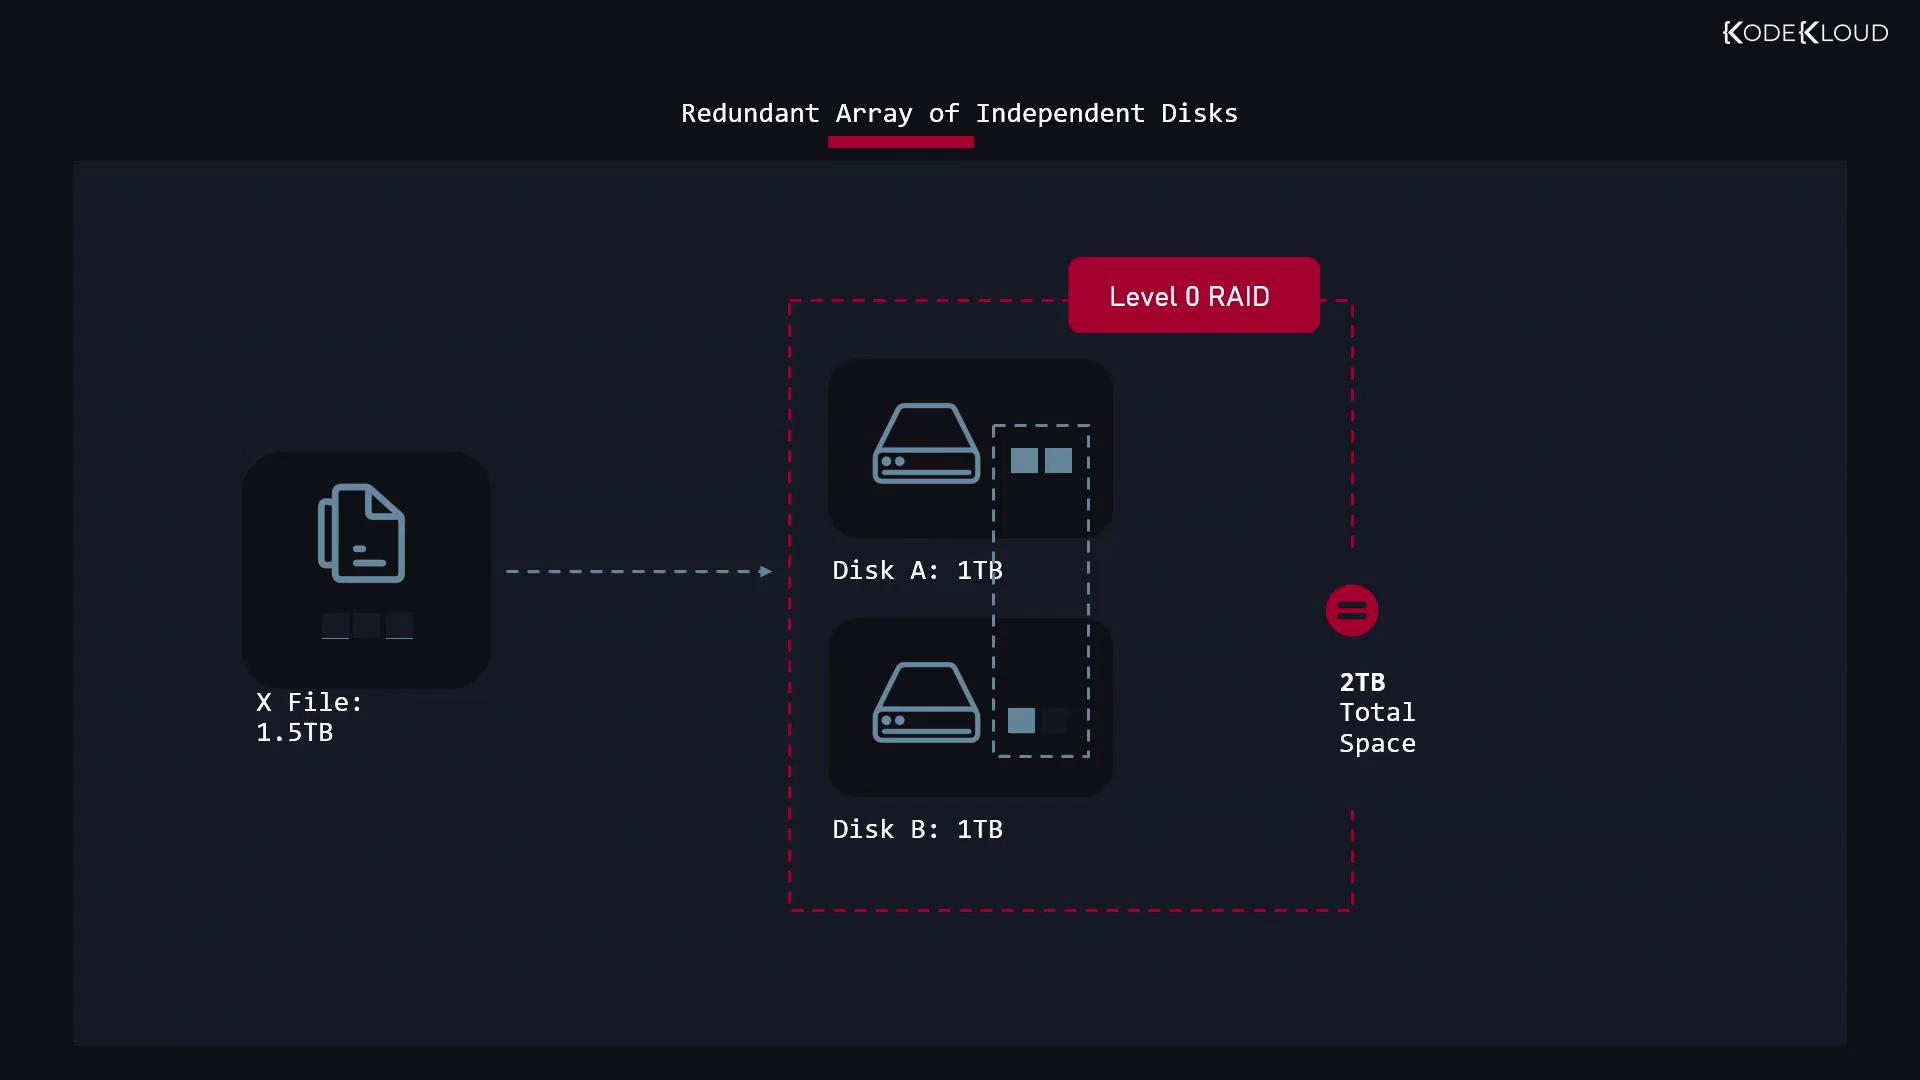
RAID 0 groups multiple disks together to form one large storage pool. The total usable space is the sum of all disks in the array. For instance, two 1-terabyte disks provide 2 terabytes of capacity, while ten disks offer 10 terabytes.RAID 0 does not provide any redundancy. If any single disk fails, all data in the array is lost.
RAID Level 1 (Mirrored Array)
RAID 1 involves duplicating the same data across all disks in the array. For example, in an array with three disks, the same file is stored on each disk. This mirroring ensures that data remains accessible even if one or two disks fail.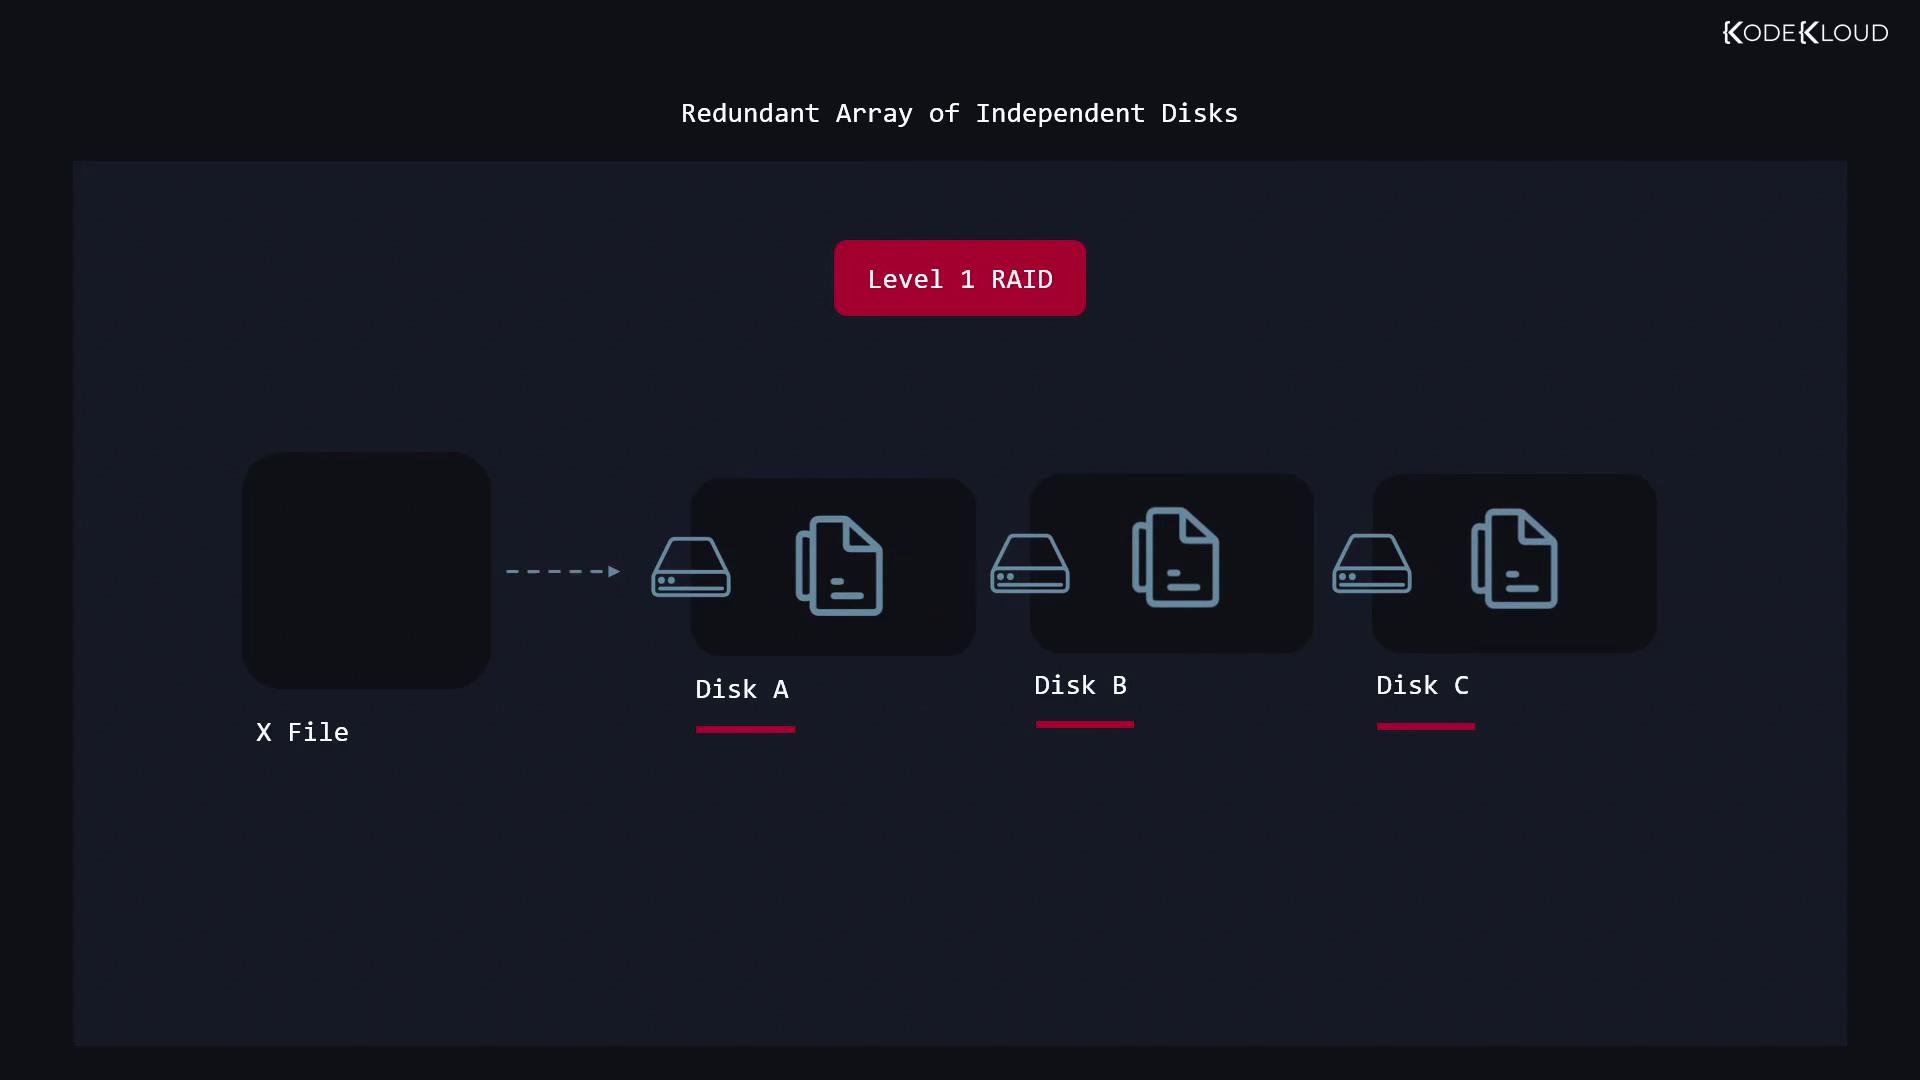
RAID Level 5
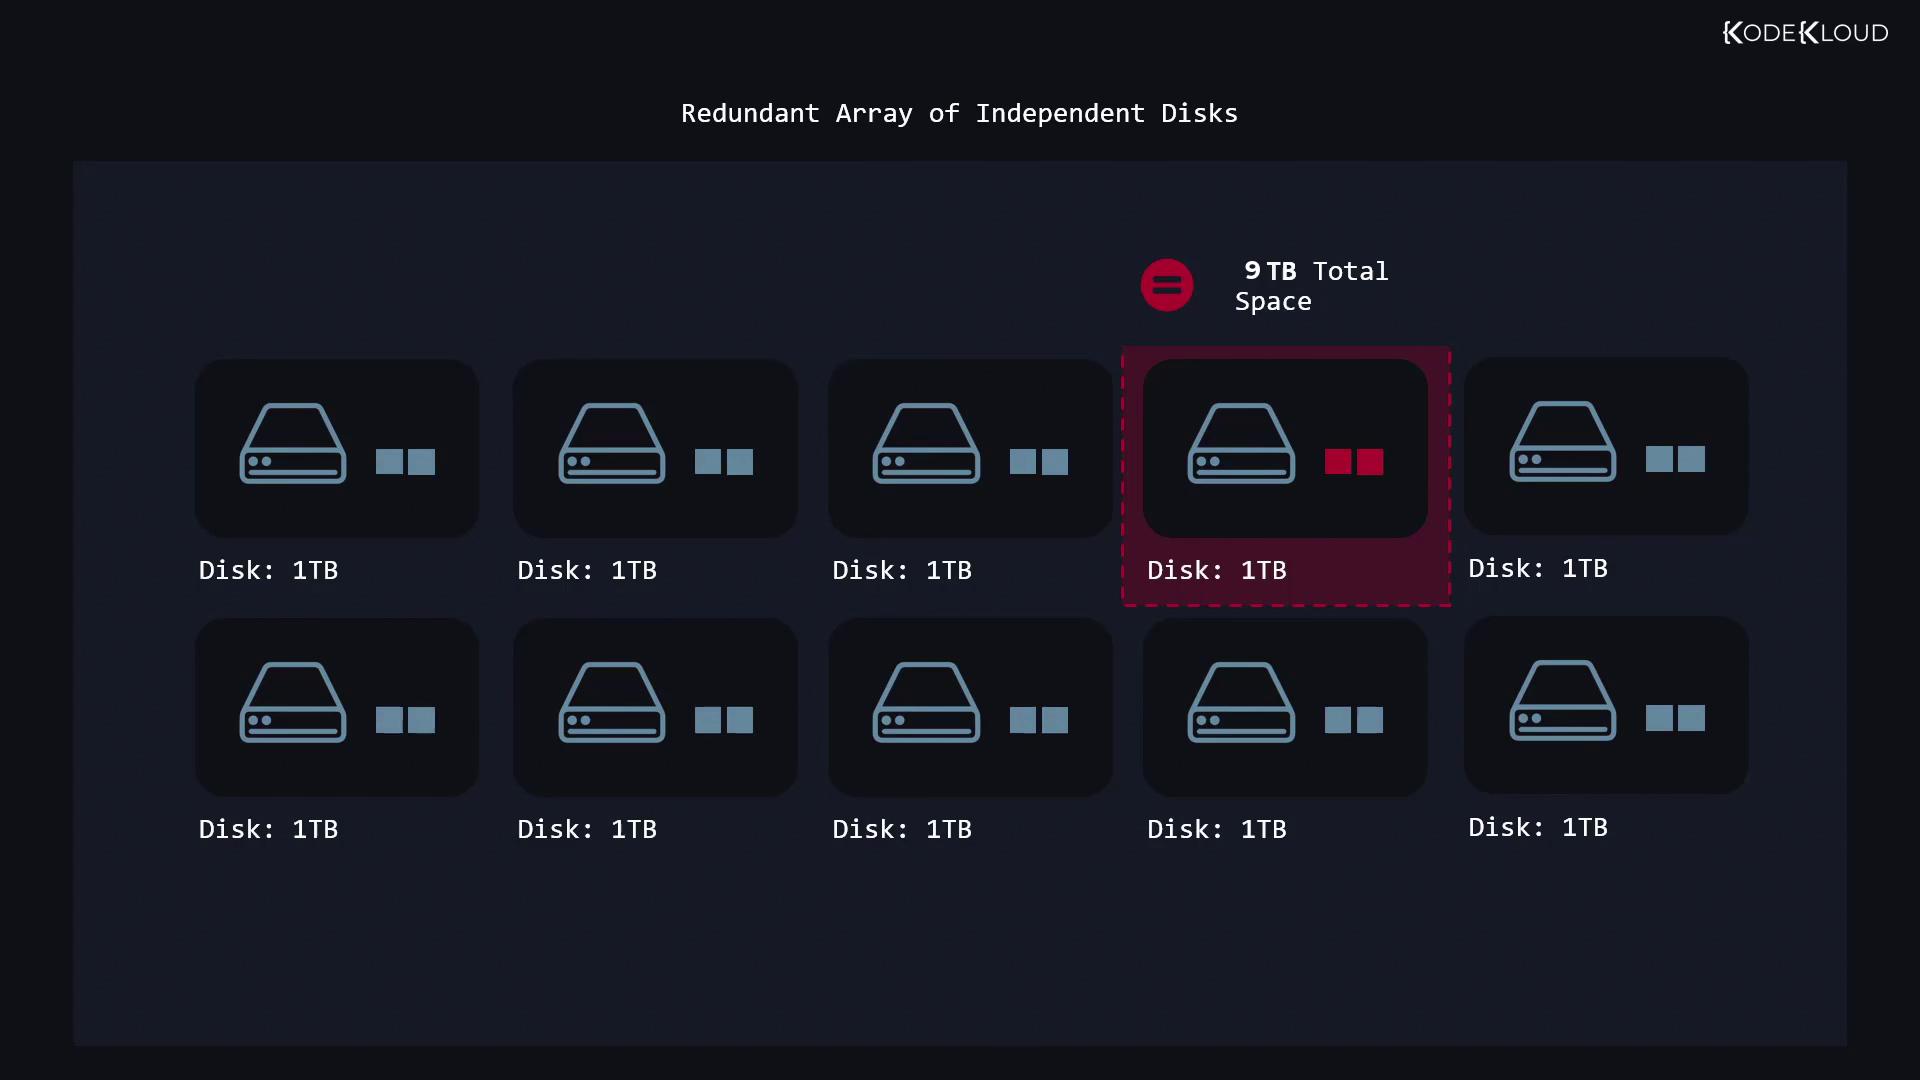
RAID 5 requires a minimum of three disks and achieves redundancy by distributing parity data across all disks. For example, in a three-disk setup with each disk at 1 terabyte, one disk’s capacity is dedicated to parity—leaving 2 terabytes of usable space. In a ten-disk configuration, you would have nine terabytes available.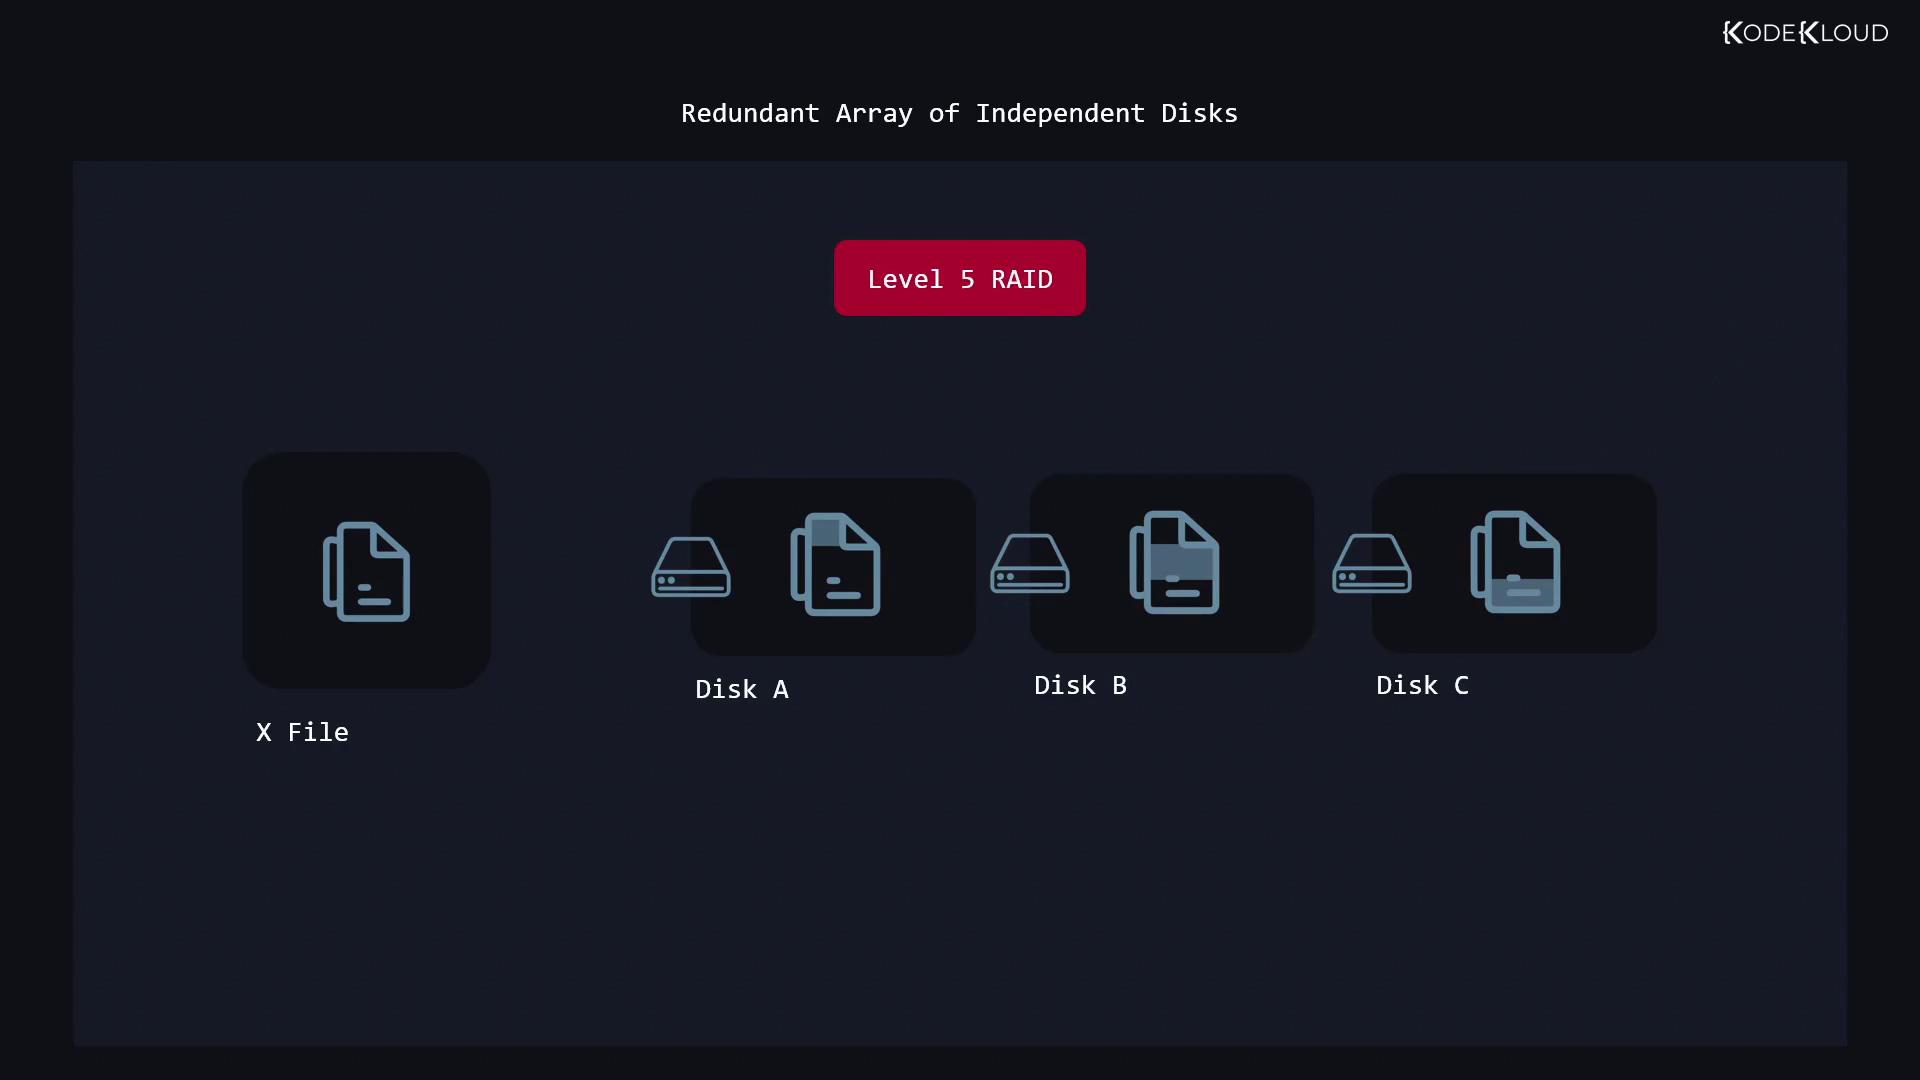
RAID Level 6
RAID 6 builds on RAID 5 by adding an extra parity block, which means two disks can fail simultaneously without data loss. This level requires a minimum of four disks and is suitable for environments where higher fault tolerance is needed.RAID Level 10 (RAID 1+0)
RAID 10 combines the performance benefits of RAID 0 and the redundancy of RAID 1. This setup first mirrors data in pairs (RAID 1) and then stripes across those mirrored pairs (RAID 0). For example, by creating two mirrored pairs with 1-terabyte disks, you achieve 2 terabytes of usable space along with improved protection against disk failure.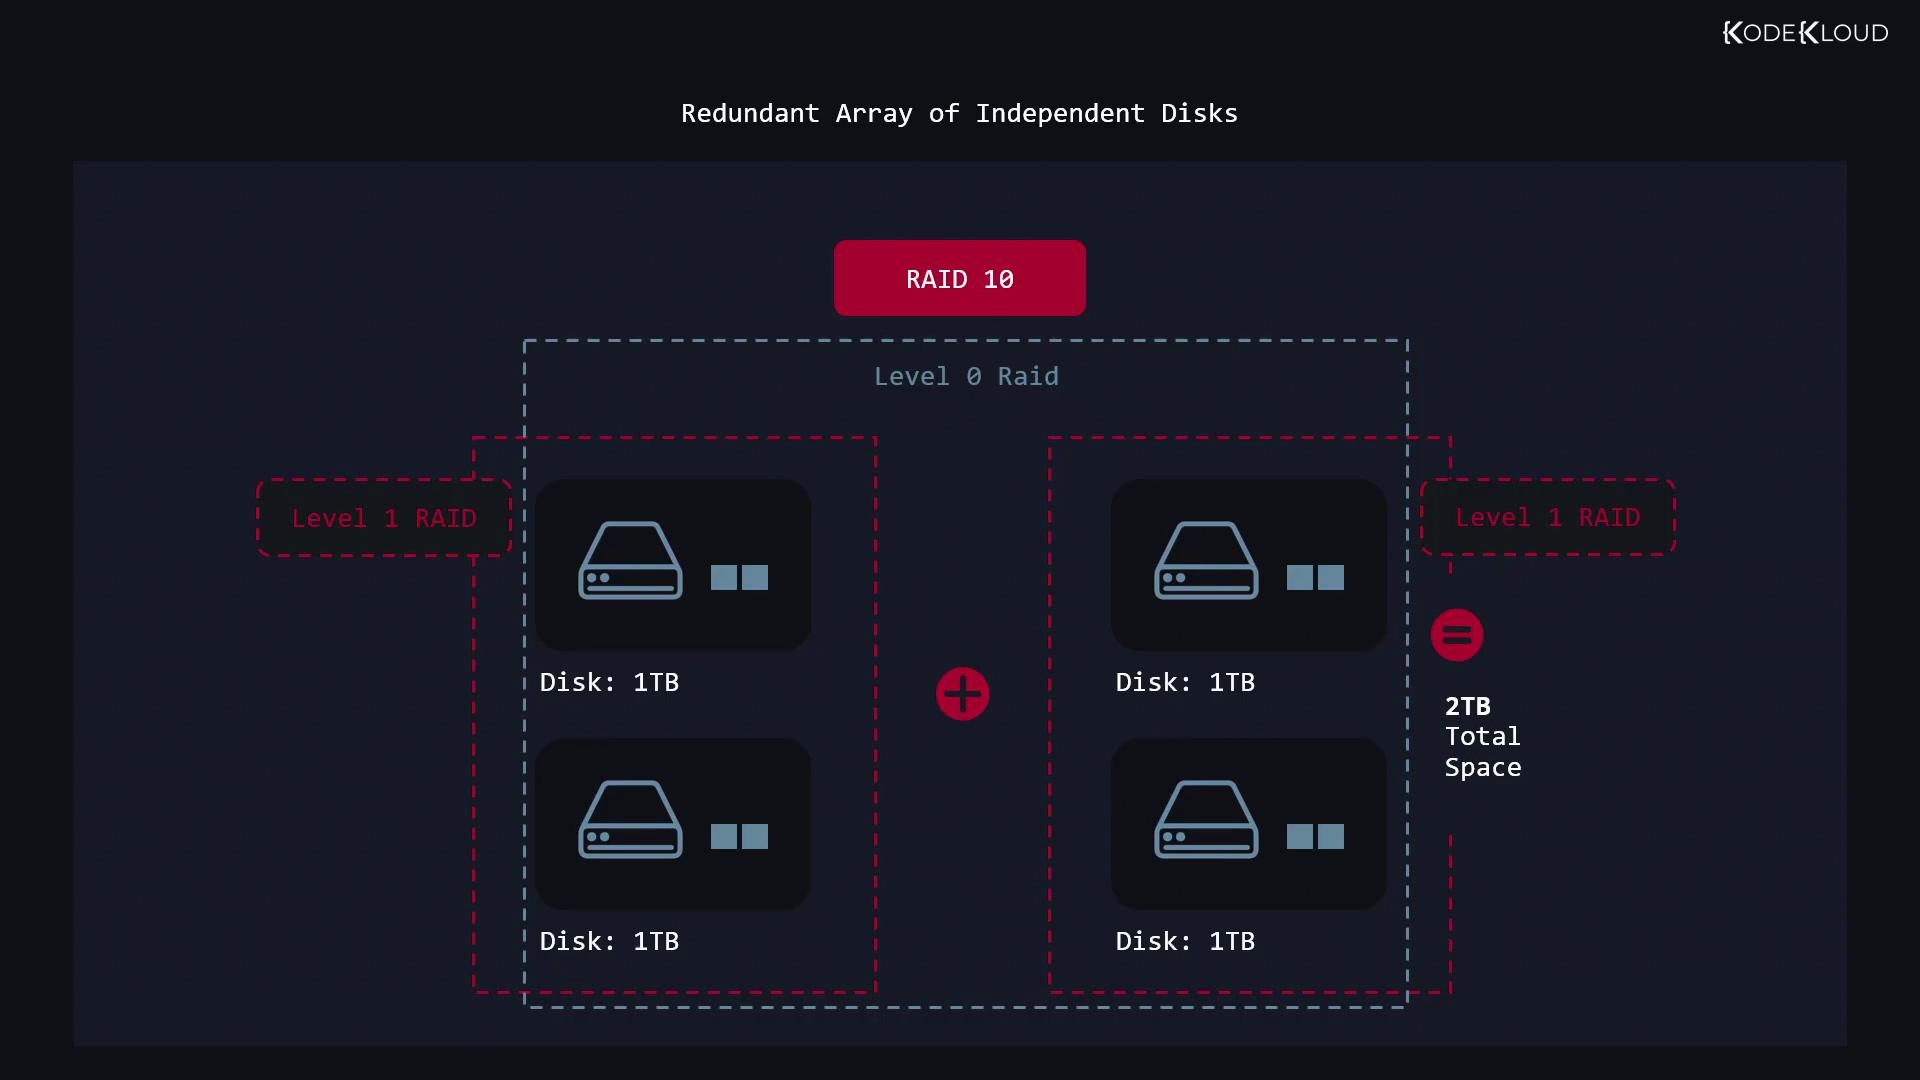
Working with RAID on Linux
Before initiating RAID configurations, you may need to remove any existing LVM storage. This involves deleting volume groups and clearing physical volumes used by the logical volume manager. To manage RAID devices on Linux, the utility mdadm (Multiple Devices Administration) is used.Removing Existing LVM Storage
The following commands force removal of an LVM volume group and then clear the physical volumes:Creating a RAID 0 Array
The next example demonstrates creating a RAID 0 array using three disks. In this configuration, /dev/md0 represents the new RAID block device, which you can then format with a file system.Stopping a RAID Array
To stop an active RAID array, use the stop directive with mdadm:Creating a RAID 1 Array with a Spare Disk
RAID 1 mirrors data across disks, ensuring redundancy. However, if one disk fails and the remaining disk subsequently fails, data can still be at risk. To address this vulnerability, you can configure a spare disk that automatically replaces a failing drive in the array. For example, if /dev/vdc and /dev/vdd form a RAID 1 array and /dev/vde is designated as a spare, follow these commands:Expanding a RAID 1 Array
If you initially create a RAID 1 array with two disks and later decide to add another disk for additional redundancy, mdadm allows you to add a disk using the add directive. To monitor the status of your RAID arrays, check the contents of /proc/mdstat:For additional guidance on managing and expanding your RAID configurations, refer to the mdadm manual and Linux system documentation.