

- Keep your Kafka broker process running in the original terminal. Do not stop it.
- Open a second terminal on the EC2 instance for the Kafka Connect steps.
- Ensure the EC2 instance has permission to access the S3 bucket used for the connector.
- Open a new terminal on the EC2 instance and become root
- Download the Confluent / Amazon S3 Sink connector plugin
- The connector is available on Confluent Hub: https://www.confluent.io/hub/confluentinc/kafka-connect-s3
- In this demo the connector zip has been staged in an S3 bucket and will be downloaded with the AWS CLI.
AmazonS3FullAccess; for production, use least-privilege policies).
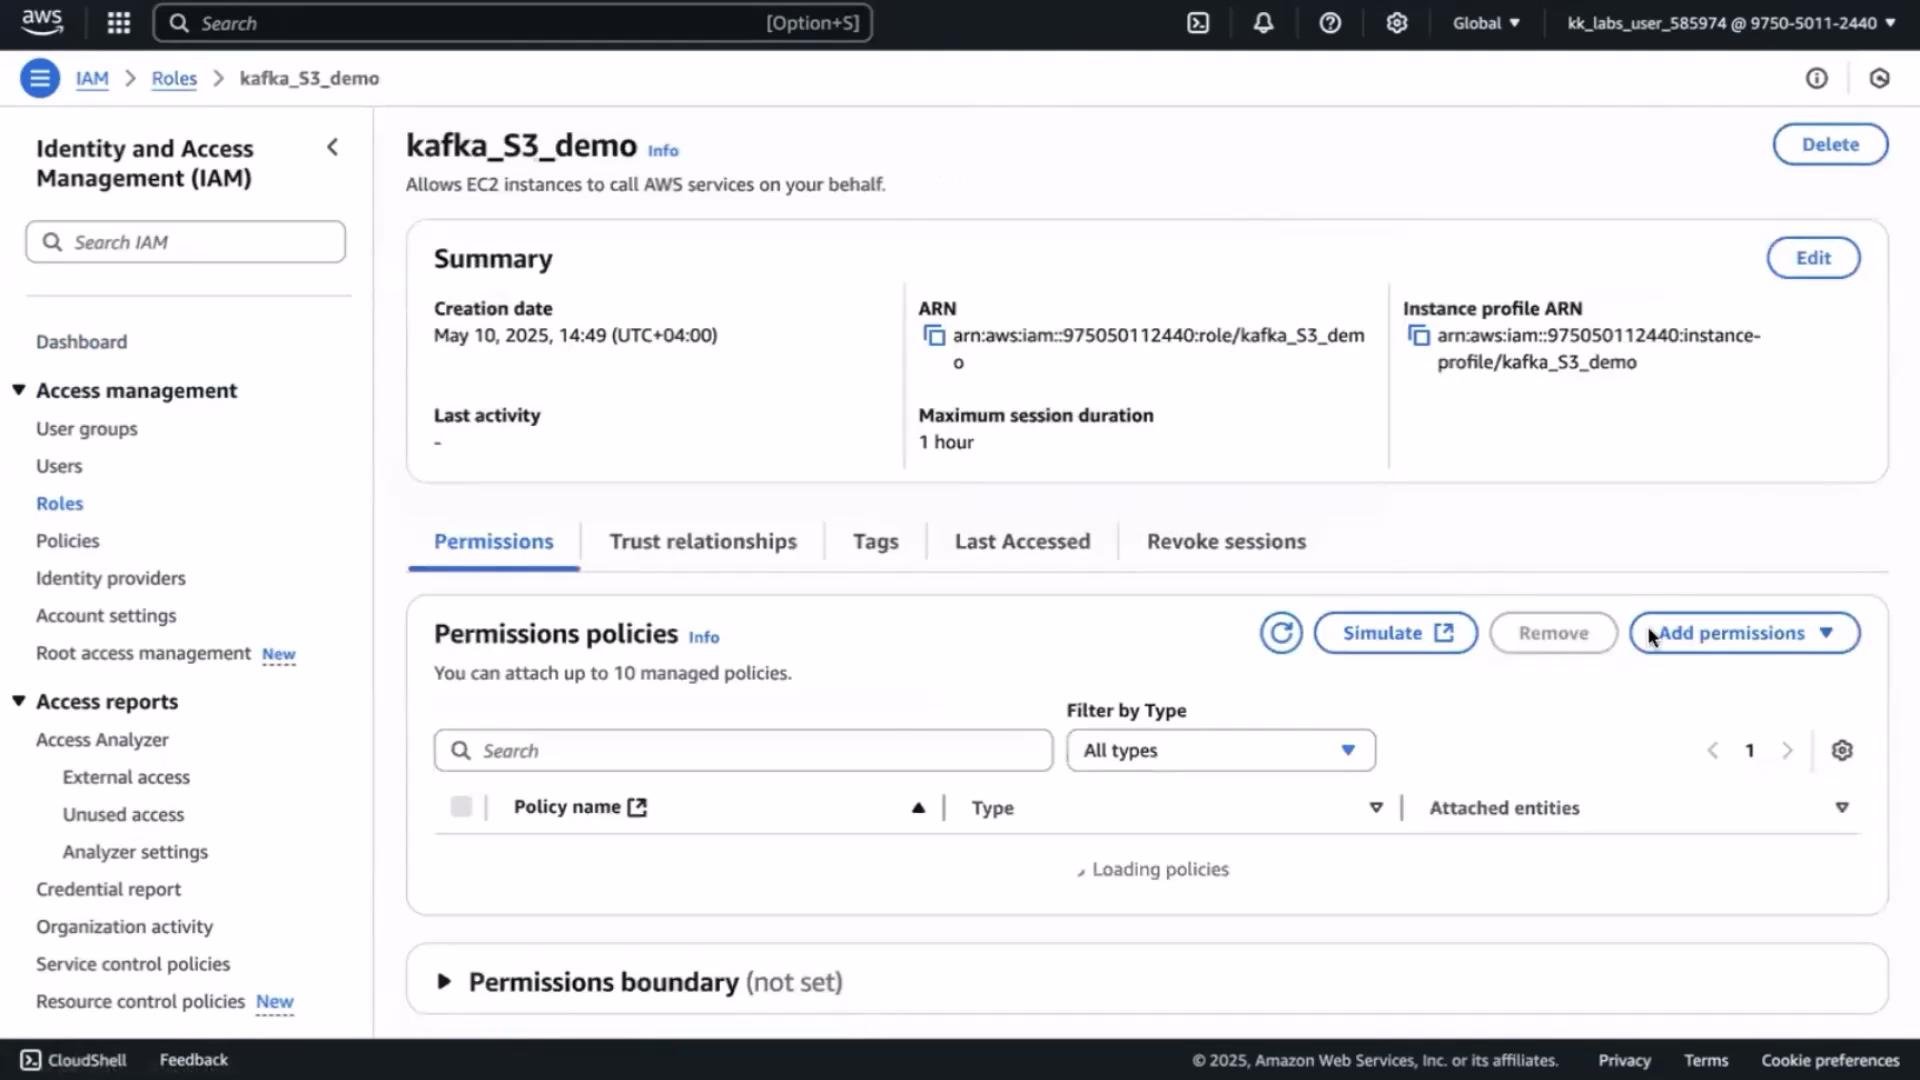
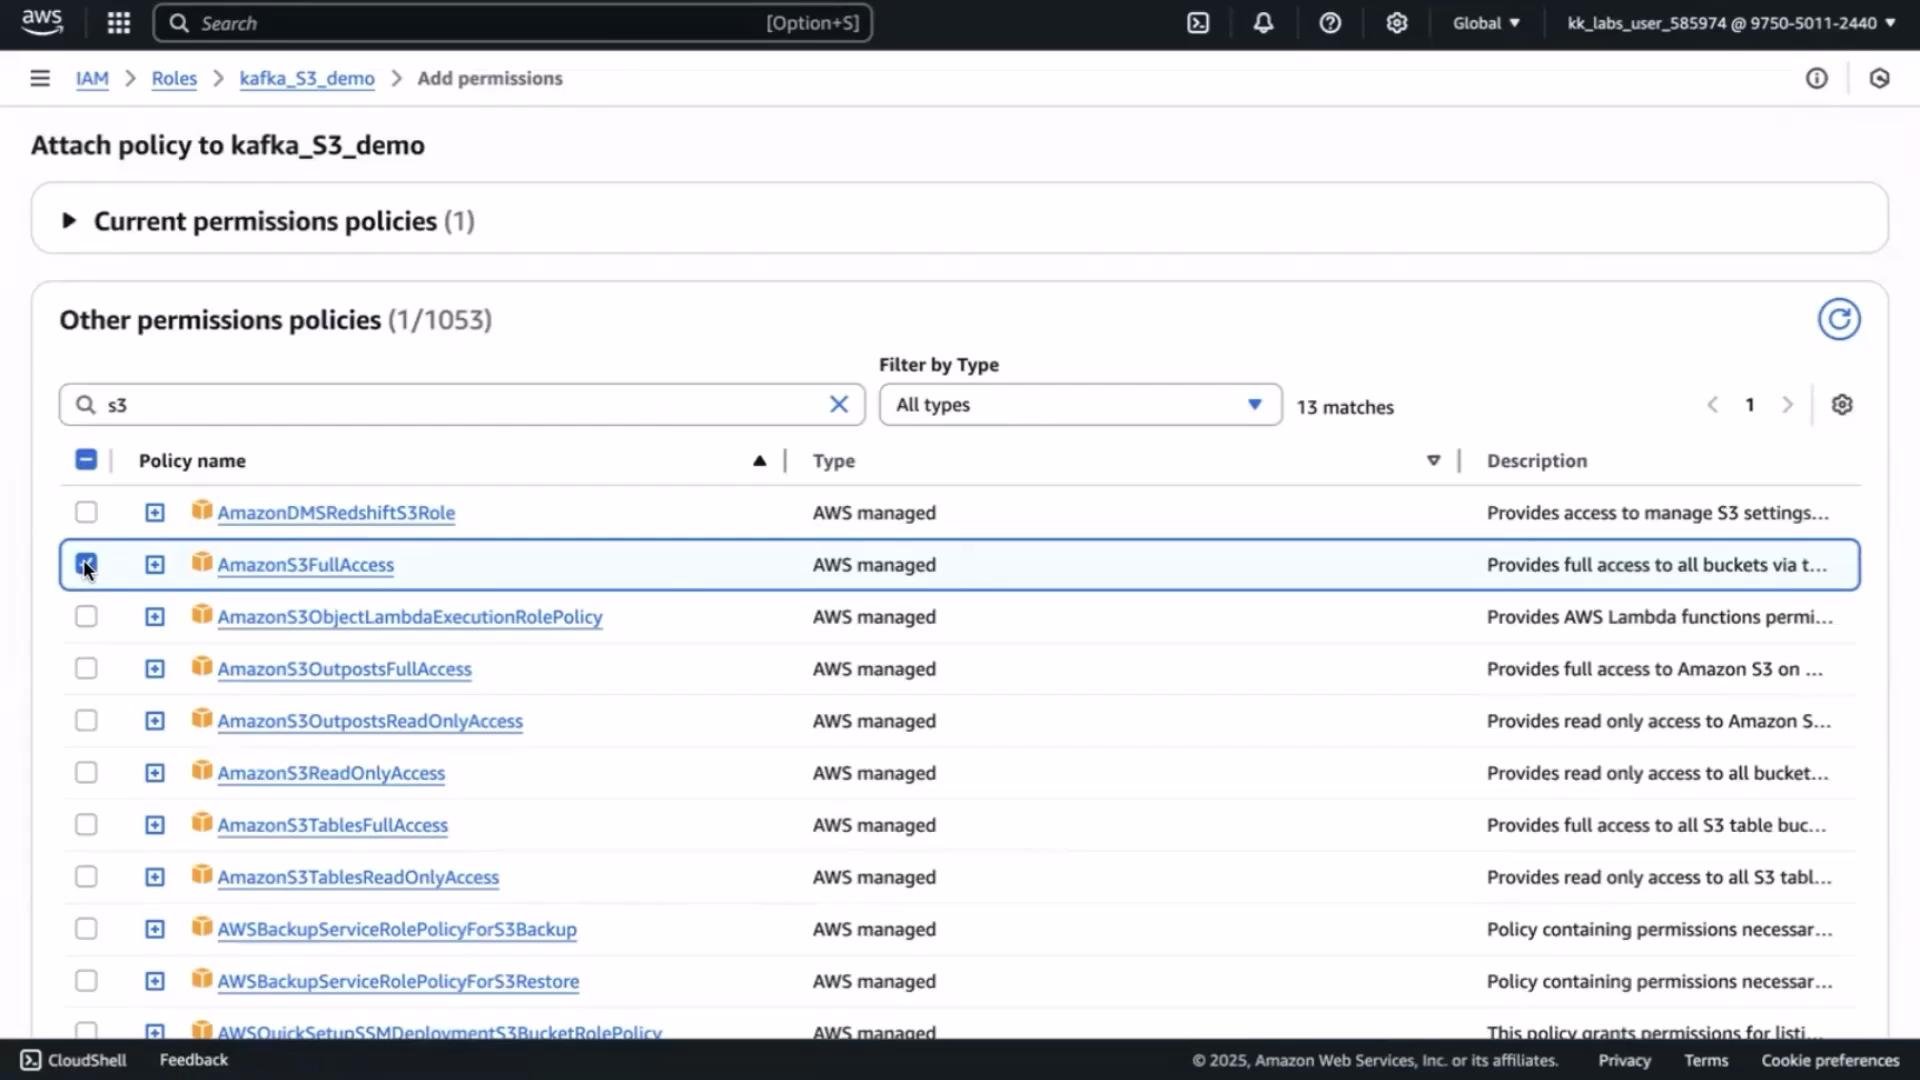
For production use, follow least-privilege principles. Grant only the S3 actions and bucket resources the connector requires (for example
s3:PutObject, s3:ListBucket on the specific bucket).aws s3 cp command. Successful download example:
- Configure the Kafka Connect worker (standalone)
bootstrap.servers value with your broker’s IP/hostname and set plugin.path to the directory where you unpacked the connector.
Example connect-standalone.properties:
connect-standalone.properties entries
- Create the S3 Sink connector configuration
s3-sink-connector.properties — replace s3.bucket.name, s3.region, and topics as appropriate:
topics: Kafka topic(s) to sink to S3.s3.bucket.name/s3.region: Target S3 bucket and region.flush.size: Number of records before writing to S3.format.class: Output format (JSON in this example).plugin.pathin the worker must include the connector JARs for Connect to load theio.confluent.connect.s3.S3SinkConnectorclass.
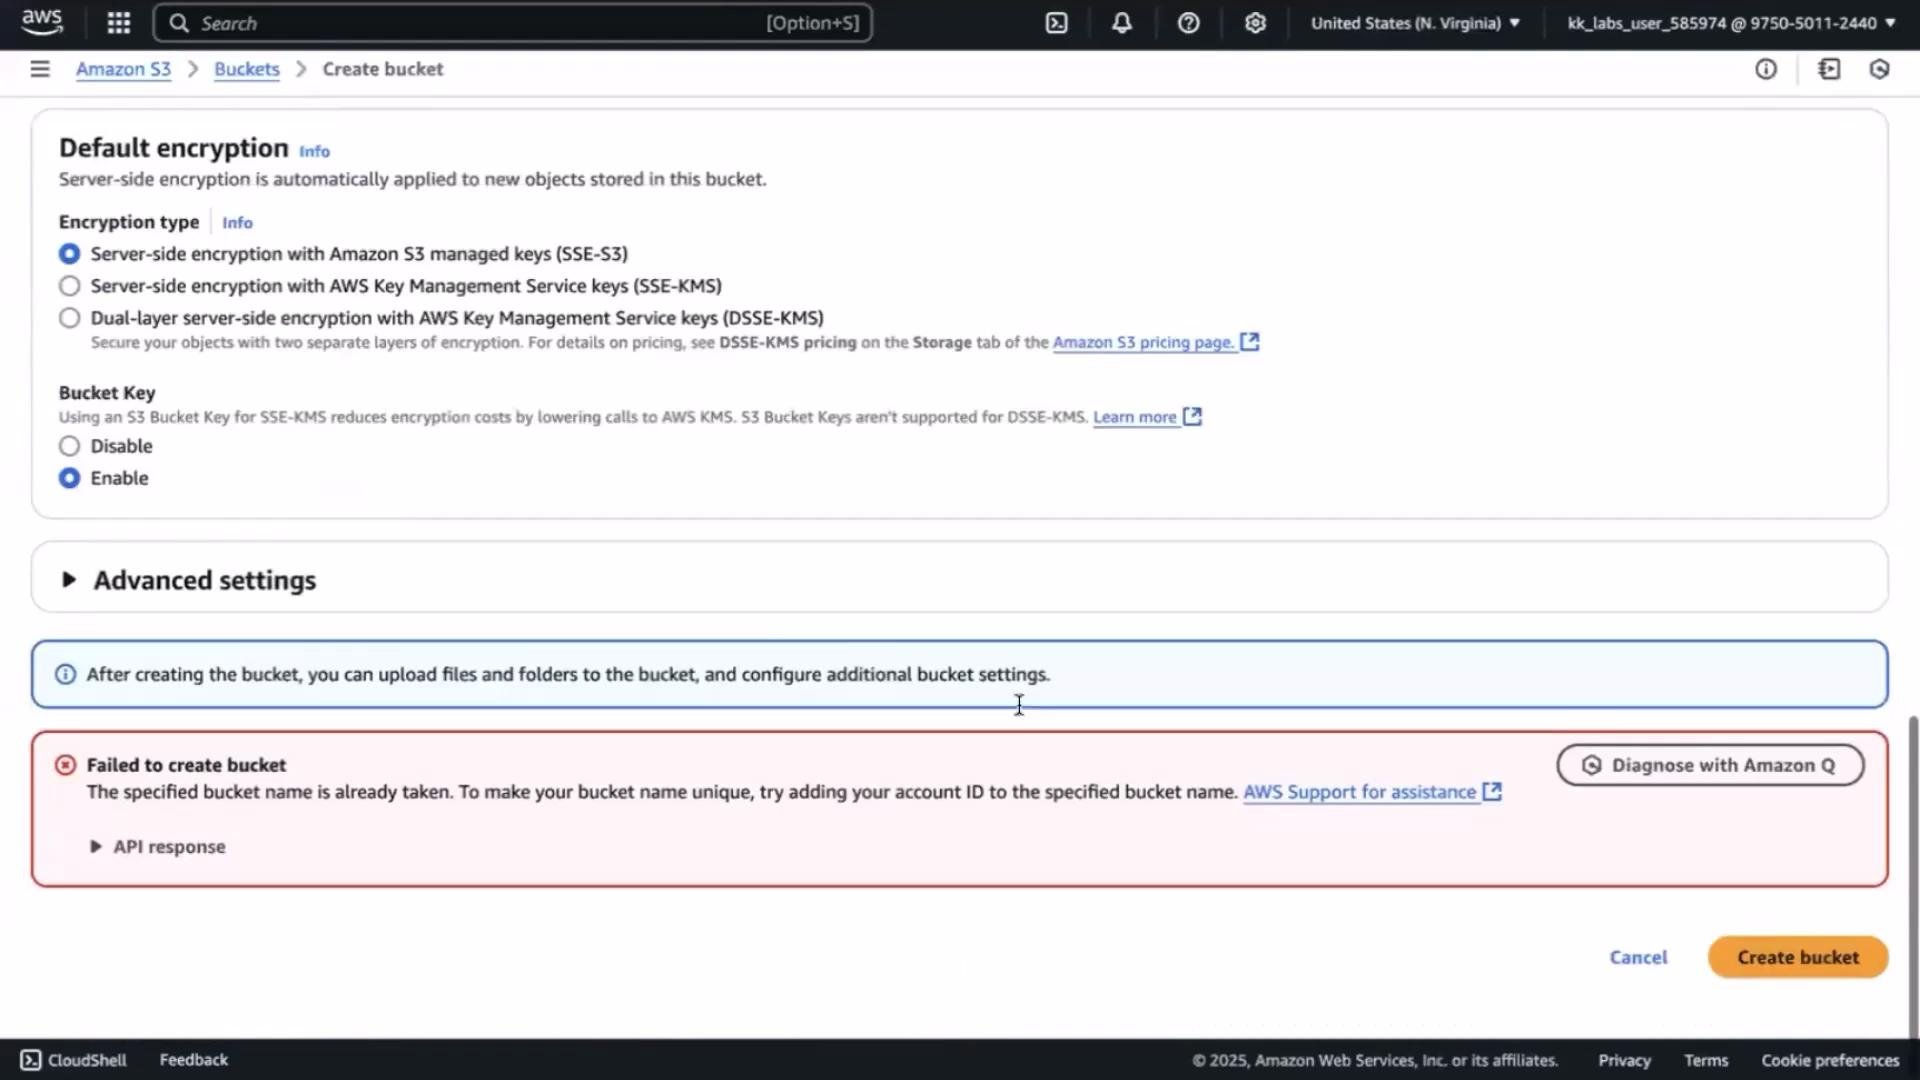
- Create the S3 bucket (if you haven’t already)
s3.region in the connector config.
- Start Kafka Connect (standalone)
Run the
connect-standalone.sh script from the Kafka root directory (the directory that contains bin/), or supply the full path. If you run it from the wrong folder you will see No such file or directory.- Topic existence: If the configured topic (for example
cartevent) does not exist, Kafka Connect will not create it for you. Topic creation is controlled by the broker settingauto.create.topics.enable. Create the topic ahead of time with your desired partitions and replication:kafka-topics.sh --create ... - plugin.path: Ensure
plugin.pathpoints to the directory containing the unpacked connector JARs. Each plugin typically lives in its own subdirectory underplugin.path; if Connect cannot find the S3 connector classes it will not load the plugin. - Permissions: Confirm the EC2 instance IAM role has S3 permissions for the bucket (PutObject, ListBucket).
- Converters: Keep worker and connector converters compatible. If you disable schemas (
schemas.enable=false) ensure your messages are formatted accordingly.
- Downloaded and unpacked the Confluent S3 Sink connector.
- Updated
connect-standalone.propertiesto reference the connector viaplugin.path. - Created a connector configuration describing topics, S3 bucket, converters, and formatting.
- Started Kafka Connect in standalone mode and verified plugin scanning and consumer assignment via logs.
- Produce events to the configured topic (
cartevent) and observe Kafka Connect writing files to the S3 bucket. - Monitor the S3 bucket for objects written by the connector and adjust
flush.size/rotate.schedule.interval.msto balance latency and file sizes.