

- Create an IAM role for the EC2 instance (to enable Session Manager).
- Launch an EC2 instance and attach the IAM role.
- Install Java and Apache Kafka.
- Configure Kafka to run in KRaft mode (no ZooKeeper).
- Open the Kafka broker port (9092) on the security group.
- Start Kafka and create a topic for the demo.
- Open the IAM console → Roles → Create role.
- Choose EC2 as the trusted entity and continue.
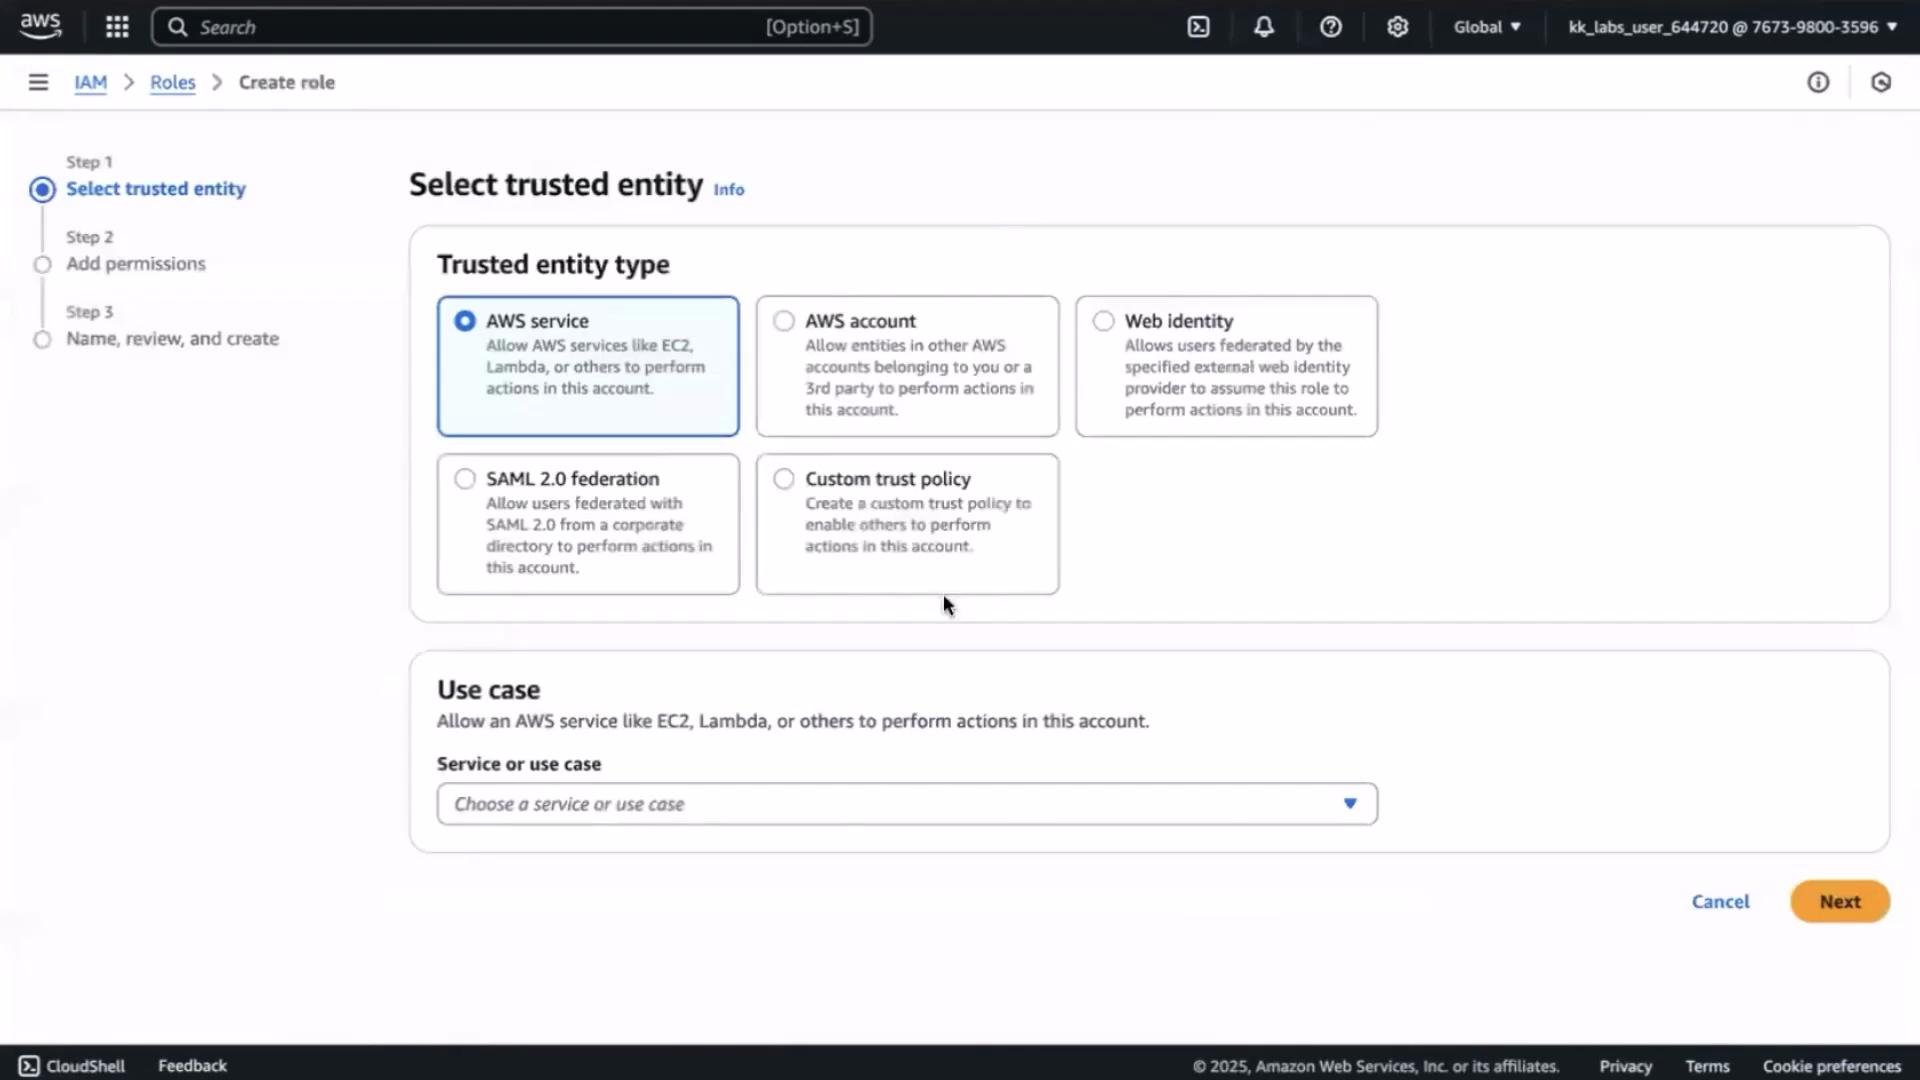
AmazonSSMManagedInstanceCore). Give the role a descriptive name such as Kafka-demo and create it.
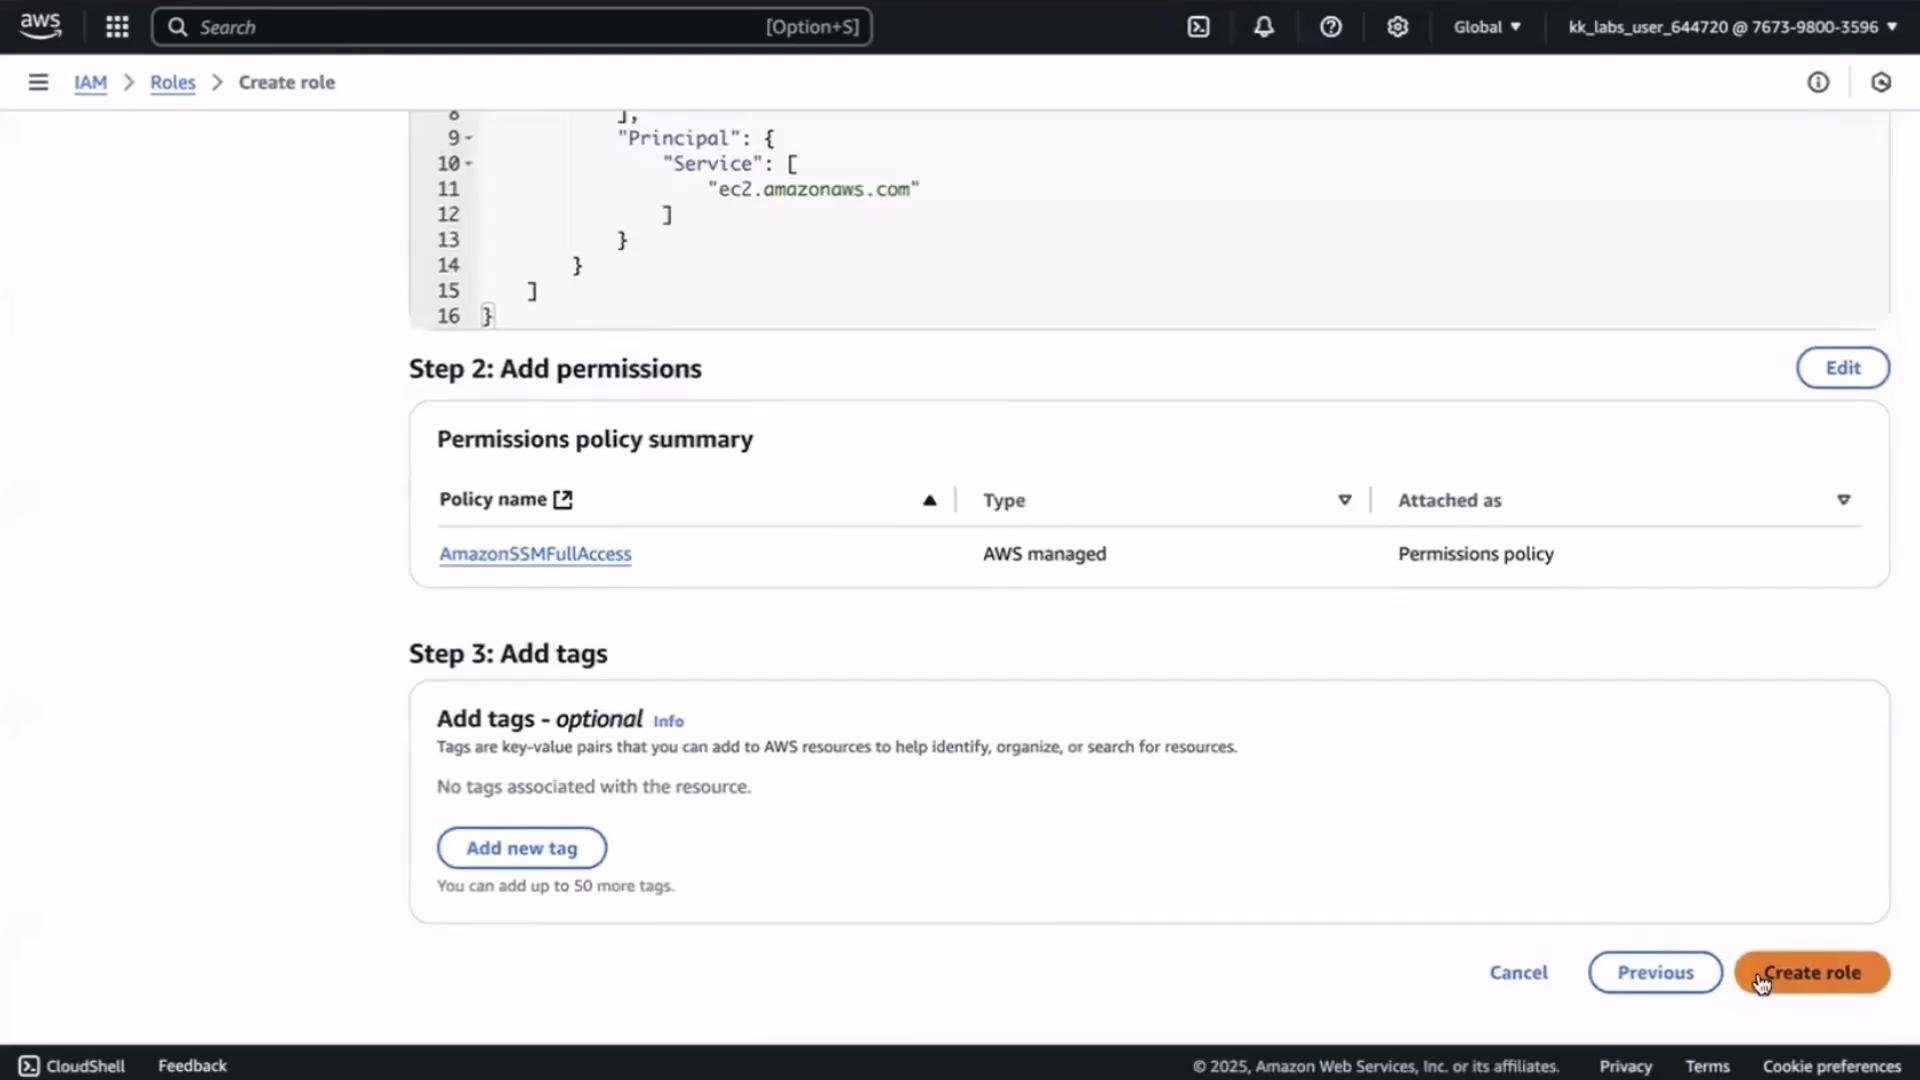
Session Manager lets you open a browser-based shell to your EC2 instance without SSH keys or open SSH ports. Attaching an IAM role with SSM permissions is the recommended approach for secure, keyless access.
- EC2 console → Launch Instance.
- Name the instance (e.g.,
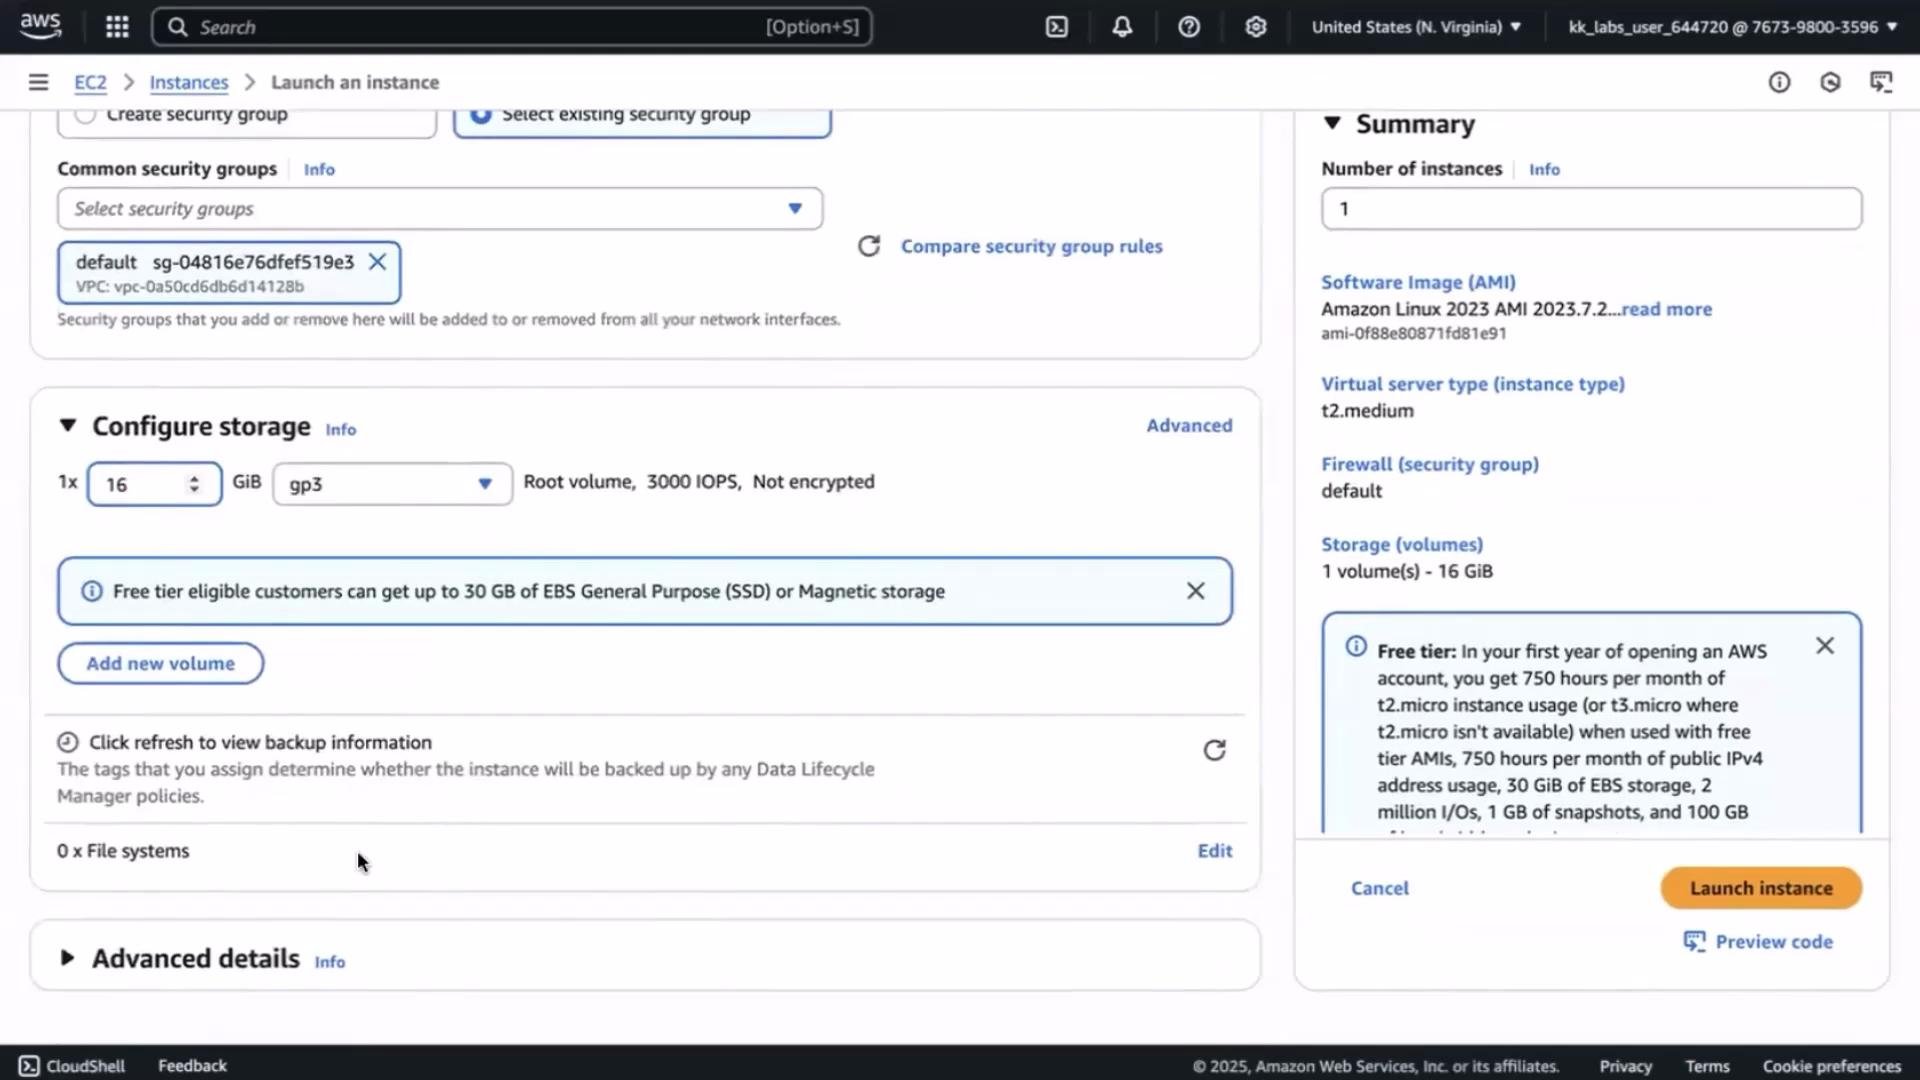
kafka-demo-broker). - Instance type:
t2.medium. - If you plan to use Session Manager you may skip creating an SSH key pair.
- Use the default security group for now (we’ll update it to allow Kafka traffic).
- Increase the root volume from 8 GB to 16 GB.
- Under Advanced Details → IAM instance profile, select the
Kafka-demorole you created.
- Select the instance → Connect → Session Manager → Connect.
- A browser shell opens and you can run commands directly as the EC2 user.
- Download and extract Kafka (example uses Kafka 3.0.0 for Scala 2.13):
- Check if Java is installed:
- Install OpenJDK 1.8 if needed:
- Verify the Java installation:
- Generate a cluster ID and format storage for KRaft.
- Update
config/kraft/server.propertieswith KRaft-specific settings. - Start the Kafka server.
config/kraft/server.properties (for example, with vim) and update the following key settings:
process.roles=broker,controllernode.id=1controller.quorum.voters=1@localhost:9093listenersshould bind to0.0.0.0so Kafka accepts remote connectionsadvertised.listenersshould use the EC2 public IP so external clients can connectcontroller.listener.name=CONTROLLERandinter.broker.listener.name=PLAINTEXT
config/kraft/server.properties:
0.0.0.0 ensures the broker accepts connections from external network interfaces. If listeners bind only to loopback, external clients will be unable to connect.
Open the Kafka port (security group)
Edit the instance security group inbound rules and add a custom TCP rule for port 9092. For quick testing you may allow 0.0.0.0/0, but be cautious — restrict access in production to specific IP ranges, VPCs, or CIDR blocks.
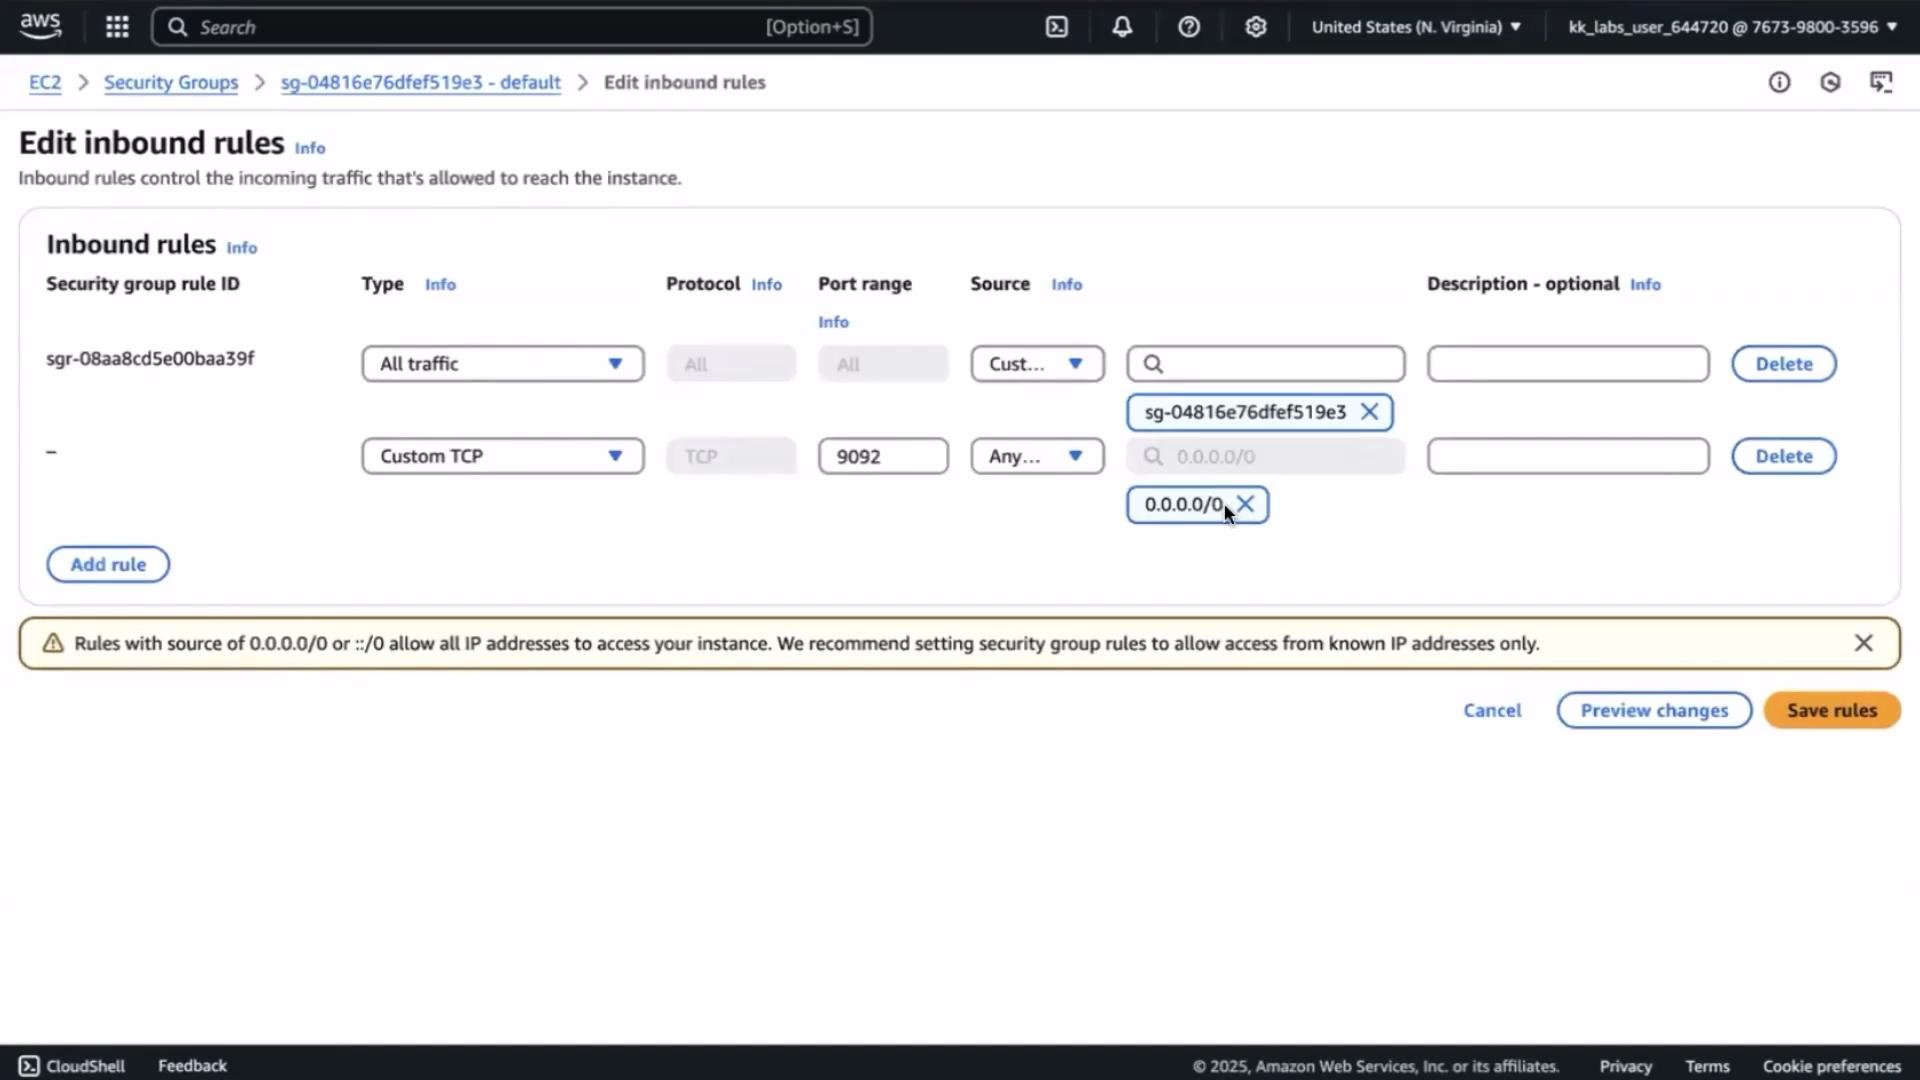
Do not leave port 9092 open to the entire internet in production. Restrict access to trusted IP ranges, your VPC, or known CIDR blocks.
cartevent:
Useful links and references
Recap
- You launched an EC2 instance with an IAM role that enables Session Manager access.
- Installed Java and Kafka, formatted KRaft storage, and configured
server.propertiesfor KRaft mode. - Opened port 9092 and started the Kafka broker.
- Created the
carteventtopic ready for producers and consumers.
cartevent topic. See you in the next lesson.