

- Left: an OpenShift cluster (the web console).
- Right: a local GitLab repository with the application source.
- A Flask application file (
.py) that serves a simple web page. - A
requirements.txtfile listing dependencies (e.g.,Flask).
Step-by-step: Deploy the Flask app
- Log in to the OpenShift web console as a developer.
- Create a new project: click Create Project and provide a descriptive name.
- Open the new project from the project list to view its Project Console.
- Click Browse Catalog to see builders and templates available in the cluster.
- Choose the Python builder image because the app uses Python/Flask.
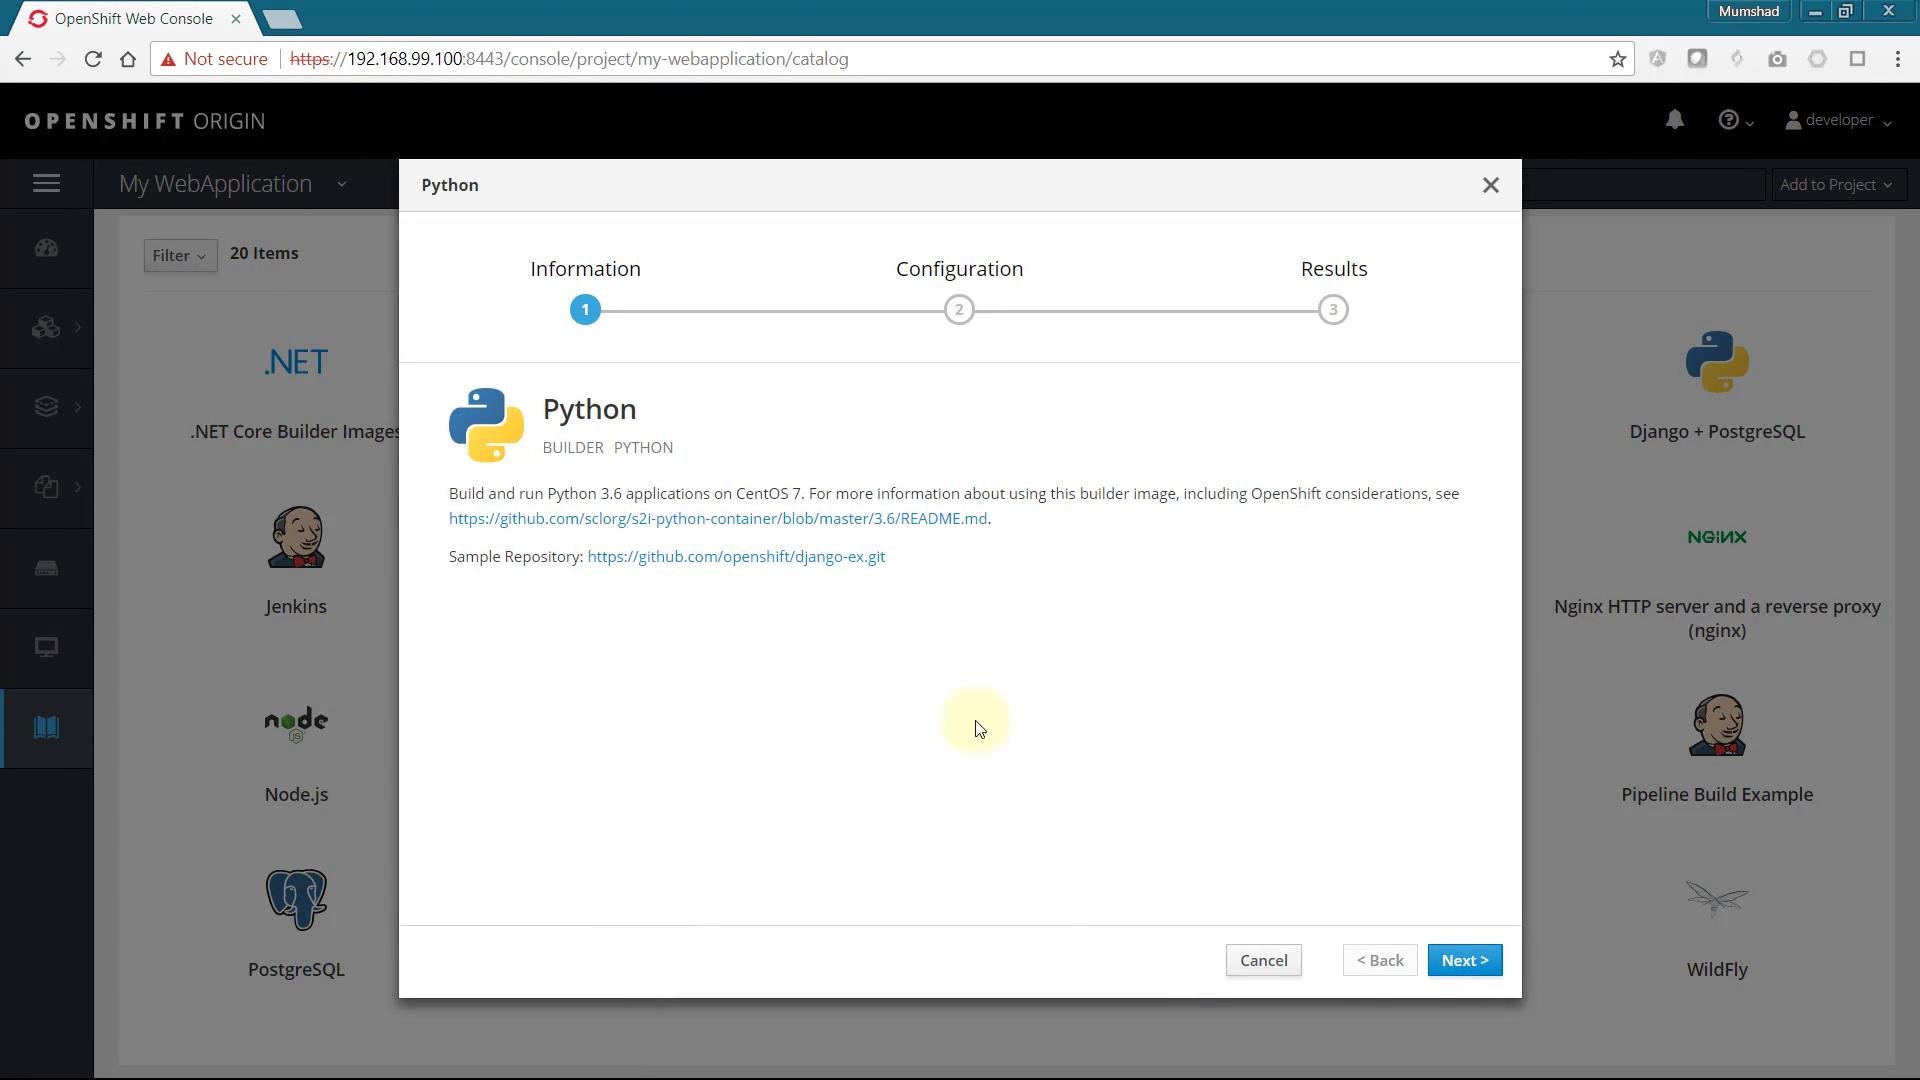
-
In the creation wizard, provide:
- An application name (for example
simple-webapp) - The Git repository URL (copy the URL from your GitLab repository)
- Any environment variables or build options you need
- An application name (for example
- Click Next (or Create) to start the build. OpenShift will create a BuildConfig and kick off a source-to-image build from your Git repository.
OpenShift creates a
BuildConfig automatically when you deploy from a Git repository. The S2I (source-to-image) process clones your repo, installs dependencies from requirements.txt, builds the image, and pushes it into the cluster registry.Monitor the build and image push
After the build starts, the Overview and Builds pages show build progress. To inspect build output, go to the Builds section and open the build log (View Log). The log typically shows:- Git clone of your repository
- Installation of Python dependencies from
requirements.txt - S2I layers assembling the application image
- The image push to the internal registry
What OpenShift creates for you
When the image push finishes, OpenShift typically creates these runtime artifacts:Verify the deployment and open the app
On the Overview page you can view:- The Build and BuildConfig
- The DeploymentConfig and Replica status
- Networking information (exposed port such as
8080, and the Route)
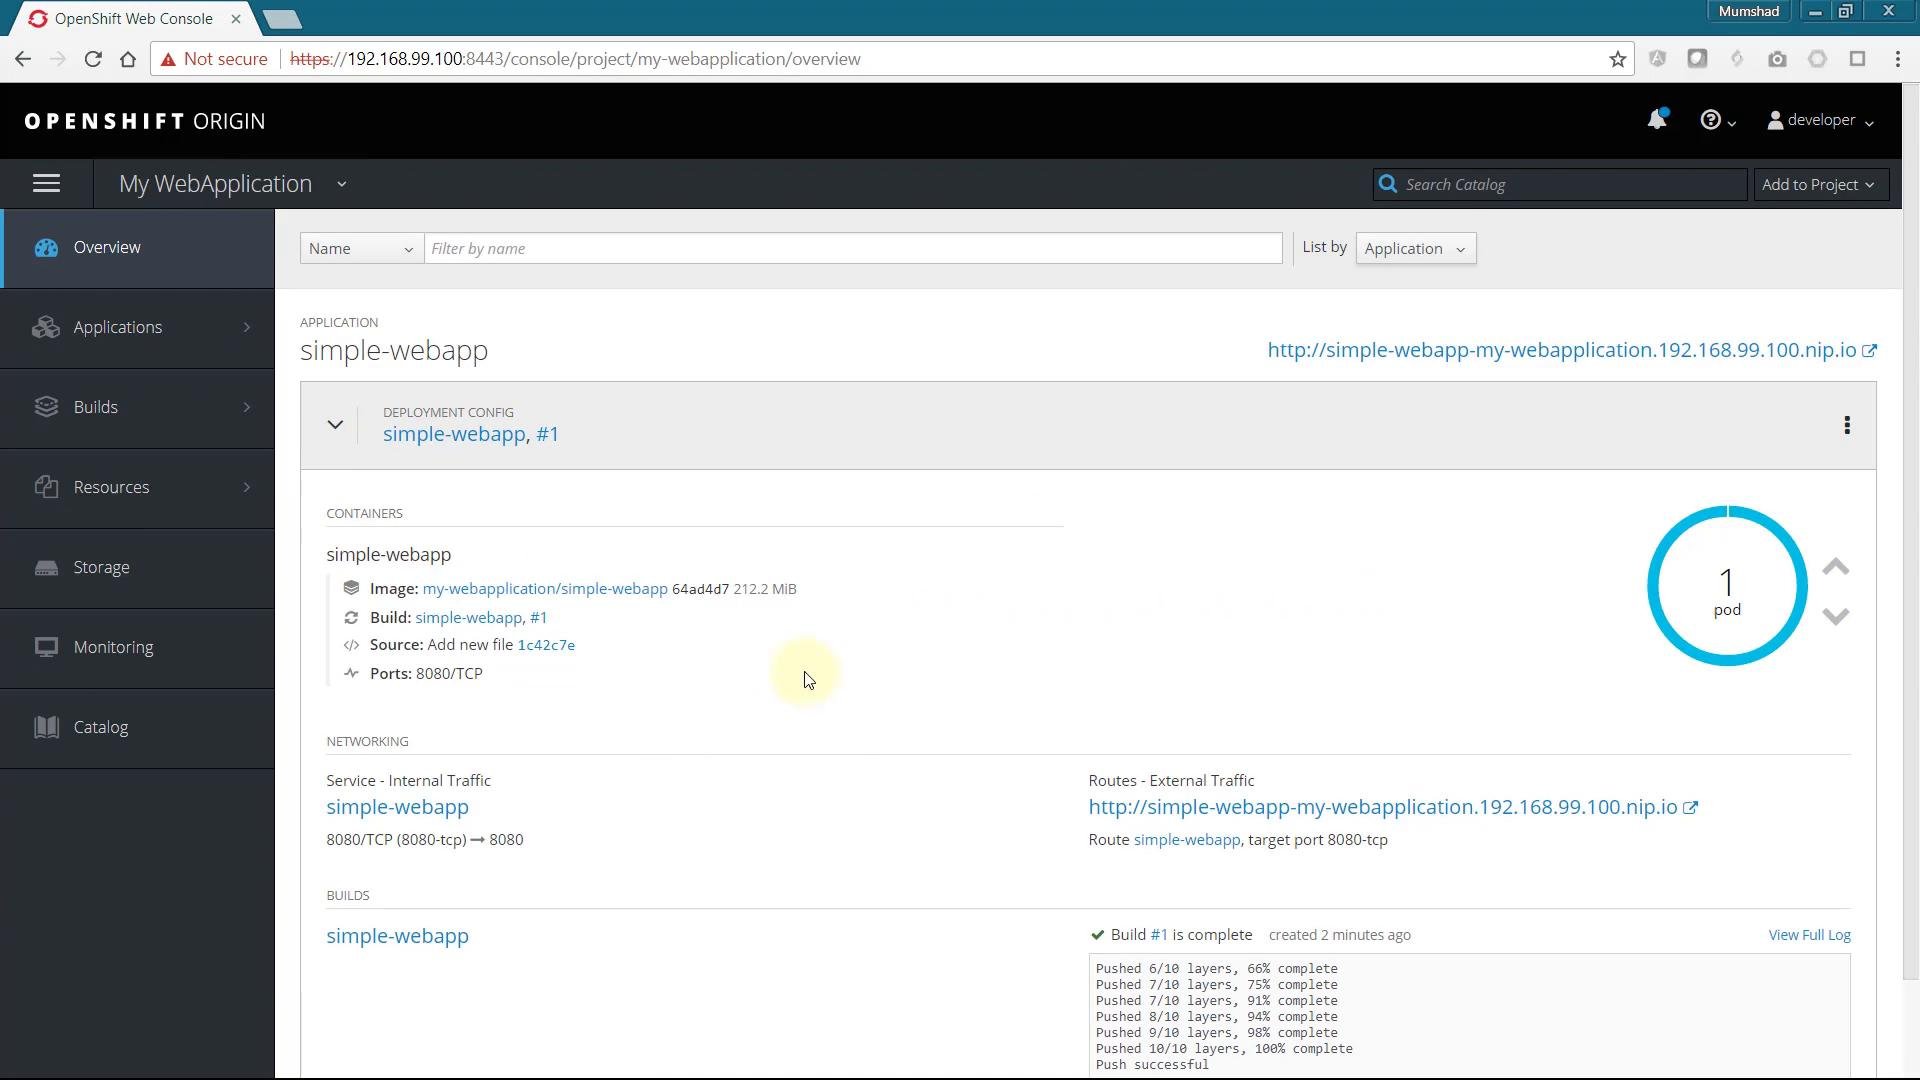
Next steps and further reading
This demo demonstrates a basic single-container deployment using OpenShift S2I. Typical follow-ups include:- Deploying multi-tier applications (front-end, API, database)
- Composing microservices and adding health checks, probes, and readiness checks
- Automating builds and deployments with CI/CD (e.g., GitLab CI)
- Securing routes and configuring TLS termination