

1) Create a Service YAML template
Get a Service template from the OpenShift web console (use the “Learn More” link or the Import YAML/JSON option), then:- Create a file named
service-config.yaml. - Paste the template contents into it.
- Update:
metadata.nameto a meaningful name for your app.spec.selectorto match the labels used by your Deployment/DeploymentConfig. This selector decides which pods receive traffic from the Service.
clusterIP in the YAML — OpenShift assigns it automatically unless you have a specific requirement.
Service field quick reference
Here is a minimal Service definition for an app listening on port 8080:
- In the OpenShift web console, use Import YAML/JSON, paste the YAML above, and click Create.
- After creation, OpenShift assigns a Cluster IP that is internal to the cluster.
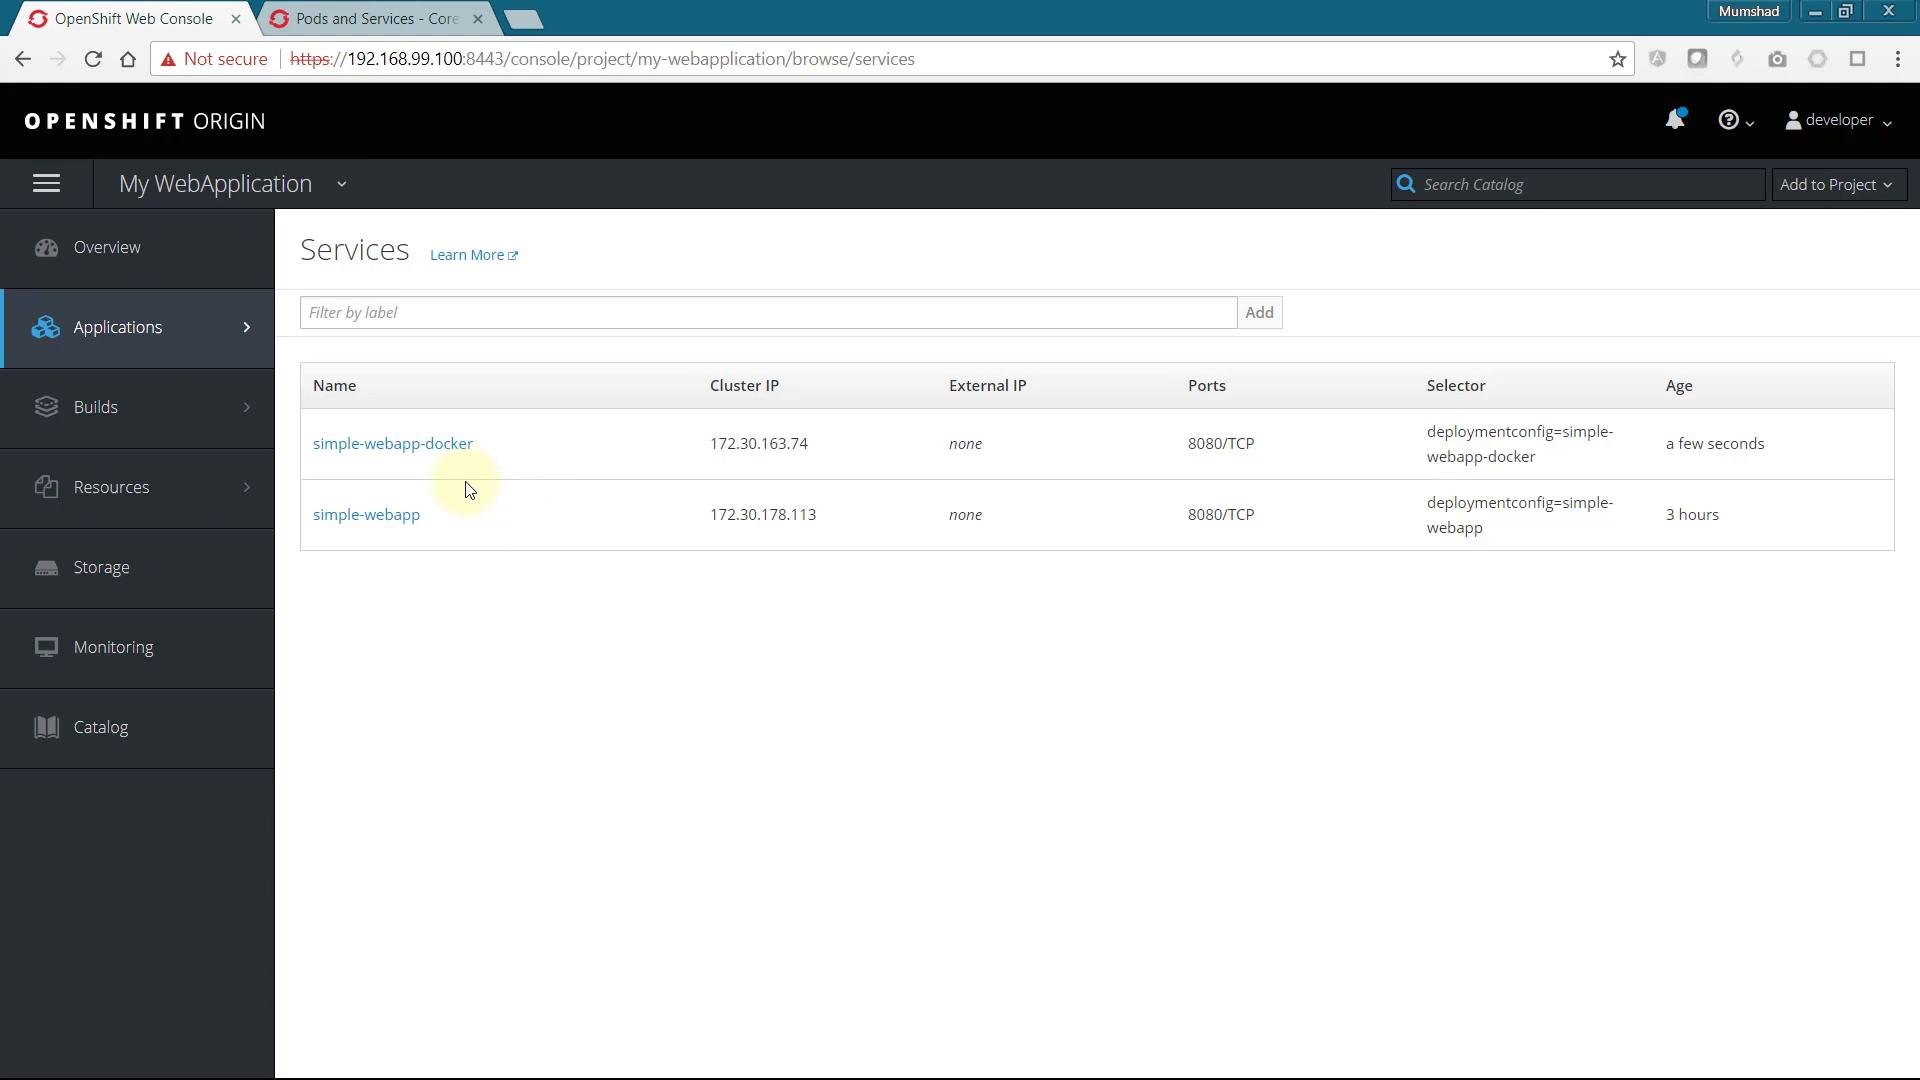
Cluster IPs are internal to the cluster. To make your application accessible externally, you must create a Route (or use a LoadBalancer/NodePort depending on your environment).
2) Test the Service from inside the cluster/network
If you have access to the OpenShift host or the Minishift/OKD VM, you can curl the Service’s cluster IP and port to verify the application responds: Example (from the Minishift VM shell):3) Create a Route (external access)
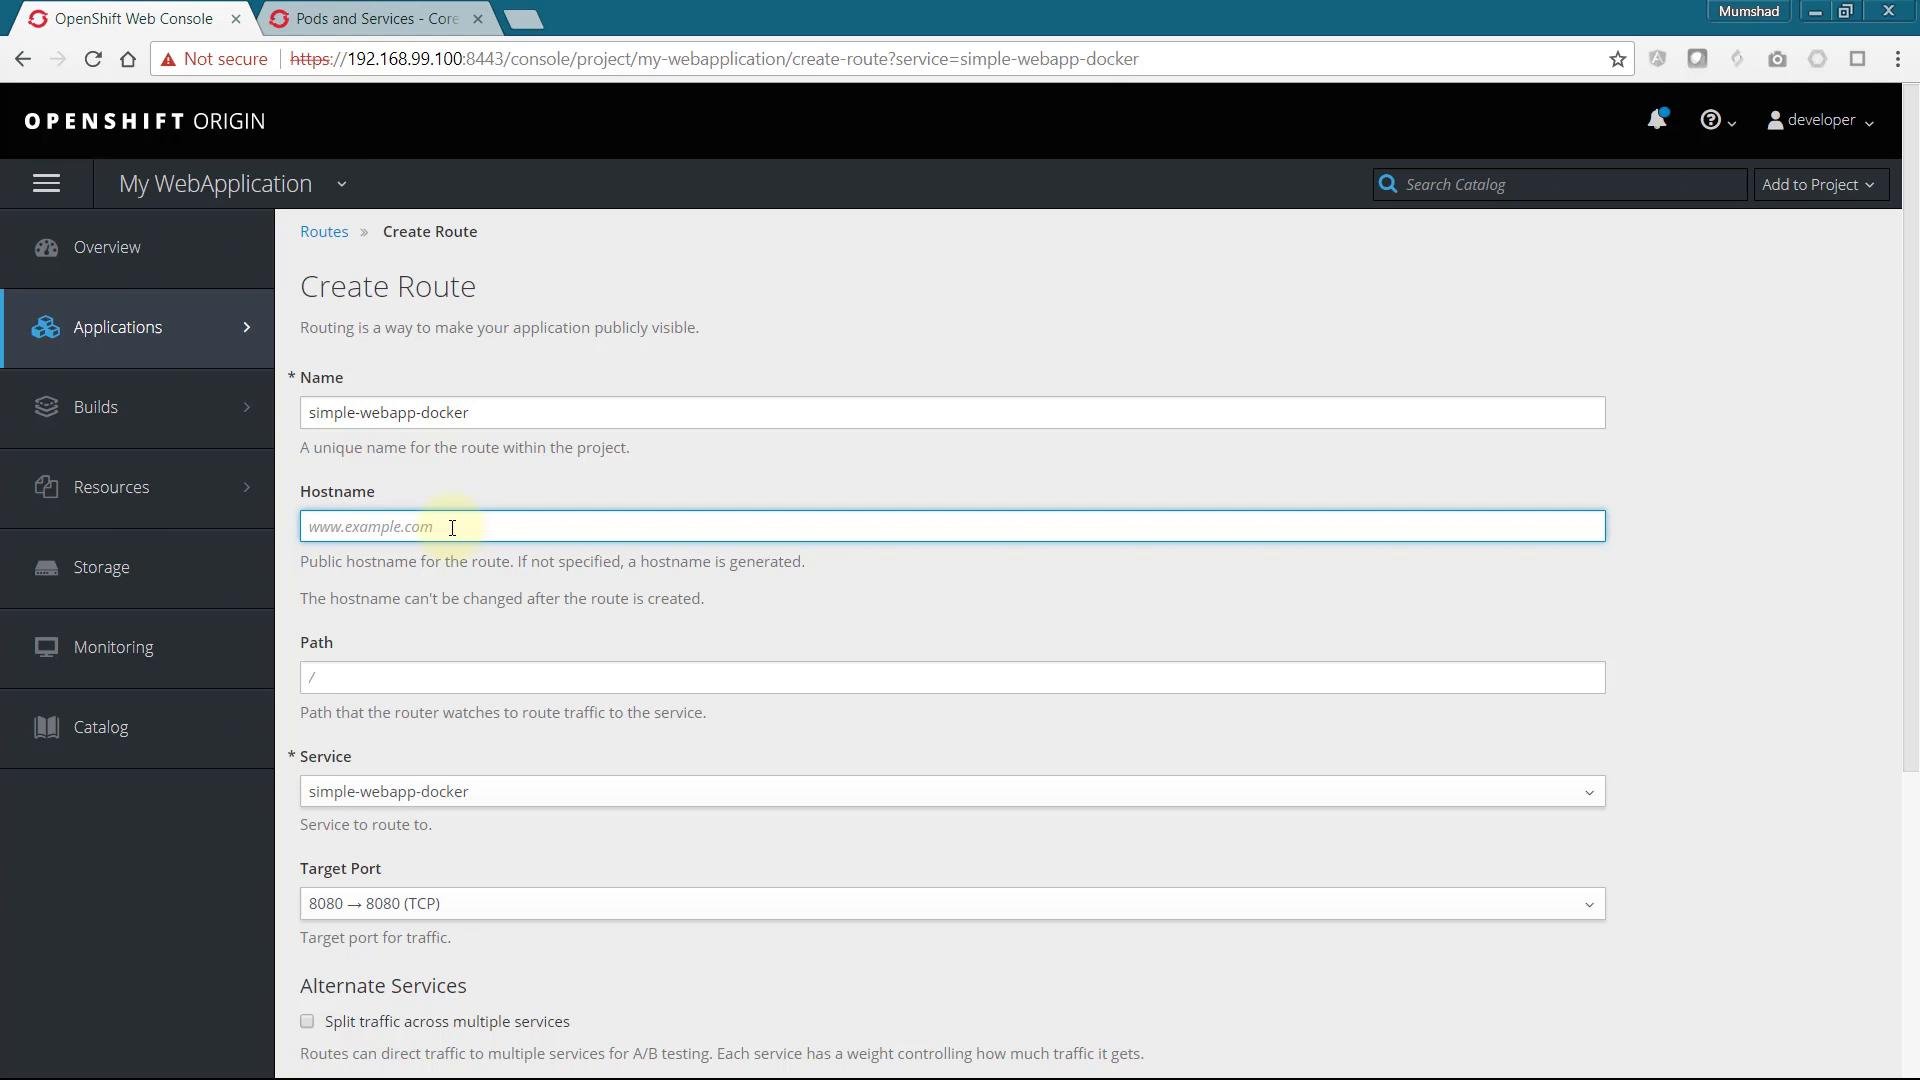
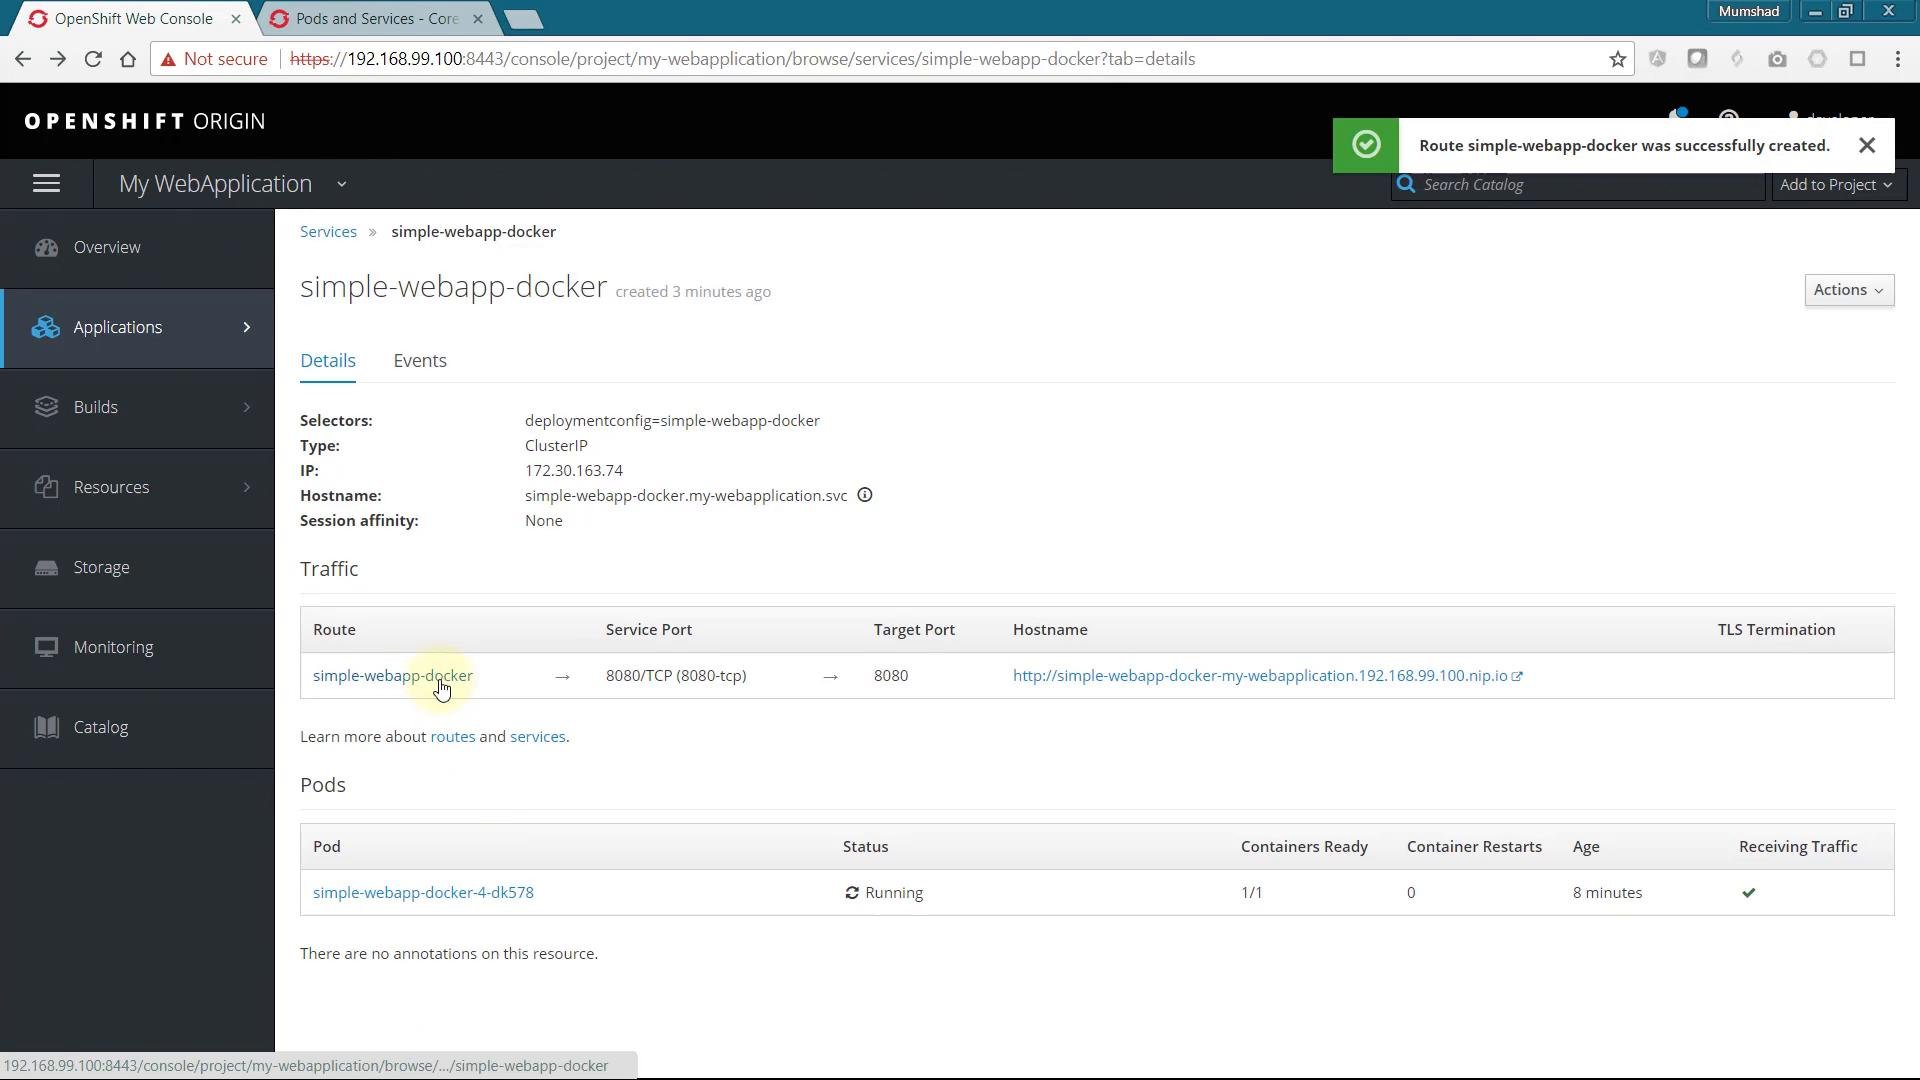
To expose the Service to external users, create an OpenShift Route which maps a hostname to the Service. Options:- Create a Route via YAML (similar to the Service), or
- Use the web console: Applications → Routes → Create Route (or use the Create Route form accessed from the Service details).
- Name: give the route a descriptive name.
- Hostname: leave blank to let OpenShift generate one (recommended for quick testing). Or set a custom hostname if you control DNS.
- Service: choose the Service (e.g.,
simple-webapp-docker). - Target Port: select the Service port (e.g.,
8080).
Using a custom hostname requires external DNS to point to your cluster’s router IP or load balancer. Without proper DNS, the hostname will not resolve to the OpenShift router and traffic won’t reach your app.
4) End-to-end flow after a code change (CI/CD)
When you update your application source (for example, changing the displayed text from “Update 4” to “Update 5”):- Your CI/CD pipeline or OpenShift build picks up the changes and produces a new image.
- OpenShift deploys the new image, creating updated pods.
- The existing Service and Route continue to route traffic to the new pods.
- Refreshing the browser at the Route URL will display the updated application.
Useful links and references
- OpenShift Routes and Services: https://docs.openshift.com
- Kubernetes Services (concepts): https://kubernetes.io/docs/concepts/services-networking/service/
- OpenShift routing documentation: https://docs.openshift.com/container-platform/latest/architecture/networking/routes.html