1) Add a Trigger Node
Open the workflow editor and add a trigger node. Trigger nodes start a workflow when an event occurs. Click the plus button in the top-right to view available triggers. For this lesson choose the When Chat Message Received trigger (it starts the workflow whenever a chat message arrives). The simplest alternative is the Manual Trigger, which runs only when you click it.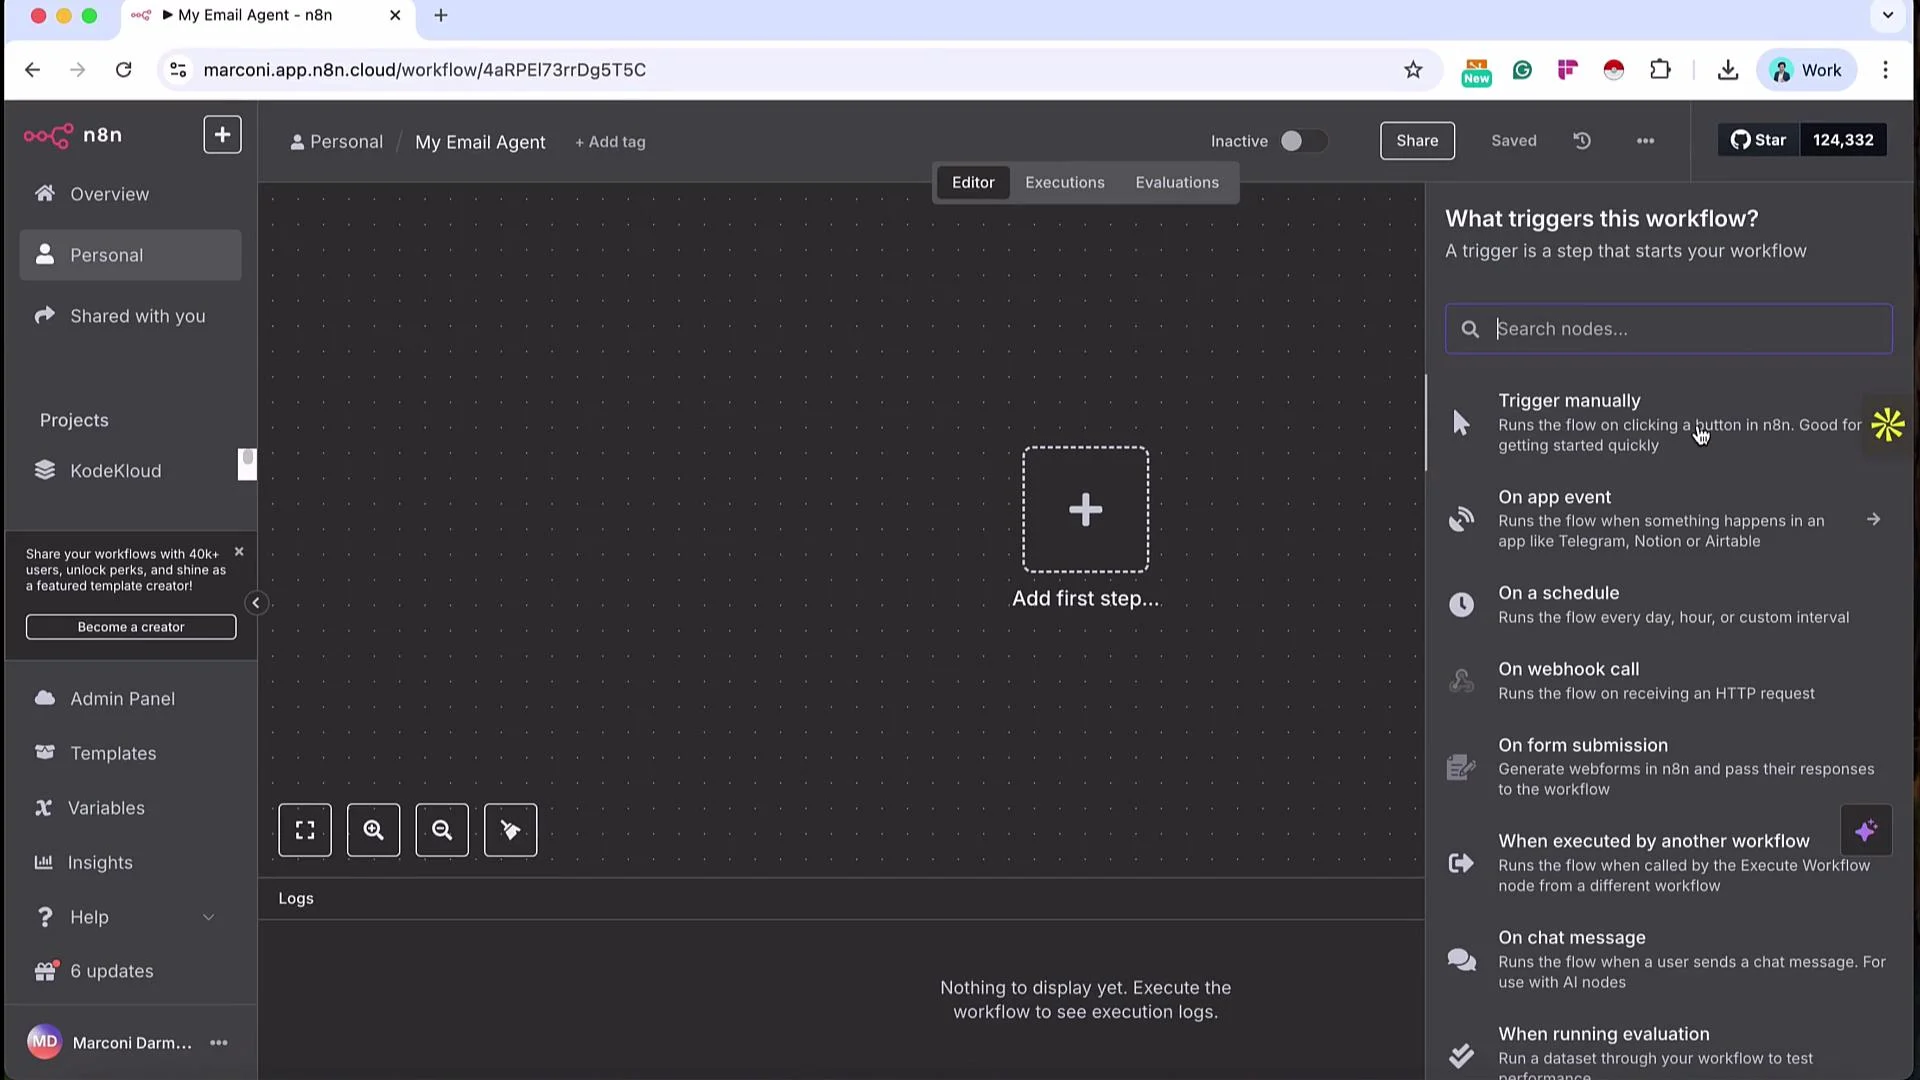
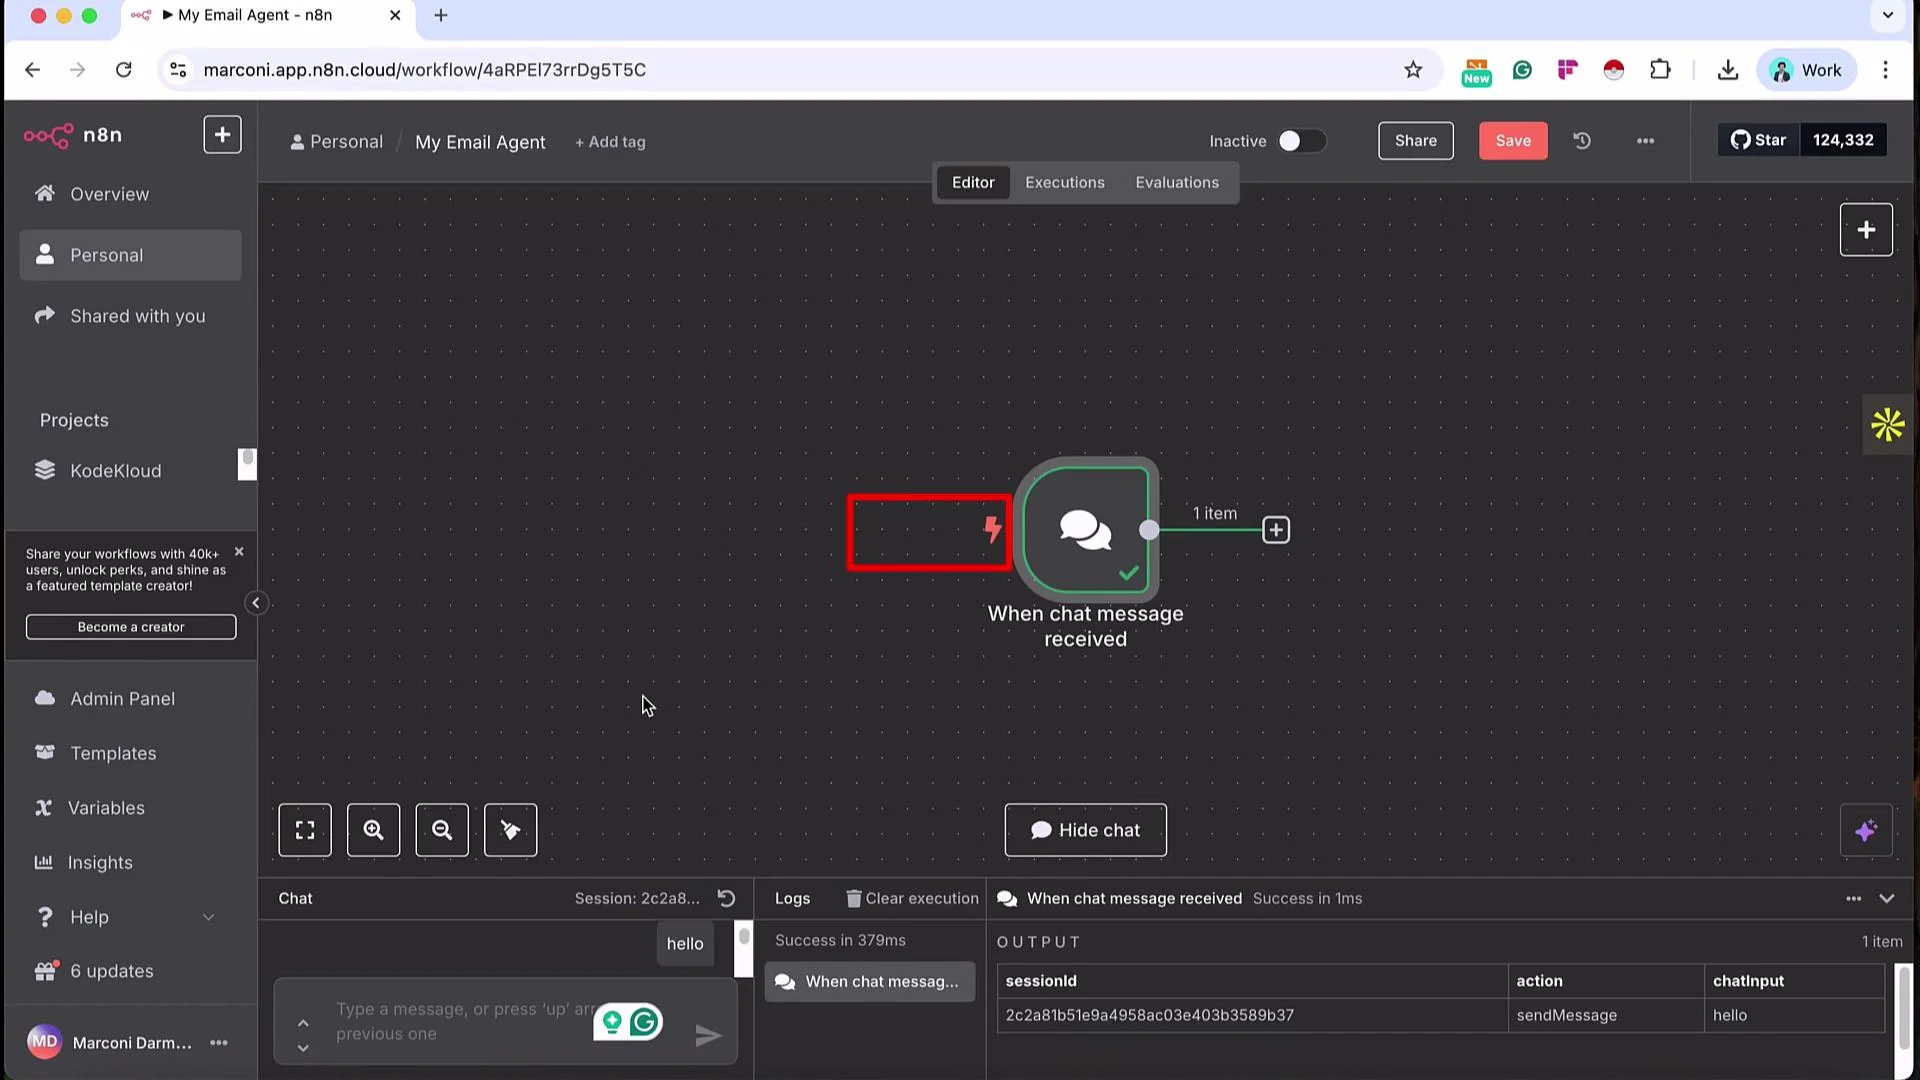
2) Inspect Trigger Output
Open the When Chat Message Received node to see its outputs — trigger nodes only have outputs (no inputs). n8n presents node data in three views: OUTPUT (readable), JSON, and Schema (typed fields useful for drag-and-drop). Example OUTPUT view:chatInput) directly into downstream node parameters.
3) Add the AI Agent Node
Add an AI Agent node (AI → AI Agent). When you connect nodes, the previous node’s output becomes the next node’s input automatically. For example, the chat trigger’s output will populate the AI Agent’s input. Small output snippet showingsessionId:
- LLM (Large Language Model) — choose which model processes user inputs.
- Memory — persistent context about prior conversation turns.
- Tools — external integrations the agent can call (e.g., Gmail).
LLM (Connect to OpenAI)
- From the LLM dropdown select an OpenAI Chat Model.
- Click Create New Credential and supply your OpenAI API key from the OpenAI Developer Platform: https://platform.openai.com/.
- Pick a model appropriate for your use case (for example,
gpt-4o-minior another OpenAI chat model).
Memory (Keep Conversation Context)
Use Simple Memory if you want the agent to remember prior interactions within a session.- Add a Simple Memory node and ensure it’s keyed to the session (so memory is stored per
sessionId). - Set the context window length (for example,
5) to retain the last N interactions. - Use an expression for the session key, for example:
{{ $json.sessionId }}.

-
Without memory:
- User: “Hello, my name is Mark.”
- User (next): “What is my name?”
- Agent reply (no memory): apologizes for not having access to personal info.
-
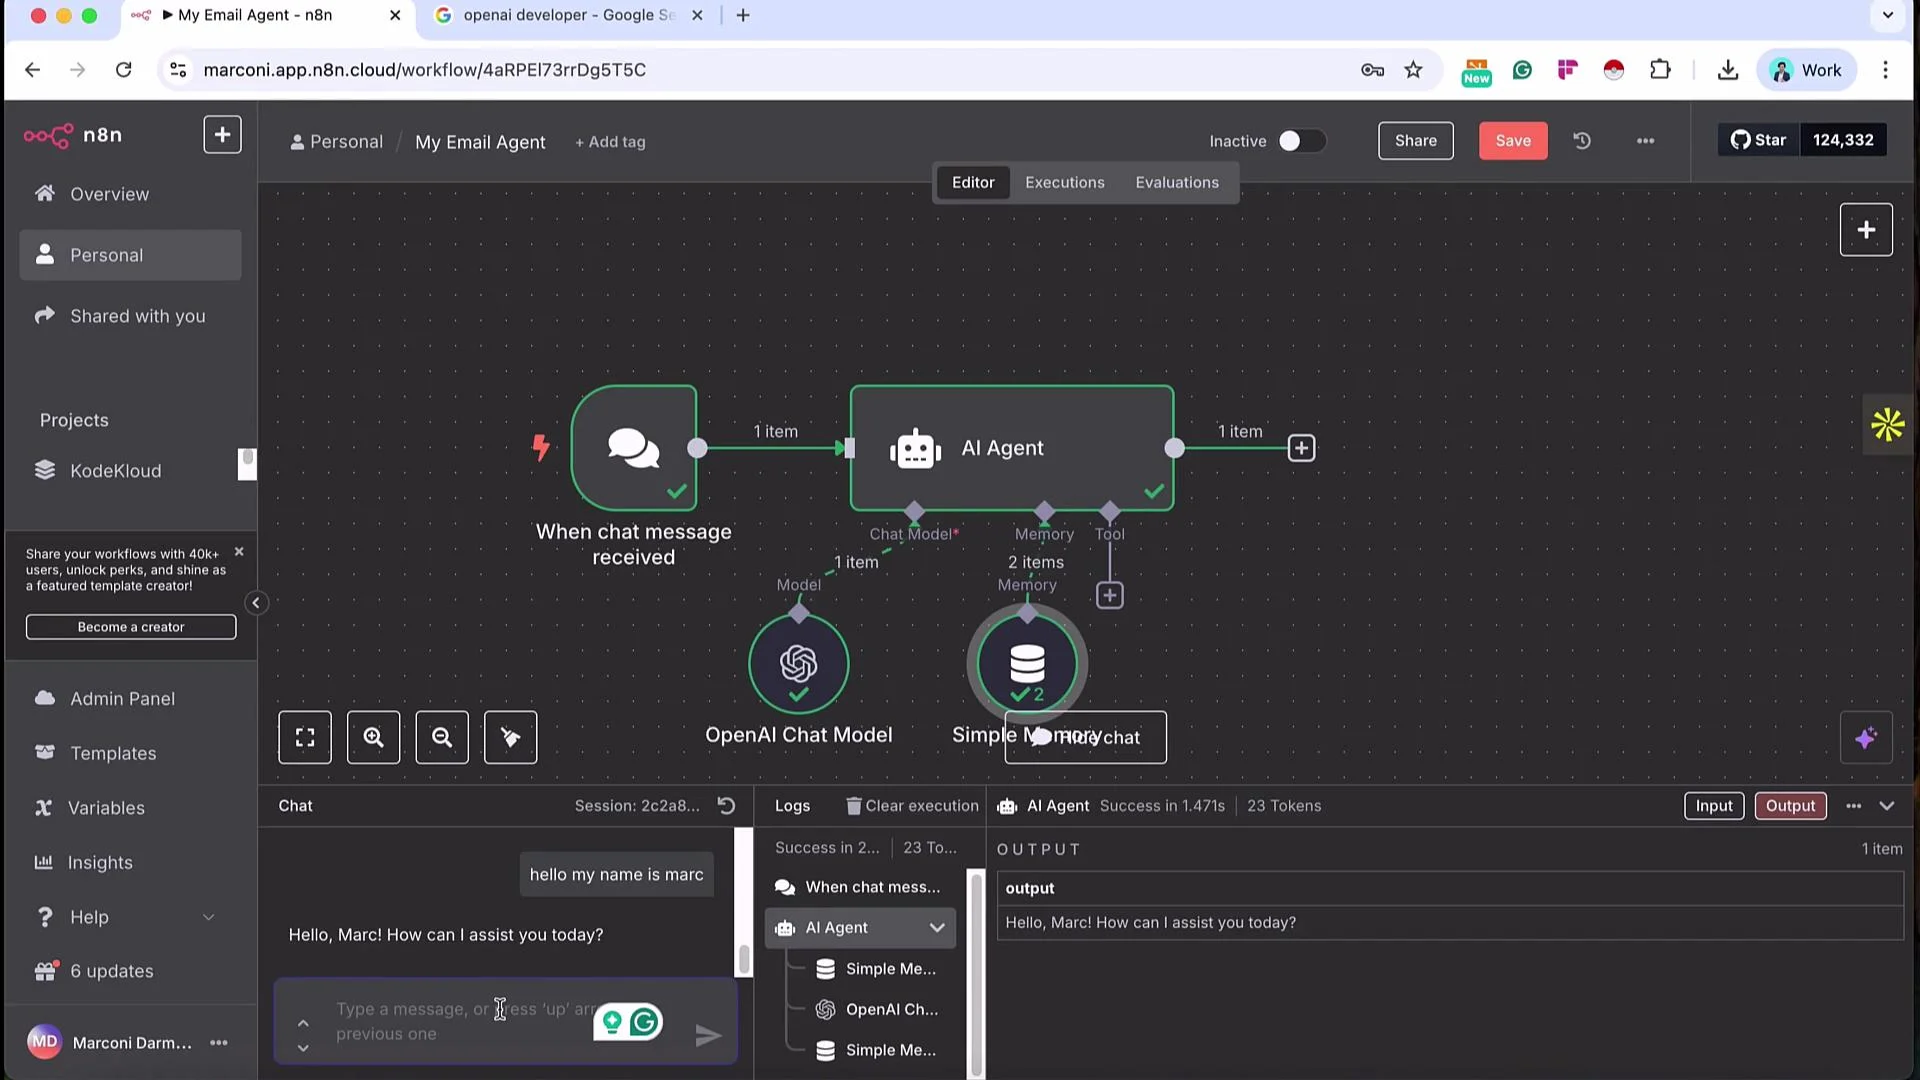
With Simple Memory attached:
- User: “Hello, my name is Mark.”
- User (next): “What is my name?”
- Agent reply: “Your name is Mark. How can I help you today, Mark?”
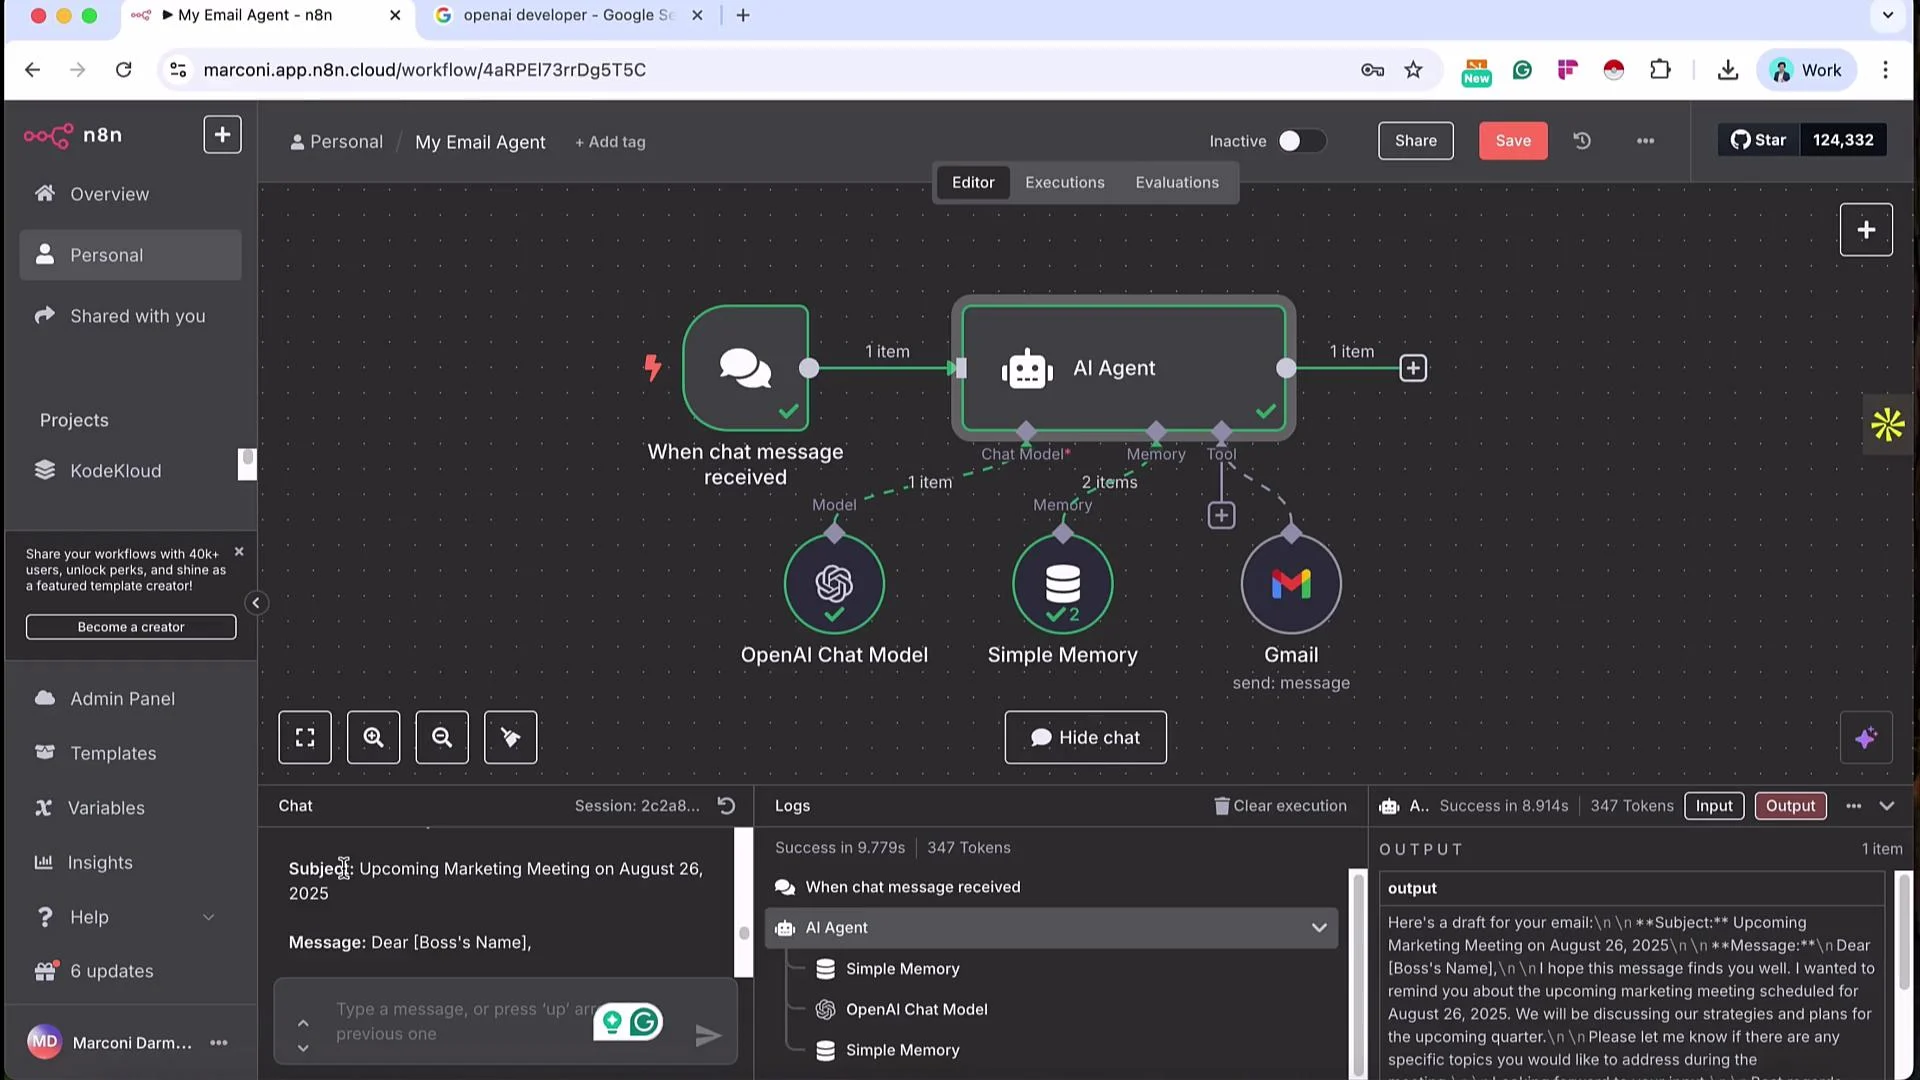
Tools (Add Gmail to Send Email)
For an email agent, attach a Gmail node so the AI can send messages directly.- Create or select Gmail credentials. n8n Cloud: OAuth2 recommended. Self-host: service account possible.
- Configure the Gmail node:
- Tool Description: leave
Set Automaticallyso the agent decides when to use Gmail. - Resource:
message - Operation:
send - Email Type:
text(choosehtmlfor formatted content) - Message: choose
Determine by Modelso the AI constructs the body
- Tool Description: leave
4) Passing Dynamic Input vs Fixed Input
You can supply the AI Agent with a fixed (literal) user message or an expression that pulls dynamic values from the previous node.Fixed input is a literal, unchanging message (for example, “Please send an email”). Expression allows dynamic values from the previous node (for example, the chat message). Use Expression to pass the actual chat text into the AI Agent so it reacts to user input.
5) System Message (Agent Role & Behavior)
Under Options → Add Option → System Message add a guiding prompt that defines the agent’s role. Example:6) Example Conversation & Drafting Email
Try this conversation to see the full flow:- User: “Hello, my name is Mark.” → agent stores the name in memory and replies.
- User: “Send an email to my boss at marconi@kodekloud.com about the upcoming marketing meeting on 26th August 2025.”
Append n8n Attribution and toggle it off.
7) Useful Node Controls & Development Tips
-
Node controls (top-right of each node):
- Play button (Execute Step): runs just this node — useful for iterative testing.
- Power button: deactivate/reactivate the node.
- Bin icon: delete the node.
- Pin node data for development: in the trigger node’s top-right corner click Pin to reuse a snapshot of the trigger output (avoid re-triggering external APIs or consuming credits).
8) Activate, Public Chat & Debugging
- Activate workflow: toggle Activate workflow at the top to receive production requests. Activation provides a production chat URL that hits your workflow for each incoming message.
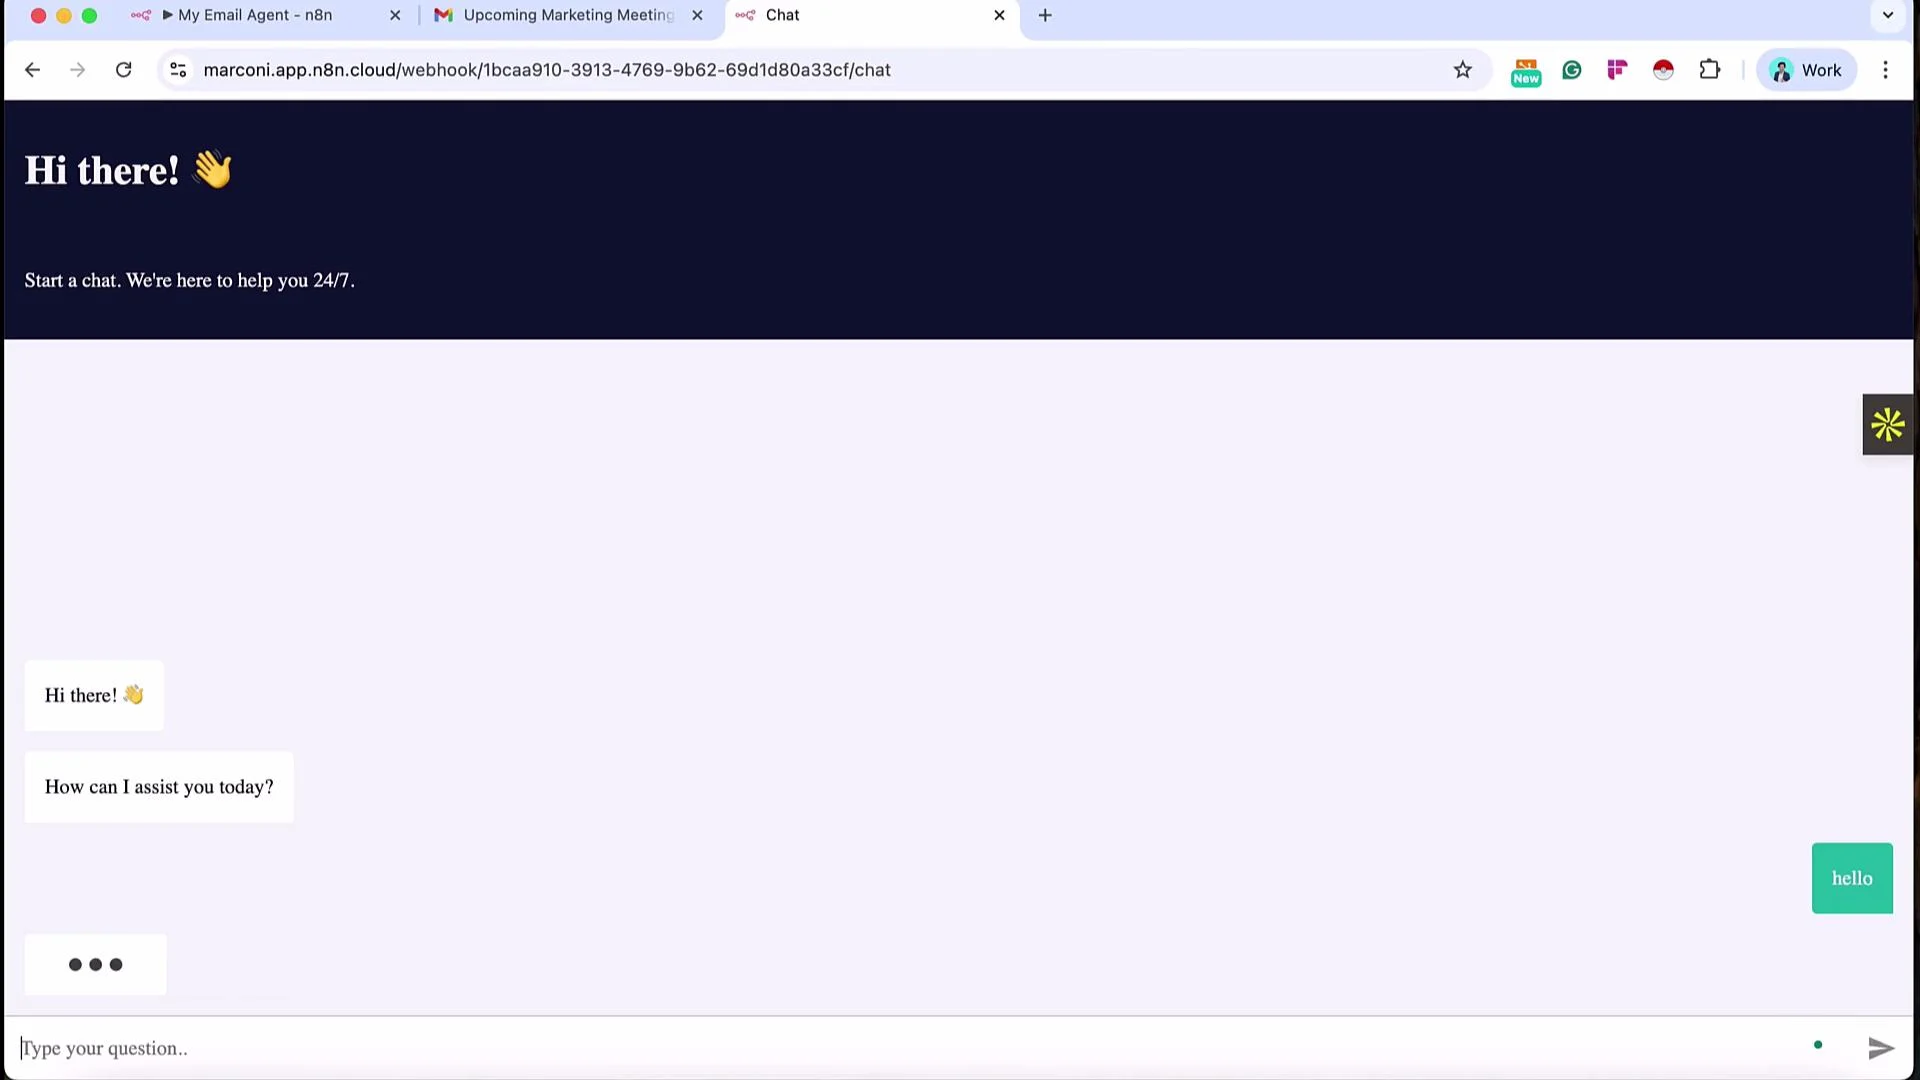
- Make chat publicly available: open the chat node and toggle Make Chat Publicly Available to get a public URL (may take a few seconds to spin up).
Debugging & Execution Views
- Editor view — build and edit workflows.
- Executions view — shows logs for runs (date, time, and run type). Test runs have a beaker icon.
- Copy to editor on an execution — import execution data into the editor for debugging. This reproduces the exact inputs/outputs for troubleshooting.
Keep API keys and credentials secure. Monitor your OpenAI usage to avoid unexpected costs. For production use, apply rate limiting, logging, and appropriate permission controls on public endpoints.
Quick Reference Table
That completes this lesson on building your first simple email AI agent in n8n. A lab is available where you can recreate the same AI agent end-to-end and validate your setup.