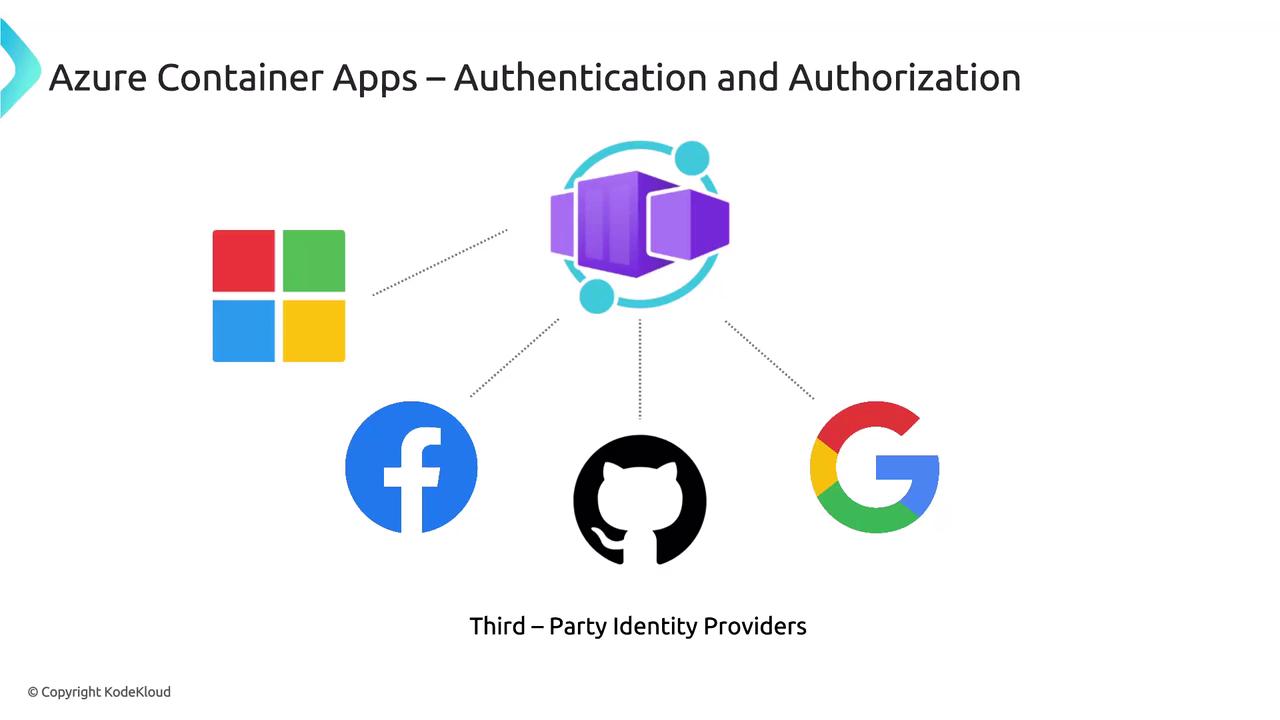
Authentication Flows
There are two primary authentication flows:-
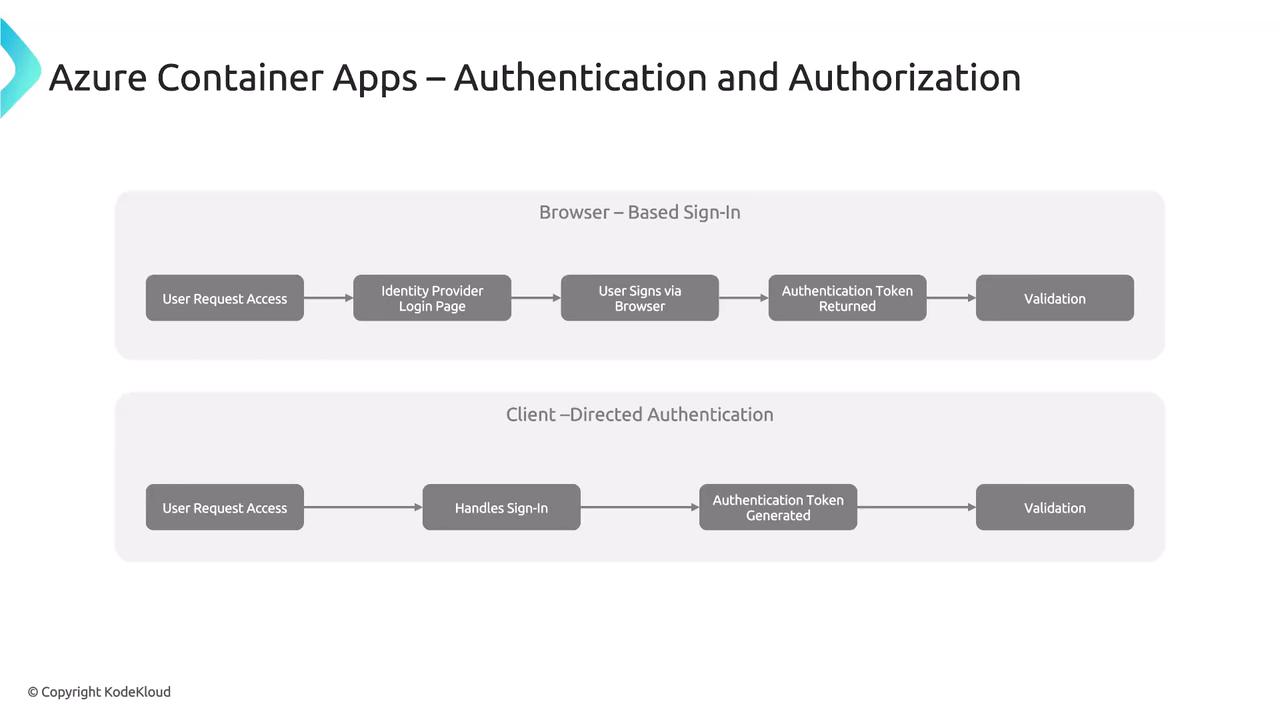
Server-Directed (Server-Flow) Authentication:
This flow delegates the authentication process to the identity provider. It typically involves a browser-based sign-in experience similar to that used in Azure App Service. -
Client-Directed (Client-Flow) Authentication:
When using the provider’s SDK, the application handles the sign-in process directly on behalf of the user. The SDK then submits the obtained authentication token to the container app for validation.
For detailed implementation examples, refer to the official Azure Container Apps documentation.
Implementing Server-Directed Authentication via the Azure Portal
Follow these steps to implement server-directed authentication (without the provider’s SDK):- Using the same container app created earlier, navigate to the Authentication section in the Azure Portal.
- Select the desired identity provider. For this example, choose Microsoft and create a new app registration.
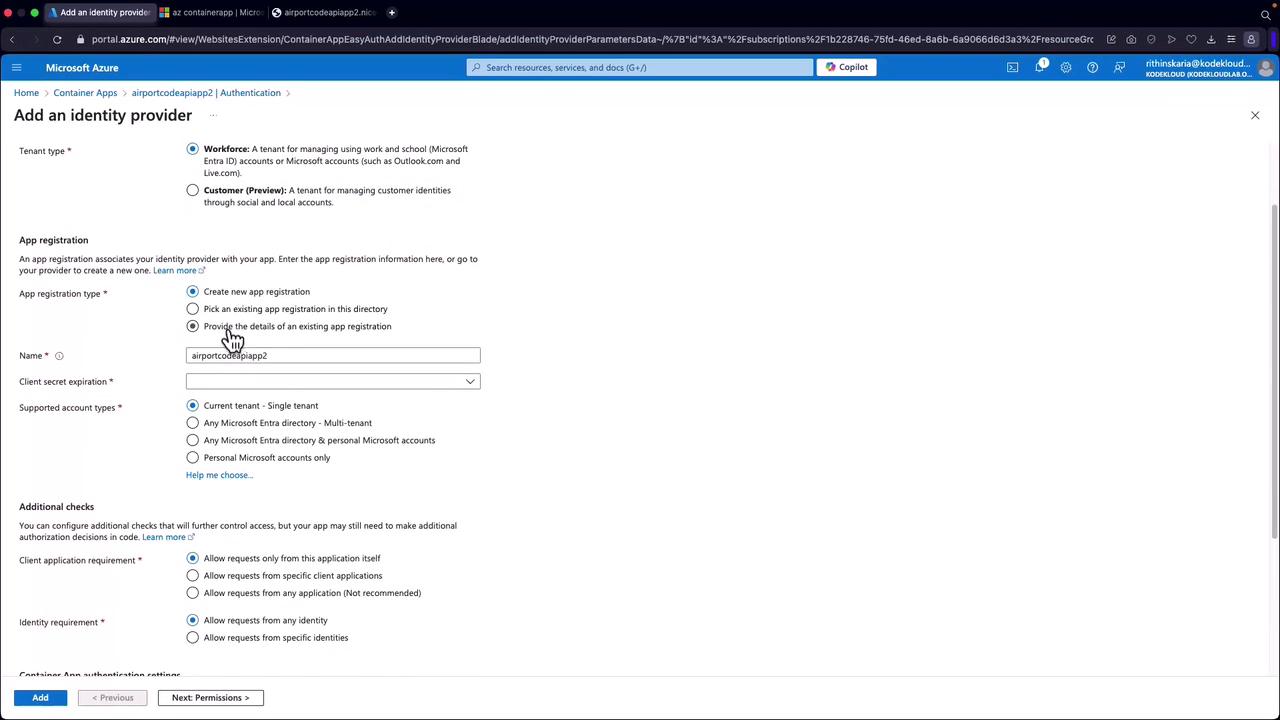
- Configure the settings for the identity provider:
- Set the token expiration to 90 days (or as required).
- Leave other settings as default.
- In the permissions section, enable the “user.read” permission to allow the application to access user profile data.
- Click Add to register the identity provider. This registration will appear in your Microsoft Entra ID.
If you are not using the provider’s SDK, follow these steps directly. When utilizing the SDK, additional code modifications will be required to manage the authentication flow.
Example JSON Response Post-Authentication
Below is an example JSON response retrieved after successful authentication: