This article explores Azure Container Apps, a serverless platform for running microservices and containerized applications with features like dynamic scaling and Dapr integration.
In this lesson, we explore Azure Container Apps—a robust serverless platform designed for running microservices and containerized applications. This service integrates with Azure Kubernetes Service (AKS) to deliver scalability, streamlined development, and minimal management overhead.
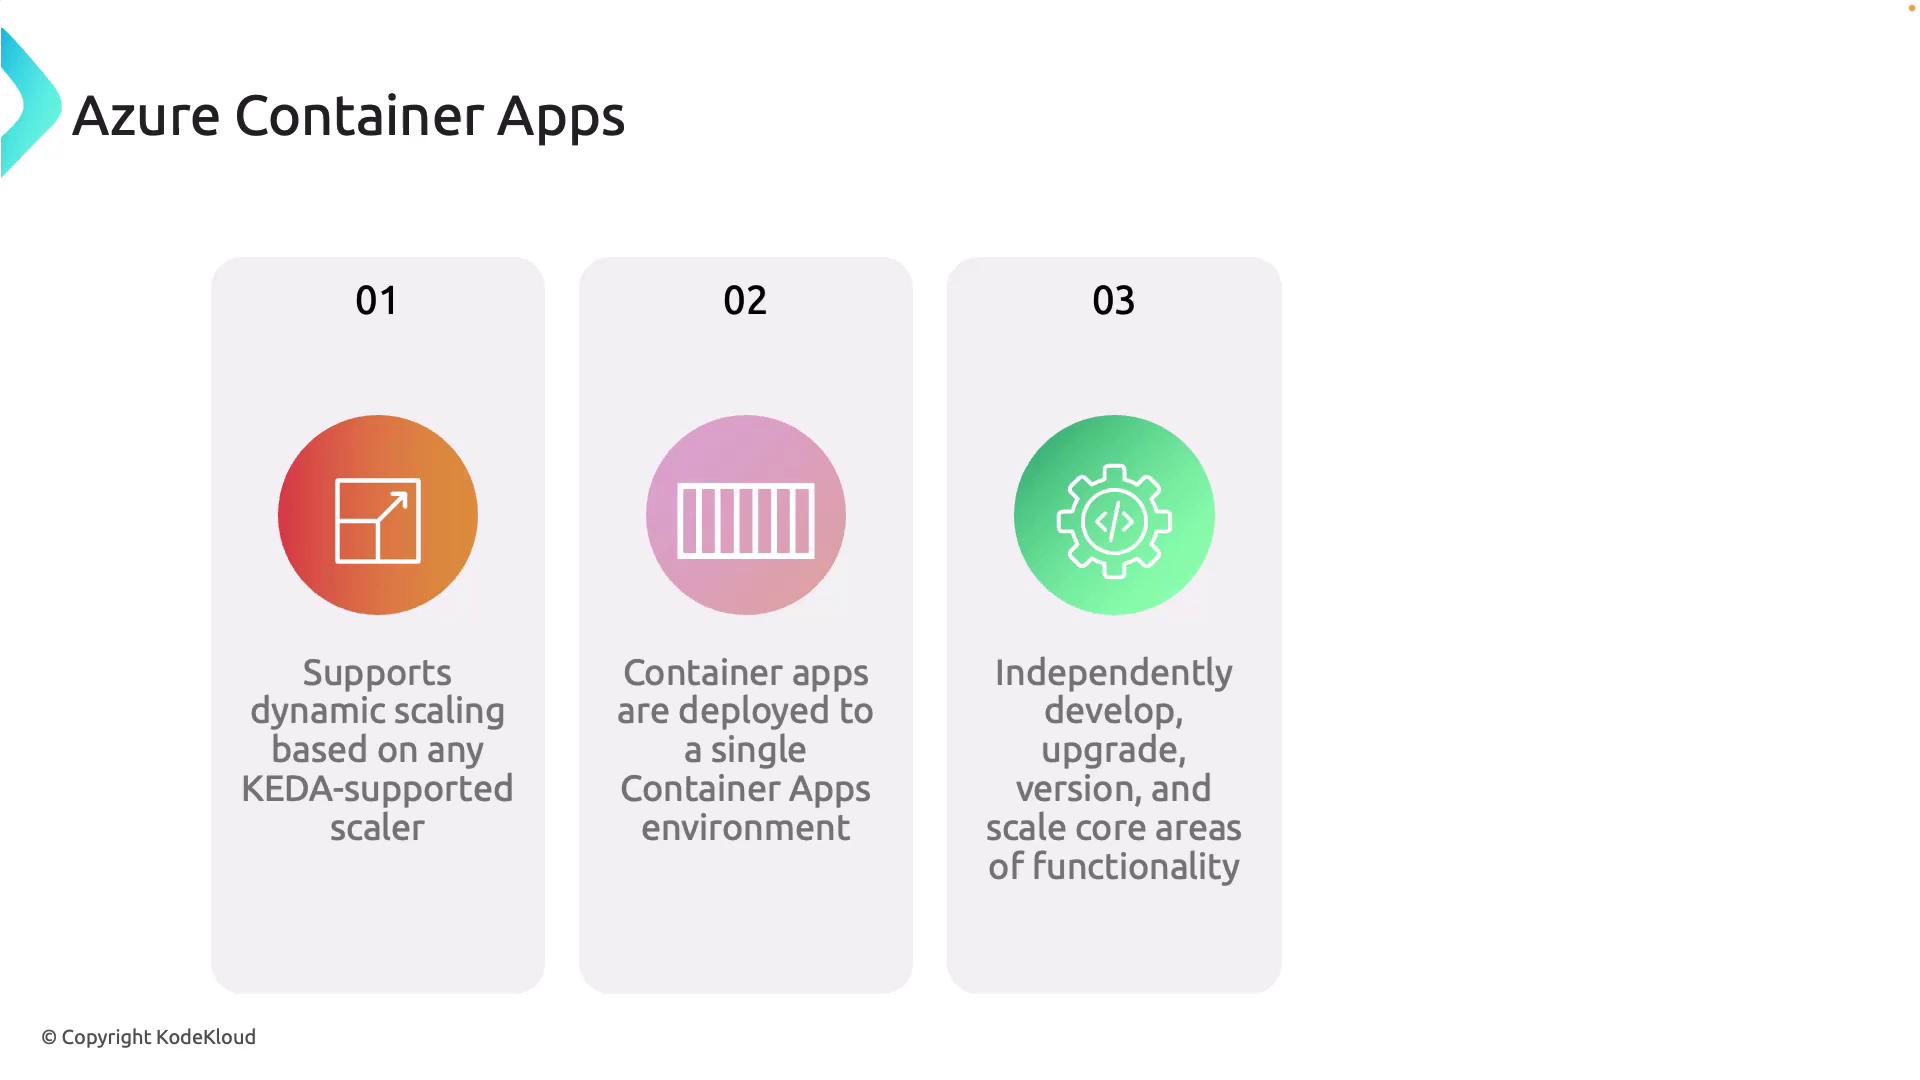
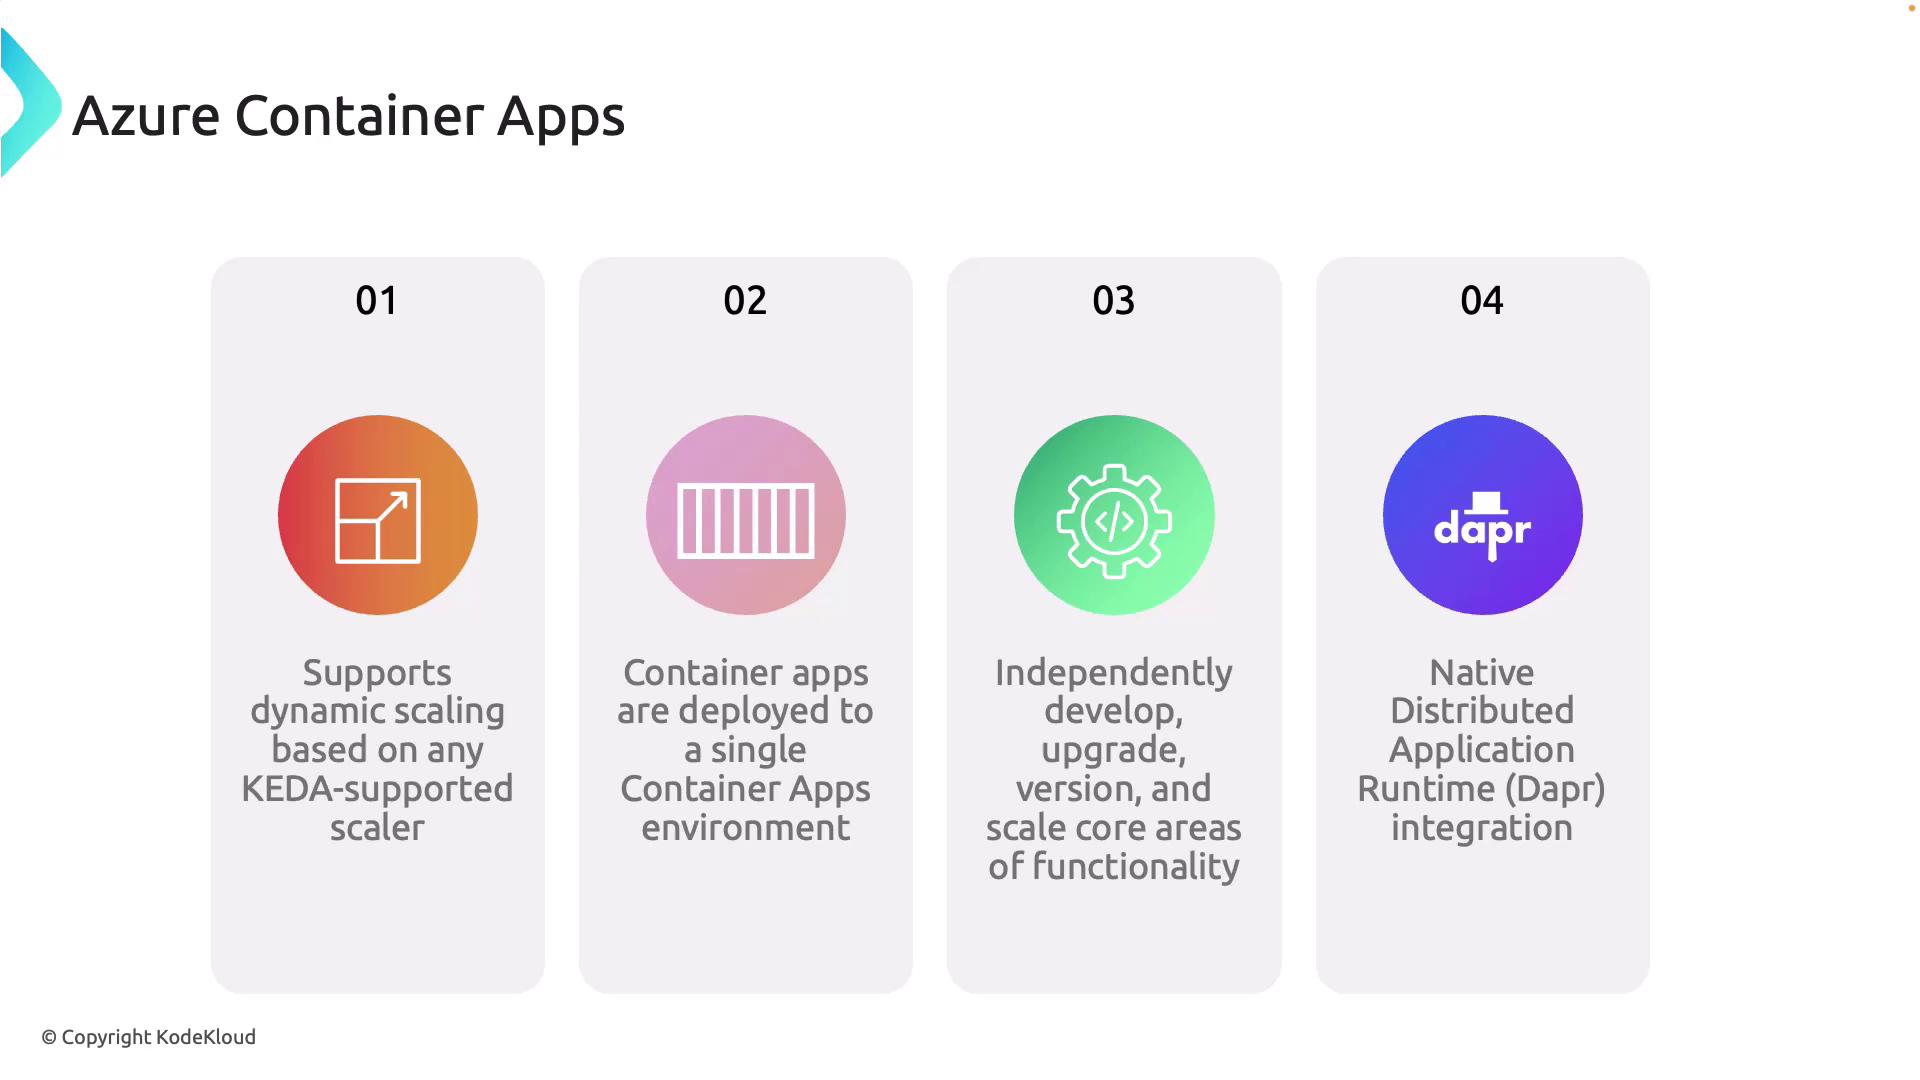
Azure Container Apps offers several advantages compared to Azure Container Instances by acting as an orchestrator with advanced features:
Dynamic Scaling with KEDA:
Azure Container Apps leverages Kubernetes Event-Driven Auto Scaling (KEDA) to automatically scale applications based on CPU, memory usage, or external event triggers such as message queues.
Deployment to a Single Environment:
All containerized applications are deployed within a secure, isolated environment, ensuring safe and reliable communication among apps.
Independent Service Development:
Utilizing a microservices architecture, container apps can be developed, updated, and scaled independently which reduces risk and increases flexibility.
Native Dapr Integration:
Built-in support for the Distributed Application Runtime (Dapr) simplifies microservices development with APIs for Pub/Sub messaging, service invocation, and state management, helping you construct resilient and scalable applications.
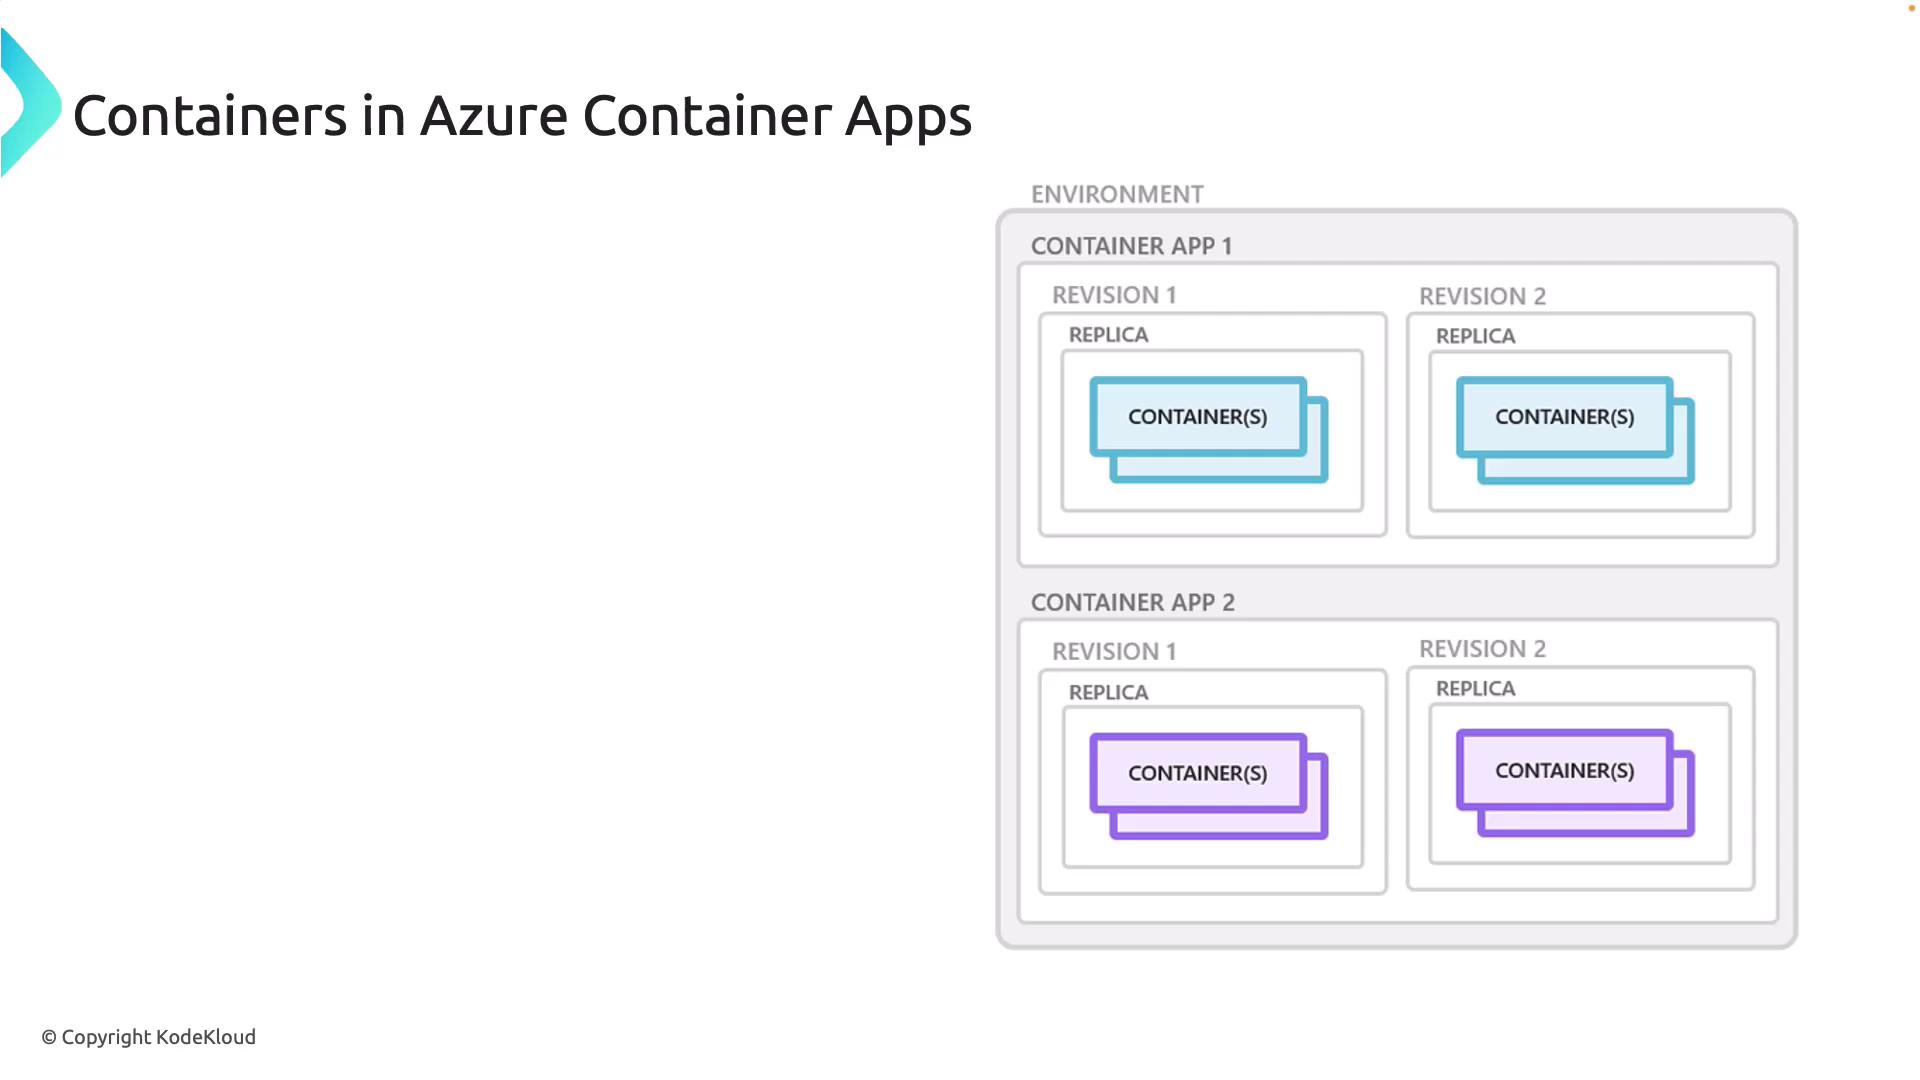
Azure Container Apps uses scalable architectures where containers are grouped into pods—logical units in Kubernetes that share resources and network namespaces. A common design pattern is the sidecar model, which adds auxiliary functionalities like logging, monitoring, and inter-service communication to support the main container service.
Working with Container Images and the Azure Portal
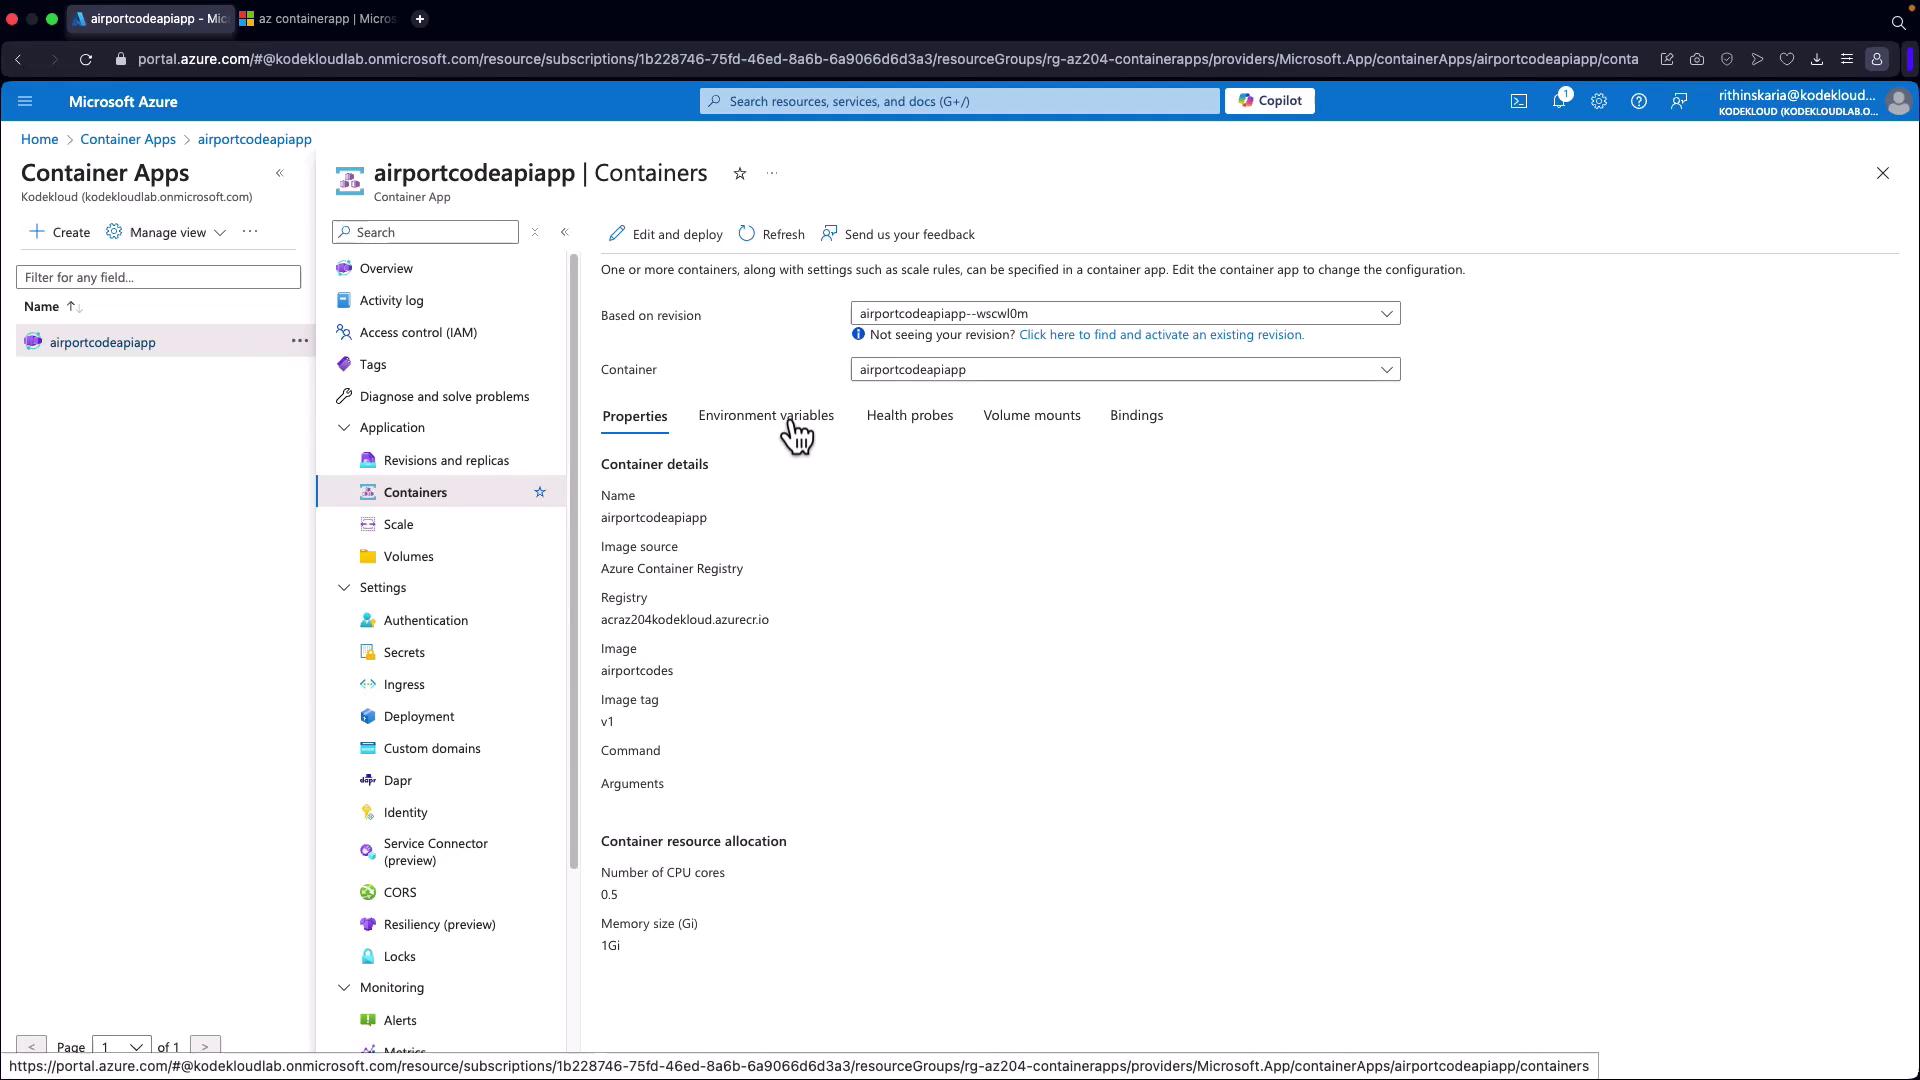
Azure Container Apps enables secure deployment of container images stored in private registries such as Azure Container Registry (ACR). By configuring the proper credentials, you ensure that sensitive container images remain protected during the deployment process.For example, consider the deployment of the Airport Codes API. This API reads a JSON file and has been containerized using the following Dockerfile:
FROM mcr.microsoft.com/dotnet/aspnet:8.0 AS baseWORKDIR /appEXPOSE 80FROM mcr.microsoft.com/dotnet/sdk:8.0 AS buildWORKDIR /srcCOPY ["AirportCodeAPI.csproj", "./"]RUN dotnet restore "./AirportCodeAPI.csproj"COPY . .WORKDIR "/src/"RUN dotnet build "AirportCodeAPI.csproj" -c Release -o /app/buildFROM build AS publishRUN dotnet publish "AirportCodeAPI.csproj" -c Release -o /app/publishFROM base AS finalWORKDIR /app
A snippet from the API code is shown below:
using Microsoft.AspNetCore.Mvc;using System.Collections.Generic;using System.IO;using System.Text.Json;using AirportCodeAPI.Models;namespace AirportCodeAPI.Controllers{ [Route("api/[controller]")] [ApiController] public class AirportCodesController : ControllerBase { private readonly string _jsonFilePath = Path.Combine(Directory.GetCurrentDirectory(), "Data", "airports.json"); // Additional controller code... }}
The build output confirms the successful creation of the image:
Next, you’ll deploy the web API to Azure Container Apps using the Azure CLI. While the Azure Portal provides a user-friendly, click-based experience, the Azure CLI offers more control over your deployment.
This command sets the target port to 80 and exposes the application externally. The registry credentials securely pull the container image from the ACR.After running the command, verify the container app’s status in the Azure Portal, where you will see details such as the app name, size, and URL for accessing your application.
If the target port does not match the port that your application is listening on (for example, if your project uses port 8080), update your application’s configuration accordingly. Alternatively, create a second container app with the correct port mapping.
After deployment, verify that the container app revisions and replicas are running correctly in the Azure Portal. Access the application URL with the appropriate API path (e.g., /api/airport-codes) to display the list of airport codes:
[ {"code":"UNN","airport_name":"Yujin Airport","country_code":"China"}, {"code":"YGR","airport_name":"Îles-de-la-Madeleine Airport","country_code":"Democratic Republic of the Congo"}, {"code":"PRM","airport_name":"Pihare Airport","country_code":"Uzbekistan"}, {"code":"YIW","airport_name":"Yiwu Airport","country_code":"China"}, {"code":"ILE","airport_name":"Gainesville Municipal Airport","country_code":"Indonesia"}, {"code":"GLE","airport_name":"Gainesville Municipal Airport","country_code":"Poland"}, {"code":"ORY","airport_name":"Orly Airport","country_code":"France"}, {"code":"FTX","airport_name":"Maltsevo Airport","country_code":"Russia"}, {"code":"IRI","airport_name":"Iri Airport","country_code":"Serbia"}, {"code":"VYI","airport_name":"Aupaluk Airport","country_code":"Yemen"} // Additional entries...]
Now that your container app is successfully deployed, consider implementing authentication and authorization to secure your API and ensure that only authorized users have access.By following these steps, you have learned how to build a container image, push it to Azure Container Registry, and deploy it as an Azure Container App using the Azure CLI. Enjoy building resilient and scalable applications on Azure Container Apps!