This article covers managing certificates using the Kubernetes Certificates API, including automation of signing requests and certificate rotation for cluster security.
Welcome to this lesson on managing certificates and exploring the Kubernetes Certificates API. In this guide, you’ll learn how Kubernetes automates certificate signing, rotation, and how it integrates with cluster security.When setting up a Kubernetes cluster, administrators initially configure a Certificate Authority (CA) server to generate certificates for various components. After assigning these certificates to the services, the cluster operates securely. As the cluster administrator, you already have your own certificate and key pair. However, when a new administrator joins your team, they need their own certificate and key to access the cluster. The process involves the new user generating a private key, creating a certificate signing request (CSR), and sending it to you. You then use the CA server—which signs the CSR using its private key and root certificate—to generate a certificate for the user. Note that certificates have a validity period and may require periodic renewal, a process known as certificate rotation.
The CA server is critically important because it consists of a key and certificate file that can sign certificates for the entire cluster. Unauthorized access to these files could potentially allow anyone to grant privileges within your Kubernetes environment. Ensure these files are secured and managed properly.
In many Kubernetes setups, such as those created with kubeadm, these CA files are stored on the master node.
Automating Certificate Management with the Certificates API
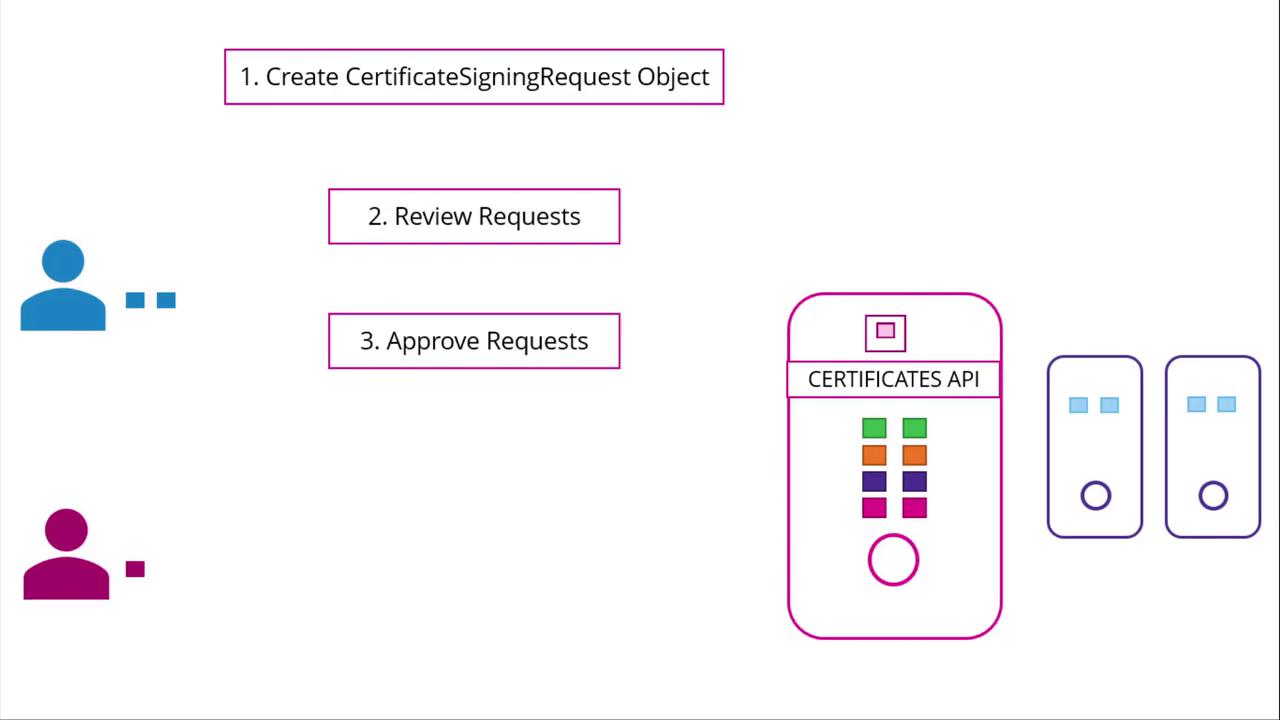
Traditionally, signing requests were handled manually. However, as the size of teams and clusters grows, automation becomes essential. Kubernetes introduces a built-in Certificates API to streamline handling certificate signing requests (CSRs) and to automate certificate rotation.Instead of logging into the master node to sign certificates manually, administrators can now create a Kubernetes object called “CertificateSigningRequest” to submit CSRs directly to the API. This object is visible to cluster administrators, making it easy to review, approve, and manage CSRs using simple kubectl commands.The following diagram illustrates the automated process:
Submit the CSR to the AdministratorThe user sends the generated CSR to the administrator. The administrator then creates a Kubernetes CSR object with a manifest file. Under the spec section, specify the groups the user qualifies for and the intended usages of the certificate. Make sure to Base64-encode the CSR before including it in the request field. Here’s an example manifest:
apiVersion: certificates.k8s.io/v1beta1kind: CertificateSigningRequestmetadata: name: janespec: groups: - system:authenticated usages: - digital signature - key encipherment - server auth request: <base64-encoded-CSR>
Replace <base64-encoded-CSR> with your actual Base64-encoded CSR output. Once this manifest is applied, you can review all pending CSRs.
Review Pending CSRsTo view pending certificate signing requests, use the following command:
kubectl get csr
The output may look like:
NAME AGE REQUESTOR CONDITIONjane 10m admin@example.com Pending
Approve the CSRAfter thorough review, approve the request by running:
kubectl certificate approve jane
Kubernetes will then sign the certificate using the CA key pair.
Retrieve the Signed CertificateTo view the signed certificate in YAML format, execute:
kubectl get csr jane -o yaml
The signed certificate appears in Base64-encoded format in the YAML output. Decode it using Base64 utilities and share the decoded certificate with the end user.Below is an example of a CSR object with its signed certificate in the status field:
Certificate Management in the Kubernetes Control Plane
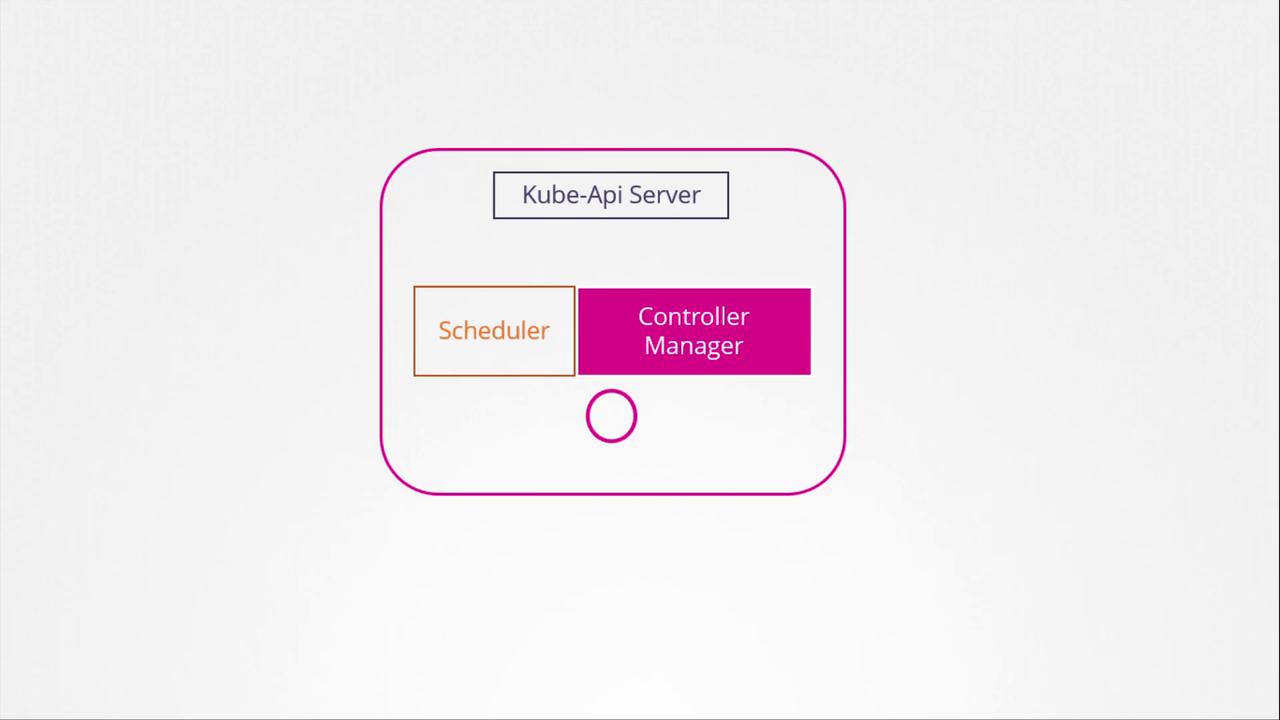
The Kubernetes control plane components, including the kube-apiserver, scheduler, and controller manager, coordinate to manage cluster operations. Certificate-related operations, such as CSR approval and signing, are performed by the controller manager through dedicated controllers.The diagram below shows the controller manager as part of the Kubernetes architecture:
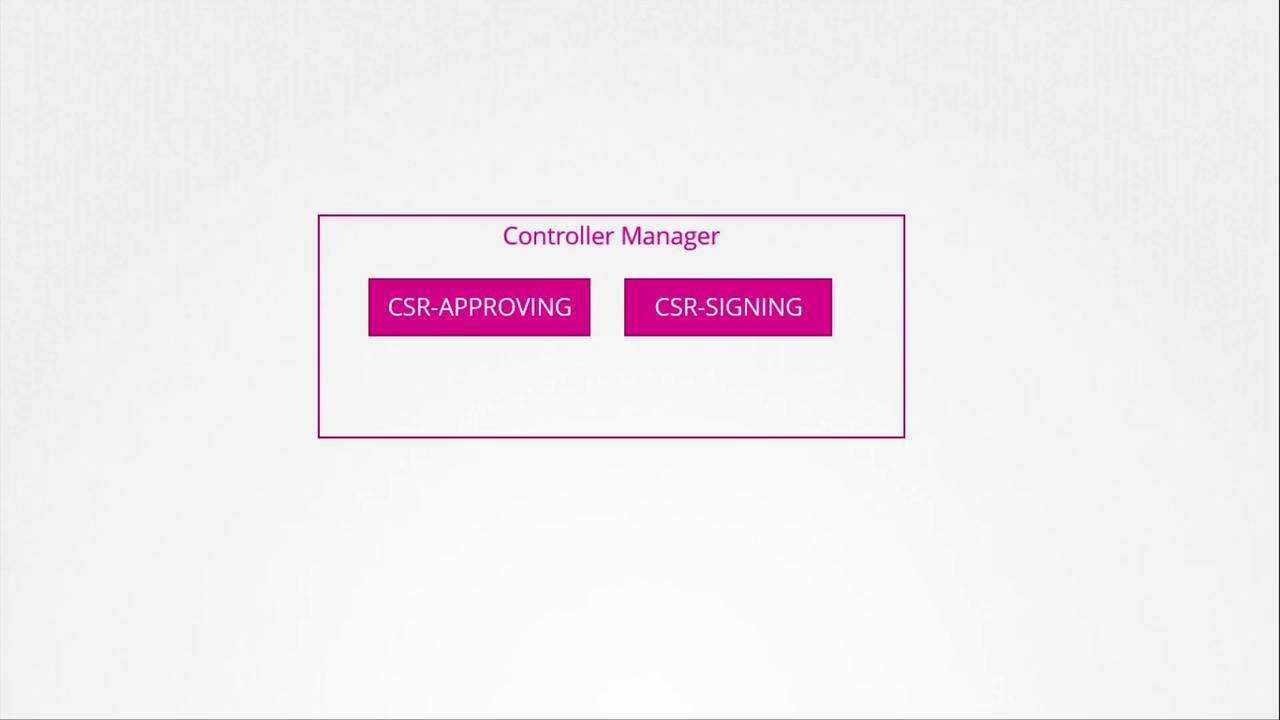
A closer look at the certificate operations of the controller manager is presented in the following diagram:
The controller manager requires the CA’s root certificate and private key, which are specified in its configuration. Here’s an excerpt from the configuration file:
This configuration ensures the controller manager can securely sign certificates and manage certificate lifecycles.That concludes our lesson on the Kubernetes Certificates API. For further hands-on practice with certificate management, head over to our practice test section and deepen your understanding.See you in the next lesson!