In this guide, we demonstrate how Kubernetes enforces CPU and memory constraints using two example pods, rabbit and elephant. You will learn how to:
  • Identify resource requests and limits
  • Diagnose pod failures caused by insufficient resources
  • Update pod specifications to prevent OOM kills

Pod “rabbit”: Identifying CPU Requests

First, confirm that the rabbit pod is running and examine its resource settings:
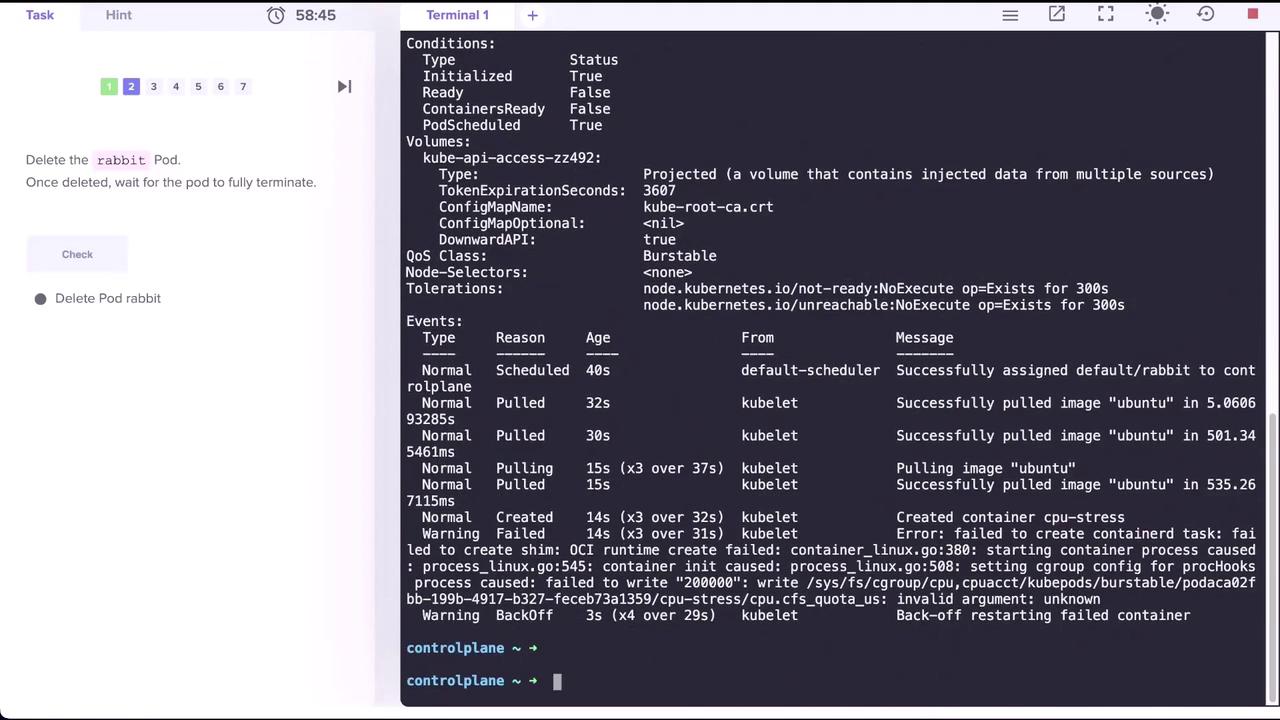
Excerpt from the description shows:
Here, the rabbit pod requests 1 CPU and caps at 2 CPUs. To clean up:
The image shows a terminal window displaying Kubernetes pod details and events, alongside a task prompt to delete the "rabbit" pod.

Pod “elephant”: Diagnosing Memory Issues

When you deploy the elephant pod, it enters a CrashLoopBackOff:
Inspect its status and events:
Key output sections:
The pod is OOMKilled because it exceeded its 10Mi memory limit while the stress workload uses around 15Mi.
The CrashLoopBackOff status indicates the container repeatedly failed due to out-of-memory errors. Always ensure your limits.memory exceed the actual usage of your application.
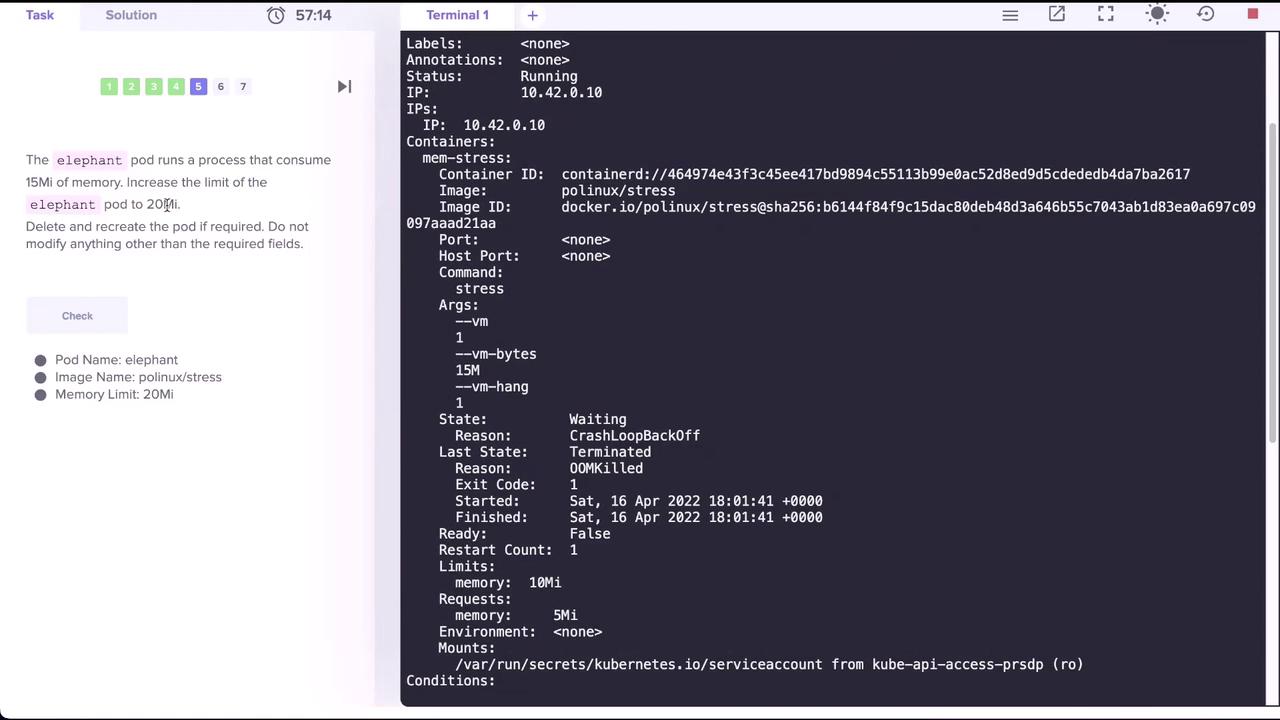
The image shows a Kubernetes pod named "elephant" with a memory issue, requiring an increase in its memory limit from 15Mi to 20Mi. The terminal displays details about the pod's status, including a "CrashLoopBackOff" error due to being "OOMKilled."

Updating the Memory Limit

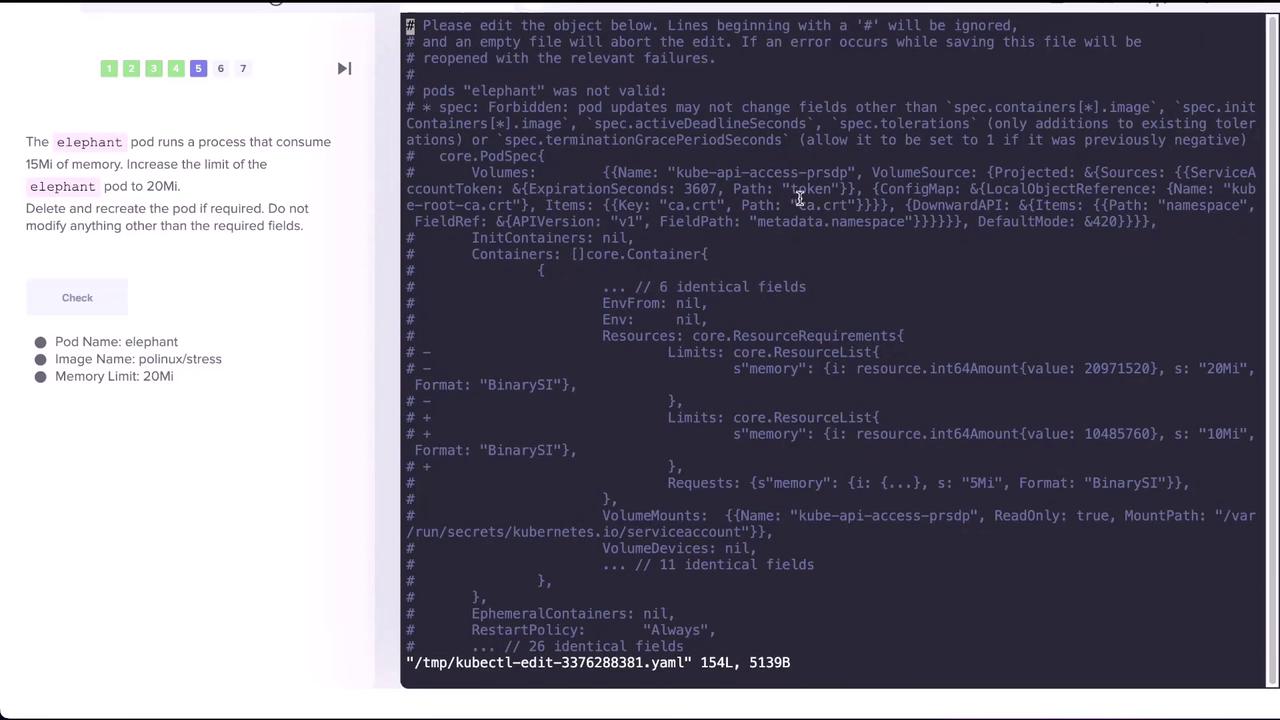
You cannot patch resource limits on a running pod. Instead, edit the pod manifest and recreate it:
The YAML editor opens. Find the resources section and change:
Save and exit. You’ll see an error because live edits to limits are not allowed:
Apply the updated manifest by deleting and recreating the pod:
Verify the new memory configuration:
Expected output:
The image shows a code editor with a YAML configuration file for a Kubernetes pod named "elephant," alongside instructions to increase its memory limit to 20Mi.

Resource Summary


Clean Up

Remove the elephant pod to finish the exercise:

Further Reading

Watch Video