

How Falco Works
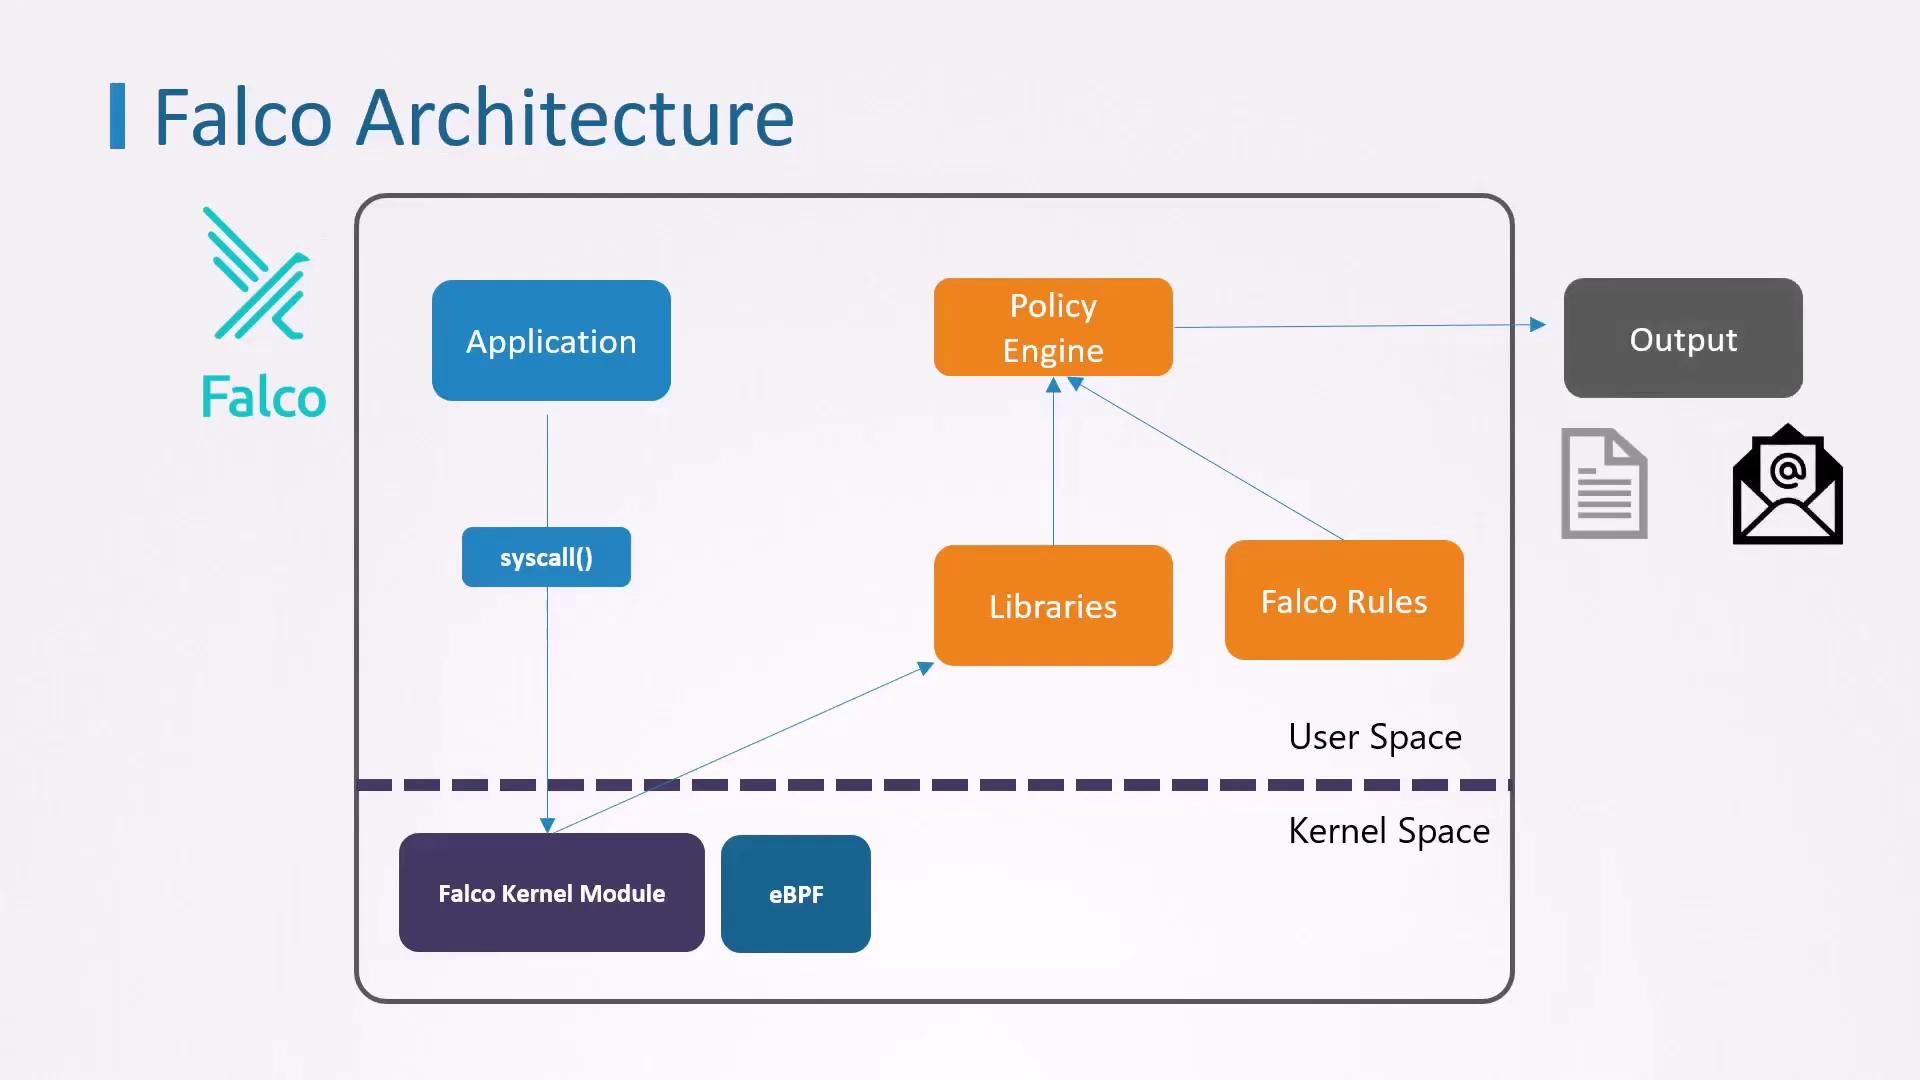
Falco captures kernel events via two primary methods, then filters them through its policy engine:
Once captured, events flow through Falco’s user-space components—including Sysdig libraries and the Falco policy engine—where they’re evaluated against rules. Alerts can be forwarded to syslog, standard output, Slack, email, and other sinks.
Installation Methods
You have two common ways to deploy Falco, depending on your access level and platform restrictions:Installing Falco on a Linux Node
Use this approach if you can install packages and kernel modules directly on your host. It ensures Falco remains operational even if your Kubernetes control plane is compromised.Ensure you have the correct
linux-headers-$(uname -r) package. Mismatched headers can prevent the Falco kernel module from building.Deploying Falco in Kubernetes via Helm
If you’re on a managed Kubernetes service or prefer Kubernetes-native deployment, use Helm to install Falco as a DaemonSet:You can customize Falco’s configuration by passing values files (
-f values.yaml) to helm install.Next Steps
- Customize or create Falco rules to detect specific threats.
- Integrate alerts with your SIEM, Slack, or PagerDuty for real-time notifications.
- Monitor Falco logs and metrics to fine-tune performance and rule accuracy.