Welcome — in this lesson we’ll create a basic AWS CodePipeline with Source and Build stages, verify a build run, and push a code fix so the pipeline automatically picks it up. This walkthrough assumes you have an existing CodeCommit repository (for example aws-microservice-project) and a CodeBuild project (for example AWS MicroserviceProject). We’ll also show a short Git workflow to push fixes from Cloud9.

Background: why we needed to fix the app

Earlier we introduced a change that produced a broken task definition (task definition 6) because a few lines were commented out in the application. Below is the problematic version that was reverted from the repository for debugging:
We resolved this by restoring the required lines in the main repository (uncommenting the necessary code) and committing the corrected version.

Create the pipeline in the AWS Console

Follow these step-by-step instructions to create a simple pipeline that fetches code from CodeCommit and runs CodeBuild.
  1. Open the AWS Management Console and navigate to CodePipeline (located near CodeBuild).
  2. Click Pipelines -> Create pipeline.
  3. Give the pipeline a descriptive name.
  4. Open Advanced settings and keep defaults unless you need to change encryption, service role, or artifact store settings.
  5. Click Next to configure the Source stage.
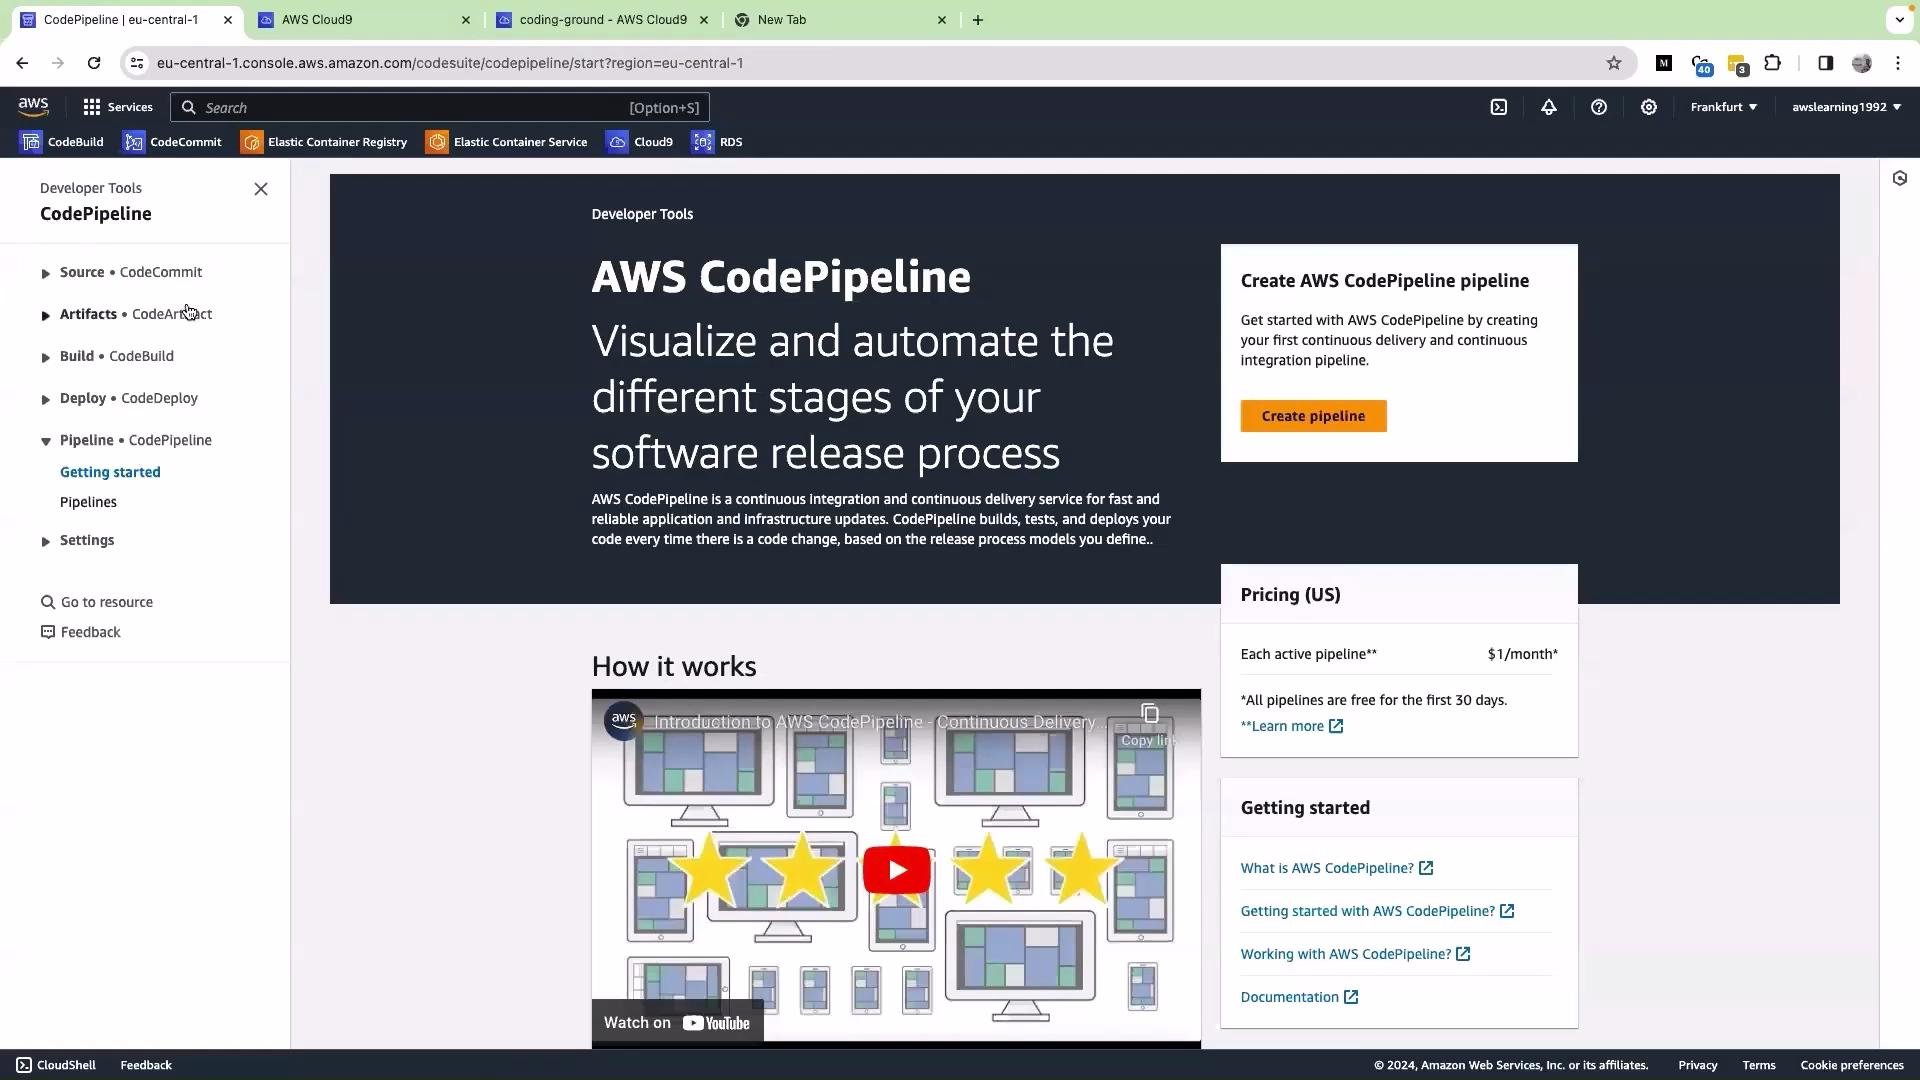
The image shows an AWS CodePipeline interface, highlighting features for visualizing and automating software release processes. It includes options to create a pipeline and provides pricing and getting started information.

Source stage: AWS CodeCommit

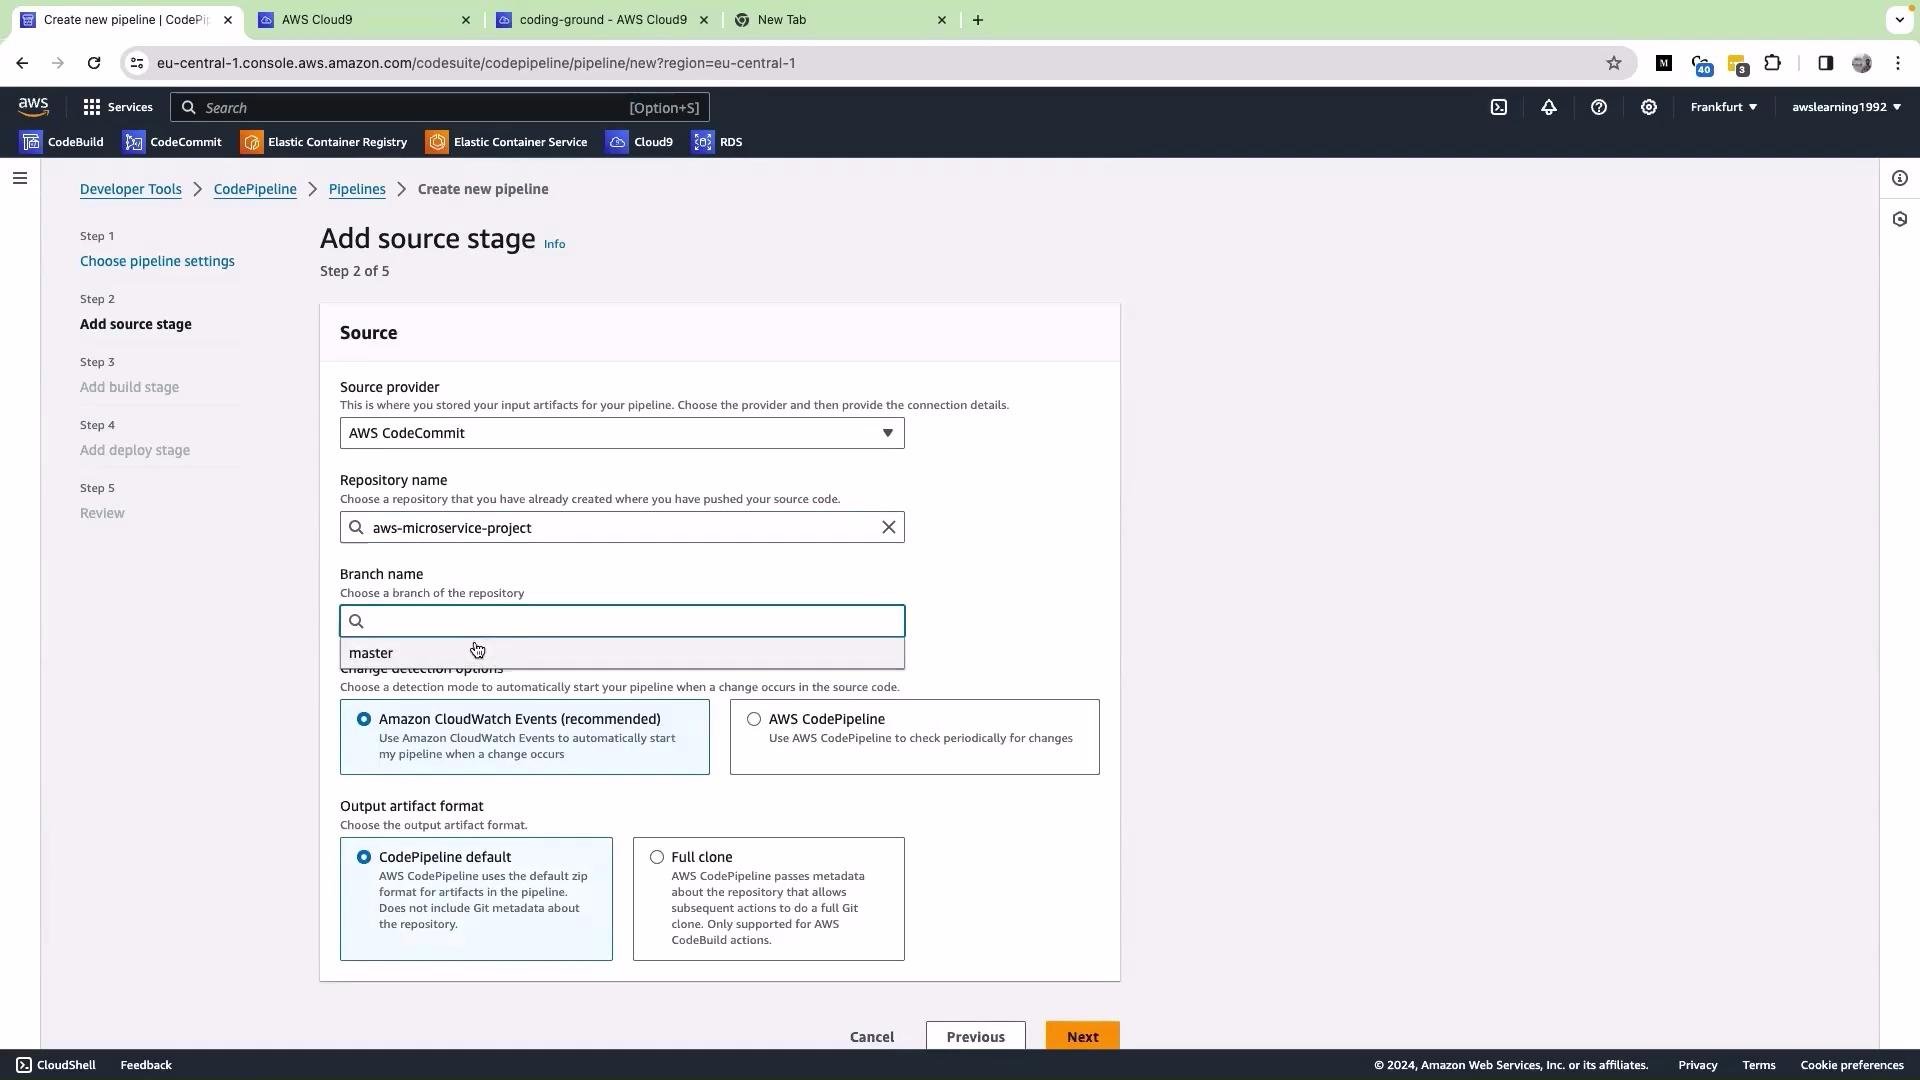
  • For Source provider, select AWS CodeCommit.
  • Choose the repository aws-microservice-project.
  • Select the branch master.
The image shows an AWS CodePipeline interface where a user is adding a source stage, selecting AWS CodeCommit as the source provider, with options to enter repository and branch names.
  1. Click Next to configure the Build stage.

Build stage: AWS CodeBuild

  • For Build provider select AWS CodeBuild.
  • Choose the appropriate project (for example AWS MicroserviceProject).
  • Click Next.
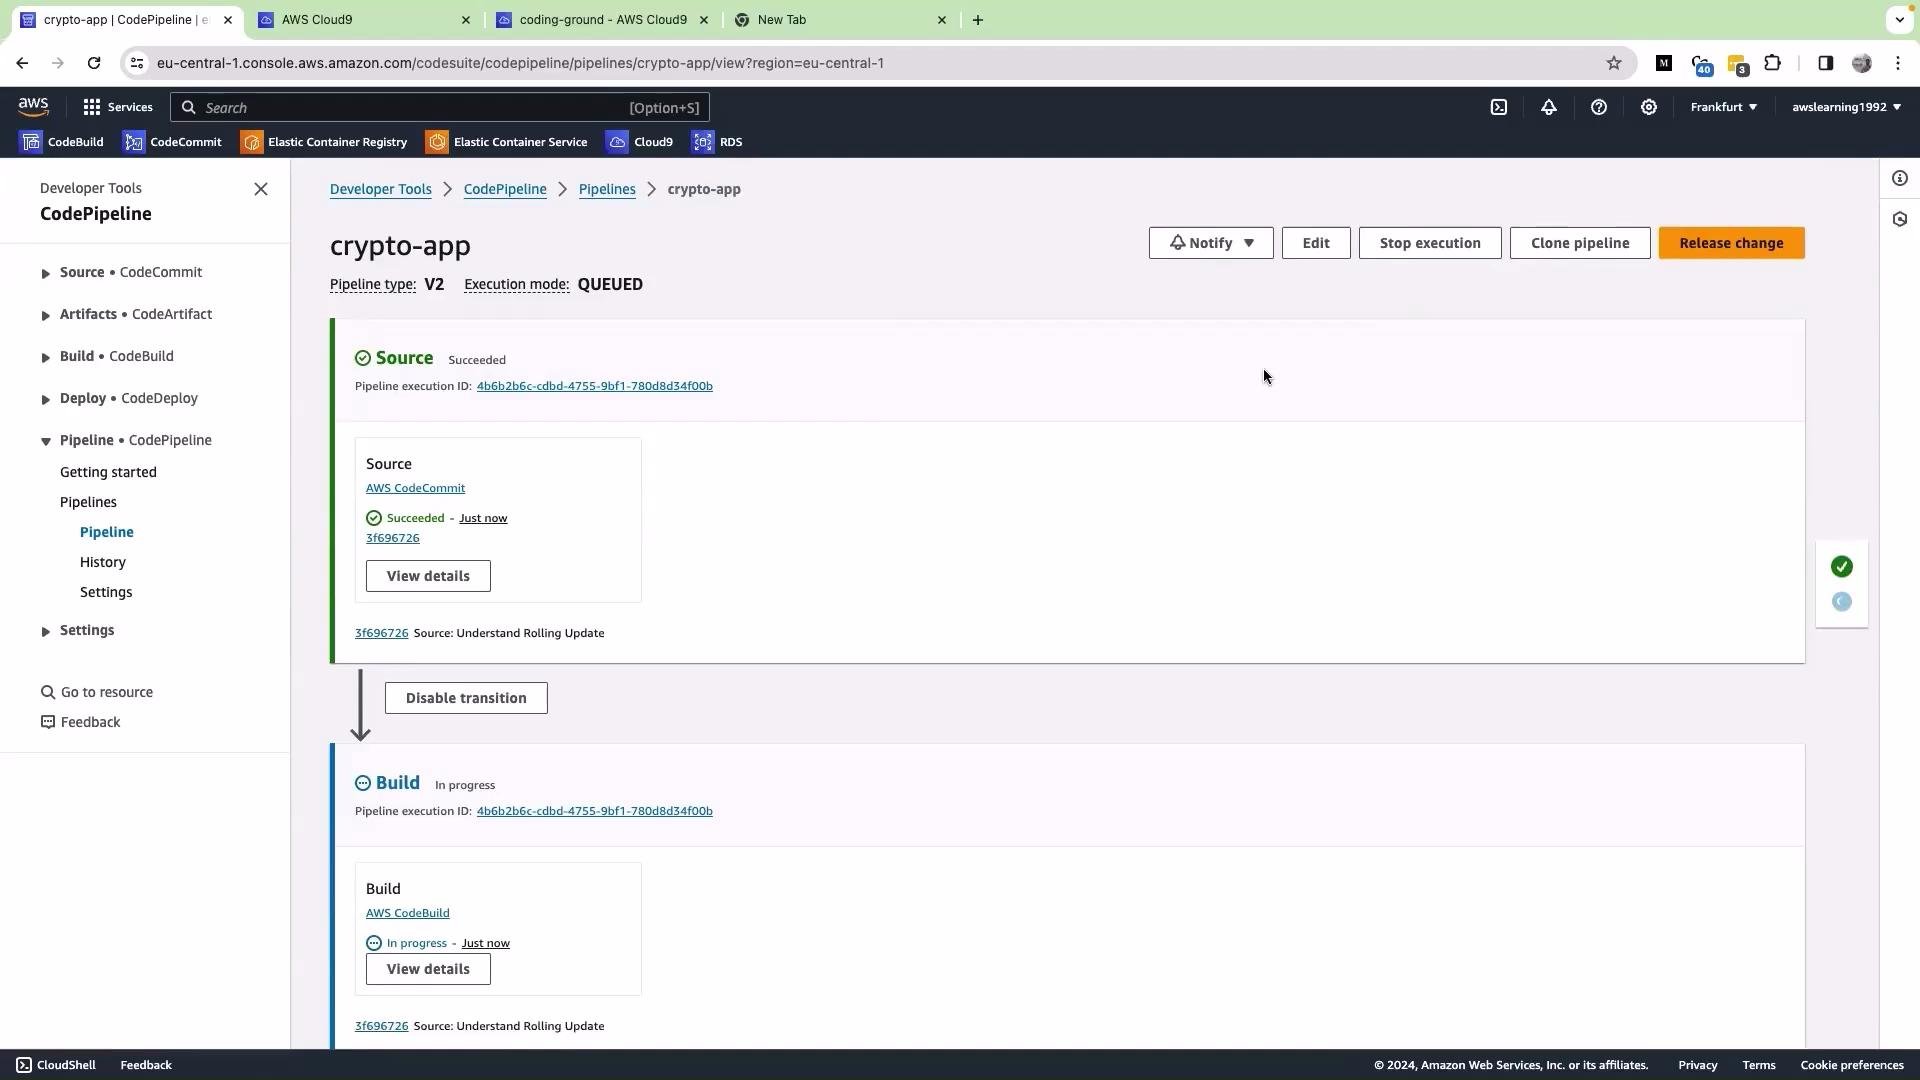
We do not want to deploy to ECS yet for this pipeline, so choose Skip deploy stage, then click Create pipeline. When the pipeline is created it starts an initial execution automatically to validate the configured stages. You can monitor progress from the pipeline detail page.
This image shows an AWS CodePipeline interface for a project named "crypto-app," displaying the status of source and build stages. The "Source" stage has succeeded, while the "Build" stage is in progress.
The Source stage should complete first, followed by the Build stage. In CodeBuild logs you’ll see initialization commands and other build steps—for example:
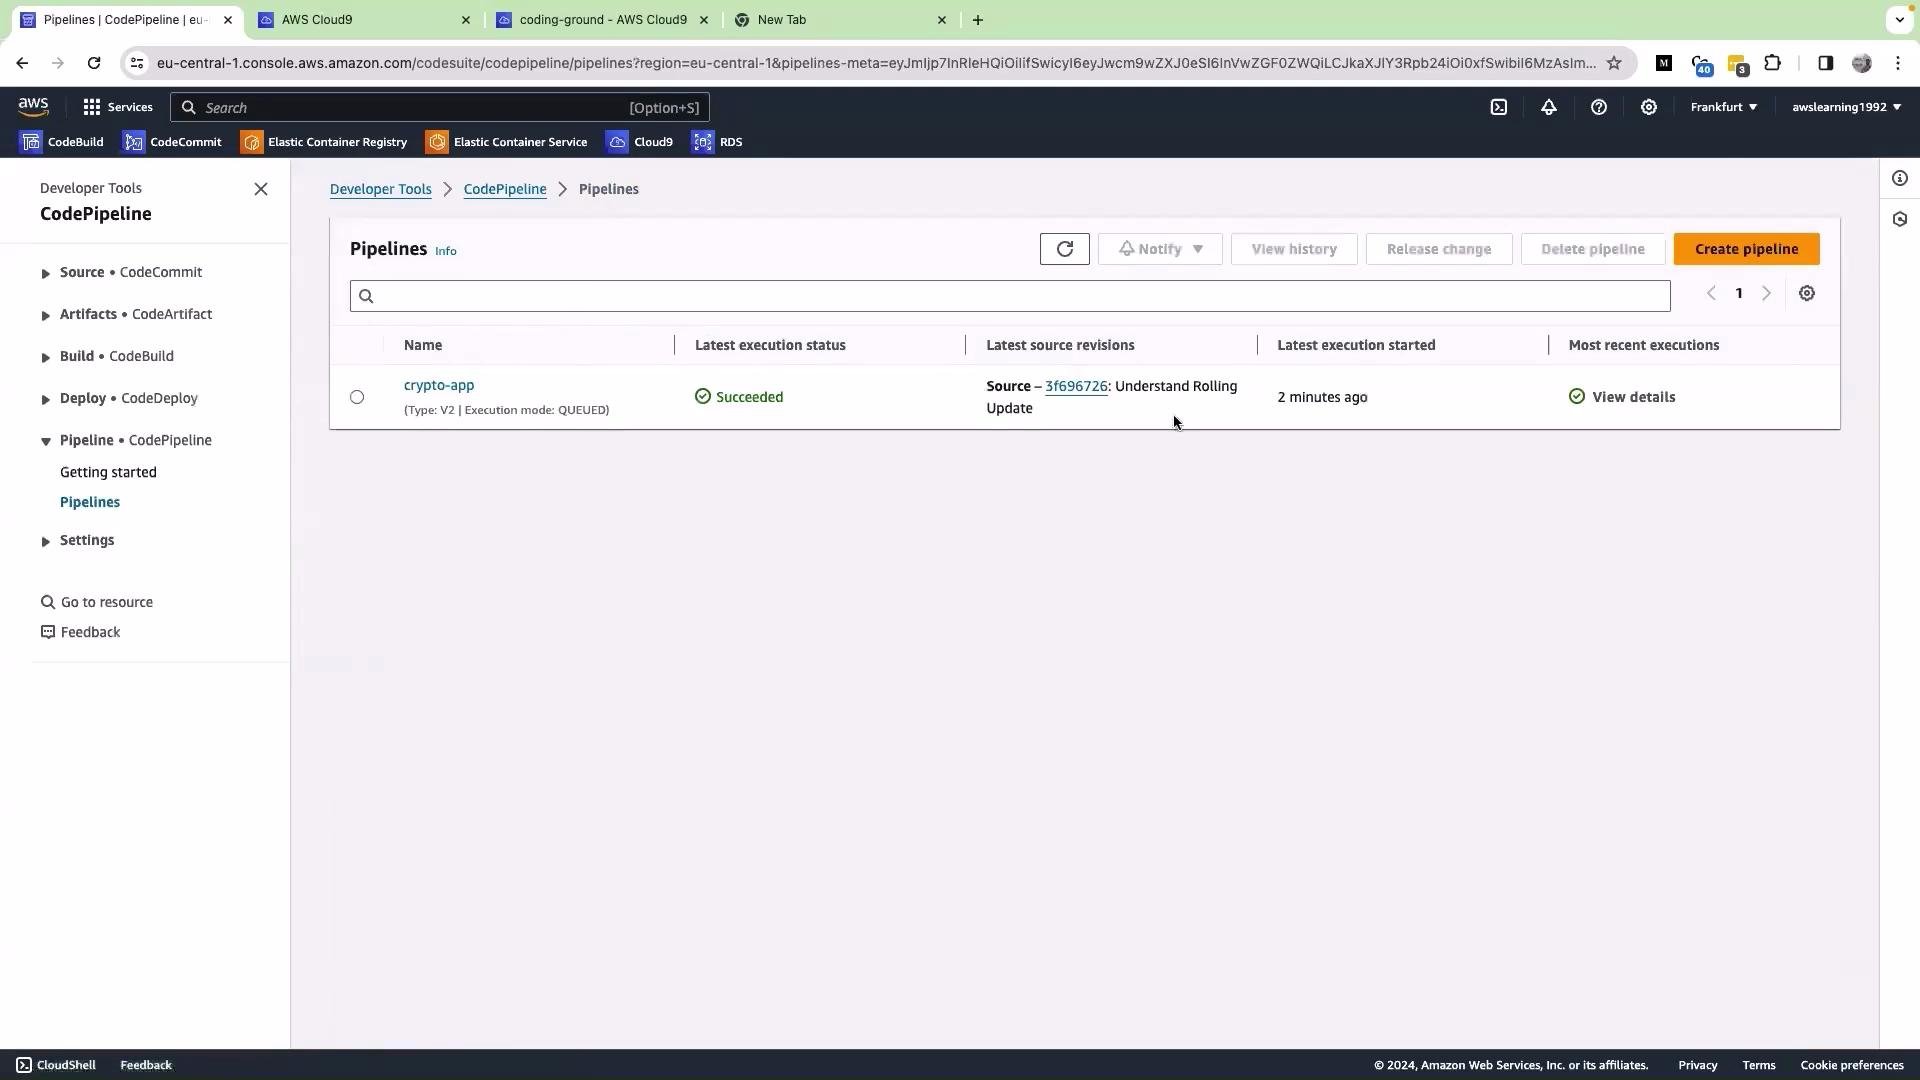
Tip: you can disable transitions between stages if you need to pause pipeline progression (for example, temporarily disable the transition from Source to Build). After the run completes successfully, the pipeline will display a successful status and show the commit hash that was built.
The image shows an AWS CodePipeline interface with one pipeline, "crypto-app," which has a status of "Succeeded." The interface provides options to view history, release changes, and create a new pipeline.
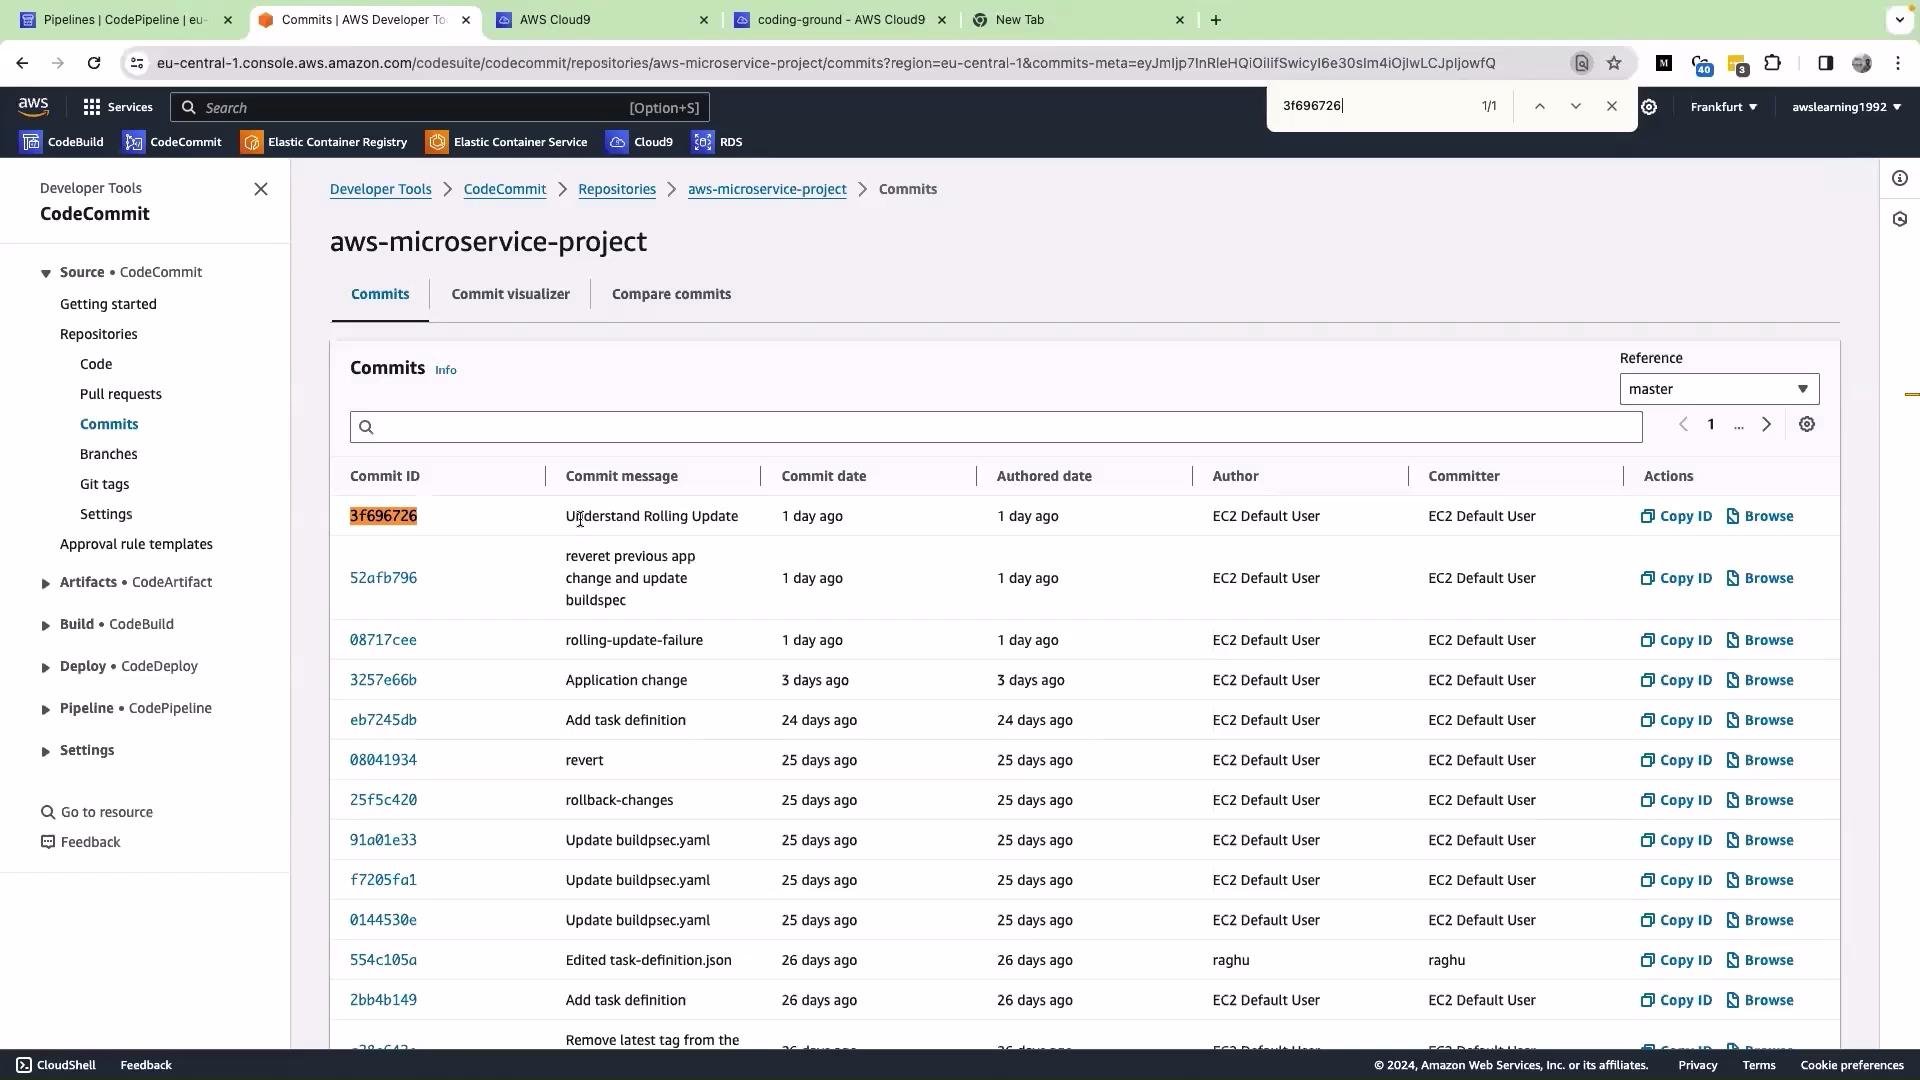
You can cross-check the commit details directly in CodeCommit—open the repository and view the commits list to confirm the pipeline picked up the intended commit.
The image shows an AWS CodeCommit interface displaying a list of commits for the "aws-microservice-project" repository, with details like commit ID, message, date, author, and actions available.

Pipeline summary

Fix code in Cloud9 and push to trigger the pipeline

Make your code edits in Cloud9 (or your local environment), commit, and push to master. CodePipeline will automatically start a new execution when it detects the new commit. Example Git workflow in your Cloud9 environment:
CodePipeline automatically detects changes in the configured source repository and triggers a pipeline execution for each new commit on the tracked branch.

Corrected application example

Below is the final (corrected) application code that was pushed to the repository and picked up by CodePipeline:

Update ECS service (manual step)

After the pipeline build completes successfully and produces a new image/task definition revision (for example, revision 8), update your ECS service to use that task definition:
  1. Open the ECS console and select your cluster.
  2. Choose the service you want to update.
  3. Click Update -> Select the new task definition revision (e.g., v8).
  4. Click Update Service to start the deployment.
  5. Monitor the deployment until it reaches a steady state.
A future lesson will show how to add an automated Deploy stage to CodePipeline to have this update done automatically. This lesson demonstrated creating a CI pipeline with Source and Build stages, validating a build, and pushing code changes to automatically trigger pipeline executions.

Watch Video