

Overview
The original monolithic application has been split into independent microservices. Each microservice lives in its own repository and is built, tested, and deployed independently. This architecture enables faster releases, isolation of failures, and autonomy for different teams. Below is a diagram that illustrates the migration from a monolith to microservices and how AWS CodePipeline and Amazon ECS work together in the CI/CD flow.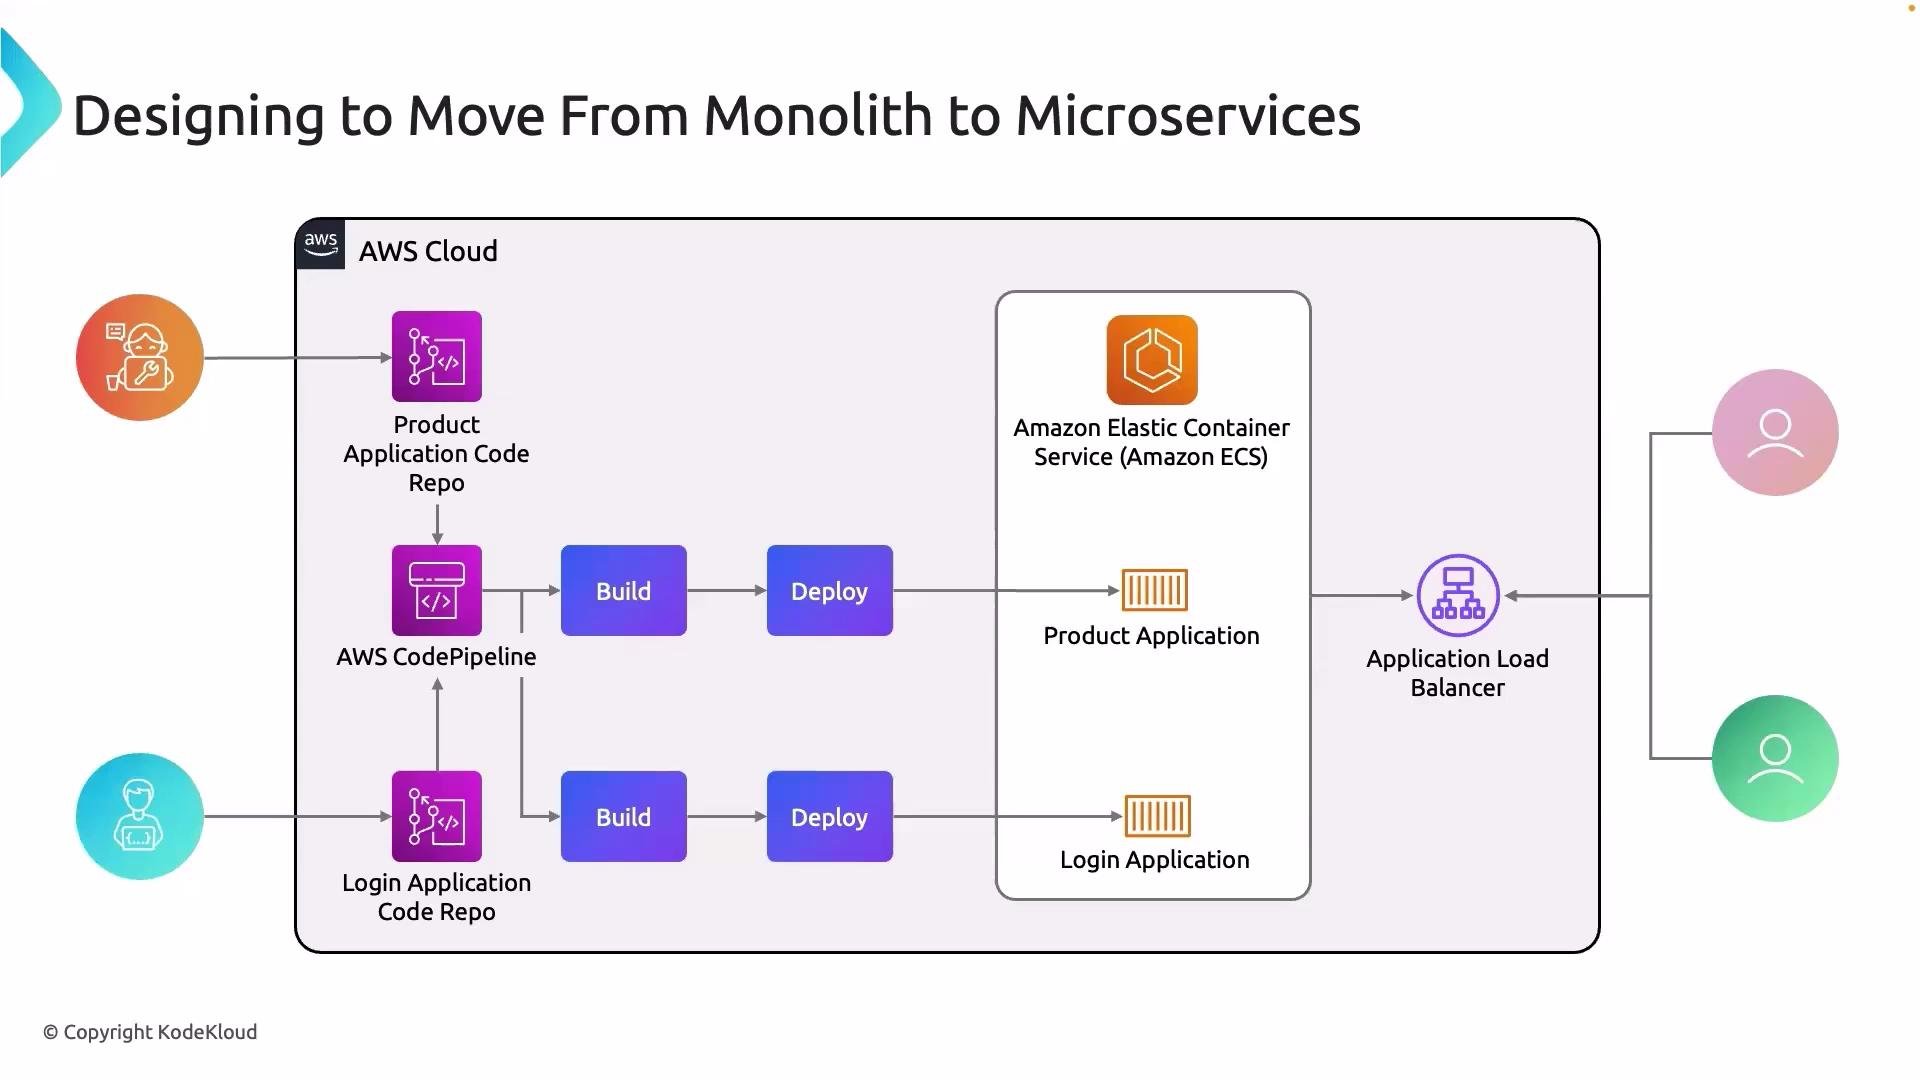
- Make small UI changes to the product page and the login page.
- Commit and push those changes to each microservice repository.
- Watch CodePipeline detect the changes, build Docker images, and update the ECS services.
- Verify the new versions are served by the Application Load Balancer.
Changes made
I used the Cloud9 IDE to edit both microservice repositories. Below are the final files I saved for each service.Product microservice — templates/product.html
This is the polished, production-ready product page that was committed to the product microservice repository:Login microservice — templates/login.html
I updated the login button text and improved inline styles for clarity. The final savedlogin.html:
Commit and push (triggering pipelines)
After editing the files, I staged, committed, and pushed changes in each repository from Cloud9. The push to AWS CodeCommit triggered the associated CodePipelines. Product microservice — example terminal steps: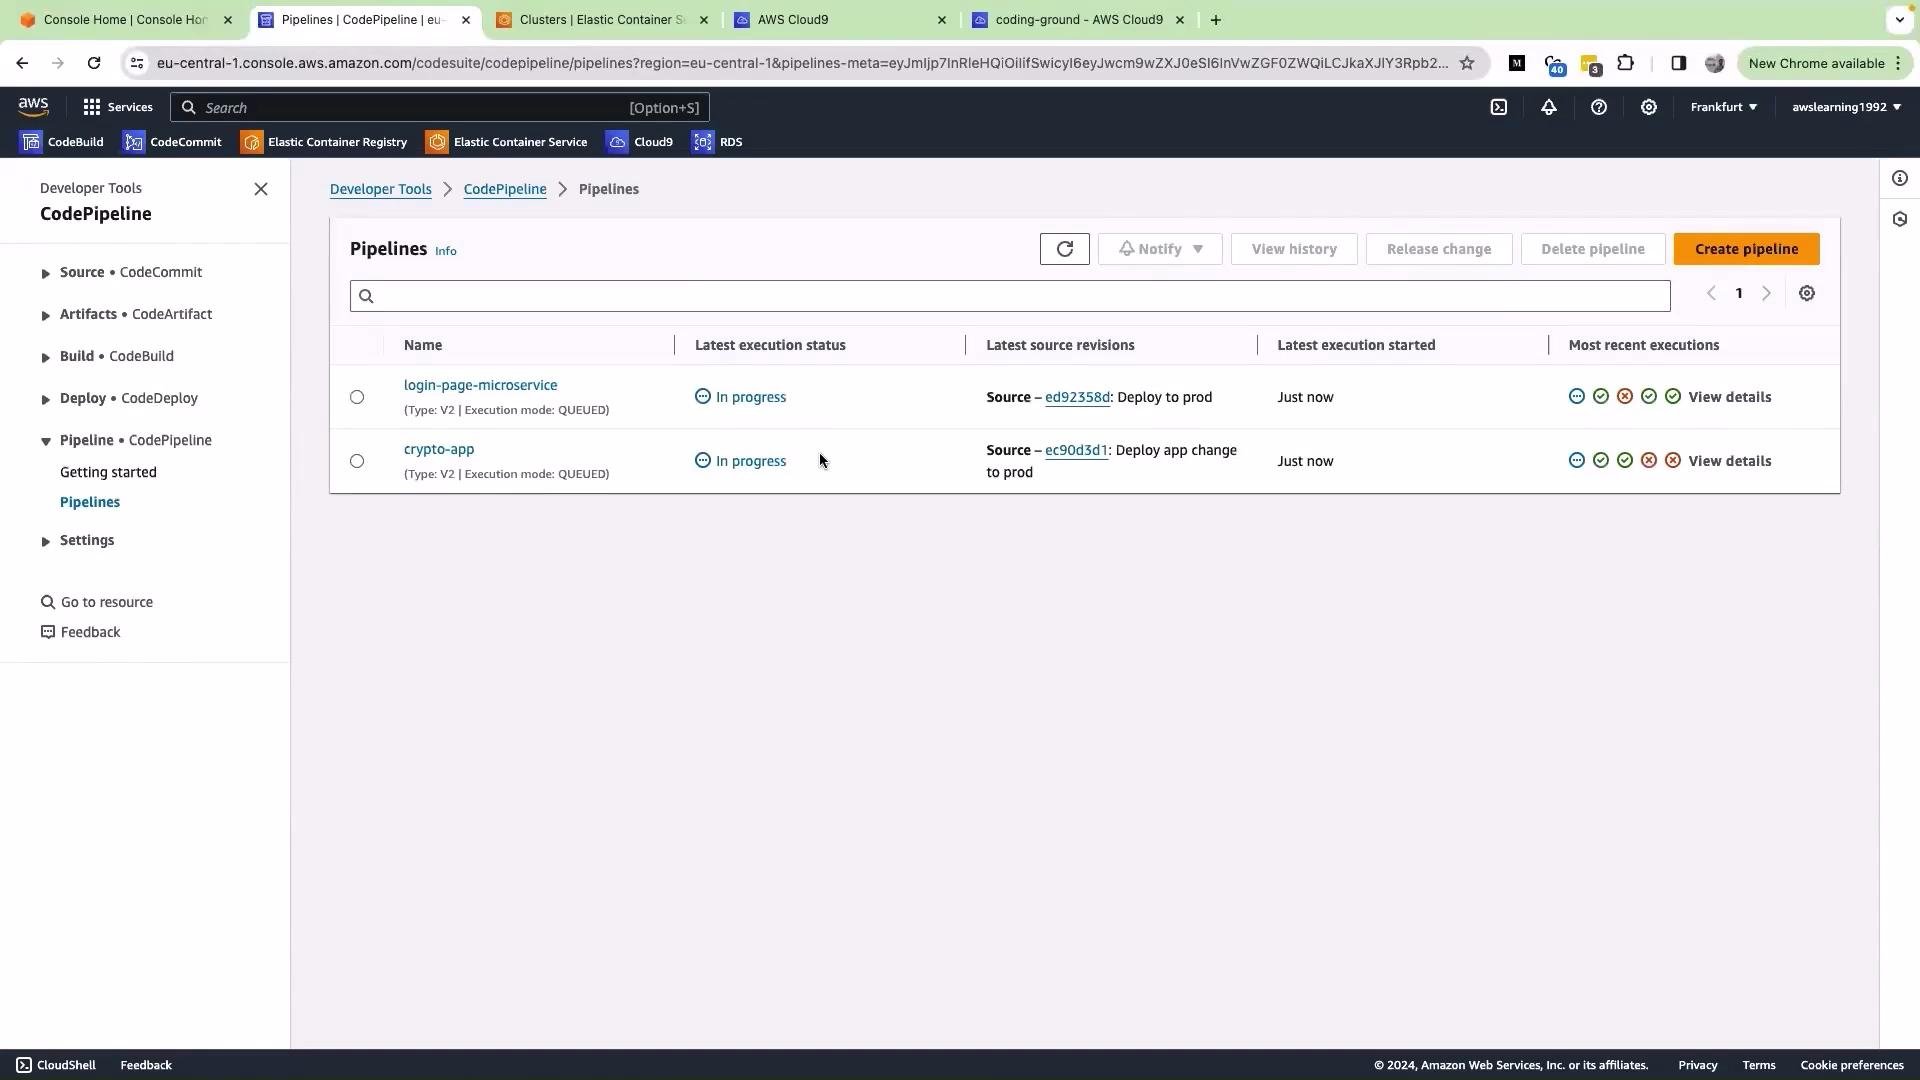
Monitor pipeline progress and verify deployment
I opened each pipeline in the AWS Console and watched them progress through the standard stages:
Both pipelines progressed through Source → Build → Deploy automatically. When the build completed, new ECS task definitions were registered and the ECS services were updated.
To verify the login UI change:
- Open the ECS service for the login application.
- Click “View Load Balancer” and copy the load balancer DNS name.
- Open the DNS in your browser.
During a rolling deployment, you may briefly see both old and new versions as the load balancer routes traffic between container instances. This is expected until old tasks are drained and the new tasks pass health checks.
Why this approach matters
Key takeaways
- Continuous deployment was implemented for both microservices using CodeCommit → CodePipeline → CodeBuild → ECS.
- Each service has an independent pipeline; pushing to a repository triggers only that service’s pipeline.
- Rolling ECS deployments can show temporary mixed versions while tasks are being replaced — this is expected.
- Microservice architecture enables faster iteration and independent team velocity.