Understanding Virtual Environments
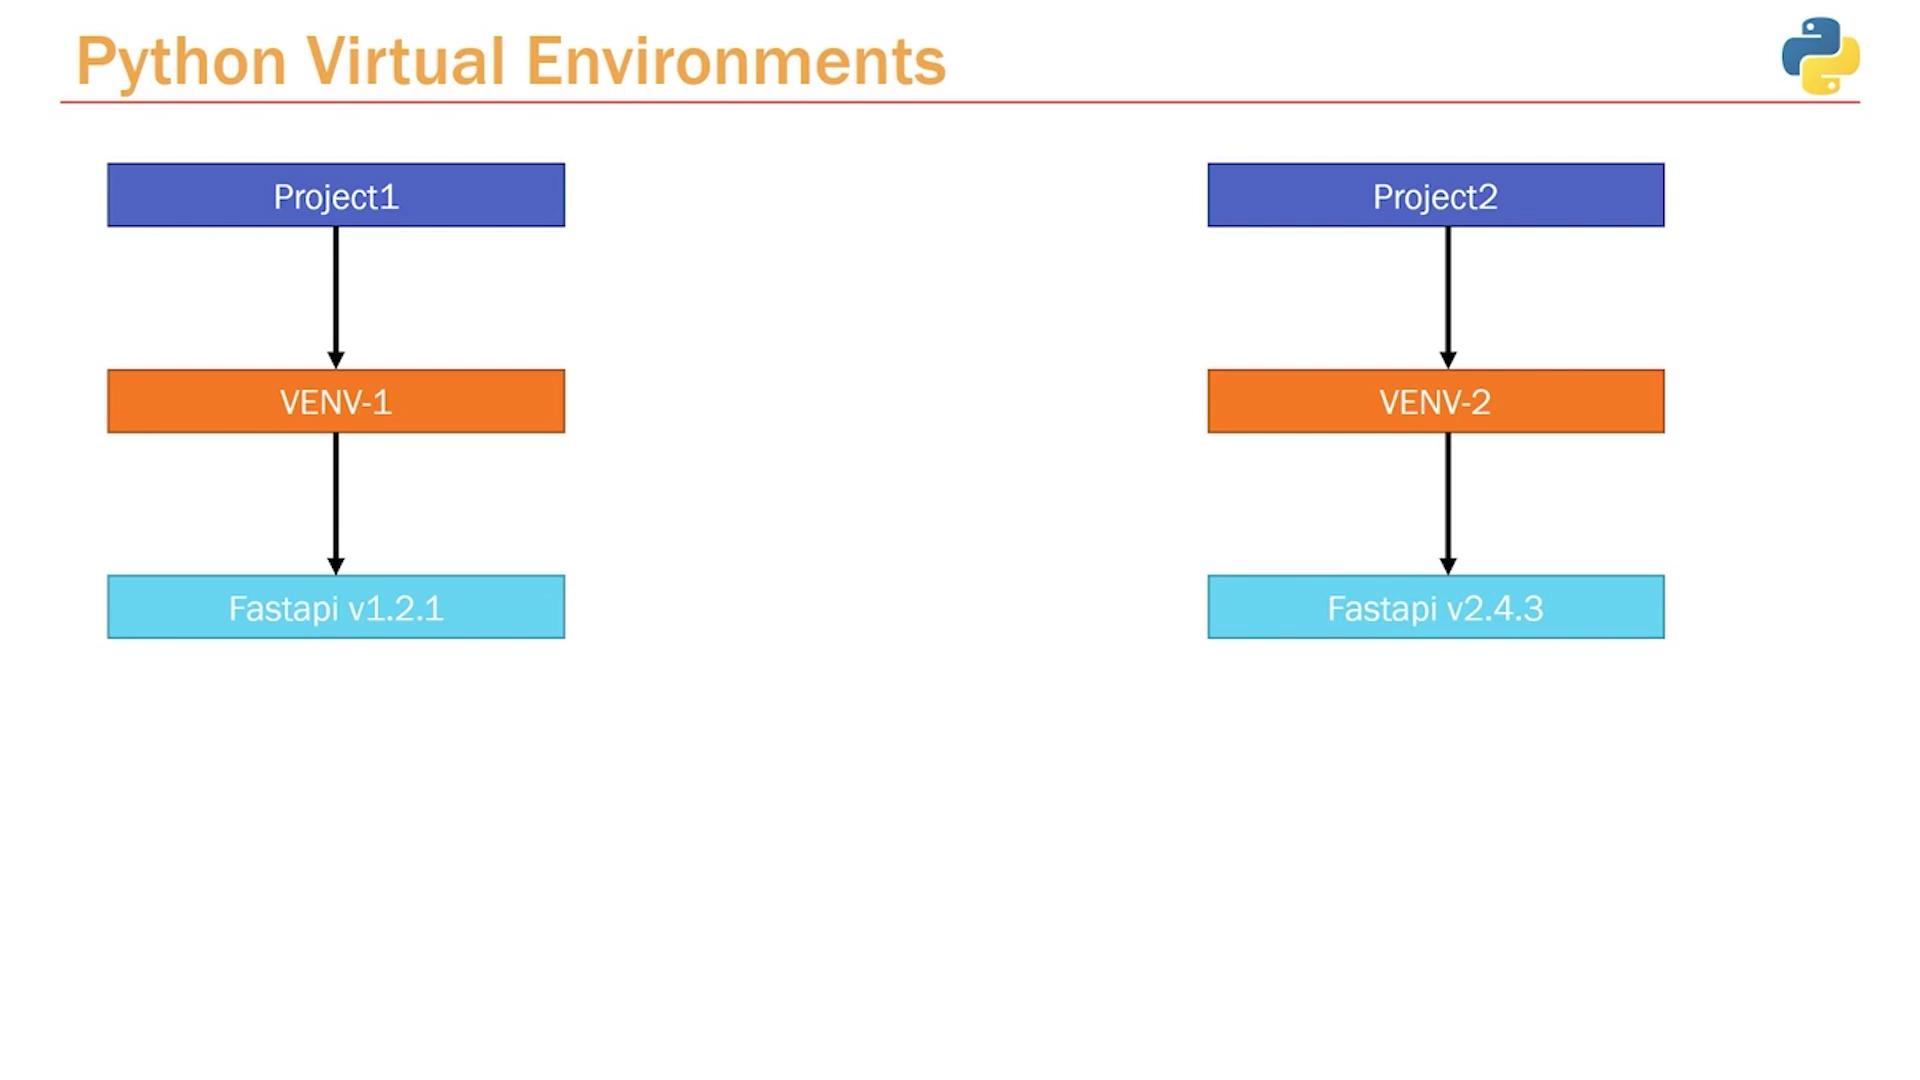
Imagine you have two projects:- Project One requires FastAPI version 1.2.1.
- Project Two requires FastAPI version 2.4.3.
Using virtual environments ensures that different projects can use different versions of the same package without conflicts. This isolation is crucial for maintaining stability across your projects.
- In Project One, you can create a virtual environment (e.g., named “venv1”) and install FastAPI version 1.2.1.
- In Project Two, create another virtual environment (e.g., “venv2”) and install FastAPI version 2.4.3.
Creating Your First Virtual Environment
With this understanding in hand, you’re ready to create your first virtual environment and manage your project’s dependencies. Follow the steps below to get started:- Open your project folder in VS Code.
- Open the integrated terminal.
-
Run the following command to create a virtual environment (replace “venv” with your preferred name):
-
Activate the virtual environment:
- On Windows:
- On macOS and Linux:
- On Windows:
- Once activated, you can install packages like FastAPI without affecting the global Python environment.