Documentation Index

Fetch the complete documentation index at: https://notes.kodekloud.com/llms.txt

Use this file to discover all available pages before exploring further.

This guide walks through installing Istio into a Kubernetes cluster using Helm. The steps follow the required sequence to get Istio running with the demo profile while keeping the control plane footprint minimal for test environments. Prerequisites:
  • A Kubernetes cluster with kubectl configured.
  • Helm installed on the machine performing the installation.

Prerequisite check

Start by confirming there are no user workloads (you should typically only see system namespaces on a fresh cluster):
kubectl get pods -A
If the cluster is fresh, you should only see pods in kube-system and other default namespaces.

1) Ensure Helm is available and add the Istio Helm repo

Verify Helm is installed and working:
helm version
Add the Istio Helm repository and update your local cache:
helm repo add istio https://istio-release.storage.googleapis.com/charts
helm repo update
Confirm the repository is present:
helm repo list
Example output:
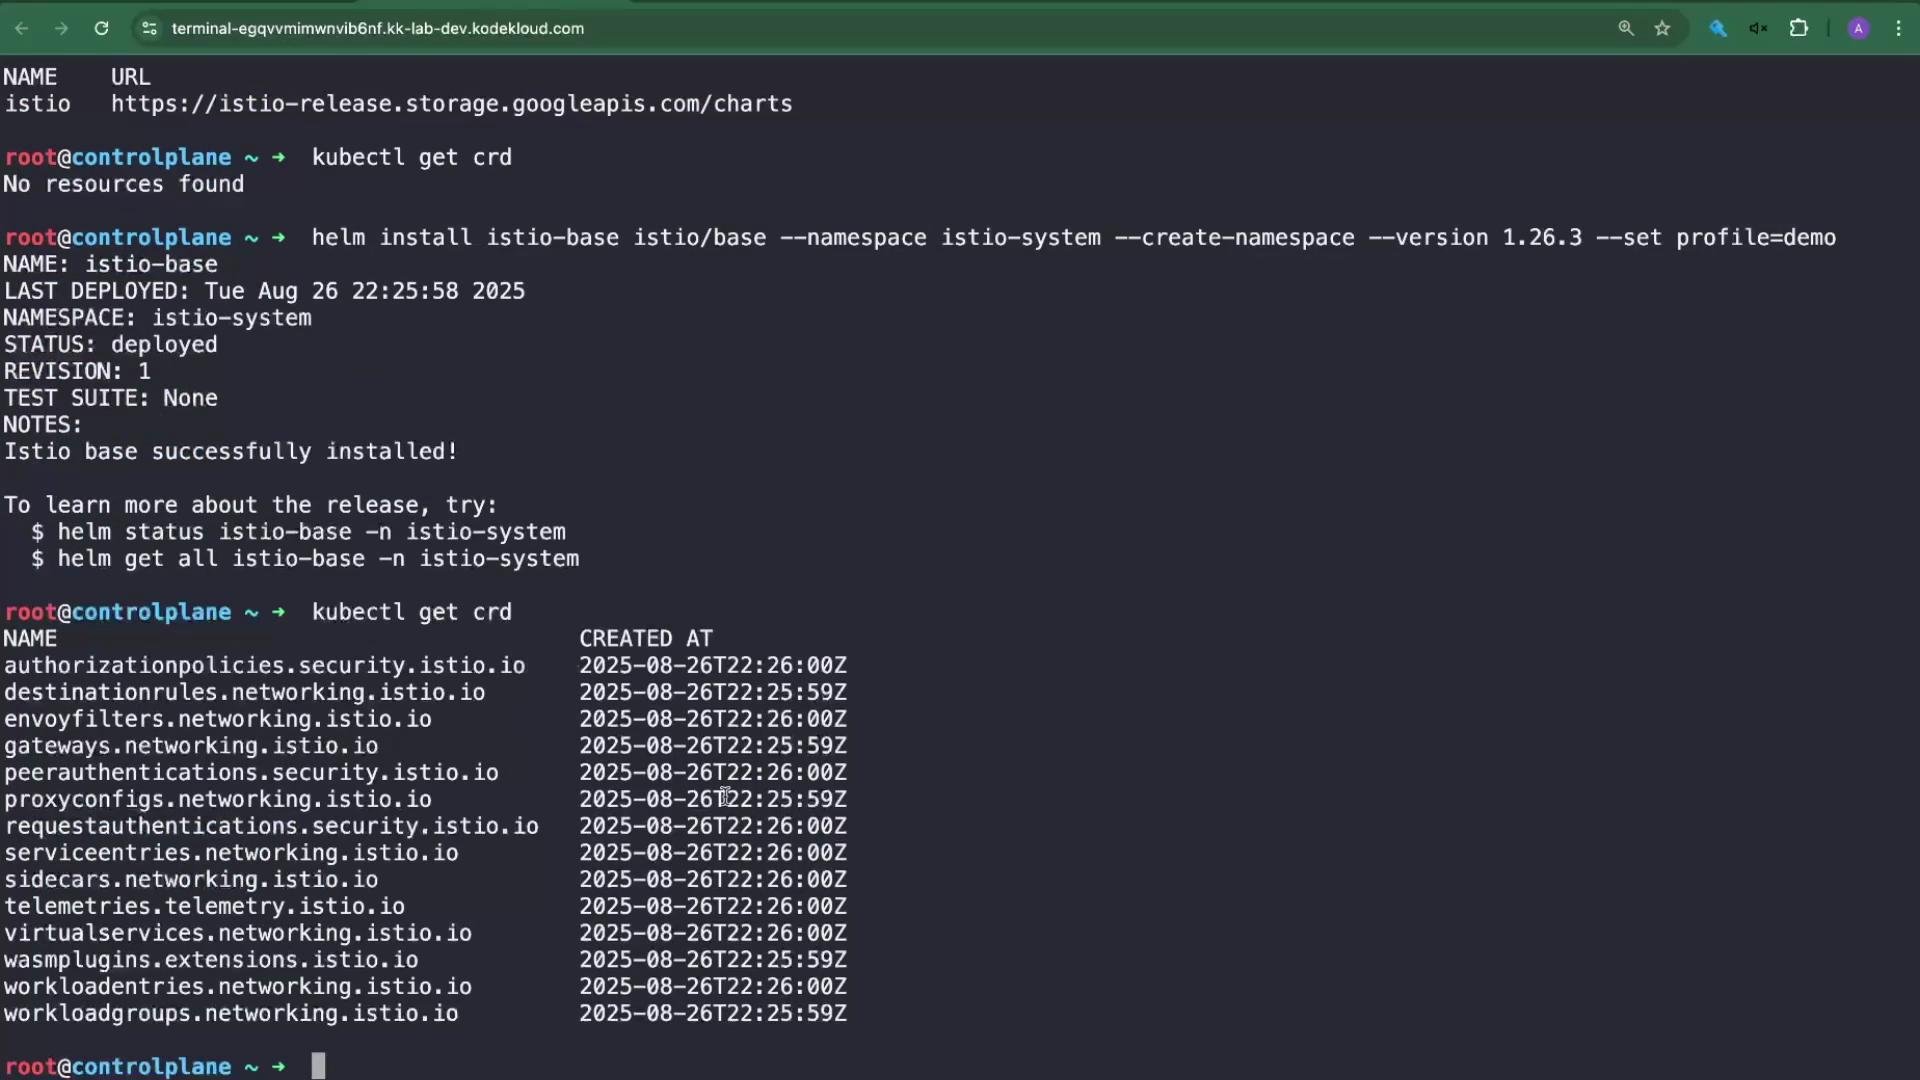
NAME  URL
istio https://istio-release.storage.googleapis.com/charts

2) Install the Istio base chart (CRDs)

Istio’s base chart installs the CustomResourceDefinitions (CRDs) required by the rest of Istio. Verify there are no CRDs present before installation:
kubectl get crd
# No resources found
Install the istio-base chart before any other Istio components. The CRDs must exist prior to installing the control plane or data plane charts.
Install istio-base into the istio-system namespace (create it if needed). This example uses version 1.26.3. The base chart only installs CRDs — the profile settings are applied when installing istiod:
helm install istio-base istio/base --namespace istio-system --create-namespace --version 1.26.3
Example Helm output:
NAME: istio-base
LAST DEPLOYED: Tue Aug 26 22:25:58 2025
NAMESPACE: istio-system
STATUS: deployed
REVISION: 1
TEST SUITE: None
NOTES:
Istio base successfully installed!

To learn more about the release, try:
$ helm status istio-base -n istio-system
$ helm get all istio-base -n istio-system
Verify the CRDs are now present:
kubectl get crd
Example output (truncated for brevity):
NAME                                                        CREATED AT
authorizationpolicies.security.istio.io                     2025-08-26T22:26:00Z
destinationrules.networking.istio.io                        2025-08-26T22:25:59Z
envoyfilters.networking.istio.io                            2025-08-26T22:26:00Z
gateways.networking.istio.io                                2025-08-26T22:25:59Z
...
virtualservices.networking.istio.io                         2025-08-26T22:26:00Z
wasmplugins.extensions.istio.io                             2025-08-26T22:25:59Z
workloadentries.networking.istio.io                         2025-08-26T22:26:00Z
workloadgroups.networking.istio.io                          2025-08-26T22:25:59Z
These CRDs are required before installing the remainder of Istio.

3) Install the Istio control plane (istiod)

Install istiod into the istio-system namespace. To reduce resource usage for testing, override the Pilot (istiod) resource requests to small values and use the demo profile:
helm install istiod istio/istiod \
  --namespace istio-system \
  --version 1.26.3 \
  --set profile=demo \
  --set pilot.resources.requests.memory=128Mi \
  --set pilot.resources.requests.cpu=250m
Example Helm output:
NAME: istiod
LAST DEPLOYED: Tue Aug 26 22:26:57 2025
NAMESPACE: istio-system
STATUS: deployed
REVISION: 1
TEST SUITE: None
NOTES:
"istiod" successfully installed!

To learn more about the release, try:
$ helm status istiod -n istio-system
$ helm get all istiod -n istio-system
Check the control plane pods:
kubectl get pods -n istio-system
Example output:
NAME                                READY   STATUS    RESTARTS   AGE
istiod-7f65f9c48b-5wgpr             1/1     Running   0          11s

4) Install the Istio gateway (ingress)

Install the gateway (ingress) component. You can install it into istio-system or a separate namespace such as istio-ingress. This example installs the gateway into istio-system:
helm install istio-ingress istio/gateway --namespace istio-system --version 1.26.3
Example Helm output:
NAME: istio-ingress
LAST DEPLOYED: Tue Aug 26 22:27:56 2025
NAMESPACE: istio-system
STATUS: deployed
REVISION: 1
TEST SUITE: None
NOTES:
"istio-ingress" successfully installed!

To learn more about the release, try:
  $ helm status istio-ingress -n istio-system
  $ helm get all istio-ingress -n istio-system
List pods in the istio-system namespace; you should now see both istio-ingress and istiod:
kubectl get pods -n istio-system
Example output:
NAME                                      READY   STATUS    RESTARTS   AGE
istio-ingress-6cc846956d-b57jn            1/1     Running   0          5s
istiod-7f65f9c48b-5wgpr                   1/1     Running   0          64s

5) Namespace labeling for automatic sidecar injection

Istio can inject sidecar proxies into pods automatically when a namespace is labeled with istio-injection=enabled. If you want automatic sidecar injection for a namespace, label it.
Labeling a namespace enables automatic injection of the Istio sidecar proxy into pods created in that namespace.
If istioctl is not installed, you’ll see an error like:
istioctl analyze
# -bash: istioctl: command not found
Check the labels on the default namespace:
kubectl get ns default --show-labels
Example output before labeling:
NAME      STATUS   AGE     LABELS
default   Active   5m21s   kubernetes.io/metadata.name=default
Label the default namespace for sidecar injection:
kubectl label ns default istio-injection=enabled
Confirm the label is applied:
kubectl get ns default --show-labels
Example output after labeling:
NAME      STATUS   AGE     LABELS
default   Active   5m40s   istio-injection=enabled,kubernetes.io/metadata.name=default

6) Deploy a sample workload to verify sidecar injection

Create a simple Redis pod to validate that Istio injects the sidecar proxy:
kubectl run redis --image=redis
Confirm the pod is created and being initialized (the injected Istio proxy increases the container count to 2):
kubectl get pods
Example progression:
# Immediately after creation
NAME     READY   STATUS            RESTARTS   AGE
redis    0/2     PodInitializing   0          2s

# Shortly afterwards
NAME     READY   STATUS    RESTARTS   AGE
redis    1/2     Running   0          6s
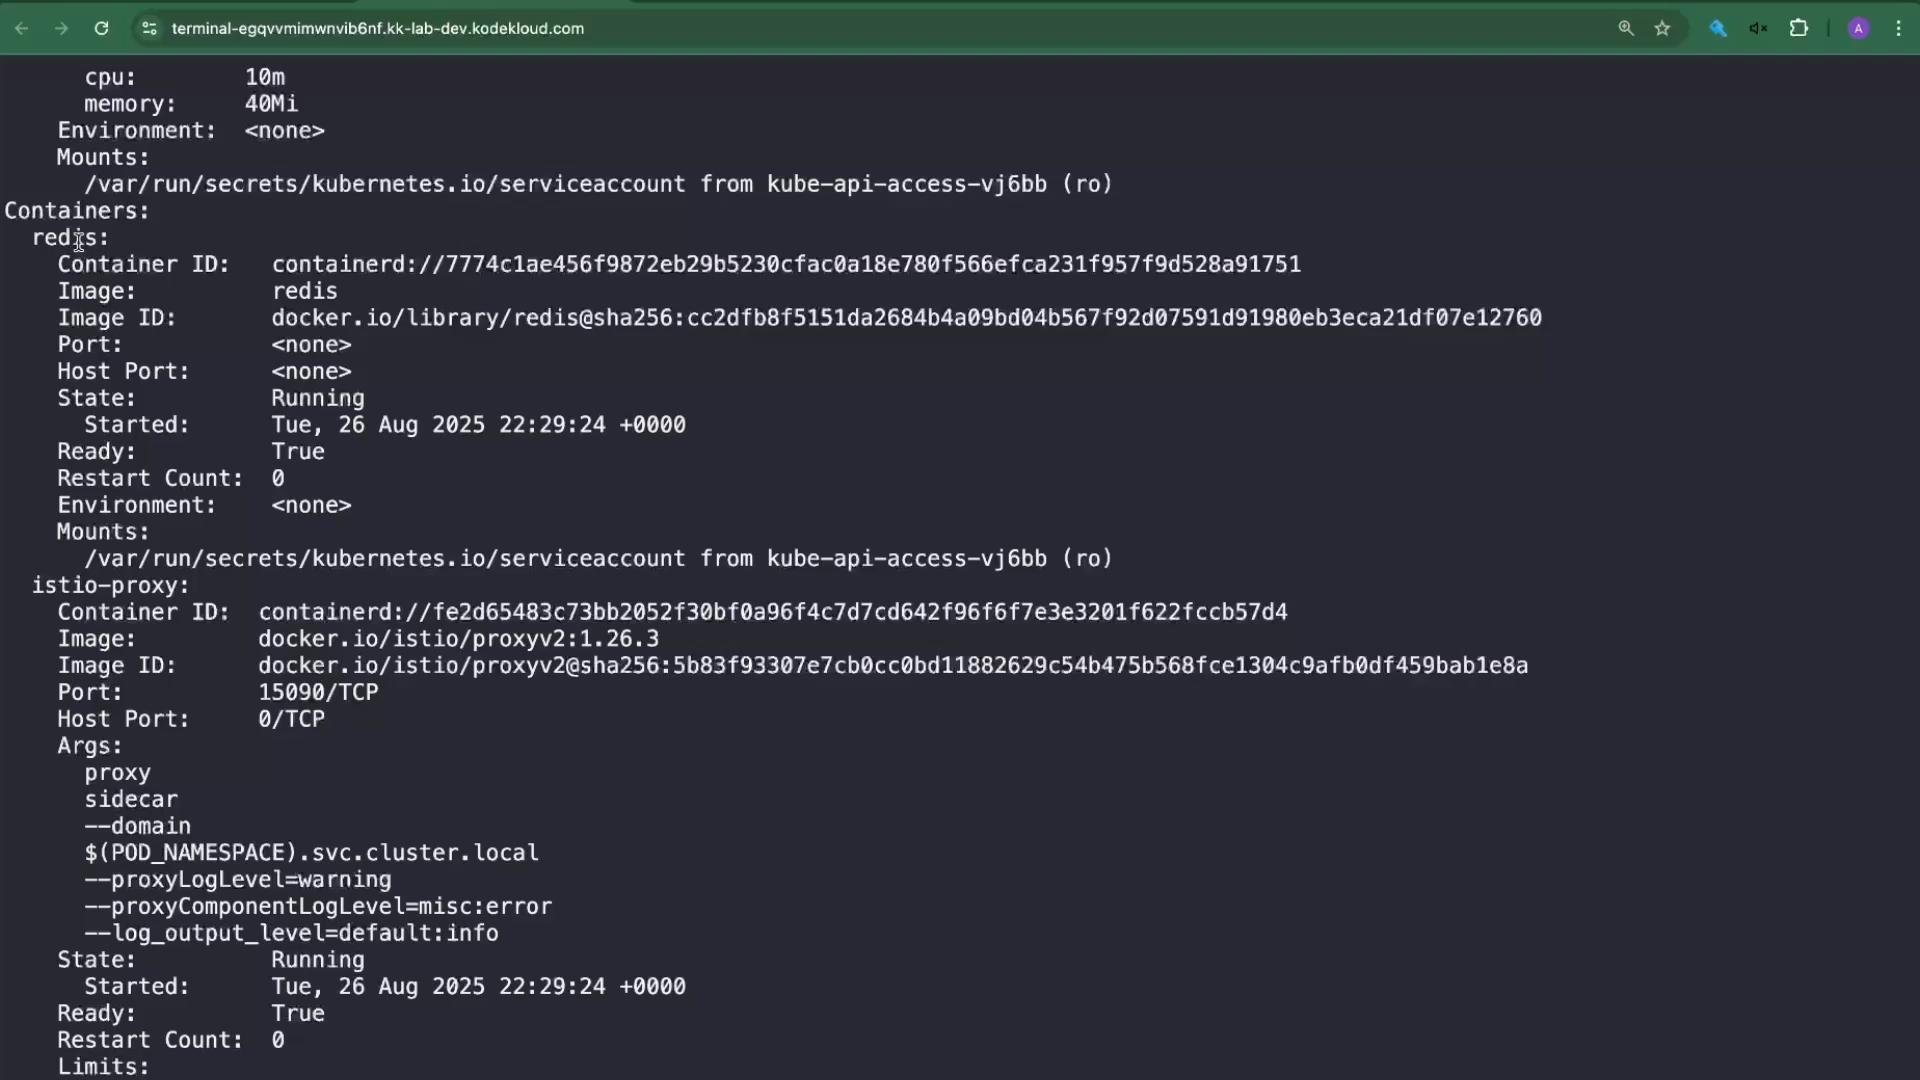
Describe the pod to see both the application container (redis) and the Istio sidecar (istio-proxy):
kubectl describe pod redis
Relevant excerpt from the describe output:
Containers:
  redis:
    Image:          redis
    State:          Running
    Ready:          True
    Restart Count:  0
    Mounts:
      /var/run/secrets/kubernetes.io/serviceaccount from kube-api-access-xxxxx (ro)

  istio-proxy:
    Image:          docker.io/istio/proxyv2:1.26.3
    Port:           15090/TCP
    Args:
      proxy
      sidecar
      --domain
      $(POD_NAMESPACE).svc.cluster.local
      --proxyLogLevel=warning
      --proxyComponentLogLevel=misc:error
      --log_output_level=default:info
    State:          Running
    Ready:          True
    Restart Count:  0

7) Inspect and customize Helm chart values

To review the default configurable values for a chart before customizing, use helm show values and redirect output to a file. For example:
helm show values istio/istiod > istiod.yaml
helm show values istio/gateway > gateway.yaml
This creates istiod.yaml and gateway.yaml containing all configurable values for the charts. Edit these files to change image tags, resource requests/limits, or other chart settings. Example directory listing after generating the files:
ll
# gateway.yaml
# istiod.yaml
Apply your edited values using helm upgrade:
helm upgrade istiod istio/istiod -n istio-system -f istiod.yaml
This upgrades the istiod release and applies your custom configuration from the values file.

8) Quick command reference

TaskCommand
List all pods across namespaceskubectl get pods -A
Verify Helm is installedhelm version
Add Istio Helm repohelm repo add istio https://istio-release.storage.googleapis.com/charts
Install istio-base (CRDs)helm install istio-base istio/base --namespace istio-system --create-namespace --version 1.26.3
Install istiod (control plane)(see install block above)
Install gatewayhelm install istio-ingress istio/gateway --namespace istio-system --version 1.26.3
Label namespace for sidecar injectionkubectl label ns default istio-injection=enabled
Generate chart values filehelm show values istio/istiod > istiod.yaml
Upgrade with custom valueshelm upgrade istiod istio/istiod -n istio-system -f istiod.yaml

9) Summary

  • Add the Istio Helm repository and update it.
  • Install istio-base first to create the required CRDs.
  • Install istiod (control plane) using the demo profile and, if needed, reduced resource requests for testing.
  • Install the gateway (ingress) chart.
  • Label namespaces where you want automatic sidecar injection: istio-injection=enabled.
  • Use helm show values to fetch default chart values, edit them, and apply changes with helm upgrade -f <values.yaml>.
That’s it — Istio is now installed via Helm with the demo profile and a minimal resource footprint.

Watch Video

Practice Lab