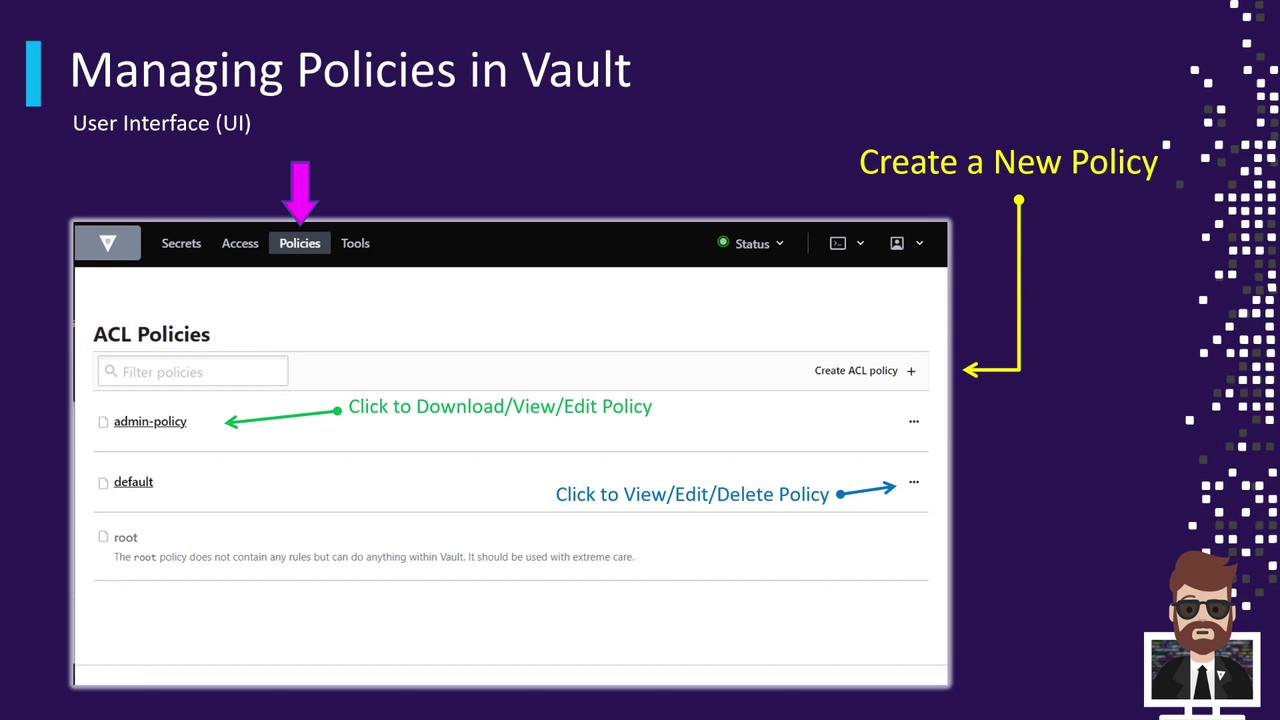
Accessing the Policies Tab
- Click on the Policies tab (highlighted by the pink arrow in the screenshot).
- Vault lists all ACL policies, including built-in and any custom policies you’ve defined.
By default, Vault includes two core policies:
| Policy | Description |
|---|---|
| default | Minimal access scope applied to all tokens |
| root | Full administrative access |
Viewing and Managing Policies
- Click a policy’s name to open its rule editor.
- Click the ⋮ (three-dot) menu on the right to:
- Download the policy file
- View policy details in a modal
- Edit the policy rules inline
- Delete the policy
Changes take effect immediately for all tokens bound to the policy. Always review your updates before saving.
Creating a New ACL Policy
- Click Create ACL Policy on the right.
- Enter a unique name for your policy.
- Paste your HCL or JSON rule definitions into the editor.
- Click Save to apply the new policy.