- Vault Enterprise license (1.5+)
- Admin-level token with
replicationcapabilities - Two Vault clusters (primary and secondary) with network connectivity
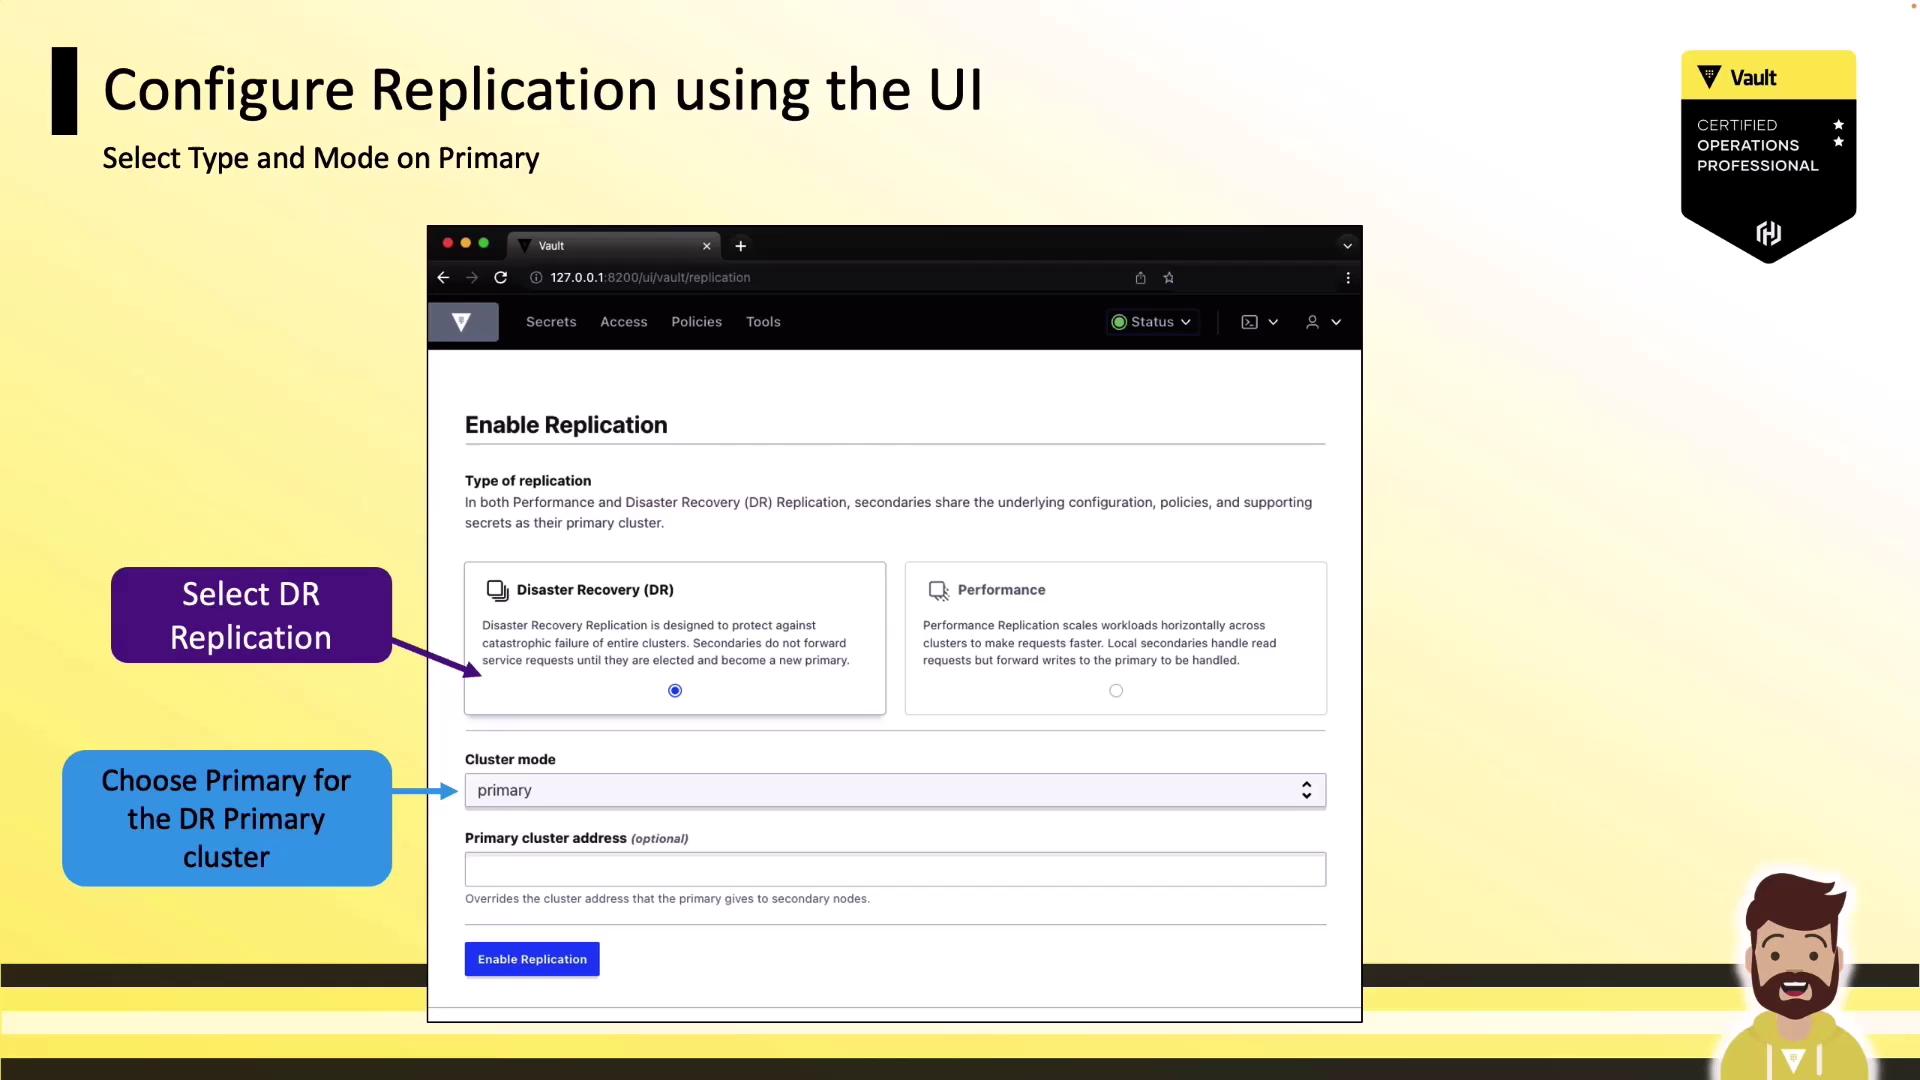
1. Enable DR Replication on the Primary Cluster
- Log in to your primary Vault cluster through the UI.
- In the sidebar, click Status, then select Replication.
- Click Enable Replication.
- From the Type dropdown, choose Disaster Recovery (DR) Replication.
- Set Cluster Mode to Primary, then confirm by clicking Enable Replication.
2. Register a Secondary Cluster
- In the Replication panel, click Add a Secondary.
- Provide a descriptive Name for your secondary cluster.
- (Optional) Adjust the Token TTL to control how long the secondary activation token remains valid.
- Click Generate Token and Copy the output.
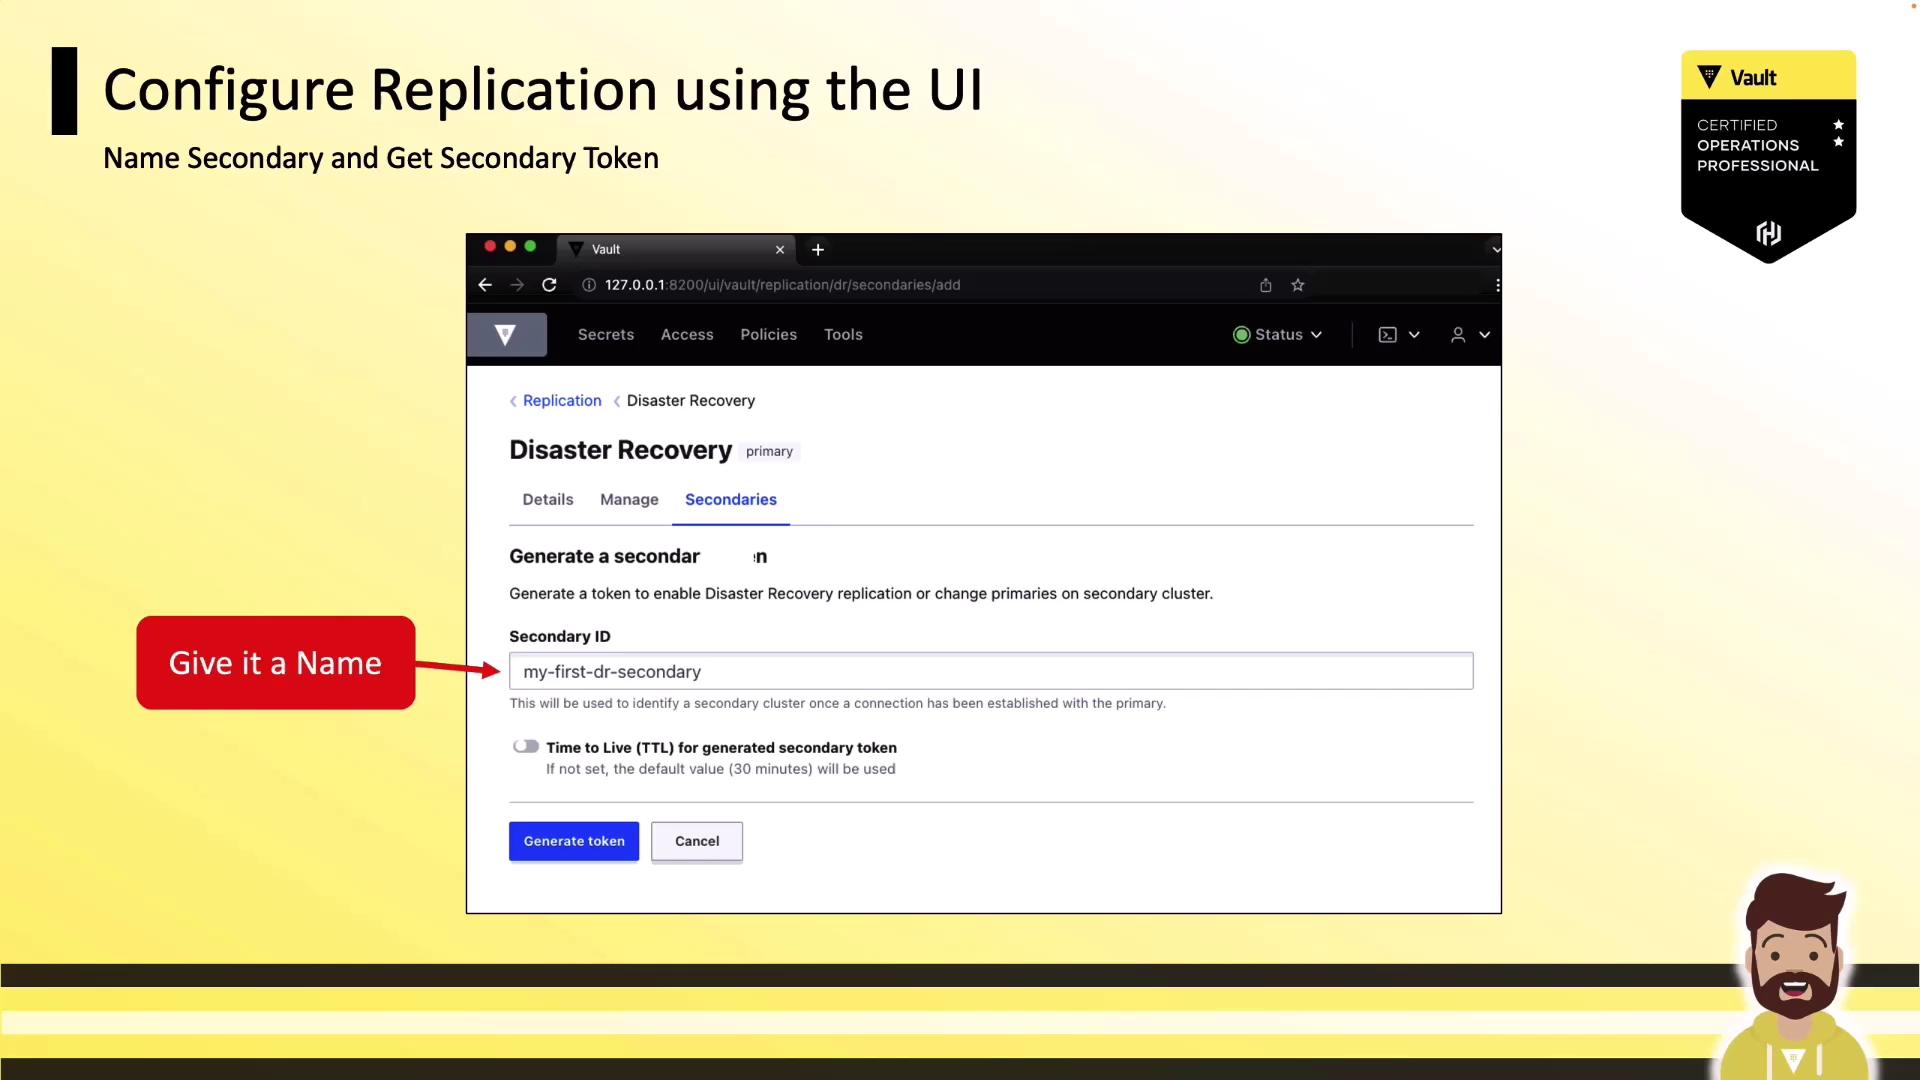
Keep the generated token secure. It grants replication activation rights on the secondary cluster.
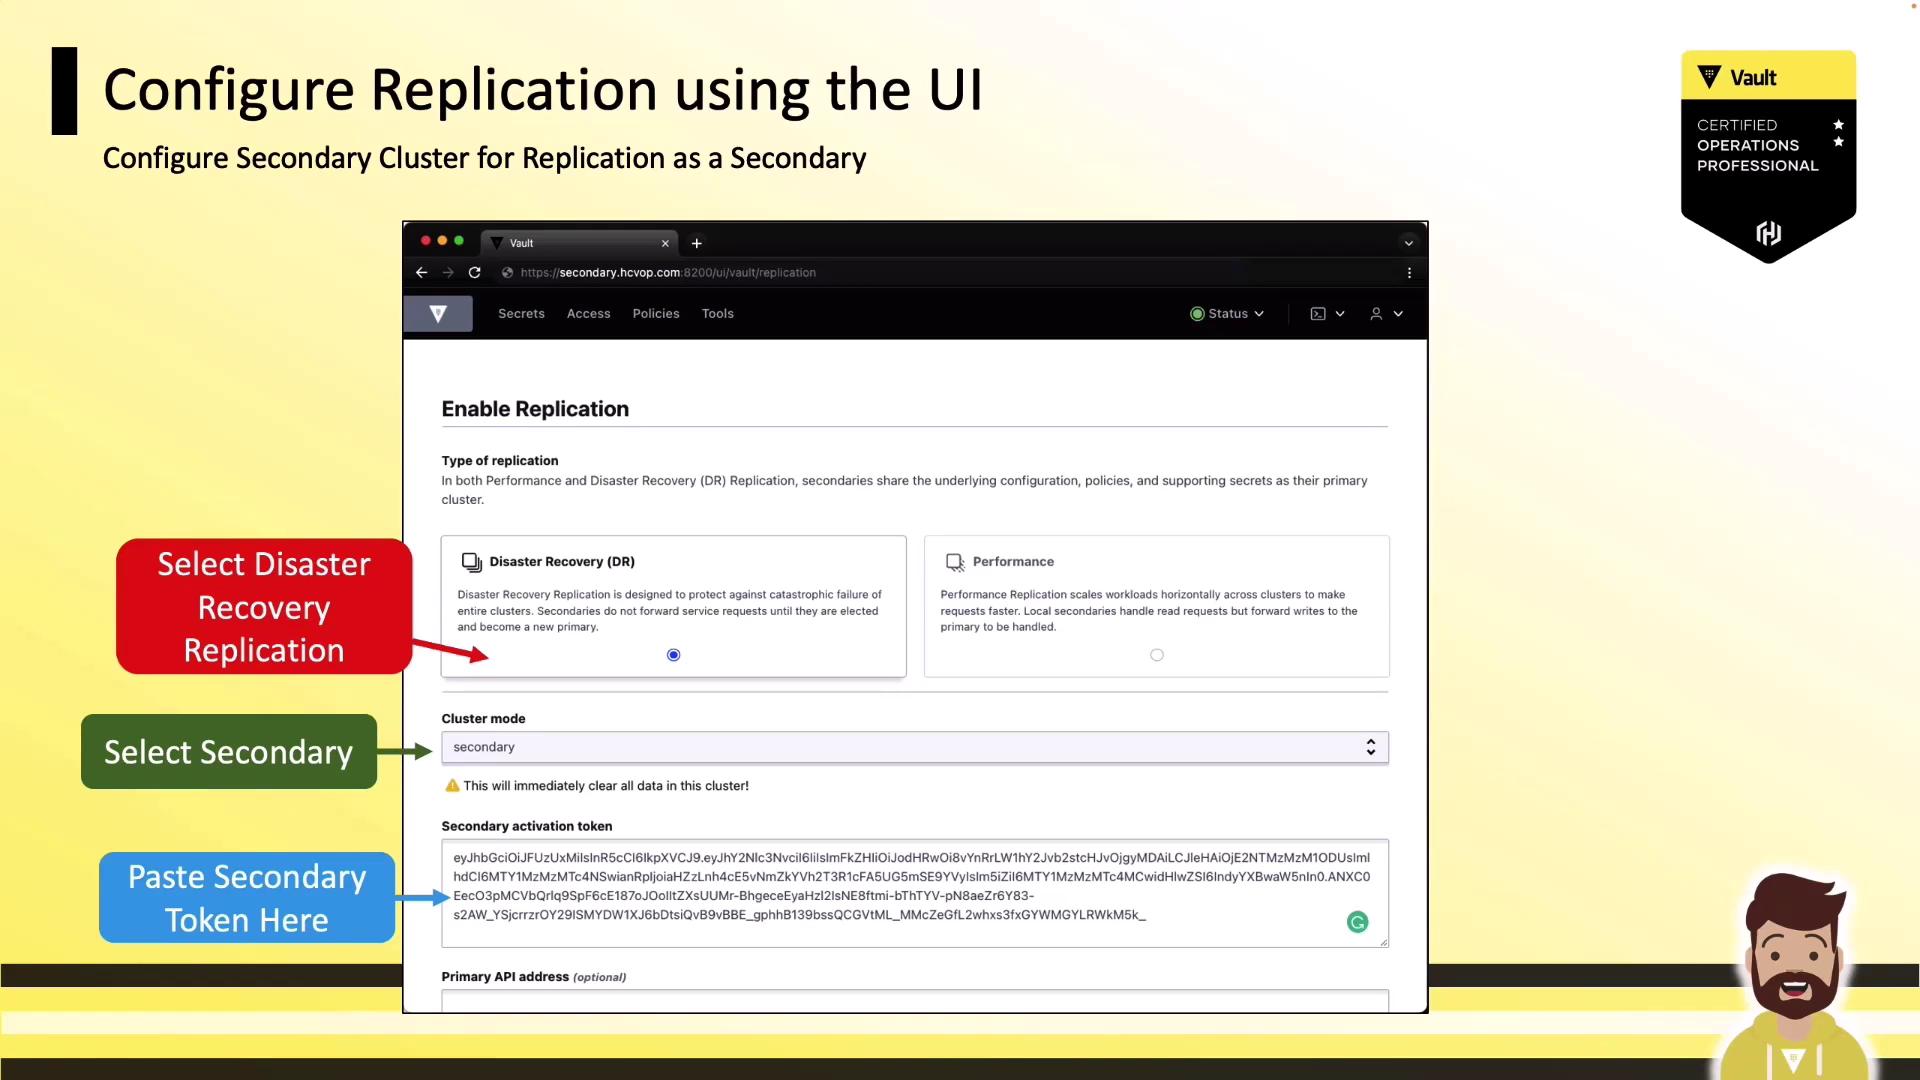
3. Activate DR Replication on the Secondary Cluster
- Log in to your secondary Vault cluster.
- Navigate to Status → Replication → Enable Replication.
- Select Disaster Recovery (DR) Replication.
- Choose Secondary for Cluster Mode.
- Paste the token you copied from the primary.
- Click Enable Replication to start synchronization.
DR vs. Performance Replication
| Replication Type | Use Case | Data Direction |
|---|---|---|
| Disaster Recovery (DR) | Failover during outages | Primary → Secondary |
| Performance Replication | Read-scaling and geo-distribution | Bidirectional |