

- See how calling components without dependencies results in parallel execution
- Enforce serial ordering so components run one after another
- Compile the pipeline Python definition to a YAML package
- Upload and run the pipeline in Kubeflow and inspect pods and logs
1) Components: minimal definitions
Below is a minimal, correct set of component definitions using the KFP v2 DSL. These example components returnNone for simplicity. In real pipelines, prefer typed Output and Input artifacts to pass data between components.
2) Calling components without dependencies (parallel execution)
If you call component functions inside a pipeline without specifying any ordering, KFP treats each call as an independent task. Without dependencies, the scheduler may run tasks concurrently (parallel execution). This is useful for independent tasks that can run simultaneously.3) Specifying ordering (run in series)
To force tasks to run in a specific sequence, use the.after() method on the task object returned by a component invocation. .after() guarantees a task does not start until the specified predecessor completes.
data_collection_processingfeature_engineering(afterdata_collection_processing)model_training(afterfeature_engineering)model_deployment(aftermodel_training)
Use
.after() when the start of a task depends on the completion of a previous task. For data transfer between steps, prefer explicit typed Output and Input artifact parameters; ordering alone does not pass artifacts.Do not rely solely on
.after() to move data between components. Define and use typed inputs/outputs so artifacts are materialized and passed correctly across steps and runs.4) Compiling the pipeline to YAML
To submit a pipeline to Kubeflow Pipelines you first compile the pipeline function into a YAML package. Use the KFP v2 compiler and produce ademo_pipeline.yaml package that contains component and deployment specs.
demo_pipeline.yaml will be created. The YAML includes component definitions and the deployment spec Kubeflow uses to generate pod templates. Compilation may produce benign warnings about pip or environment; check exit status to ensure the compile succeeded.
5) Uploading the YAML to Kubeflow Pipelines
Open the Kubeflow Central Dashboard and navigate to Pipelines → Upload (or Create pipeline). Upload the generateddemo_pipeline.yaml, provide a pipeline name and optionally a version/description, and save.
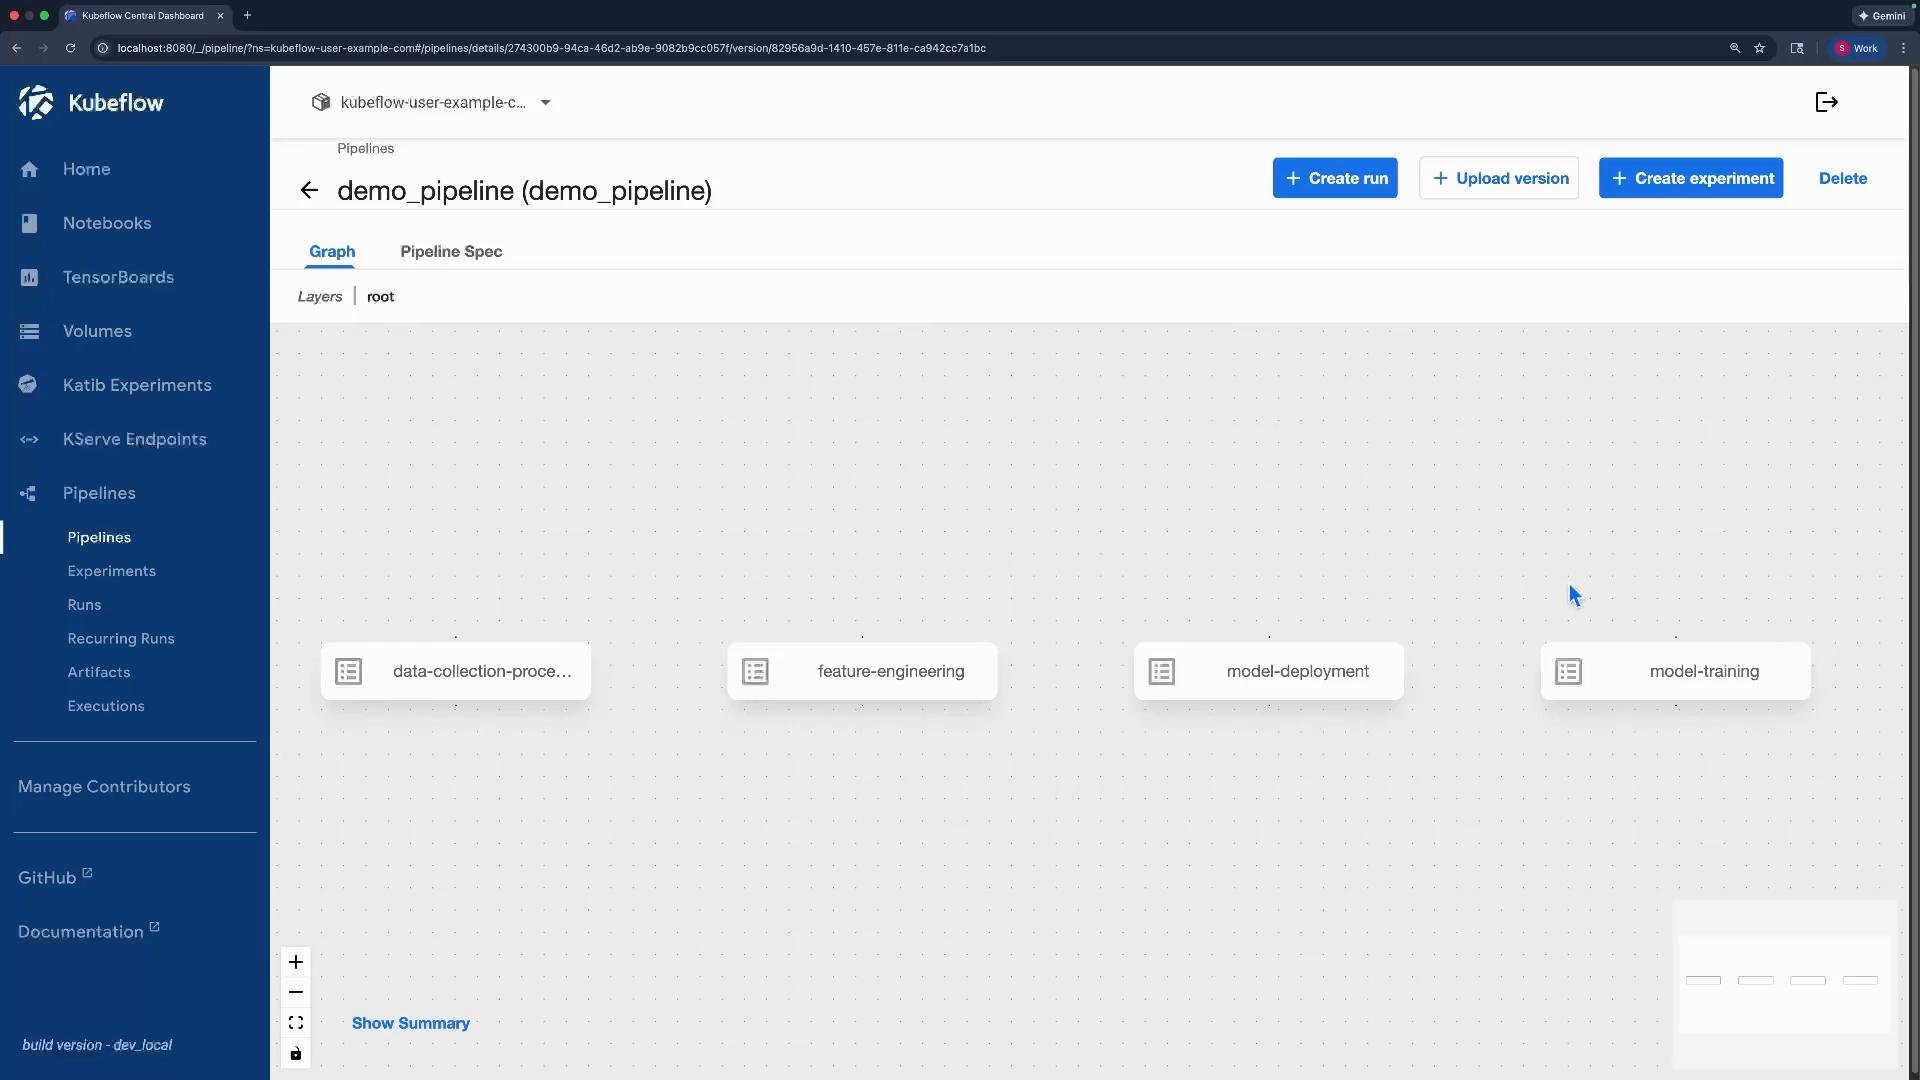
.after() ordering, the UI displays the DAG in sequence (vertical or directed order). To run the pipeline, choose Create run, select or create an Experiment to group runs, choose run type (one-off or recurring), and start the run.
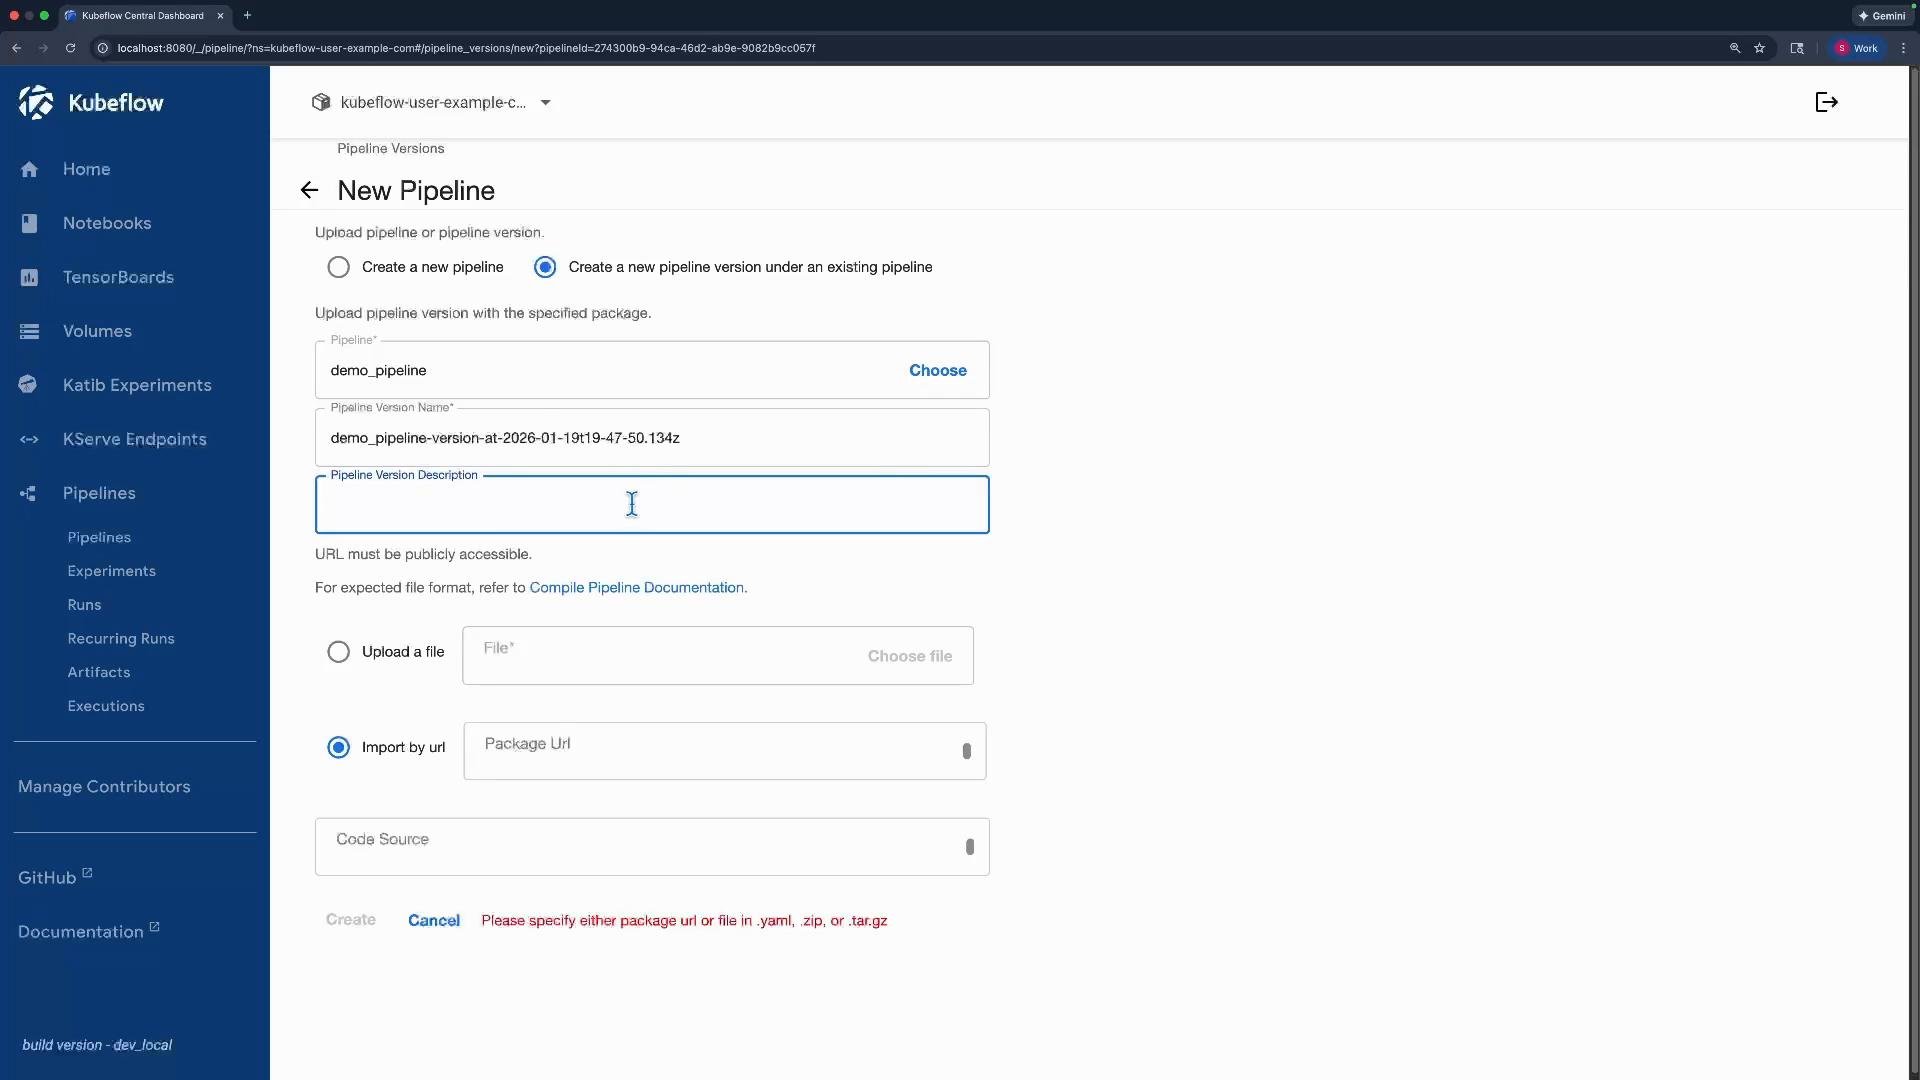
6) Observing pods and runtime behavior
When a pipeline run starts, Kubernetes creates pods for orchestration and for each component invocation. Typical pod roles you will encounter for a KFP run:
To list pods across namespaces and check their status:
your-namespace and your-pod-name with values from kubectl get pod -A.)
Implementation (impl) pods typically start, run the component, and then terminate. Executor and driver pods provide orchestration and helper logic; their logs are valuable when debugging pipeline failures.
When a run finishes successfully, Kubeflow shows a green checkmark in the UI. From the run details you can access per-task logs and artifact locations, and you can also view the uploaded YAML that describes the pipeline spec.
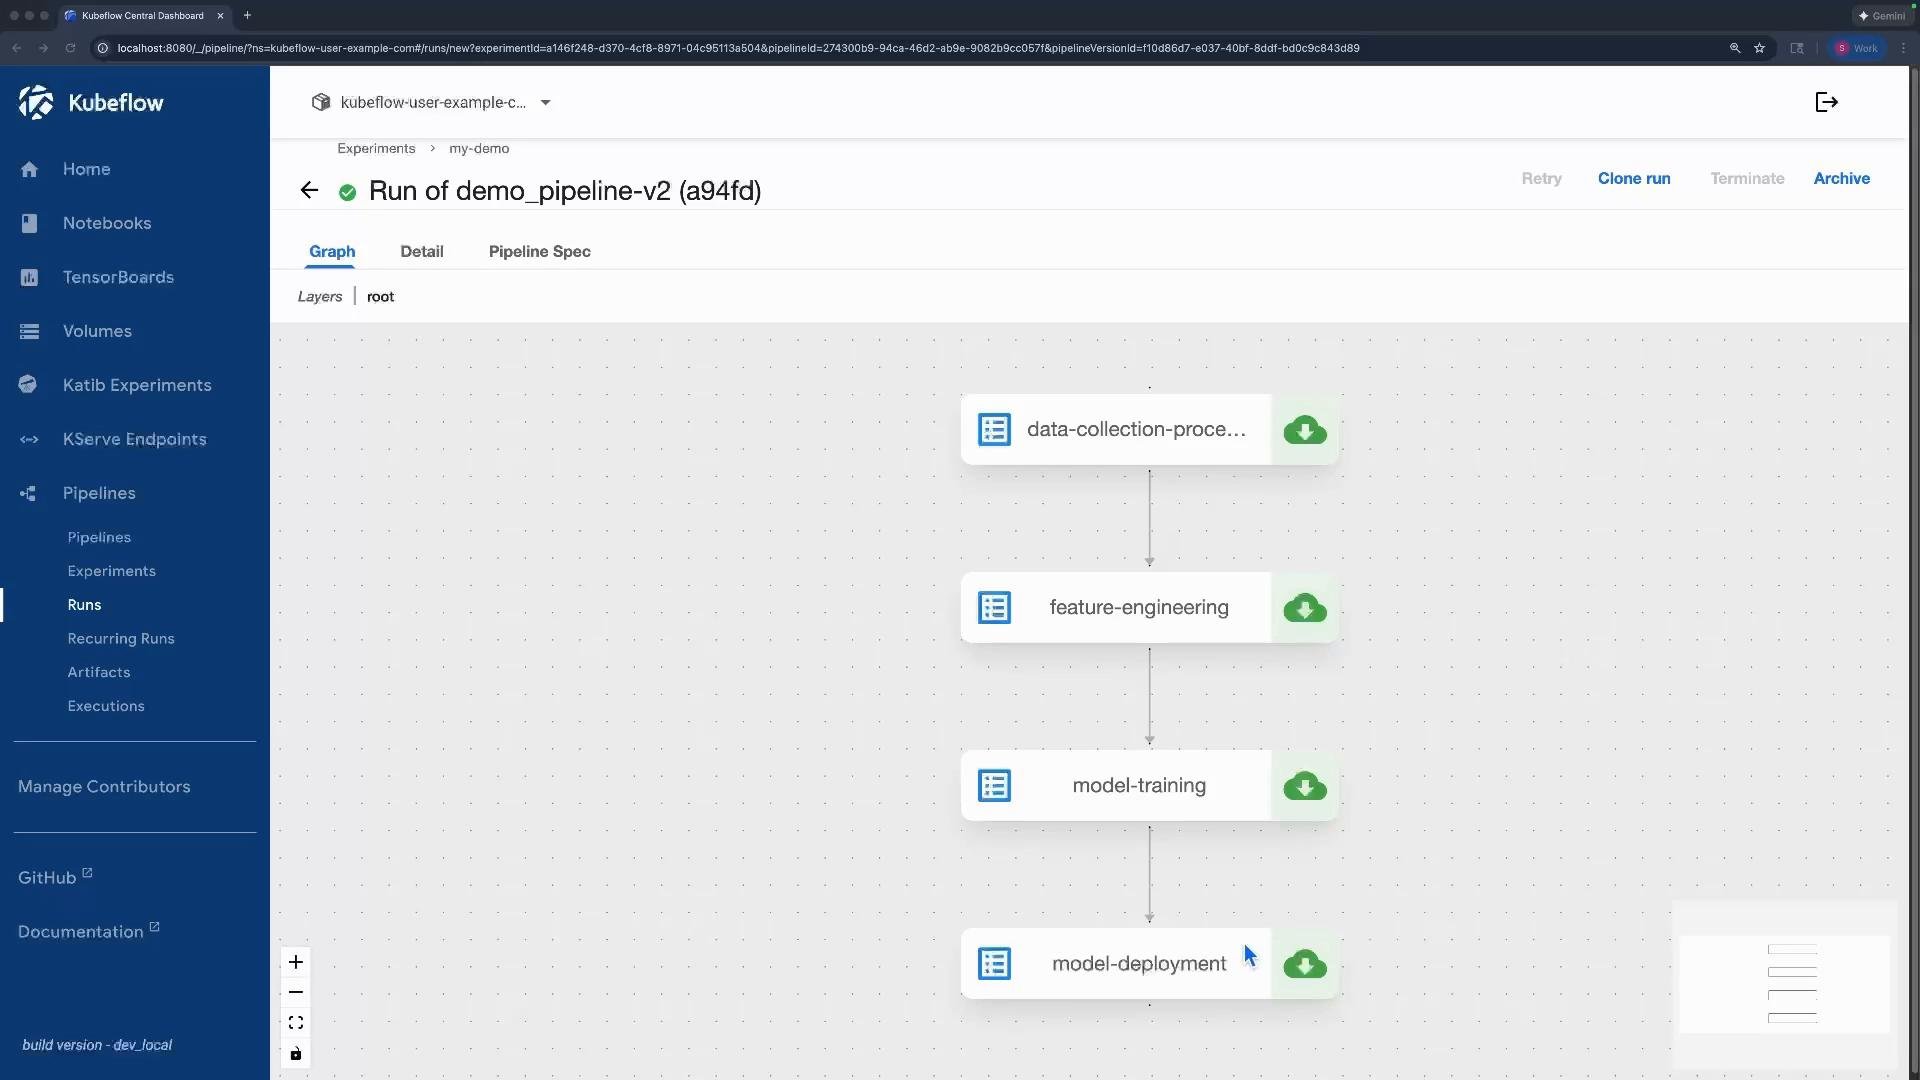
7) Inspecting the pipeline spec (YAML) in the UI
From a run details page you can open the pipeline spec to see the generated YAML that Kubeflow used to create pods and containers. The spec shows components, executor labels, and the runtime command used to invoke your component function. A truncated example:pip and runtime dependencies are available, then invokes the specified component function. Check executor logs when components fail—these logs often surface install or import errors or Python exceptions from your component code.
8) Summary
- Invoking components without explicit dependencies allows potential parallel execution — useful for independent tasks.
- Use
.after(previous_task)to enforce serial ordering when tasks depend on earlier steps. - Prefer typed
Input/Outputartifacts for passing data between steps; ordering alone does not transfer artifacts. - Compile your pipeline with the KFP v2 compiler to generate a YAML package for upload to Kubeflow Pipelines.
- Use the Kubeflow Central Dashboard to upload pipeline versions, create runs, and inspect run details, logs, and specs.
- Inspect Kubernetes pods (
kubectl get pod -Aandkubectl logs) to understand orchestration (DAG driver), container drivers, and impl pods that execute component code.
Links and references
- KFP v2 DSL and compiler docs: https://www.kubeflow.org/docs/components/pipelines/sdk/v2/
- Kubeflow Central Dashboard: https://www.kubeflow.org/docs/components/central-dash/
- Kubernetes
kubectlreference: https://kubernetes.io/docs/reference/kubectl/overview/