- Authentication and Authorization
- Network Security
AKS Authentication and Authorization
AKS offers seamless integration with Azure Active Directory (Azure AD), empowering users and applications to authenticate securely. This integration enhances security by combining Azure Role-Based Access Control (RBAC) with Kubernetes native RBAC, allowing you to enforce granular access policies. Key features include:- Azure AD Integration: Leverages Azure’s robust identity management.
- Azure RBAC and Kubernetes RBAC: Define fine-grained access controls.
- Managed Identities: Utilize service principals or managed identities so your applications can securely access other Azure resources.
- Pod-Managed Identities: Assign specific identities to pods for enhanced permission control.
For improved security, consider using pod-managed identities to limit access permissions on a per-pod basis.
AKS Network Security
Protecting network traffic is critical for your cluster’s integrity. AKS supports private clusters, enabling the API server to have a private IP address that reduces exposure to external threats. Here are the key components:- Private API Server: Limits public access by assigning a private IP.
- Network Security Groups (NSGs) and Firewalls: Tightly manage traffic flow.
- Kubernetes Network Policies: Define specific ingress and egress rules between pods.
- Azure Key Vault Integration: Securely store sensitive data such as connection strings.
Authenticating to AKS with Azure Active Directory
When authenticating to your AKS cluster, both Azure RBAC and Kubernetes RBAC are available. Upon interaction (for example, using thekubectl command to create a pod), you’ll be prompted to enter your Azure AD credentials. Once authenticated, a token is issued to authorize the requested action.
The process is as follows:
- A user requests an operation via the API server.
- The user is prompted for Azure AD credentials.
- Azure AD validates the credentials and issues a token.
- The token authorizes the operation via the configured RBAC policies.
Creating an AKS Cluster with Integrated Azure AD
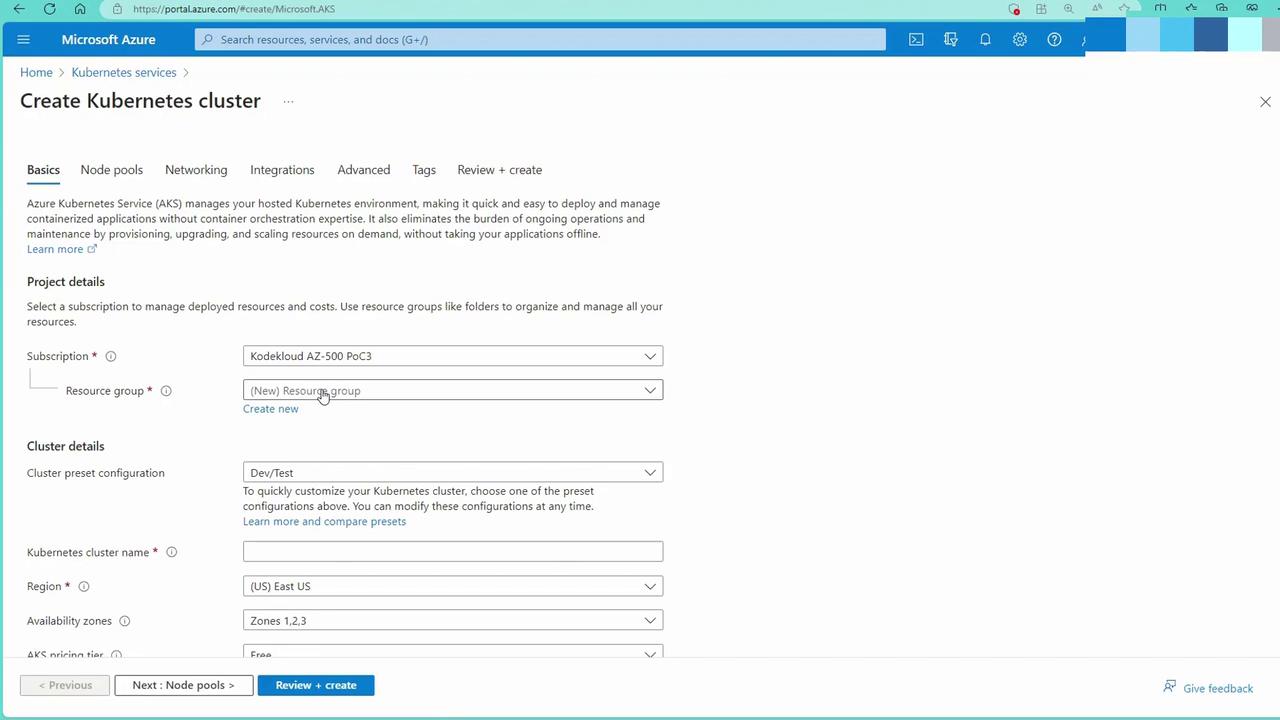
Follow these steps to deploy an AKS cluster with Azure AD integration using the Azure portal:Step 1: Cluster Configuration
Configure your cluster with the following details:- Resource Group: Create a new group (e.g., app AKS-01).
- Cluster Name: Example: app AKS cluster.
- Region: Select your preferred region (e.g., East US) and distribute nodes for high availability.
- Pricing Tier and Version: For demo purposes, select the free control plane with version 1.26.6.
- Authentication and Authorization: Choose “Azure AD with Azure RBAC” for enhanced security.
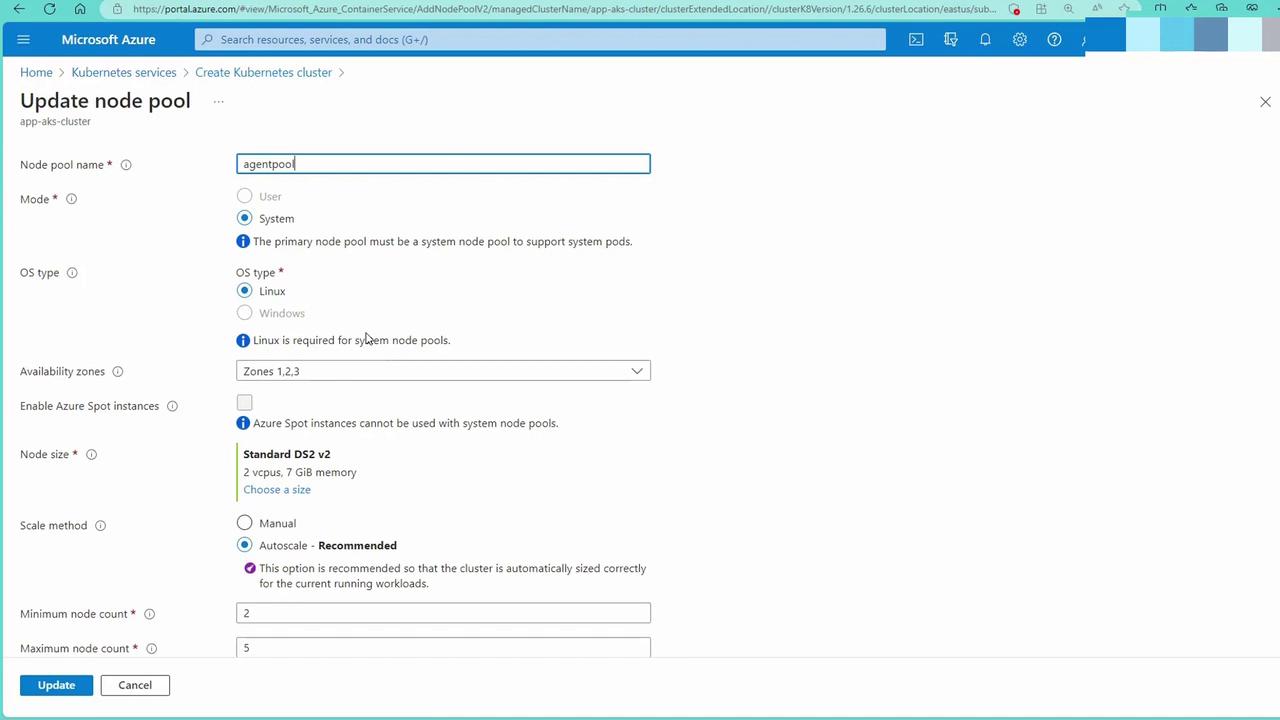
Step 2: Node Pools
Configure your node pools as follows:- OS Type: Choose Linux by default.
- Zone Distribution and Size: Distribute nodes across zones and choose a cost-effective size (e.g., B2S).
- Scaling: Enable autoscaling with a default pool of five nodes.
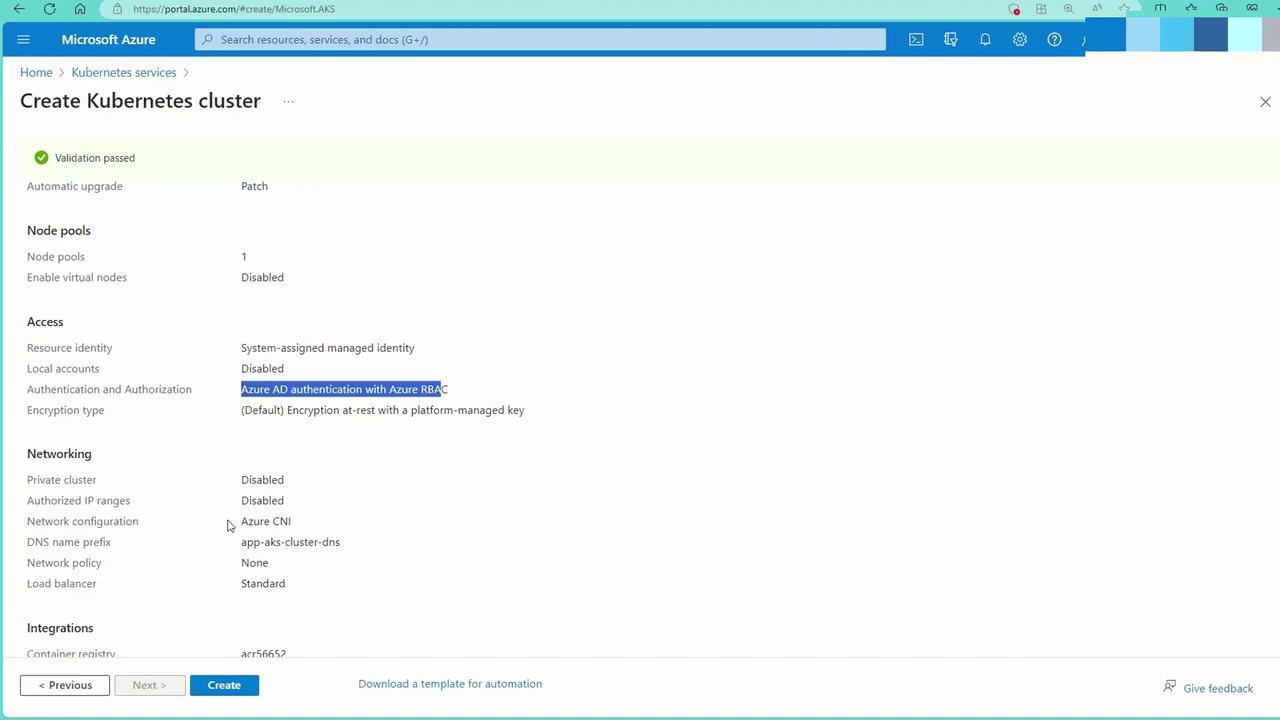
Step 3: Networking
For networking, configure these settings:- Private Cluster: Optionally enable a private API server.
- Authorized IP Ranges: Limit public access where applicable.
- Network Configuration: Choose Azure CNI and select a network policy. For demonstration purposes, opting for “none” simplifies setup (in production, consider Calico or the native Azure solution).

Step 4: Additional Integrations
Additional integrations include:- Container Registry: Connect to your existing Azure Container Registry (ACR).
- Monitoring and Defender for Cloud: Enable integrations as required.
- Infrastructure Resource Group: AKS will create a managed resource group to host supporting resources, such as virtual machine scale sets.
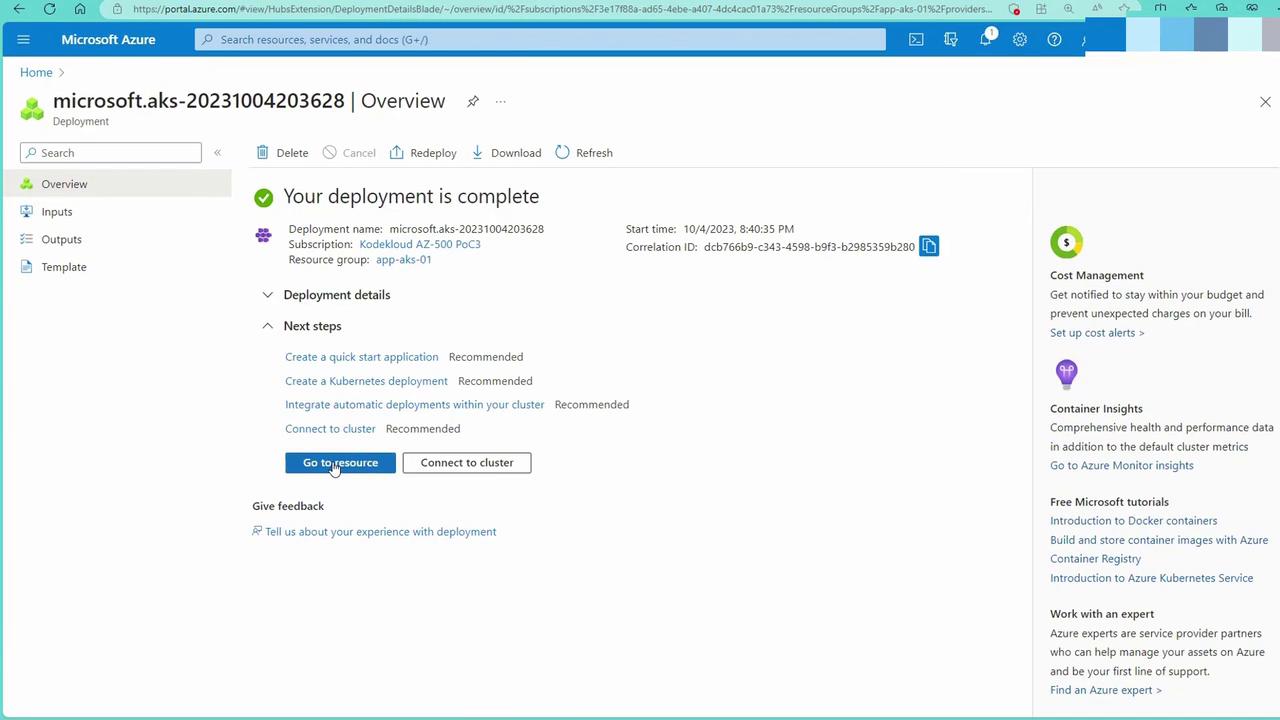
Connecting to the AKS Cluster
After deploying your cluster, access the resource page and select “Go to Resource” to view cluster details. To connect:- Use the Cloud Shell (with kubectl pre-installed) or install kubectl locally.
- Run the following commands to integrate your local configuration with the new cluster:
Integrating with Azure Container Registry (ACR) and Deploying an Application
Now that your cluster is running, let’s deploy an application using an image from an Azure Container Registry (ACR).Reviewing ACR Role Assignments
In the Azure portal, navigate to your Container Registry and check the Access Control (IAM) settings. Ensure the AKS cluster’s managed identity has the ACR Pull role assigned.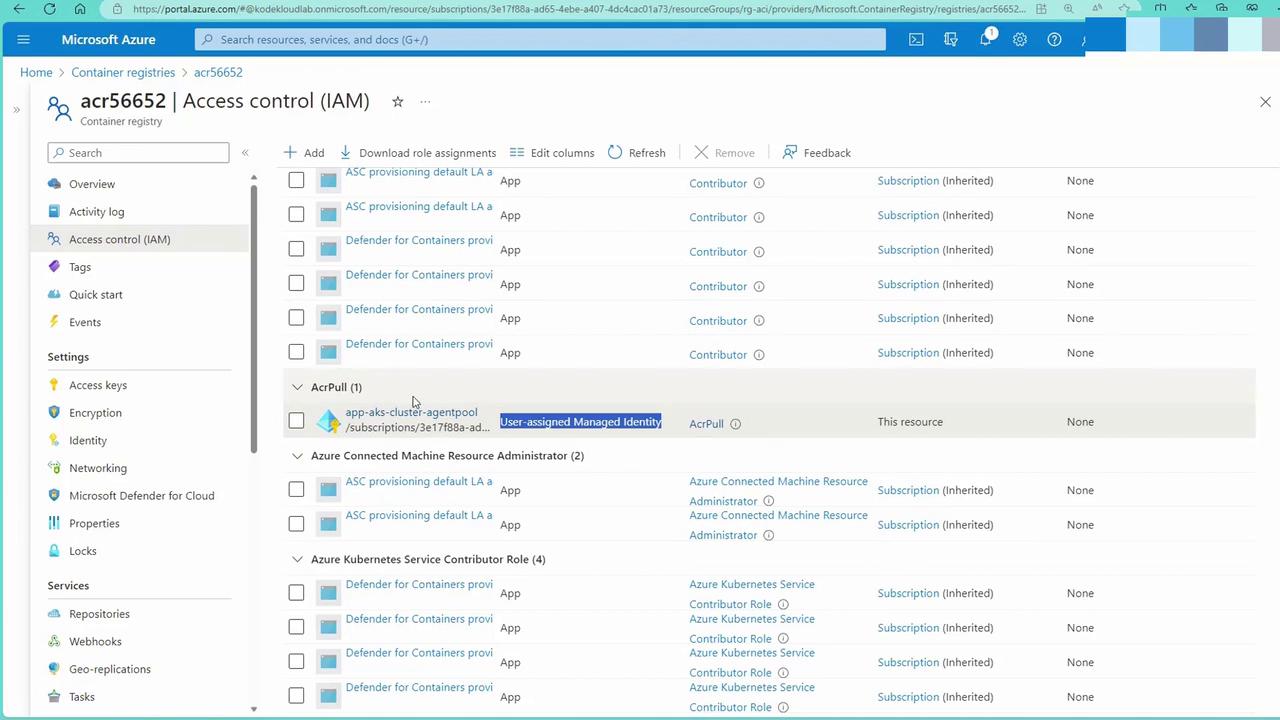
Creating a Deployment with a Load Balancer
Below is a sample YAML configuration to deploy an application (named “bootstrap”) from your ACR:deploy.yml) using the Cloud Shell editor:
Scaling and Managing the Deployment
To scale the deployment, edit the number of replicas. For instance, to increase replicas to five:replicas value to 5, save your changes, and then run:
Container and Key Vault Security
AKS not only secures container orchestration but also integrates with Azure Key Vault to safeguard sensitive information such as secrets and connection strings. Integrations include:- Defender for Cloud: Provides advanced threat protection.
- Azure Key Vault: Stores sensitive data securely. Your application can authenticate to Azure AD, retrieve an access token, and fetch secrets such as SQL connection strings from Key Vault.
It is highly recommended to pair your container deployments with Azure Key Vault to manage secrets securely and minimize the risk of exposing sensitive information.