Real-World Analogy
Imagine calling your bank where the customer service agent requests the last four digits of your credit card number, debit card number, Social Security number, or another identification number. Although this step verifies your identity, you wouldn’t want the agent to have full access to your sensitive data. To mitigate this risk, banks and other organizations apply data masking. The agent sees only a portion of the number—typically the last four digits—which is sufficient for verification but prevents misuse of complete data.What Is Dynamic Data Masking?
Dynamic data masking protects sensitive data by replacing it with obfuscated values during query execution. Consider a database with a schema named CX that includes a table called Customer with columns like Name, SSN, and Phone Number. If you decide to mask the SSN column, any query retrieving that column will display masked content (such as random characters or a predefined format) instead of the actual SSN. This masking is applied in real time so that unauthorized users never see the unmasked data.Key Features of Dynamic Data Masking
- Real-time Masking: Data is masked instantly at query time, ensuring that sensitive information is never fully exposed.
- Customizable Masks: Define specific mask rules based on data sensitivity. Azure SQL offers built-in options for email addresses, credit card numbers, and zip codes, and you can also create custom masking patterns.
- Predefined Masking Patterns: Azure SQL provides ready-to-use masks for common sensitive data types.
- Role-based Access: Only users with appropriate permissions can view unmasked data.
- Compliance Support: Masking aids in meeting data protection regulations by ensuring that only authorized information is visible to application users.
Configuring Dynamic Data Masking in the Azure Portal
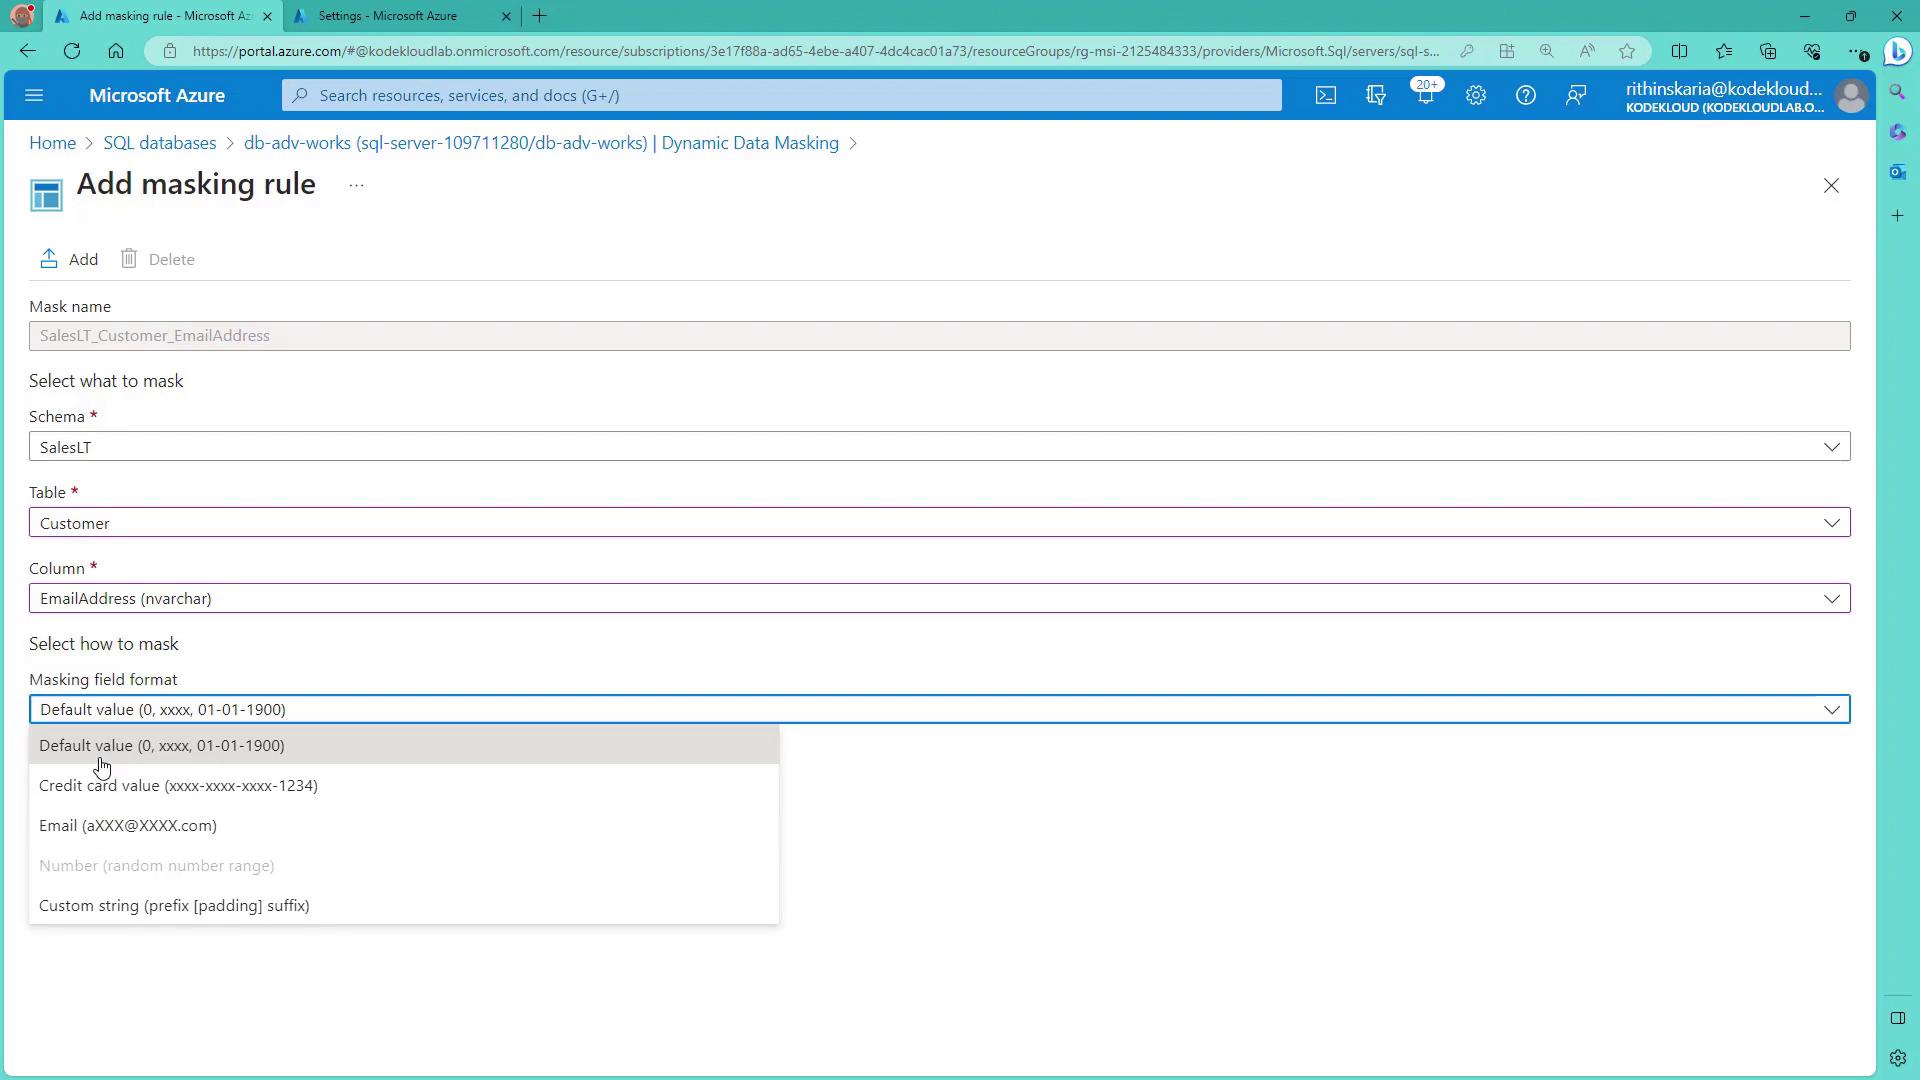
You can easily add a masking rule to a specific column in your SQL database via the Azure Portal. For example, to mask customer email addresses:- Navigate to your database and scroll down to the Dynamic Data Masking section.
- Select the Customer table and choose the column to mask (for example, Email Address).
- Choose the “Email” option from the available masking formats.
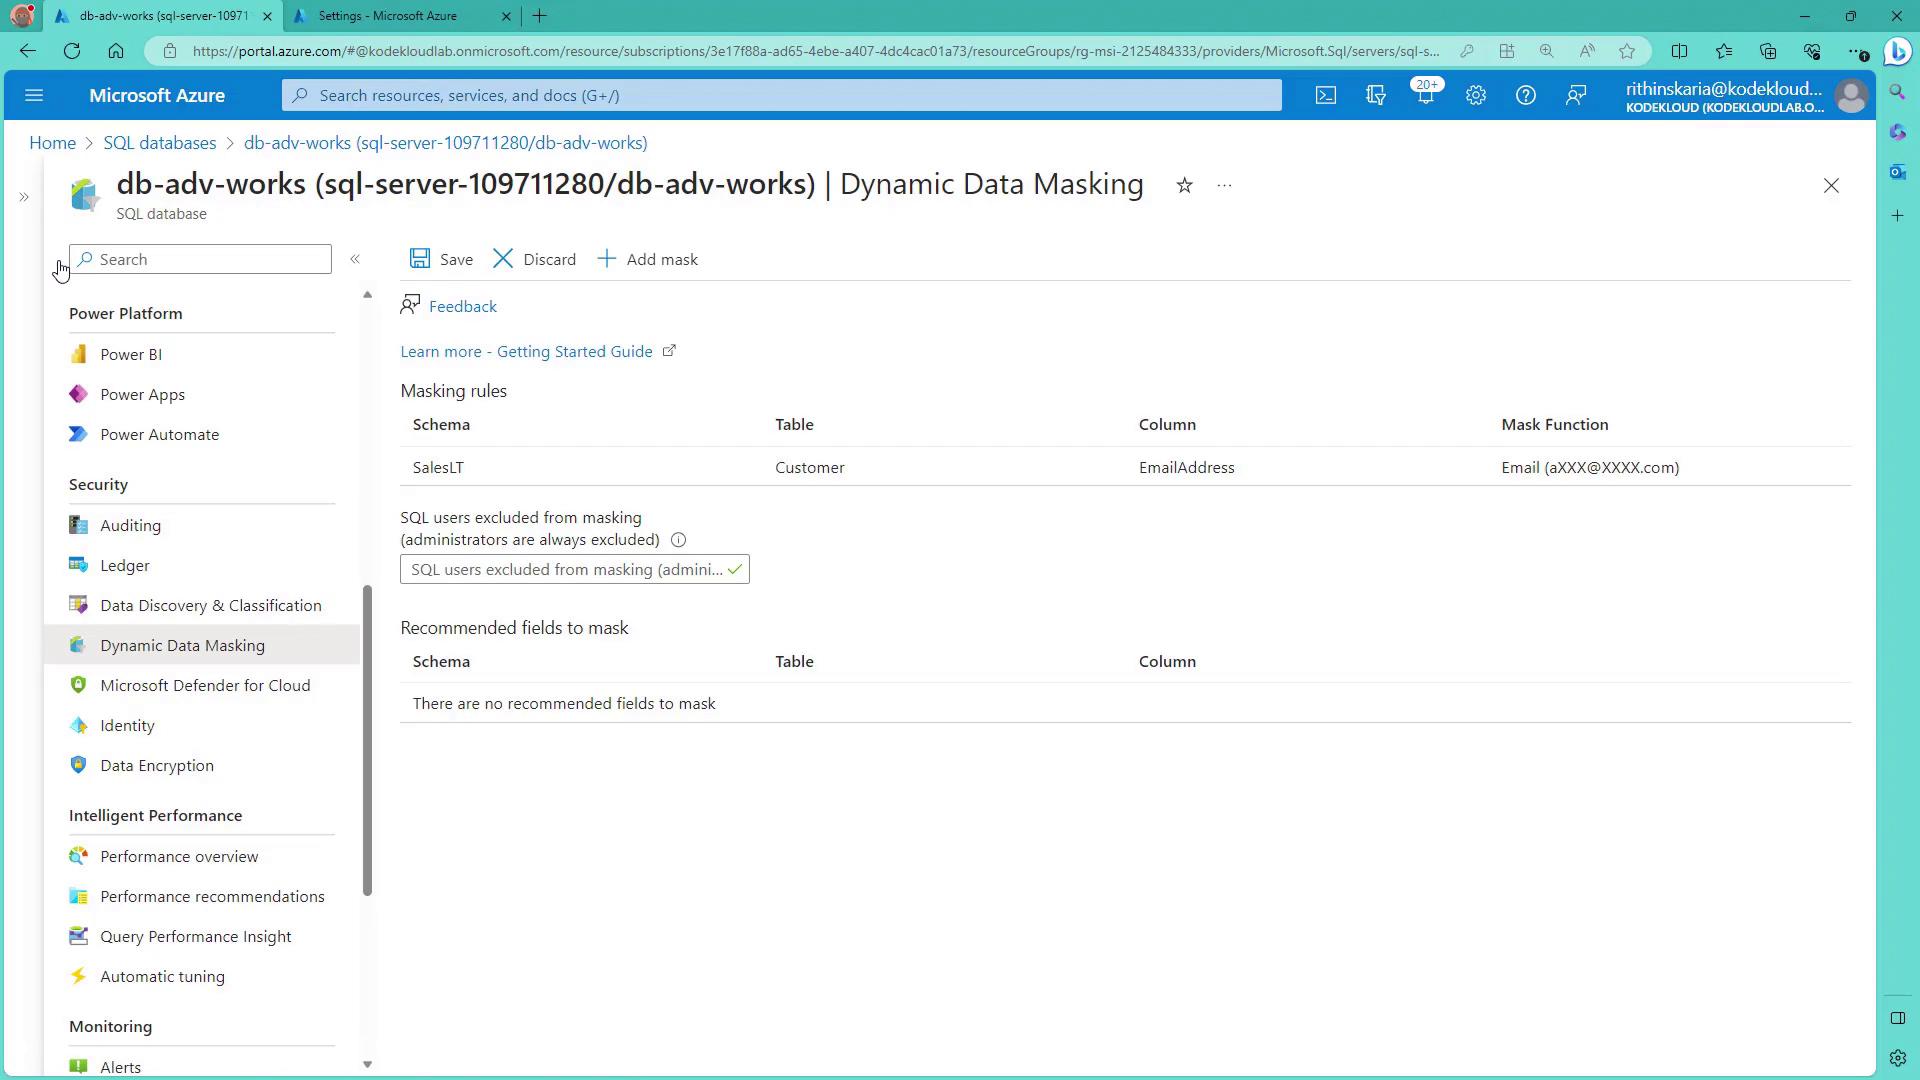
After adding the mask rule, when you query the database, masked data is returned for non-administrative users. However, administrators who have higher privileges will see unmasked information.
Verifying the Masked Data
When you execute queries against the table, non-administrative users will receive masked data. For instance, if you run the following query as an administrator, you will see complete data:Configuring User Access with T-SQL
To control who can see the unmasked data, you need to configure user logins and assign proper permissions using SQL Server Management Studio (SSMS). It is important to note that both the login and user must be created on the master database. Follow these steps to configure user access:- Open SSMS, click on Connect → Database Engine, and connect using the server name provided from the Azure Portal.
- If the user does not exist, create the login and the associated user from an external provider.