Overview
Exposing management ports to the internet poses security risks. With JIT access, these ports remain closed by default and are only opened for a limited duration for approved IP addresses. This approach resembles Privileged Identity Management, ensuring that access is temporary and pre-approved. The key benefits include:- Minimized risk through reduced open attack surfaces.
- Granular control over privileged access.
- Comprehensive audit trails that log every access request, approval, and active timeframe.
Regularly review and update your access policies to align with evolving security requirements.
How JIT Access Works
The workflow for implementing JIT access is straightforward and consists of four main steps:- Onboard Virtual Machines: Enroll your VMs in the JIT system.
- Define Policies: Configure policies outlining which management ports to open, allowed source IPs, protocols, and maximum access duration.
- Request and Approve Access: Users request access, and administrators approve the request for a short period.
- Monitor Access: All access requests and activity are logged for auditing and alert purposes in case of unauthorized or suspicious activities.
Policy Configuration
When setting up JIT, you need to establish clear policies that include:- Configuring allowed ports and protocols.
- Specifying the permitted IP addresses or ranges.
- Defining the maximum duration for access.
Demonstration through the Azure Portal
Below, we walk through the configuration process for JIT access using the Azure Portal.Step 1: Verify Virtual Machine Network Settings
Assume you have a Linux VM with port 22 exposed to the internet. Begin by reviewing its Network Security Group (NSG) settings.
Step 2: Access Microsoft Defender for Cloud
Next, navigate to Microsoft Defender for Cloud to explore the JIT access settings. Look for the “Workload Protection” quick link, which, after a brief load, displays JIT VM access details.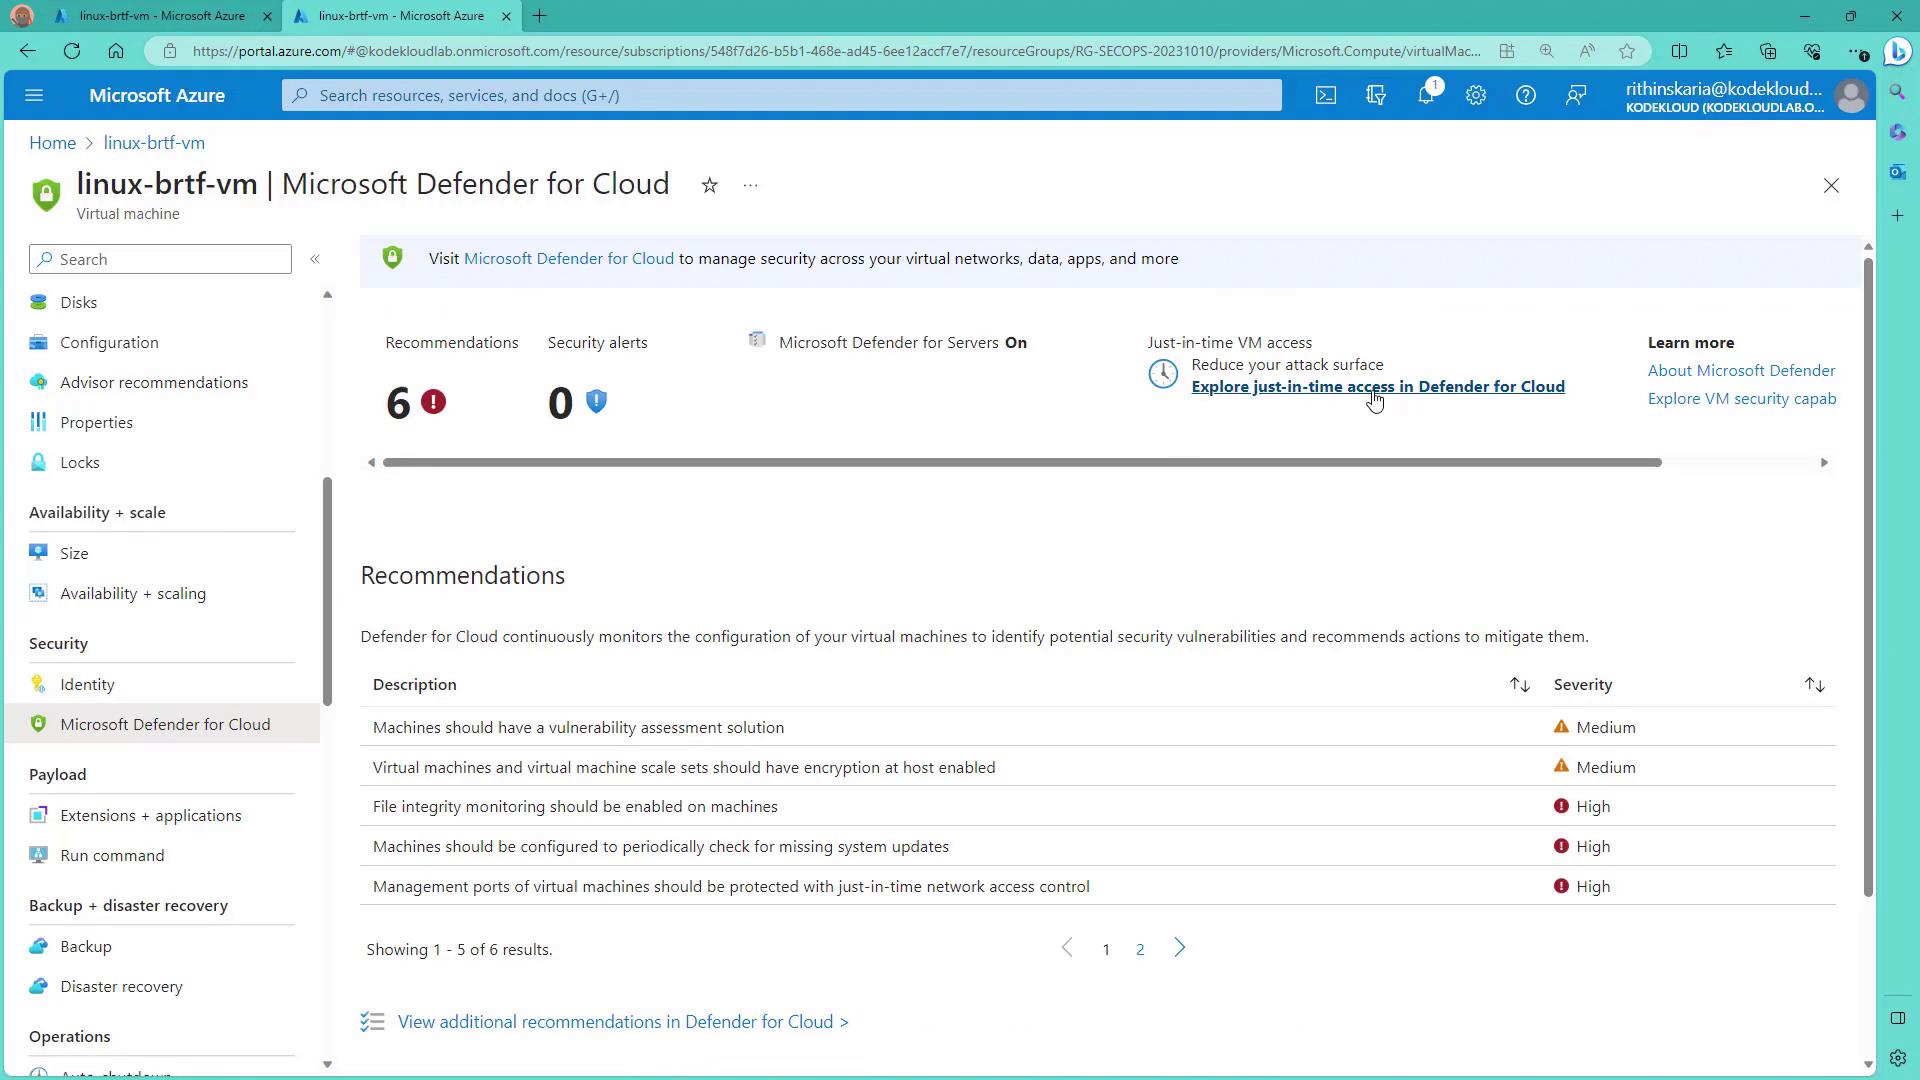
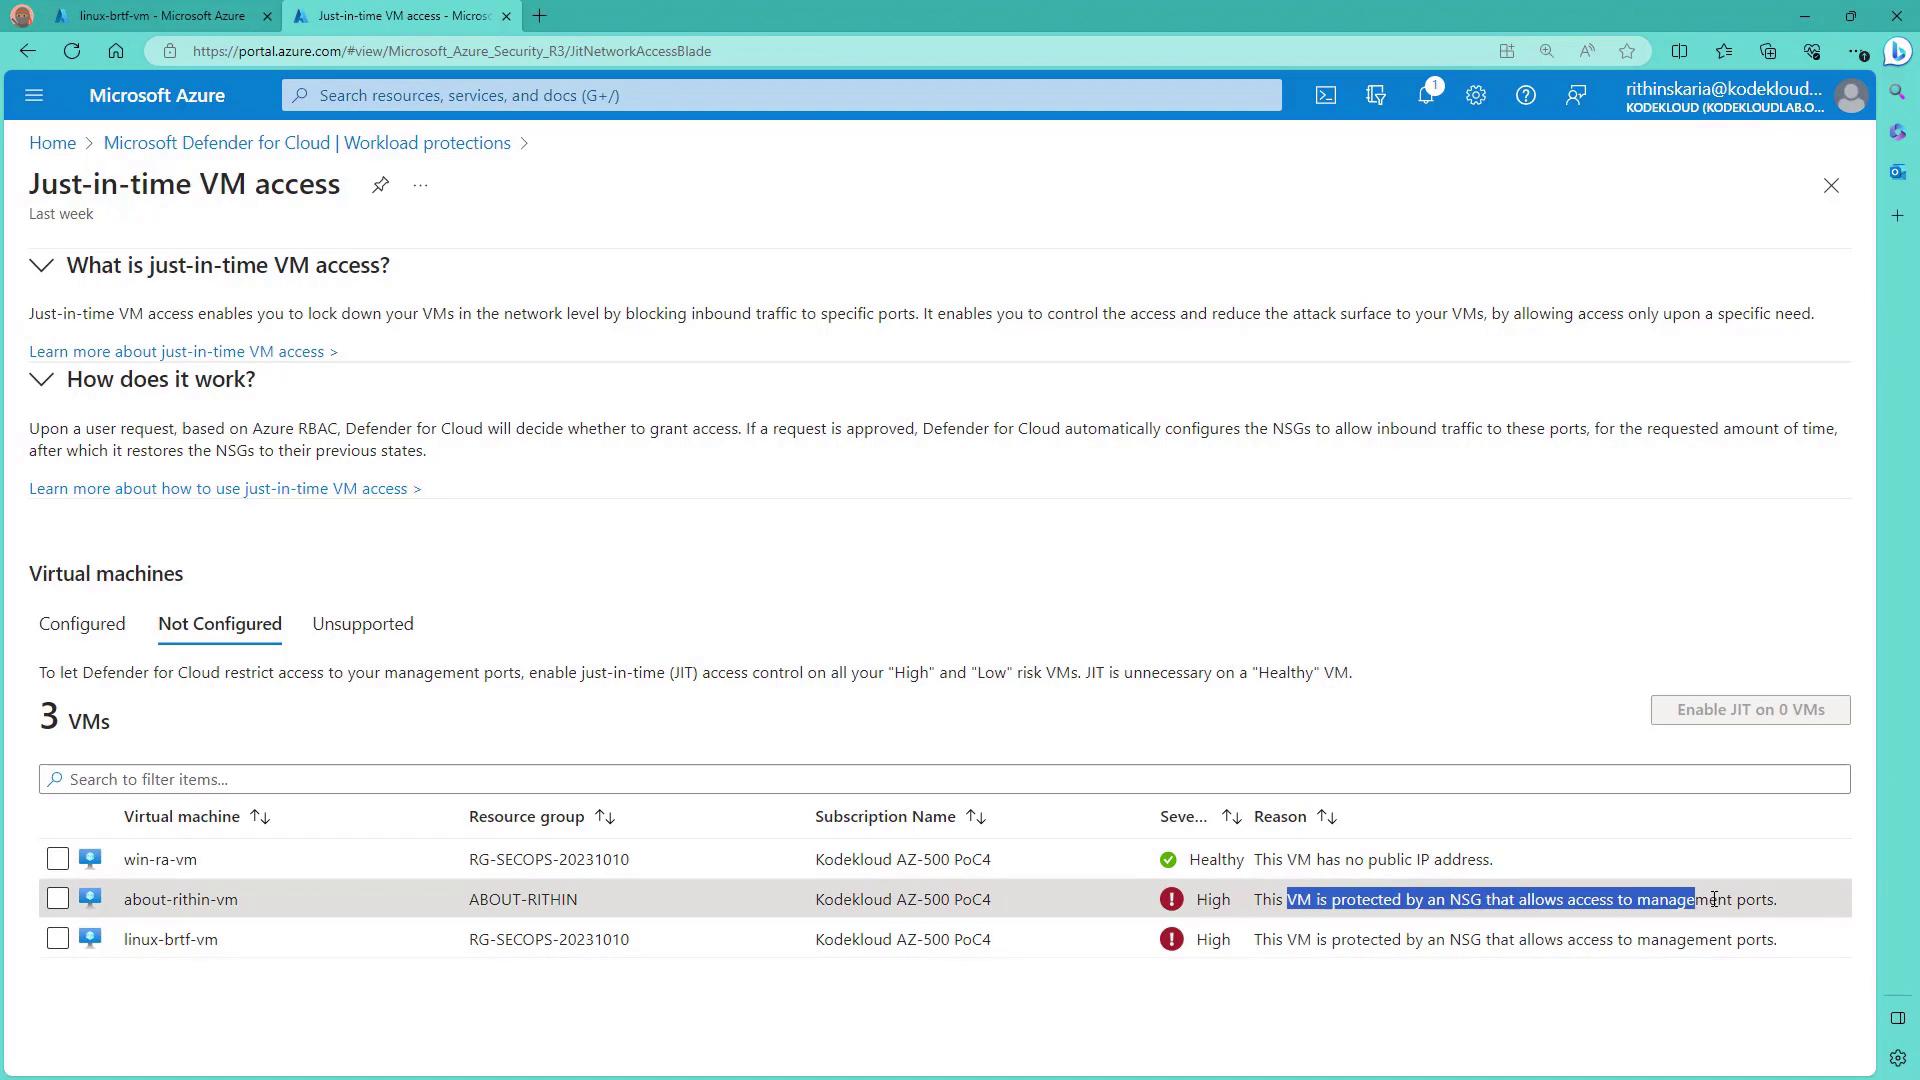
Step 3: Configure JIT Access
Select the virtual machine that requires JIT access configuration. For a Linux VM, you might want to remove any unnecessary port configurations on port 22 before adding a secure rule.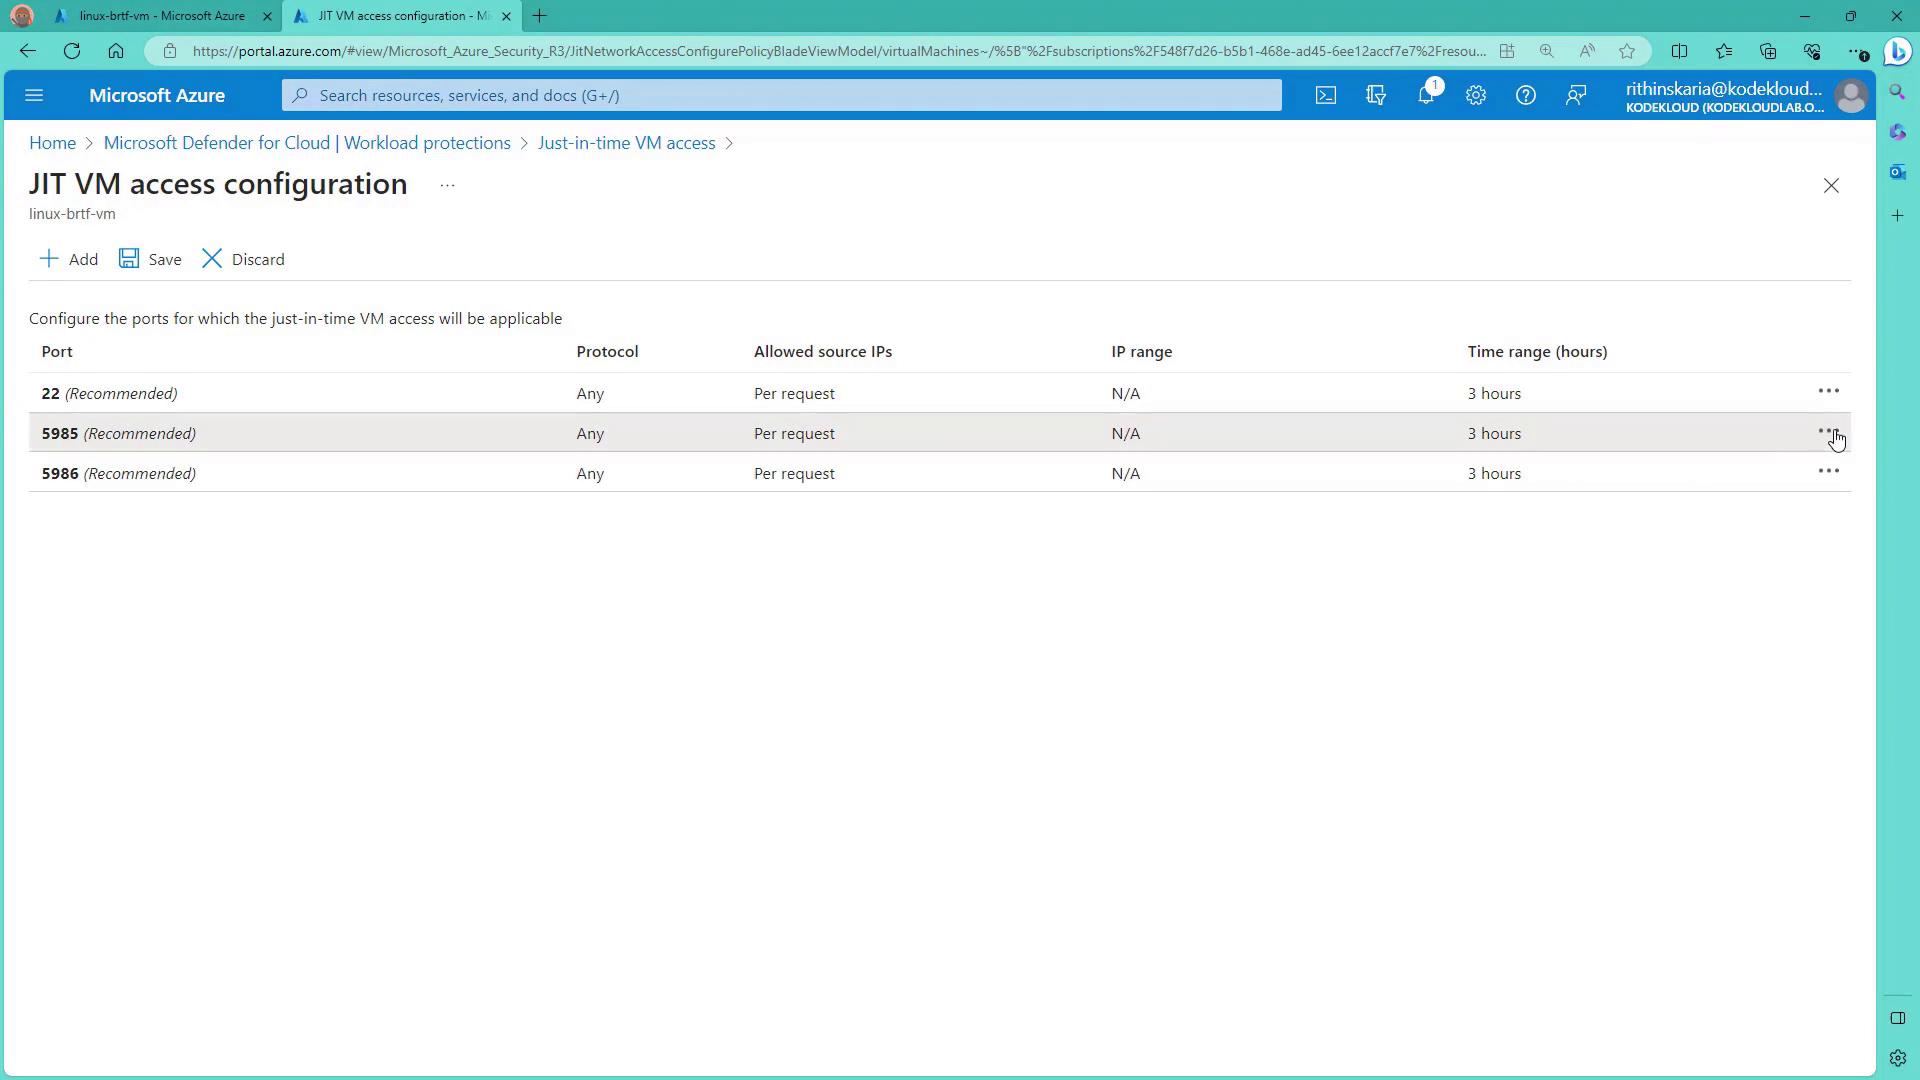
- Port: 22 with TCP as the protocol.
- Maximum Request Time: 1 hour (after which access is automatically revoked).
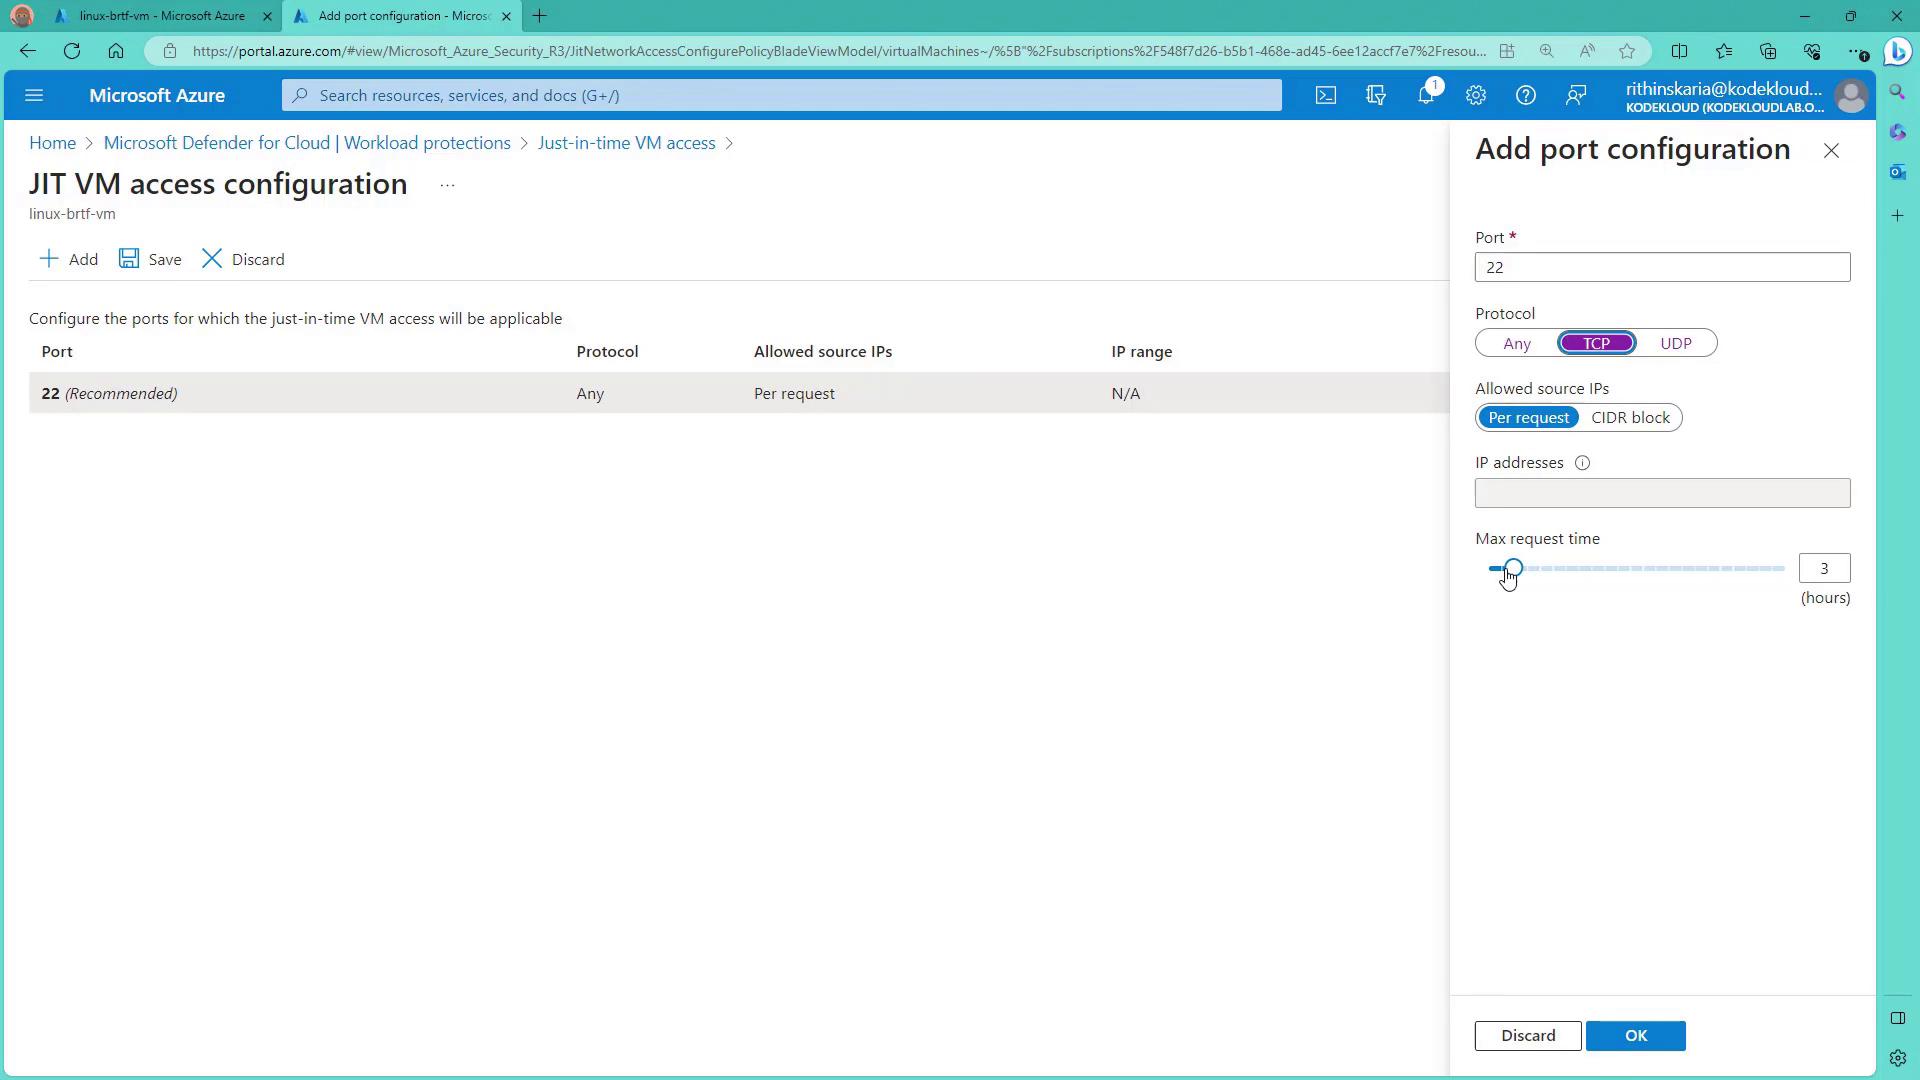
Always verify that the correct ports and IP addresses are configured to prevent unintended access.
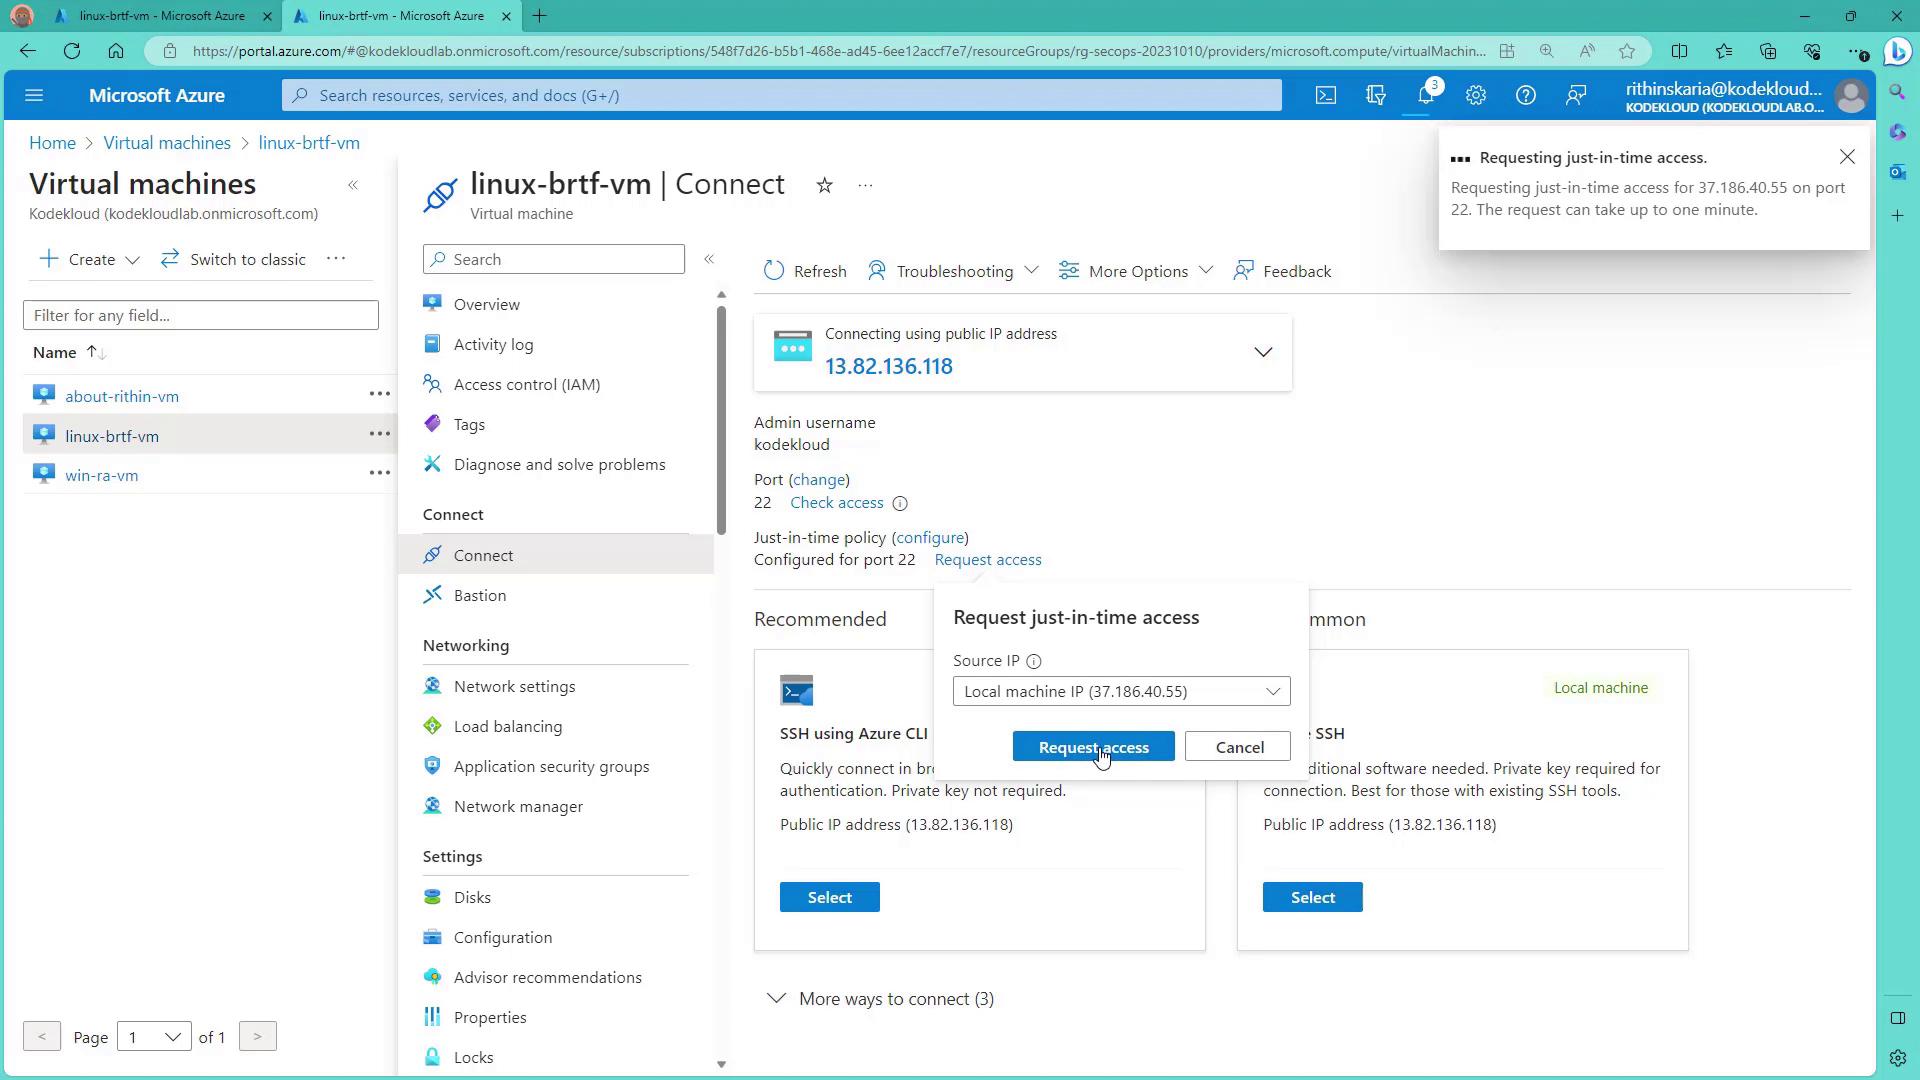
Step 4: Request and Use JIT Access
To access your VM, follow these steps:- Navigate to the VM in the Azure Portal.
- Click the “Connect” option.
- In the connection portal, review the configuration for port 22 and use the request access option.
- Select the appropriate IP address (for example, your local machine’s IP) and request access.