Remember that while Microsoft manages the underlying infrastructure (data center, networking, physical hardware), you are responsible for the virtual machine’s operating system, patching, updates, and securing application access.
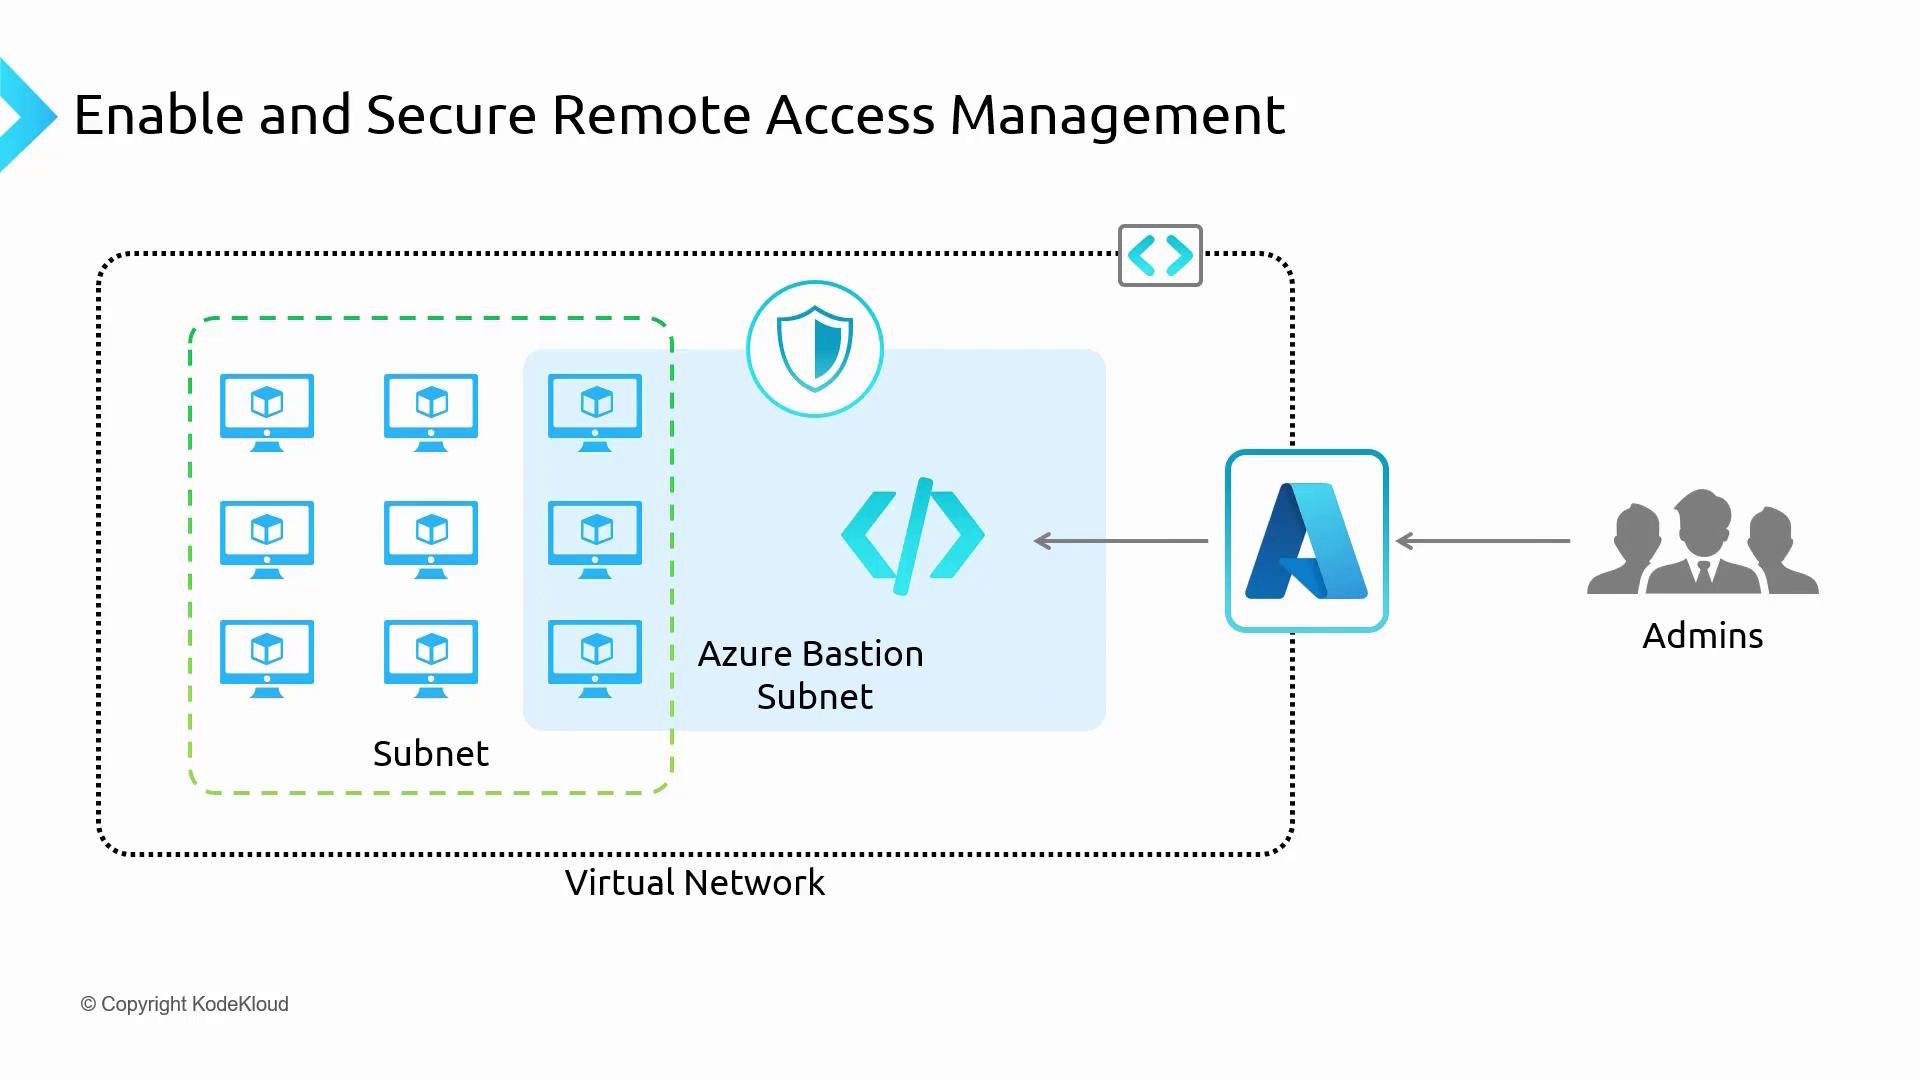
Azure Bastion must be deployed to a dedicated subnet within your virtual network. Once set up—either in a central VNet for a hub-and-spoke architecture or in a specific network—you can peer with other VNets and securely connect to your virtual machines without deploying extra jump boxes. Below is a diagram that illustrates secure remote access management using Azure Bastion within a virtual network. It shows the connections between the Bastion host, subnets, and administrators:
Benefits of Using Azure Bastion
Azure Bastion offers several advantages over traditional jump boxes:-
Direct RDP and SSH Access in the Azure Portal
Enjoy secure and straightforward connectivity directly from your browser without the need to install additional RDP/SSH clients. -
Elimination of Public IP Requirement
Virtual machines do not require public IP addresses, reducing the risk of DDoS or brute-force attacks and simplifying management. -
Simplified Network Security Group (NSG) Management
Bastion connects directly to the private IP of your VMs, removing the need for complex NSG configurations. -
Protection from Port Scanning
Without a public endpoint, attackers cannot perform port scanning, which significantly enhances network security. -
Centralized Hardening
As a platform-managed service, Azure Bastion benefits from consistent hardening and regular security updates managed by Microsoft.
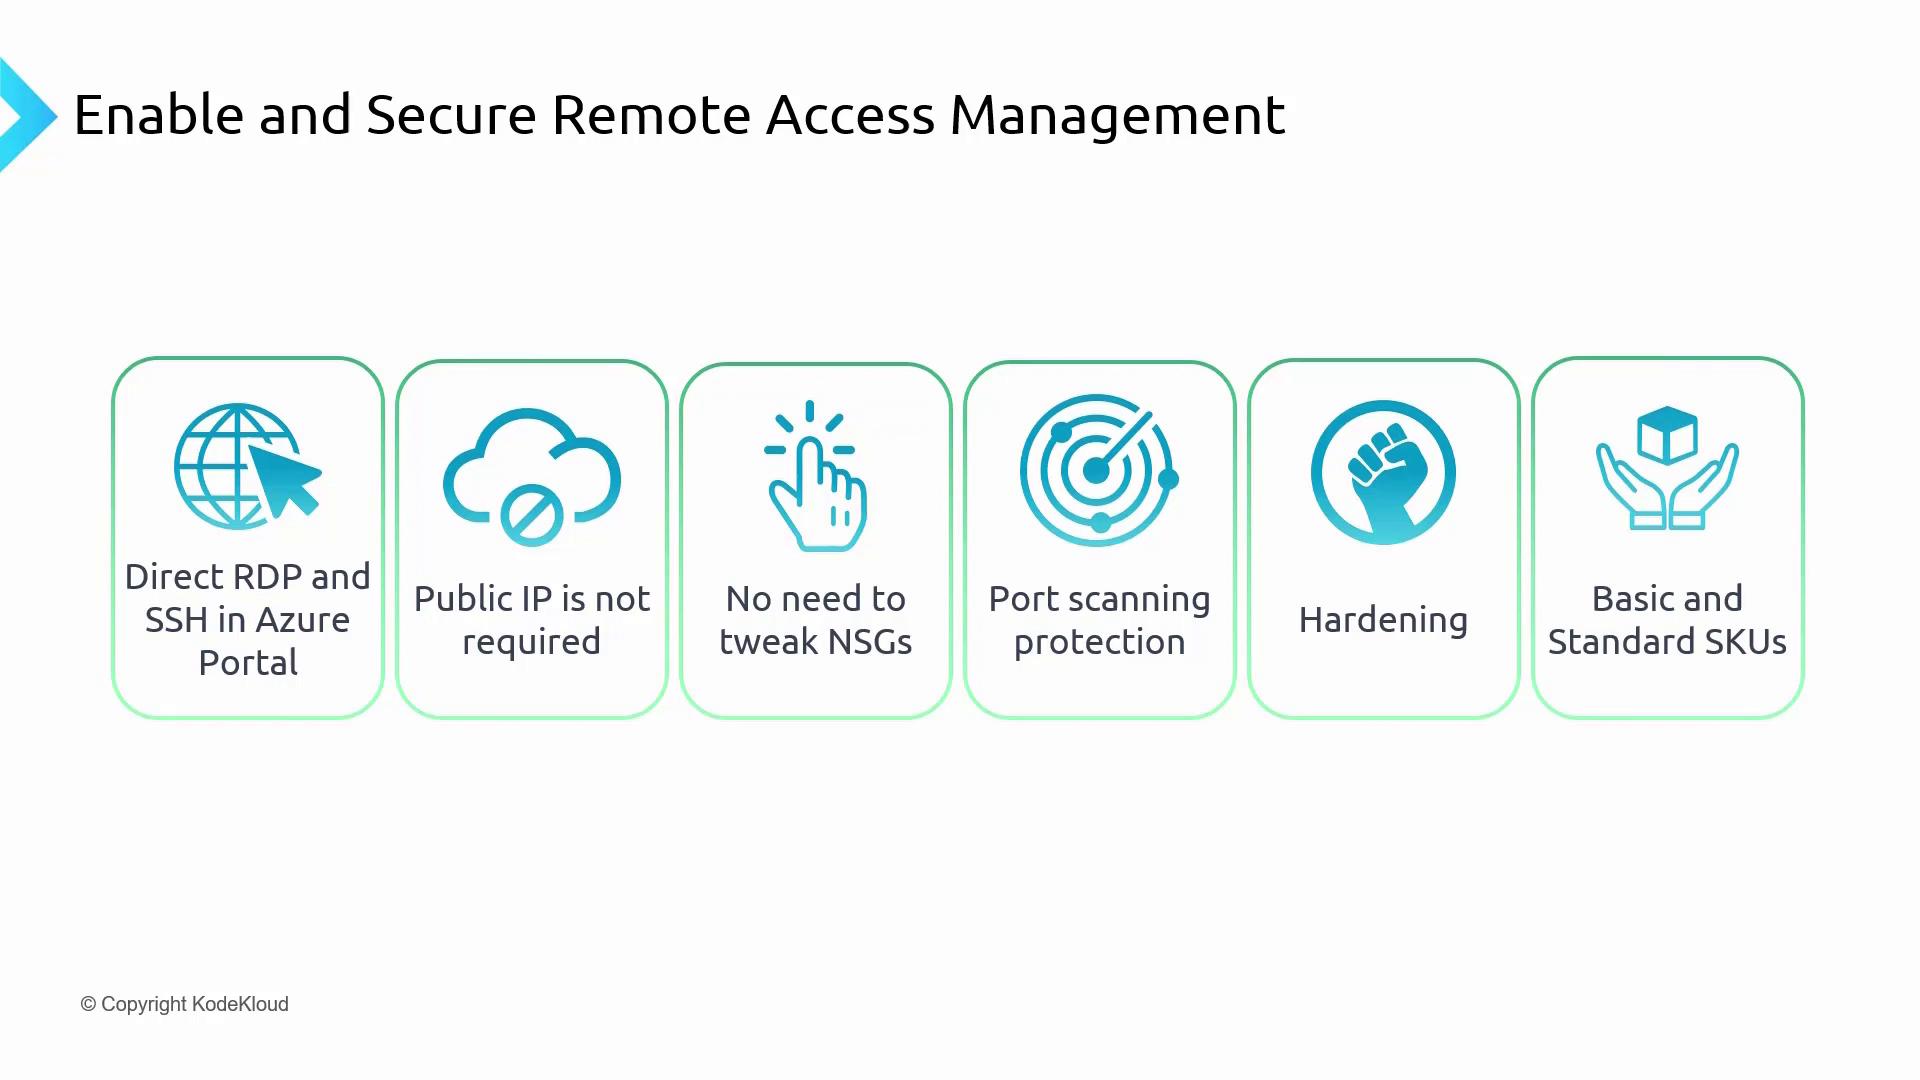
- Basic SKU: Provides essential direct RDP and SSH functionality.
- Standard SKU: Offers premium features ideal for larger enterprises and scaling needs.
Deploying and Using Azure Bastion
Below is an overview of deploying Azure Bastion to connect with both Linux and Windows virtual machines that do not have public IP addresses.Deployment Output Snippet
The following output snippet shows the deployment of a Linux and a Windows machine to a virtual network. Notice that these machines connect via their private IP addresses: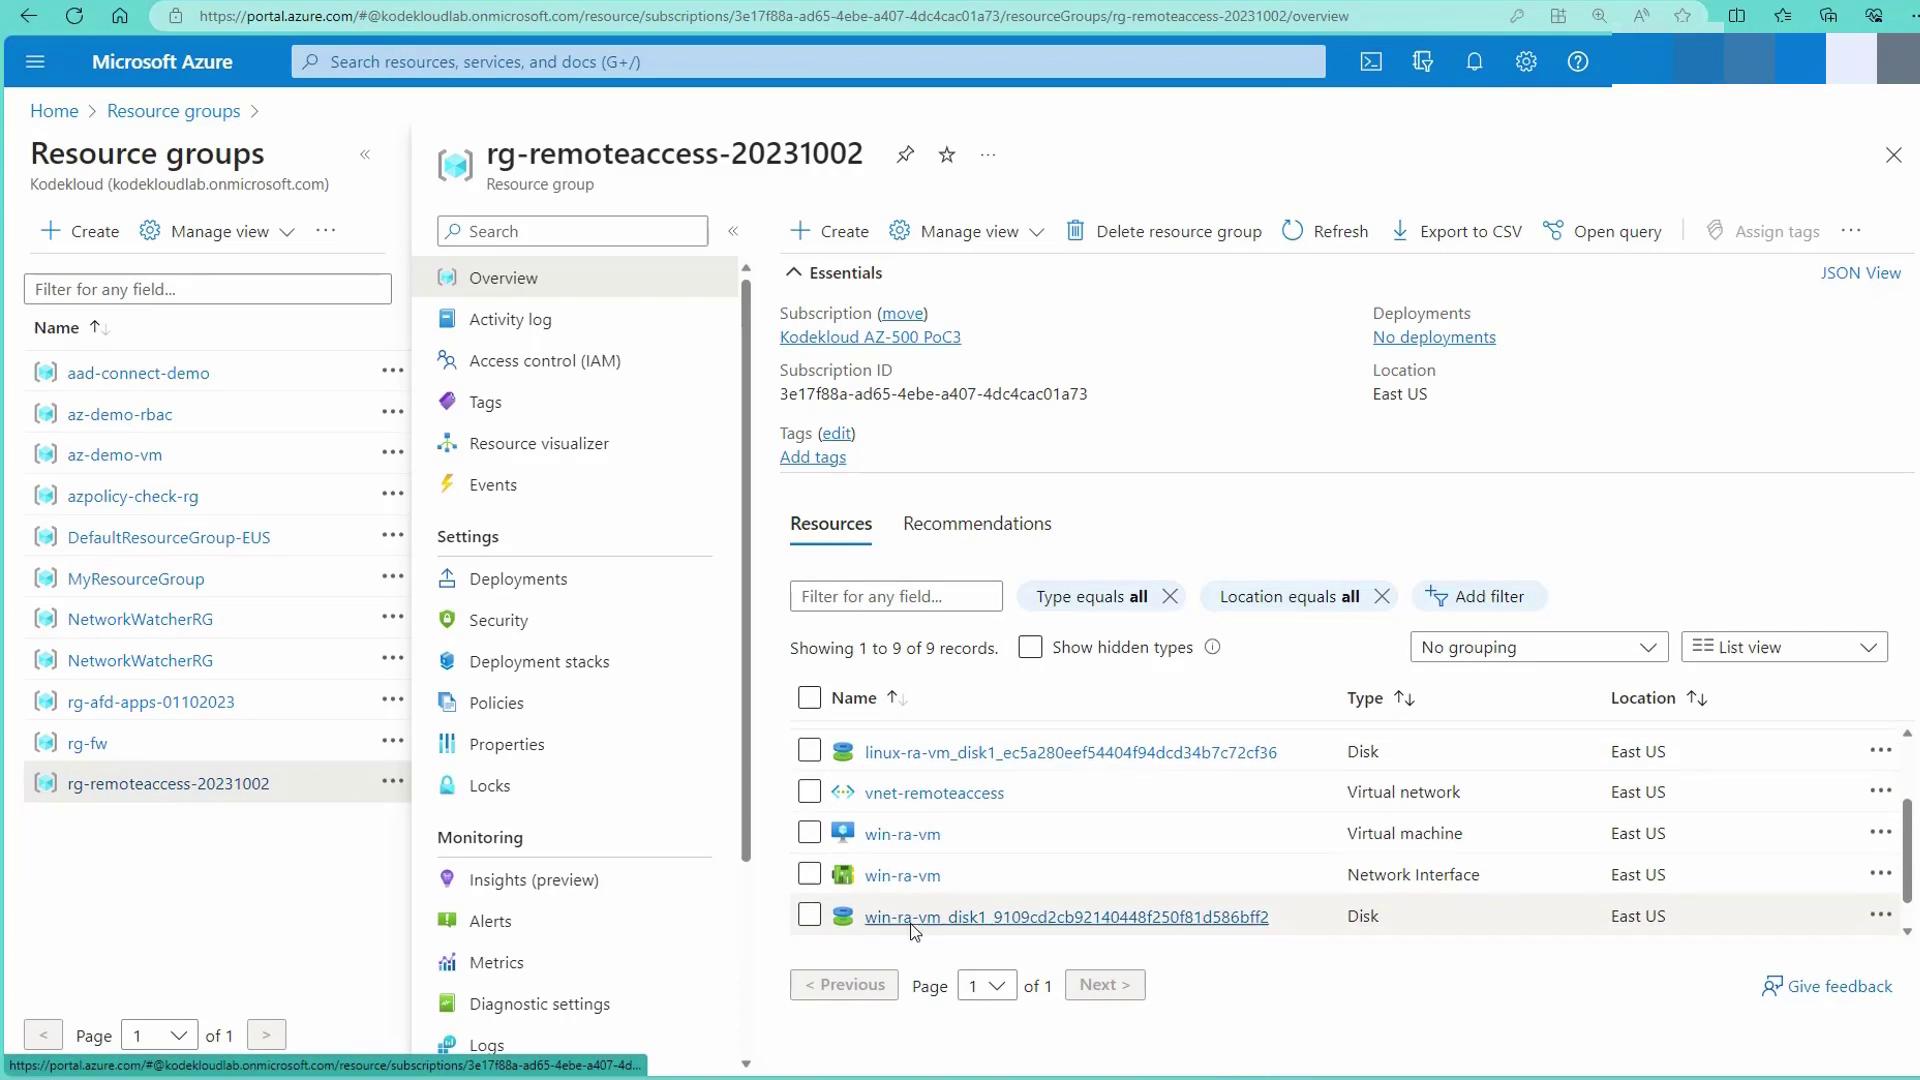

Setting Up Azure Bastion
-
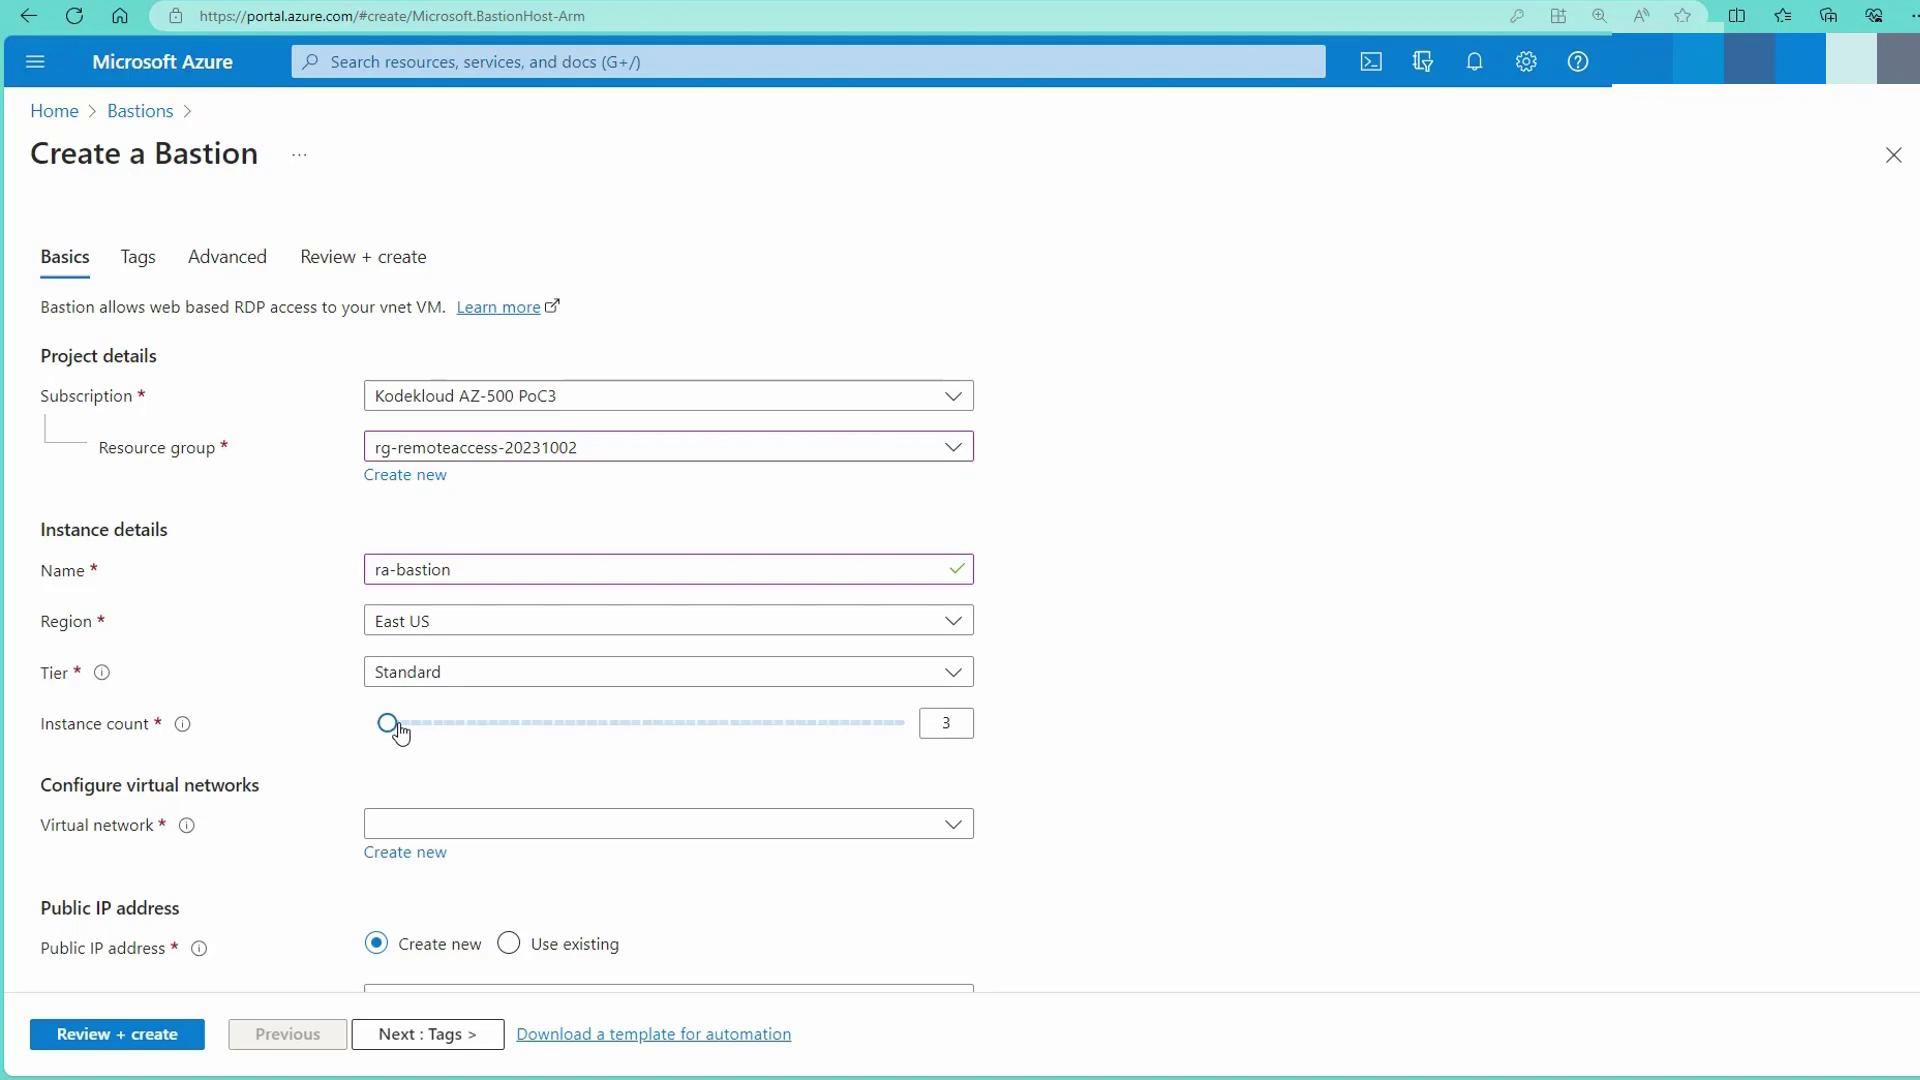
Create a Bastion Host
In the Azure portal, navigate to the Bastion creation page and enter the following details:- Resource Group: Select your remote access resource group.
- Region: East US.
- Tier: Standard.
- Instance Count: Two (or more if needed).
-
Configure the Virtual Network
Choose the “VNet remote access” and click on “Manage subnet configuration” to add a subnet. Name this subnet “Azure Bastion subnet” and assign an appropriate address space (a /26 is sufficient). Azure Bastion will automatically detect this dedicated subnet. -
Configure Public IP Address
Create a new public IP address for Azure Bastion. This public IP is dedicated solely to the Bastion service and is not exposed directly to the internet. -
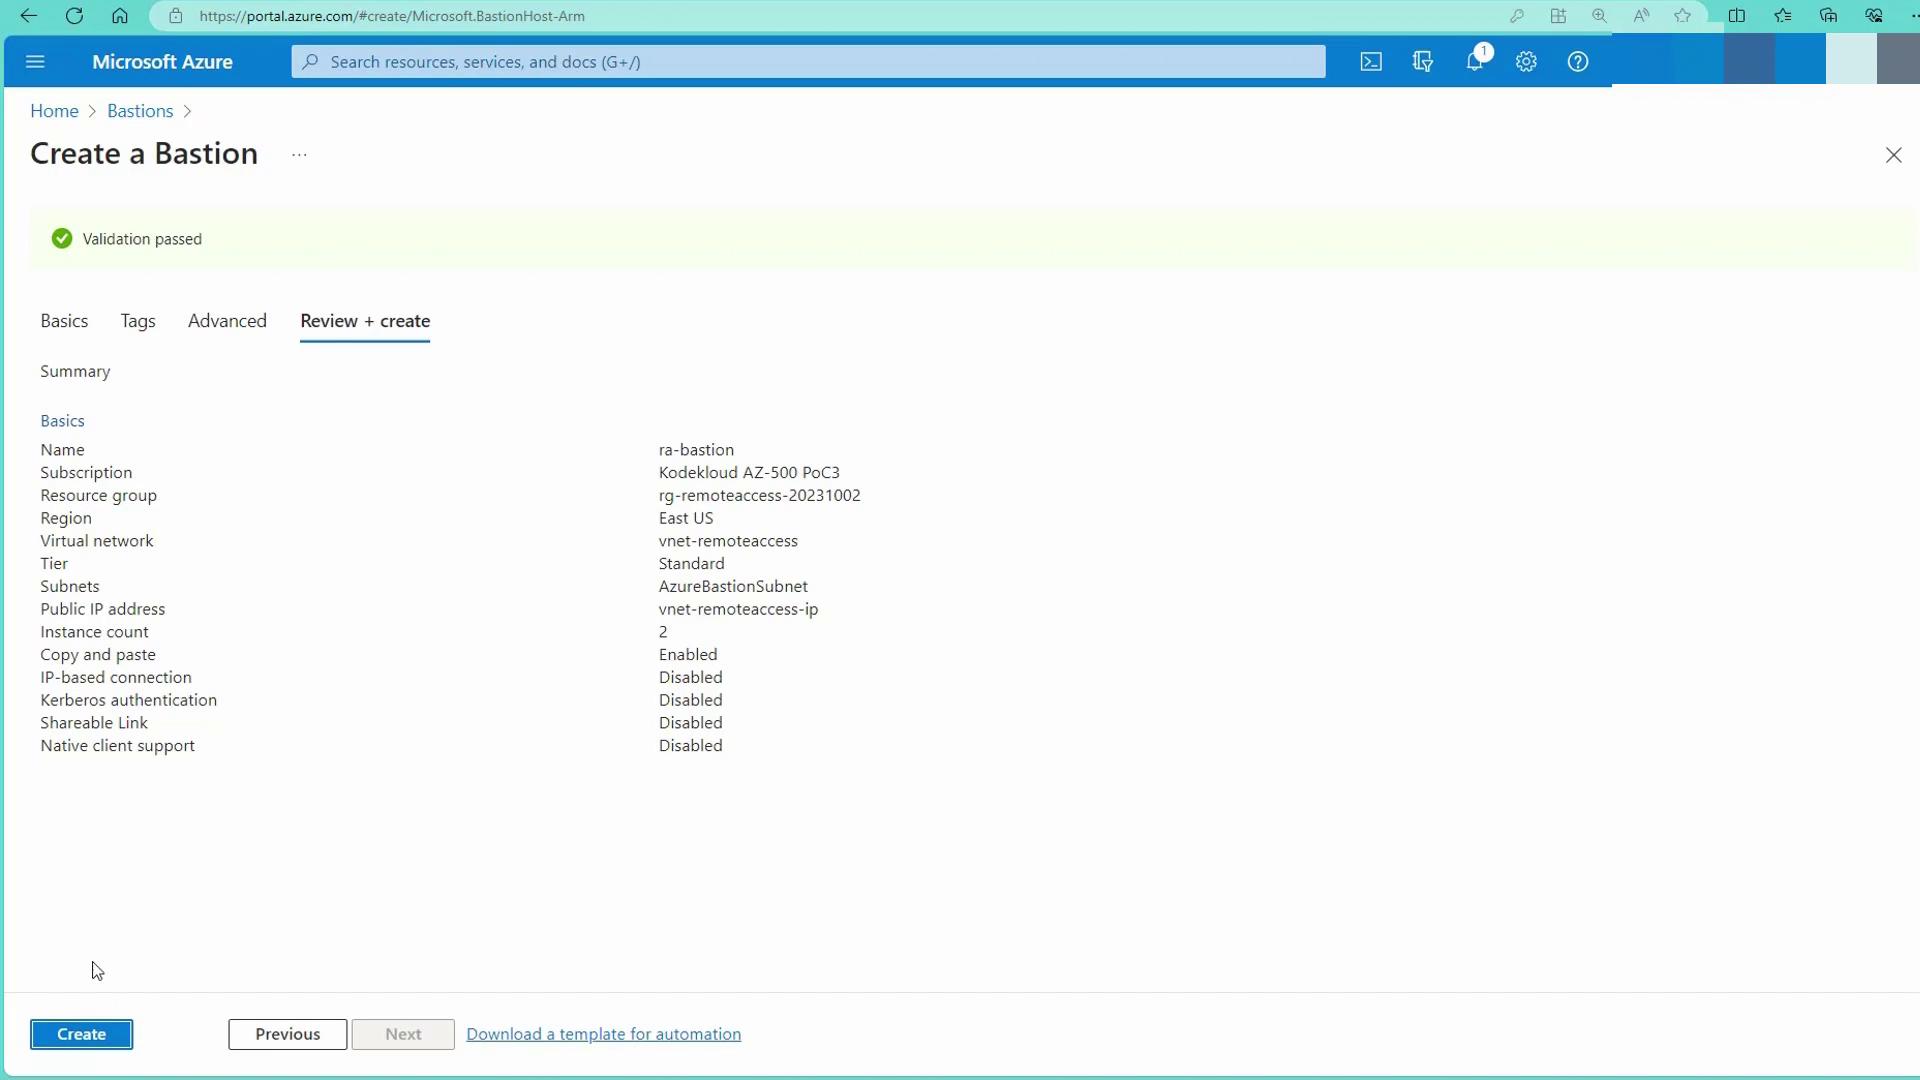
Review and Create
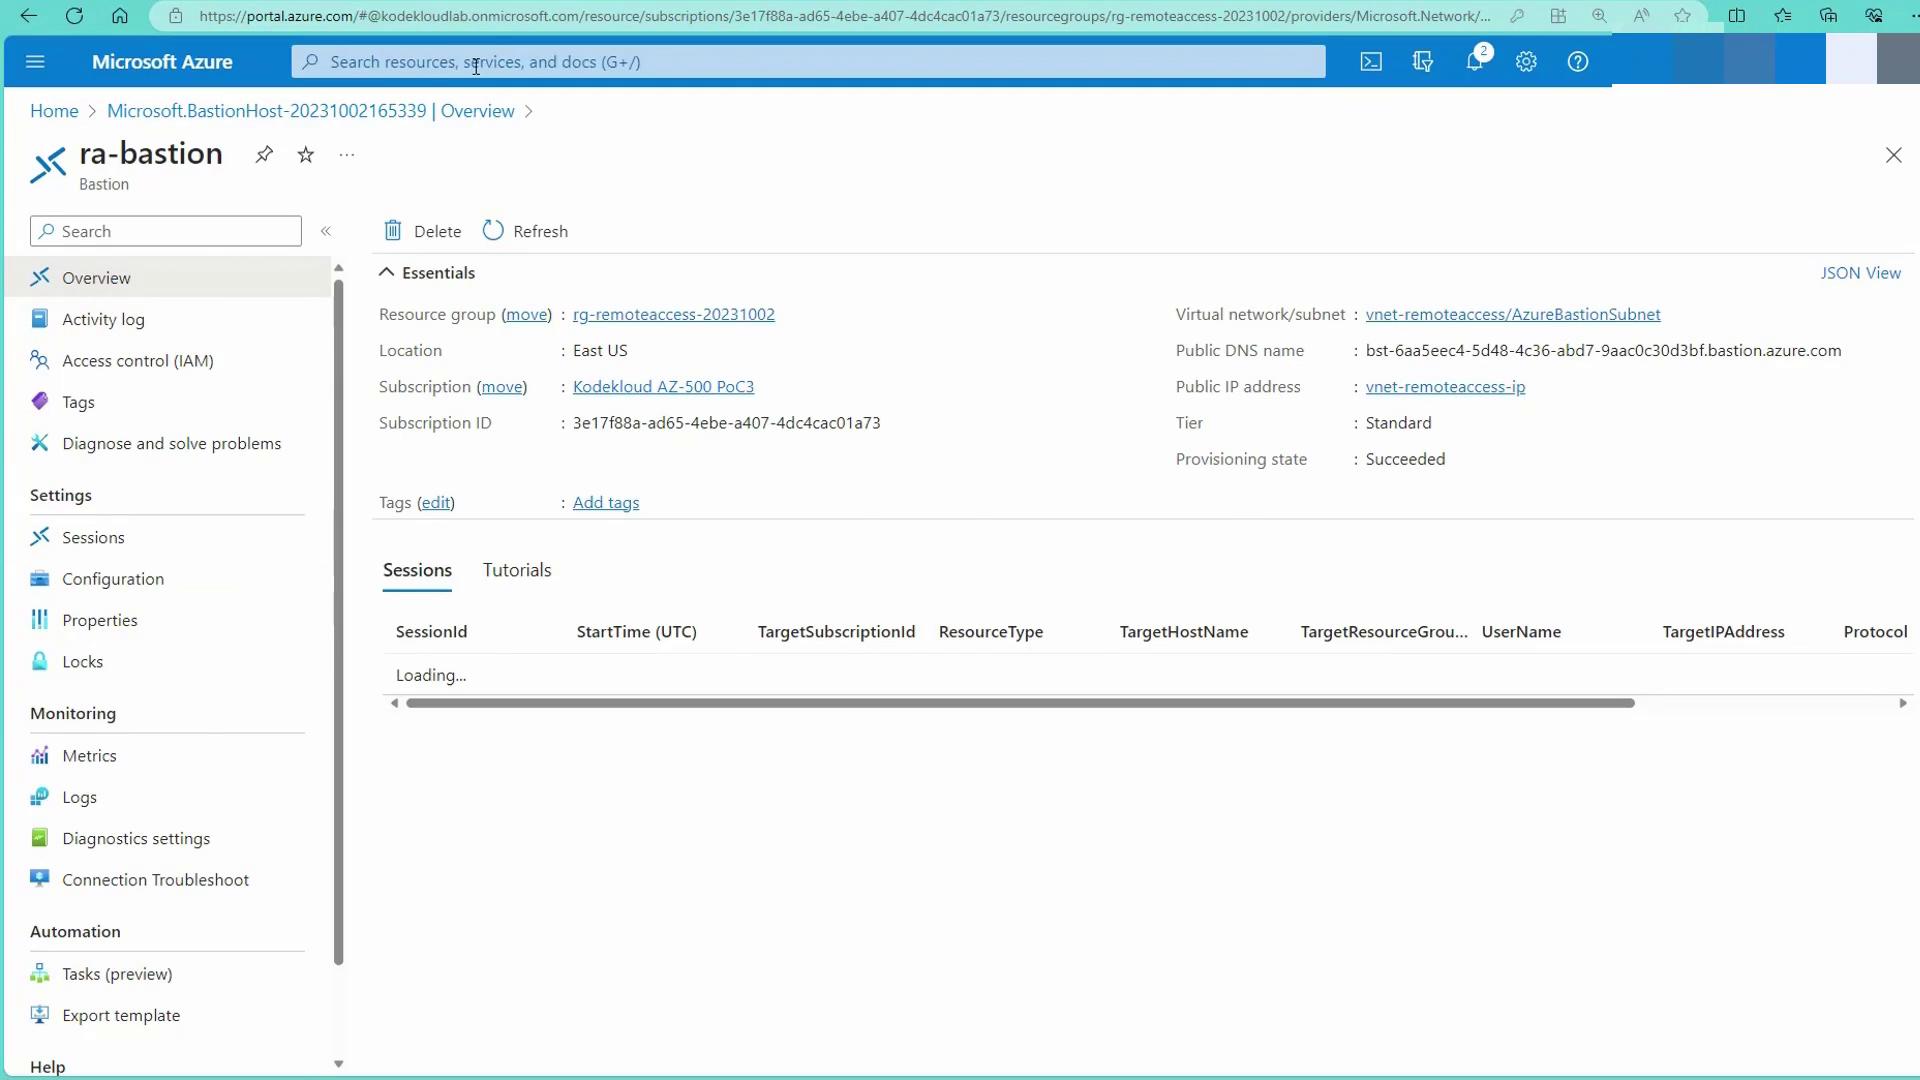
Review your settings, and optionally configure additional features such as IT base connection and Kerberos authentication. Then, click on Create to deploy the Bastion host.
Connecting to Virtual Machines via Azure Bastion
With Azure Bastion deployed, connecting to your virtual machines is straightforward:- Navigate to the “Virtual Machines” section in the Azure portal.
- Select the desired virtual machine (e.g., a Windows machine).
- Click on “Connect” and then choose “Bastion.”
- Provide the necessary username and password when prompted.
- Approve any browser pop-up prompts to launch the remote session.
There is no need to deploy Azure Bastion in every virtual network. A centralized Bastion host in a hub network can provide secure access to virtual machines across multiple peered VNets.