

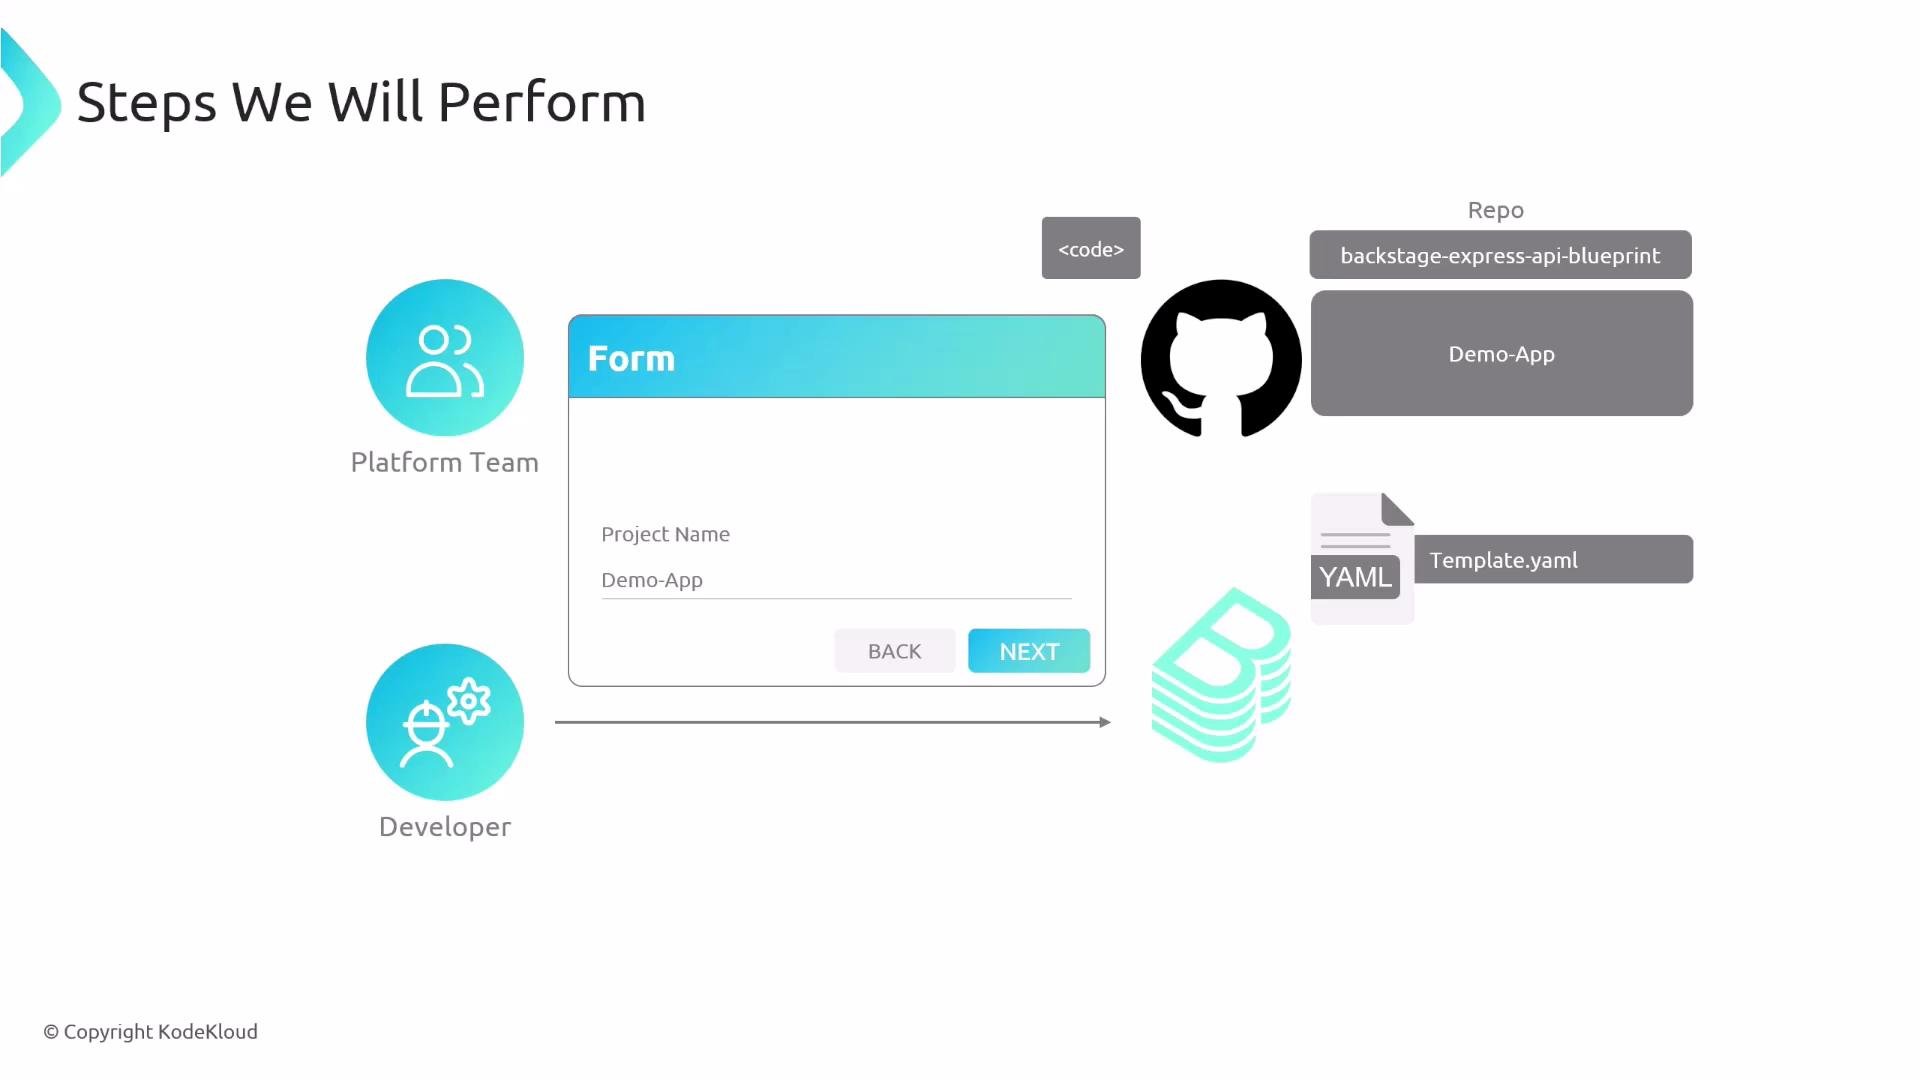
Conceptual workflow
High-level flow for templated scaffolding:- Platform team maintains a blueprint repository with starter code (linter, formatter, tests, CI workflow, Express app).
- The blueprint + its
template.yamldescriptor are made available to Backstage (for example, registered viaapp-config.yamlstatic entries). - Developers open Backstage → Create → select the template → fill a brief form → the scaffolder:
- fetches the blueprint,
- renders files with the form values,
- creates a new GitHub repository and pushes the rendered files,
- registers the new service in the Backstage catalog.
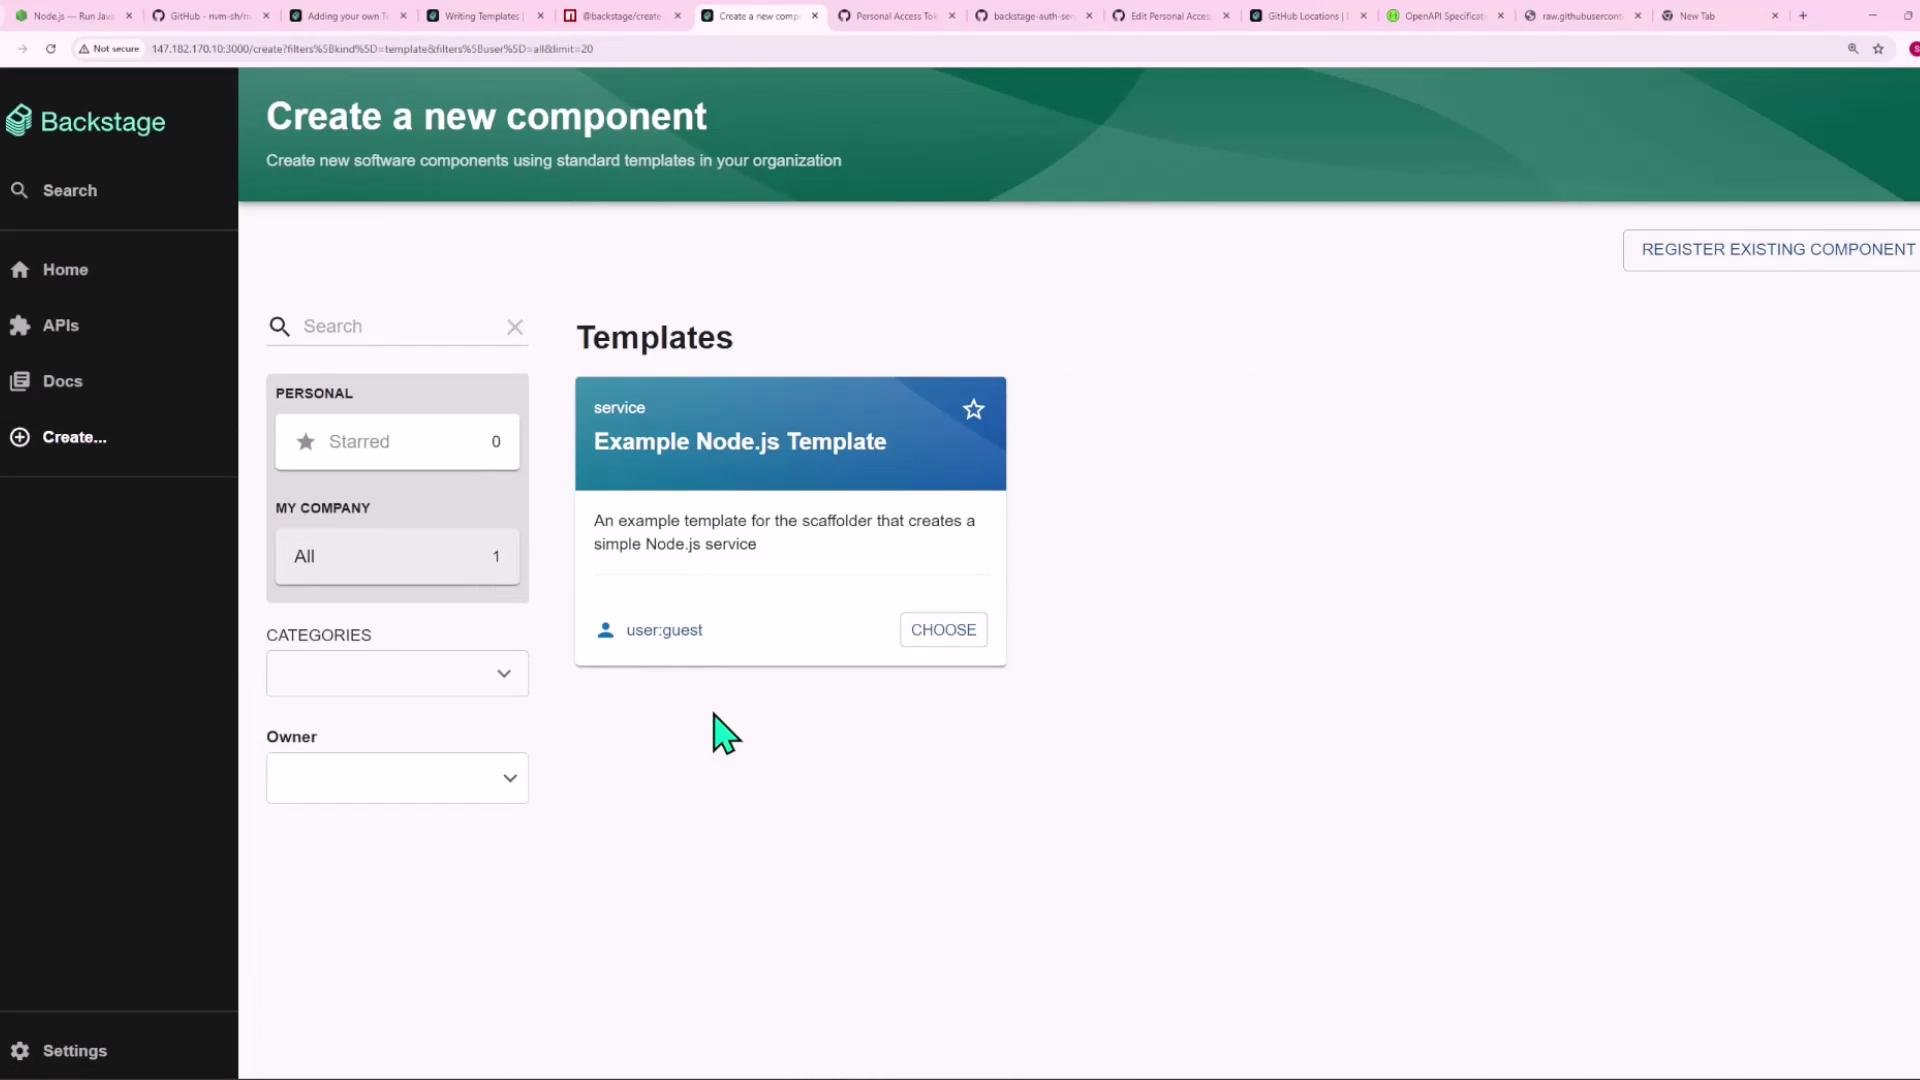
Where does that example template come from?
Backstage can import static templates viaapp-config.yaml. A representative static entry that imports the local example template looks like this:
target above points to the example template.yaml that Backstage imports and lists in the Create UI.
Minimal template.yaml example
A template descriptor follows the Scaffolder descriptor format. Here is a minimal cleaned template.yaml example:
nameis a required string used as the project name.repoUrluses theRepoUrlPickerUI component and restricts allowed hosts togithub.com.
When authoring or editing template YAML and template files in MDX content, always place expressions such as
${{ parameters.name }} or {{ values.name }} inside fenced code blocks or inline code backticks so MDX does not attempt to evaluate them.How the template executes — steps
The scaffolder runs a sequence of steps defined underspec.steps. A canonical Node.js blueprint flow includes:
- Fetch the blueprint content and render it with provided values.
- Publish the rendered files to GitHub (create repo and push).
- Register the new service in the Backstage catalog.
steps example:
- The
fetch:templateaction copies and renders files from the blueprint./contentfolder into a working directory. In this example we passvalues.nameasnameusingname: ${{ parameters.name }}. - The
publish:githubaction creates the repository and pushes the rendered files. It requires therepoUrlinput derived from the UI parameter. - The
catalog:registeraction uses therepoContentsUrloutput from thepublishstep and thecatalogInfoPath(for example,/catalog-info.yaml) to register the entity in the catalog.
Scaffolder actions at a glance
Example blueprint content files
The blueprintcontent folder typically contains files that the scaffolder renders with template expressions.
package.json (in content/package.json):
content/index.js):
content/catalog-info.yaml):
- It renders files by replacing template placeholders (e.g.,
package.json’snamebecomes the project name entered in the UI because${{ values.name }}is substituted). - The
publishstep uploads the rendered files to the created GitHub repository (using therepoUrlsupplied by the user). - The
registerstep registers thecatalog-info.yamlentity in the Backstage catalog usingrepoContentsUrlfrom thepublishstep and thecatalogInfoPath.
Outputs and UX
After a successful run,template.yaml’s output.links field surfaces useful links to the user:
- Repository:
steps['publish'].output.remoteUrl— opens the newly created repo. - Open in catalog:
steps['register'].output.entityRef— opens the newly registered entity in Backstage.
Summary
Templates let platform teams encode organizational best practices into reproducible blueprints. With only a couple of form fields, Backstage can:- Create a new repository from a standardized blueprint,
- Render project-specific values into files,
- Publish the project to GitHub,
- Register the service in the Backstage catalog.
content folder, write your template.yaml with spec.steps, and test the end-to-end scaffolding flow from the Backstage Create UI.
Links and References
- Backstage Scaffolder docs: https://backstage.io/docs/features/software-templates/creating-templates
- Descriptor format: https://backstage.io/docs/features/software-catalog/descriptor-format#kind-template
- Scaffolder actions reference: https://backstage.io/docs/features/software-templates/available-actions
- GitHub repository: https://github.com/ (for
publish:github)