

agent with a stage-level agent override.
Why this matters:
- Ensures builds run on nodes with the required OS, tools, or runtime versions.
- Keeps resource-sensitive or platform-specific builds isolated to the correct agents.
- Helps scale CI by distributing pipeline stages across multiple worker nodes.
Freestyle job
- From the Jenkins UI, confirm your external agent is online and ready to accept builds.
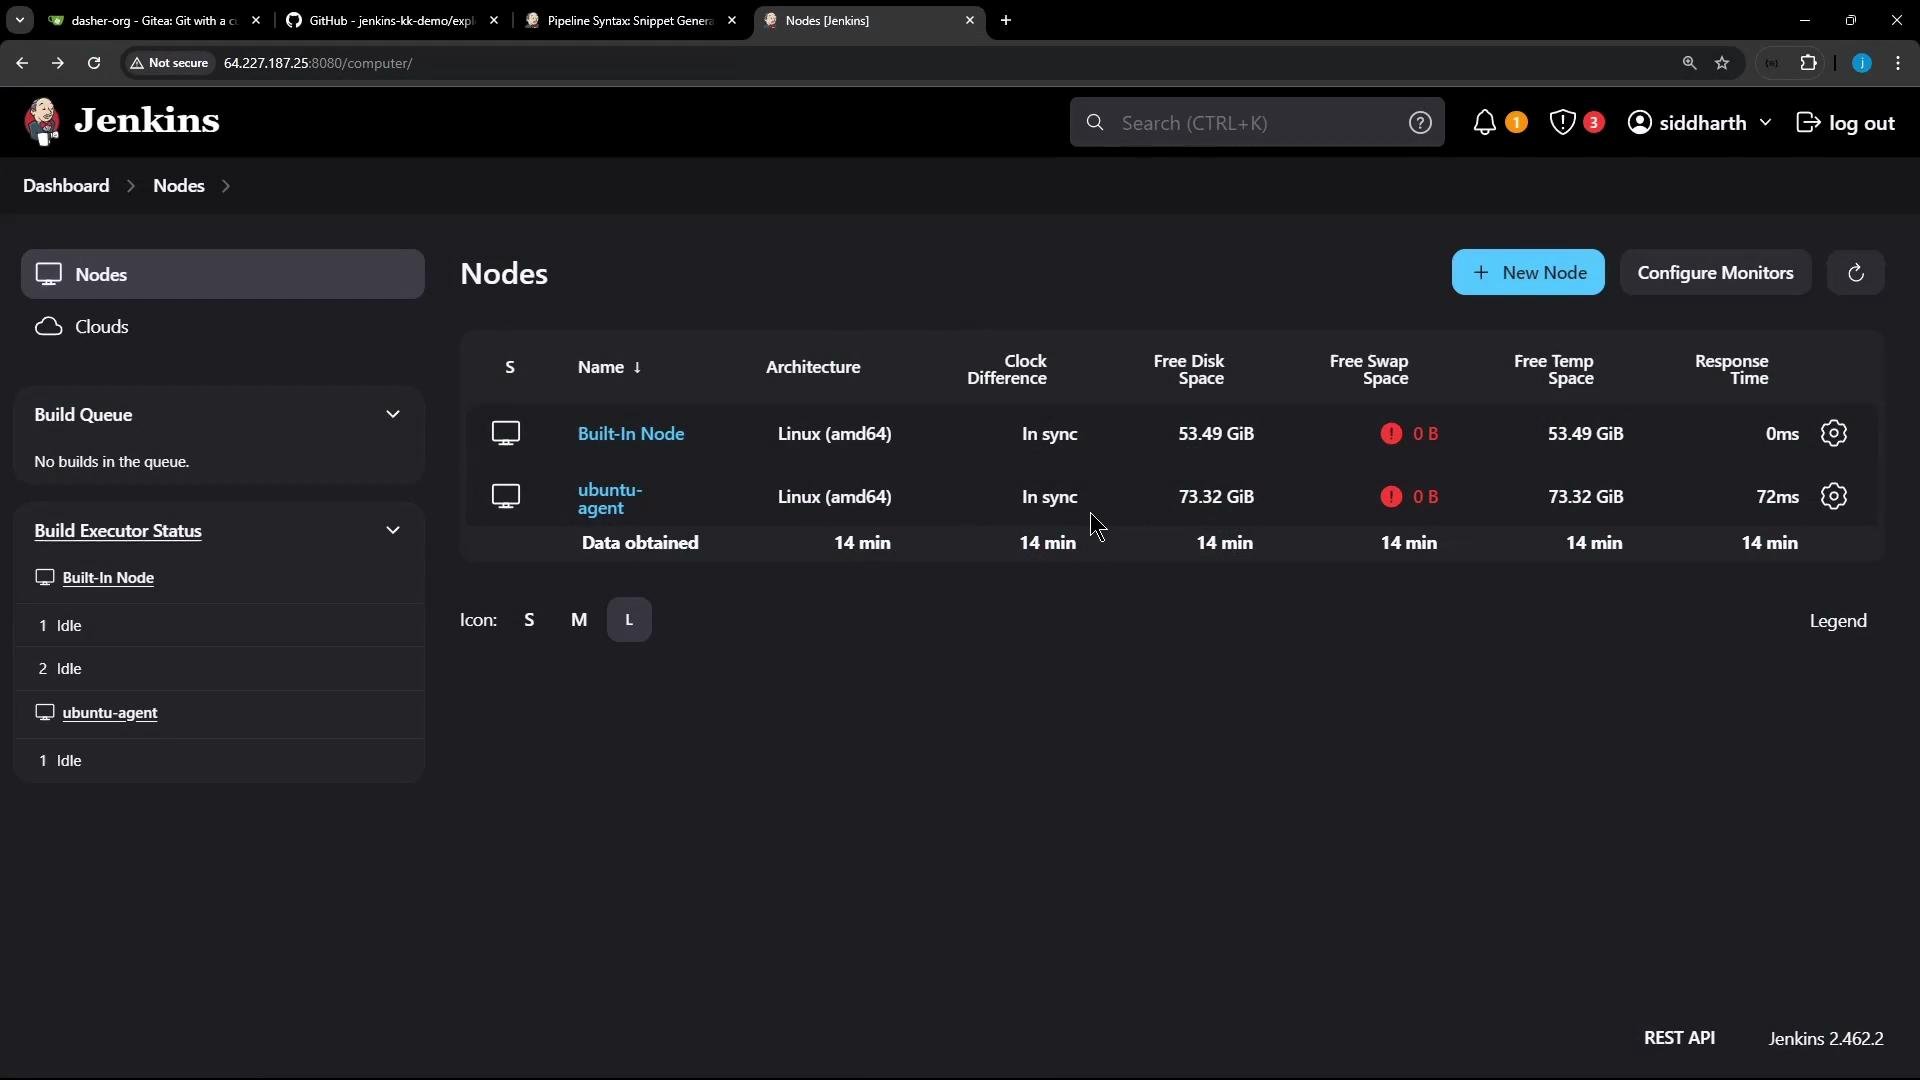
-
Create a new Freestyle job (for example,
FreestyleExternalAgent). - Add a Build Step → Execute shell with the following commands to print the OS and Node.js/NPM versions available on the agent:
- Restrict the job to run on the external agent by enabling Restrict where this project can be run and entering the node label. In this example the label is
ubuntu-docker-jdk17-node20.
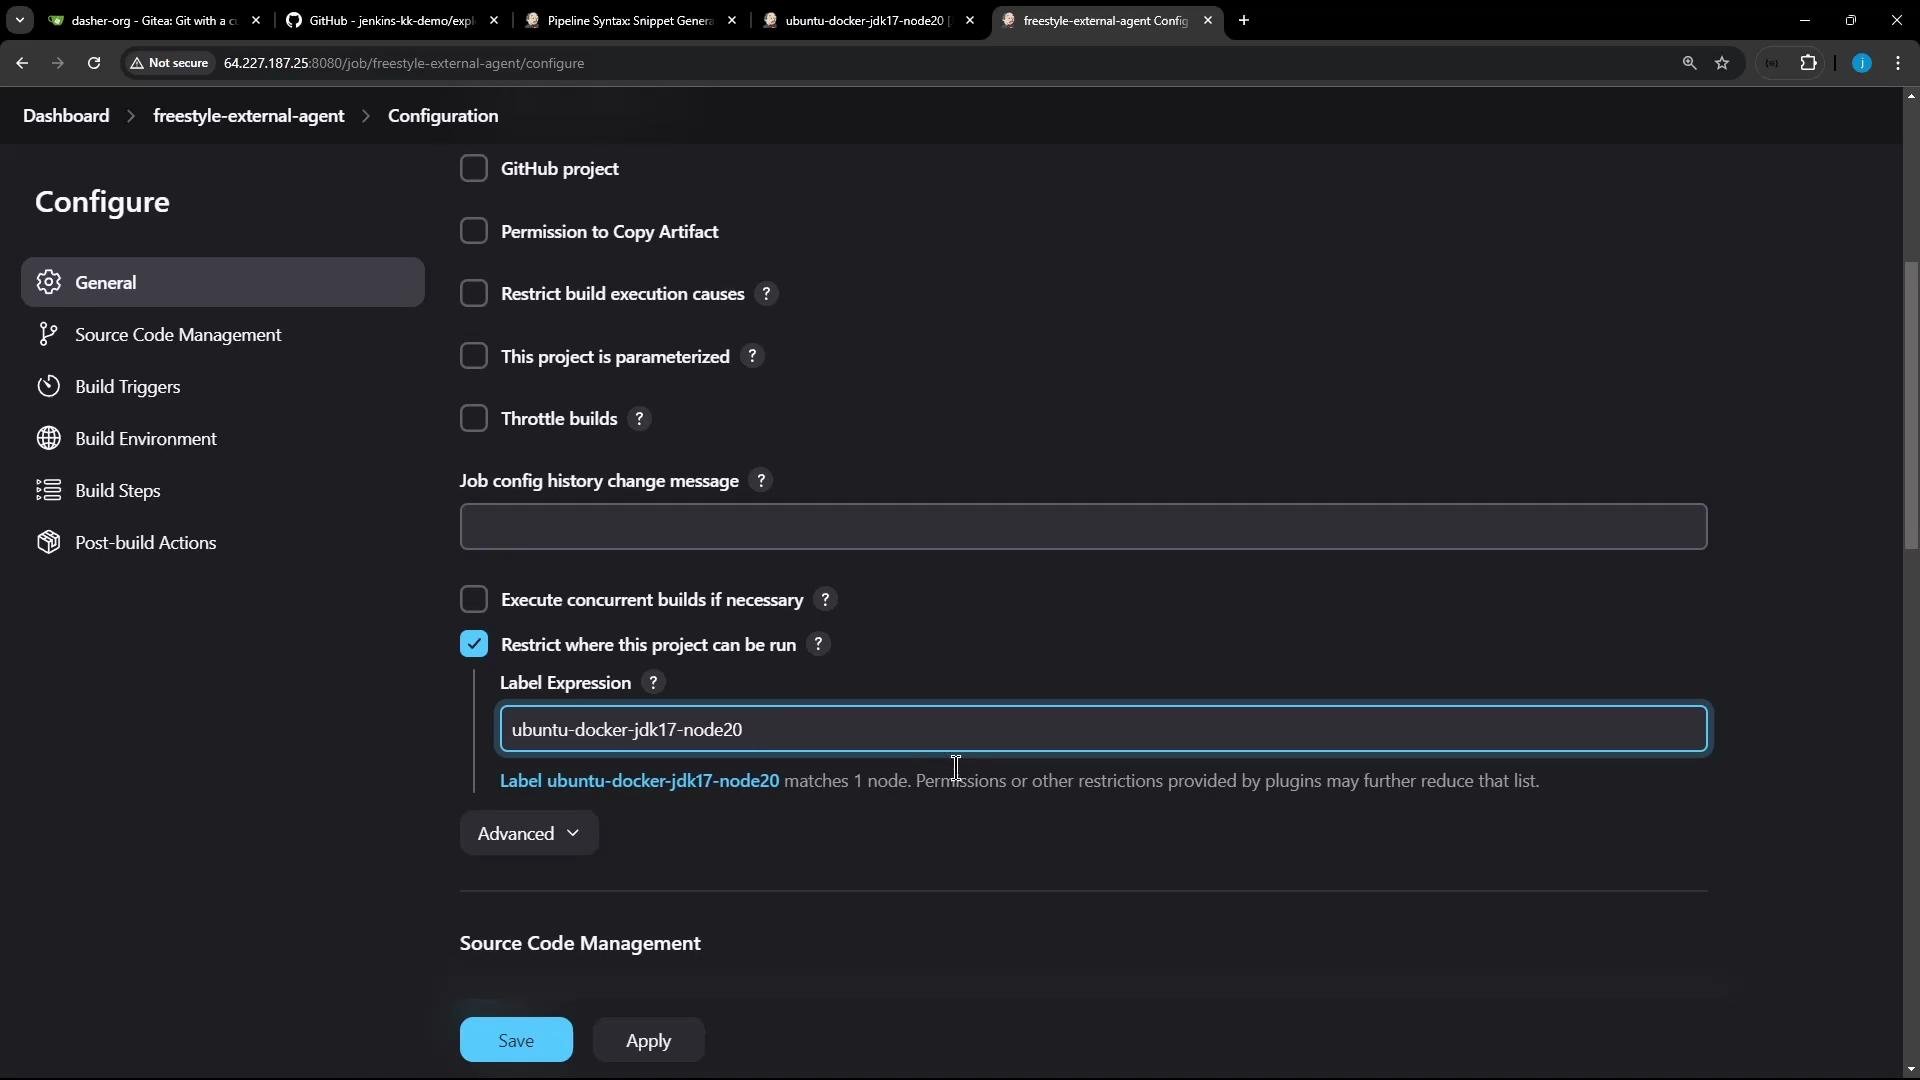
- Save and build the job. The build console will show the job executing remotely on the matching agent and will print the OS and Node/NPM versions returned by that agent.
Declarative Pipeline job
This section shows how to use a top-level (global)agent for default behavior and override it for an individual stage using a label.
-
Create a new Pipeline job (for example,
ExternalAgentsPipelineJob). -
Configure the job to fetch the
Jenkinsfilefrom Git (Gitea, GitHub, etc.). In the demo the repository was imported into Gitea. Example migration parameters used for the import:
- Use the following Declarative
Jenkinsfile. It setsagent anyat the pipeline level and overrides the agent for stageS2-Ubuntu Agentto use the labelubuntu-docker-jdk17-node20:
agent directives (for example, label, docker, dockerfile, none), use the Declarative Directive Generator on the Pipeline Syntax page to create the correct snippet.
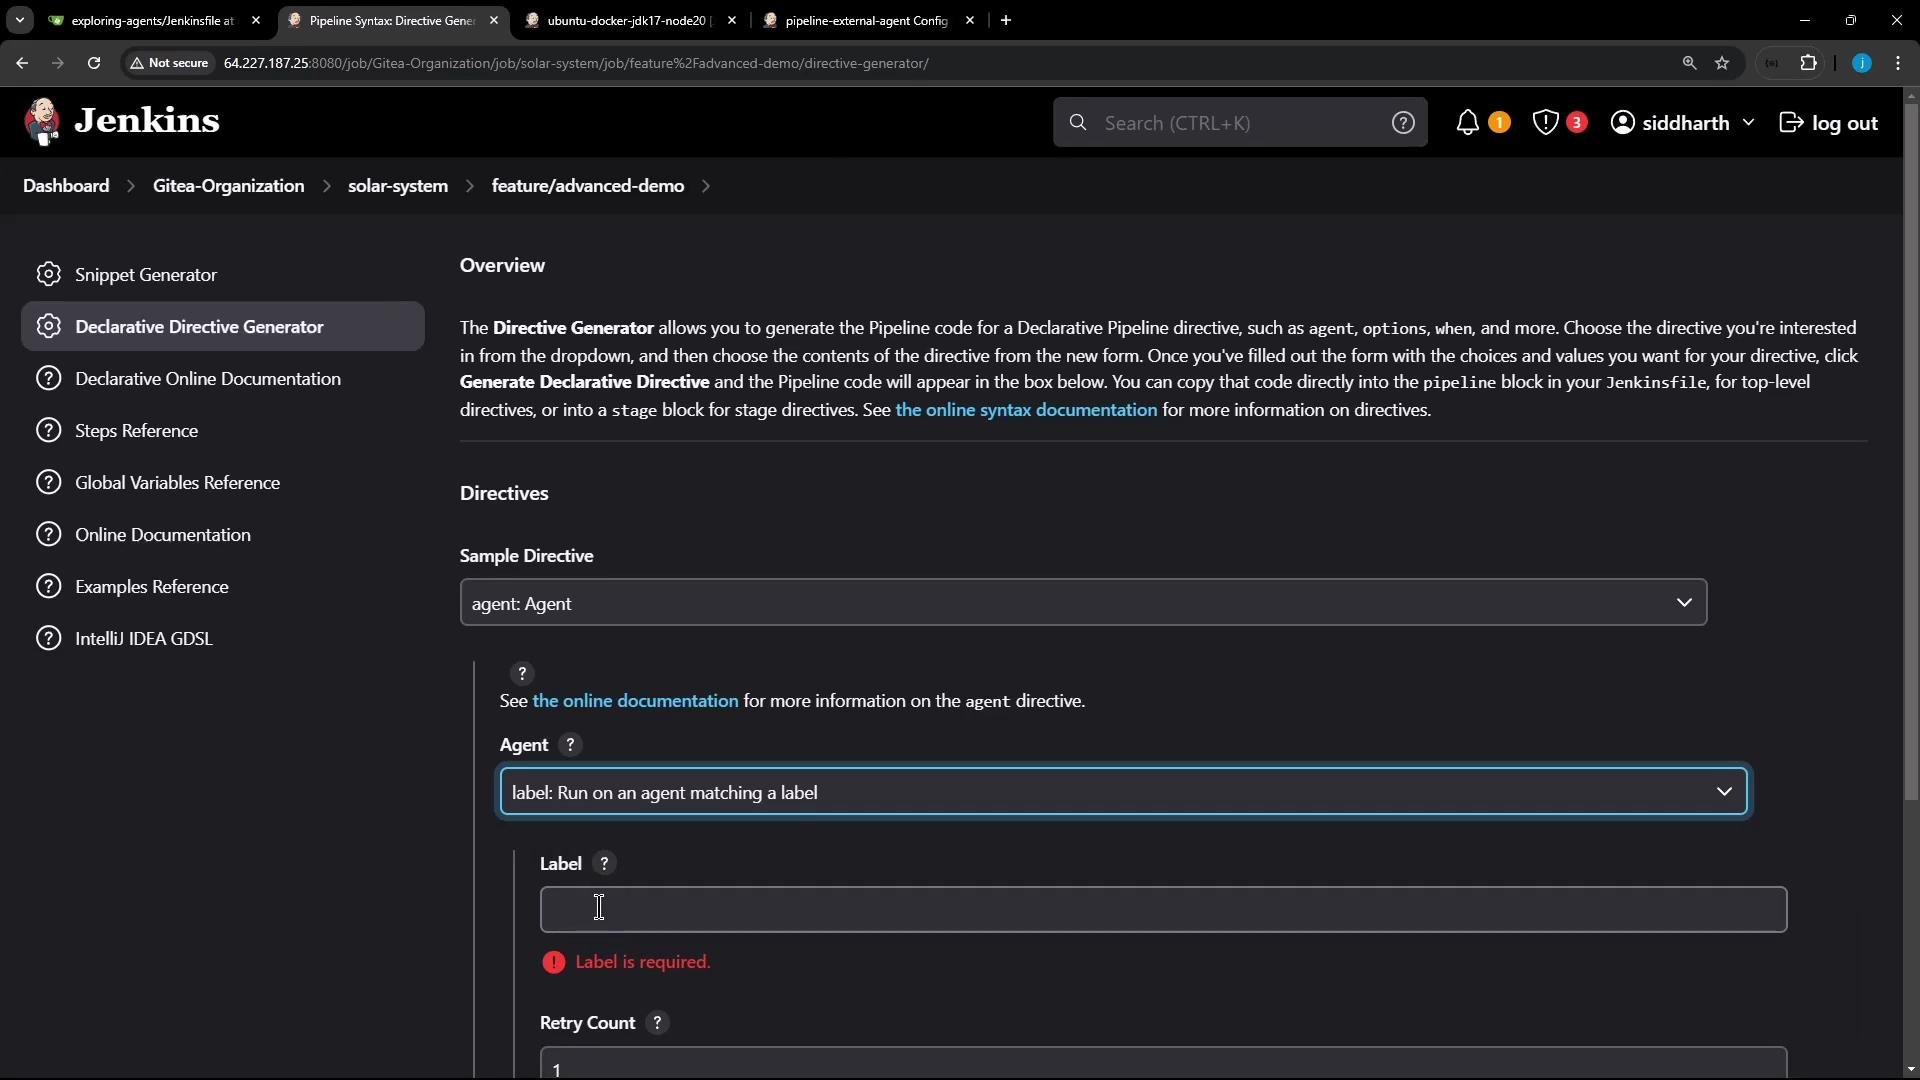
- Commit the
Jenkinsfile, point the Pipeline job to your repository and branch (for example,main), and run the build.
Behavior and console output
- A global
agent(e.g.,agent any) provides the default node for stages that do not declare their ownagent. - A stage-level
agentdirective overrides the globalagentfor that stage only and will schedule the stage on a node that matches the provided label (or other directive). - If a stage is restricted to a label that no node matches, that stage remains queued until a matching agent becomes available.
/home/jenkins-agent/workspace/pipeline-external-agent) to view the checked-out repository and build artifacts. In this demo the agent workspace contains both PipelineExternalAgent and FreestyleExternalAgent folders.
Stage-level
agent directives override the global agent for that stage only. If a stage is restricted to a label that no node matches, the stage will remain queued until a matching agent is available.Quick reference
Links and references
- Jenkins: Pipeline Syntax — Declarative Directive Generator
- Jenkins: Agents and Nodes
- Jenkins Pipeline: Declarative Pipeline
Summary
- For Freestyle jobs, use the node label with Restrict where this project can be run to bind a job to a specific agent.
- For Declarative Pipelines, use a global
agentfor default behavior and a stage-levelagentto run an individual stage on a specific agent. - Verify which agent executed a build by checking the build console — it reports the node name and the workspace path and prints any tool versions you run during the build.