

node_modules) instead of reinstalling them on every run. This is particularly valuable for ephemeral agents or fresh containers where every build starts from a clean environment.
In this lesson you’ll learn how to enable and use the Jenkins Job Cacher plugin to cache dependencies (like node_modules) and reuse them across builds, speeding up CI and reducing load on package registries.
Why cache dependencies?
- Fast feedback: Large JavaScript projects with thousands of packages can spend significant time in the install step. Caching reduces iteration time.
- Bandwidth and registry load: Re-using previously downloaded packages reduces reliance on external registries.
- Stability: Using a lockfile-driven cache helps ensure consistent dependency versions across builds.
How to enable caching in Jenkins
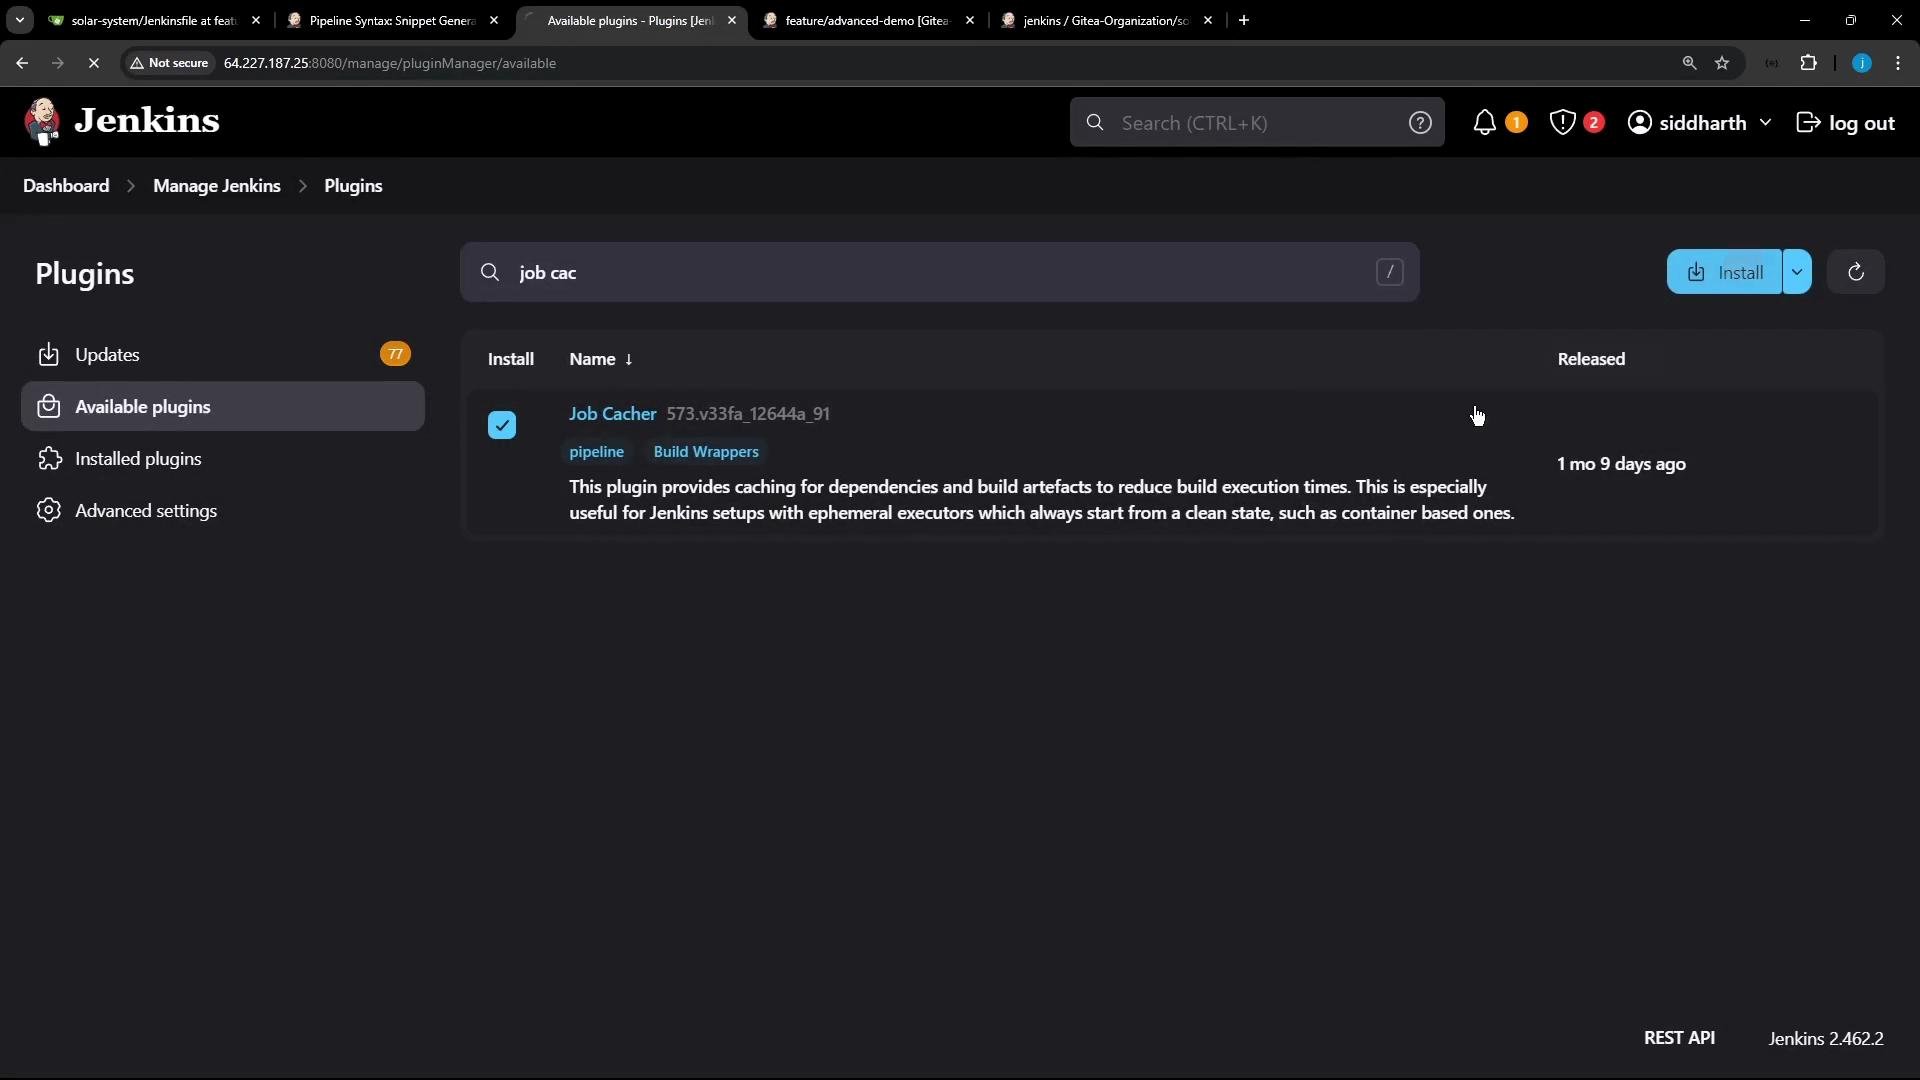
- Install the Job Cacher plugin from the Jenkins plugin manager.
- Configure a cache either using the Pipeline Snippet Generator or by adding the snippet directly to your
Jenkinsfile. - Use a cache validity file (for npm:
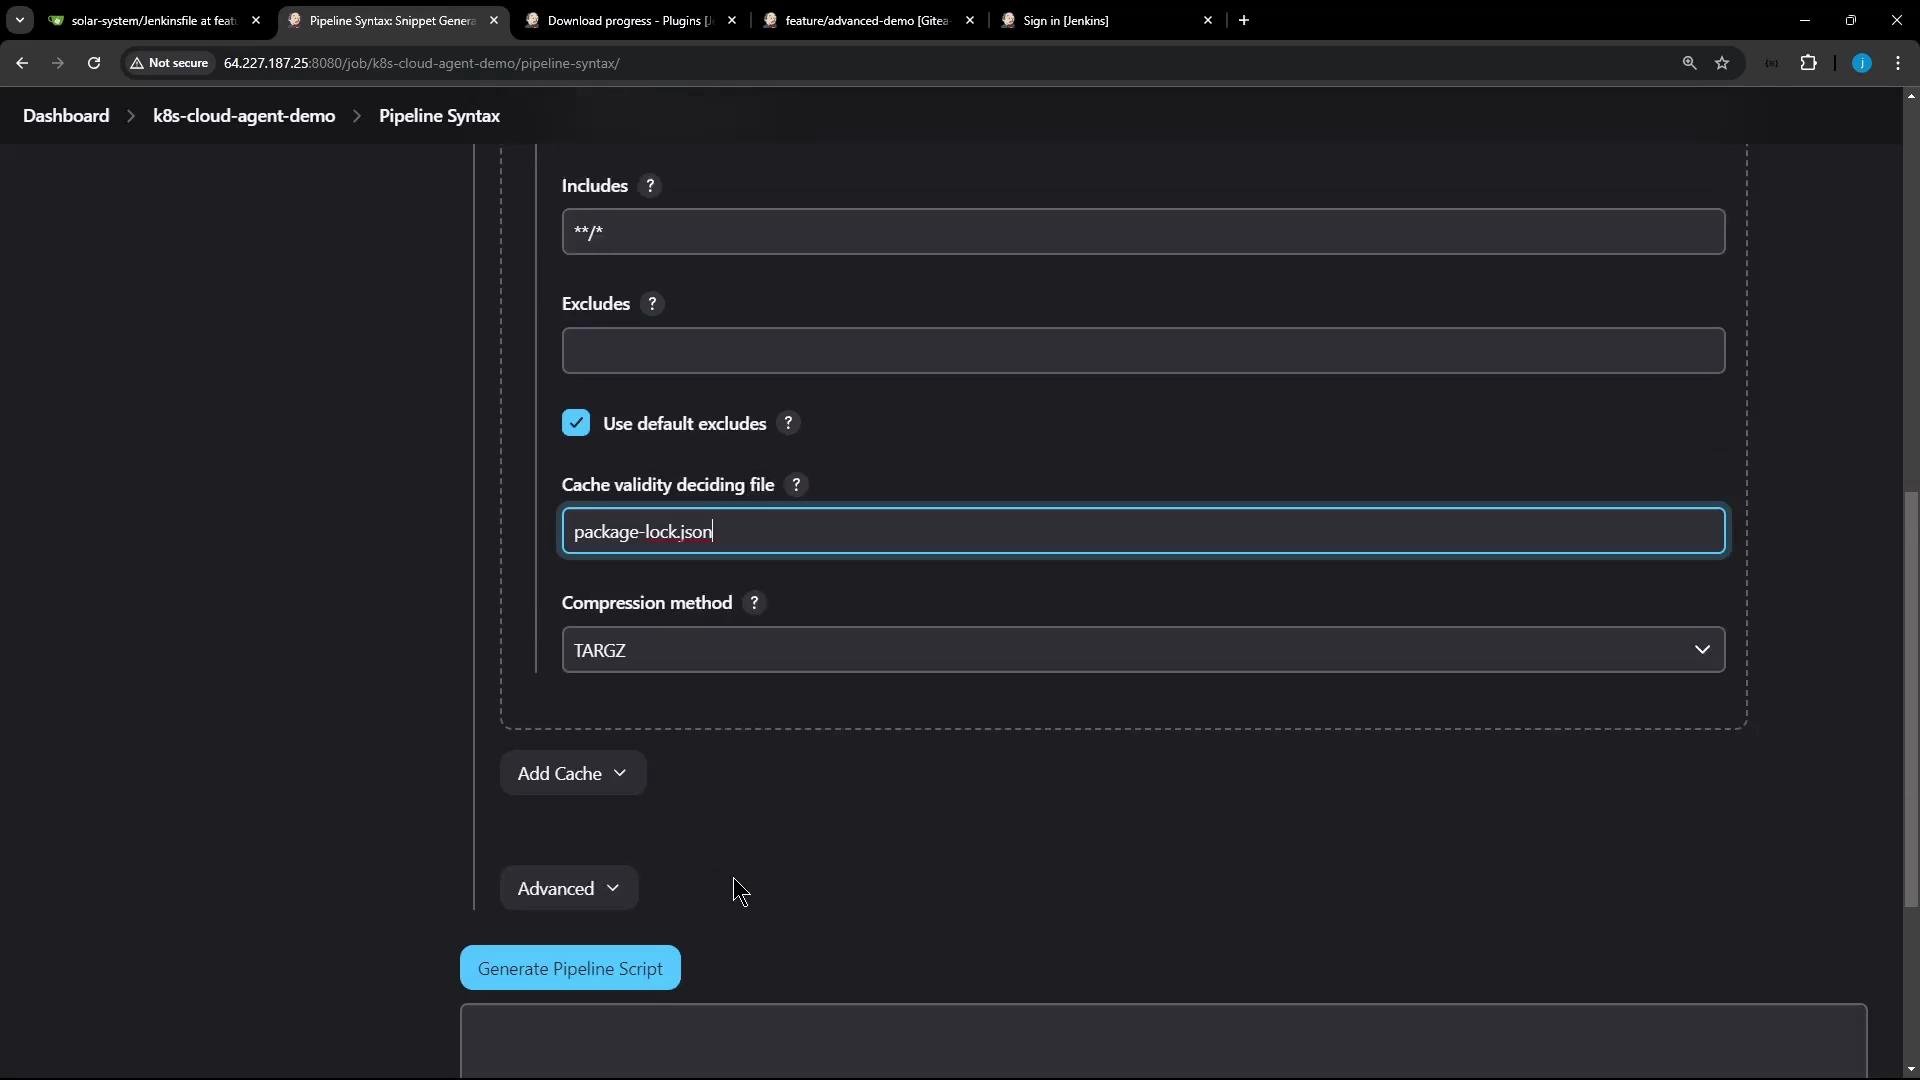
package-lock.json; for yarn:yarn.lock) to decide when to invalidate and recreate the cache.
Configuring the cache (Pipeline Snippet Generator)
Recommended snippet settings for caching Node.js dependencies:path: the directory to cache (e.g.,node_modules)cacheName: an identifiable name (e.g.,npm-dependency-cache)cacheValidityDecidingFile: a lockfile such aspackage-lock.jsonoryarn.lockused to detect changescompression: choose an archive format (e.g.,TARGZ)maxCacheSize: a reasonable size limit (e.g.,550 MB)
cache snippet and complete those fields. Example configuration in the Snippet Generator (screenshot):
Avoid caching sensitive files or environment-specific binaries. Use the cache for reproducible dependencies (like
node_modules) and ensure the cache validity deciding file (lockfile) is trusted.package-lock.json or yarn.lock as the cache validity deciding file. When the lockfile hash changes, the plugin will consider the cache stale and recreate it automatically.
Example Jenkinsfile snippets
Below are concise examples showing where to place thecache step in a Declarative Pipeline and how to use stash/unstash alongside caching when stages run on different agents.
Installing Dependencies stage (cache node_modules and stash for later stages)
cachewraps the steps that create or consume files underpath. On first run the plugin will create the cache; on subsequent runs it will attempt to restore it.- Use
stash/unstashto move files between stages or agents when the cache restore occurs on a different executor (for example, controller vs Kubernetes pod).
Running the pipeline and interpreting cache logs
On the first run:- The plugin searches job and default caches.
- If no up-to-date cache exists it will skip restoring, run the install step, then create and upload a new cache keyed by the lockfile hash.
- If the lockfile hash matches a cached entry, the plugin restores the cache quickly and avoids re-downloading packages.
[Cache]).
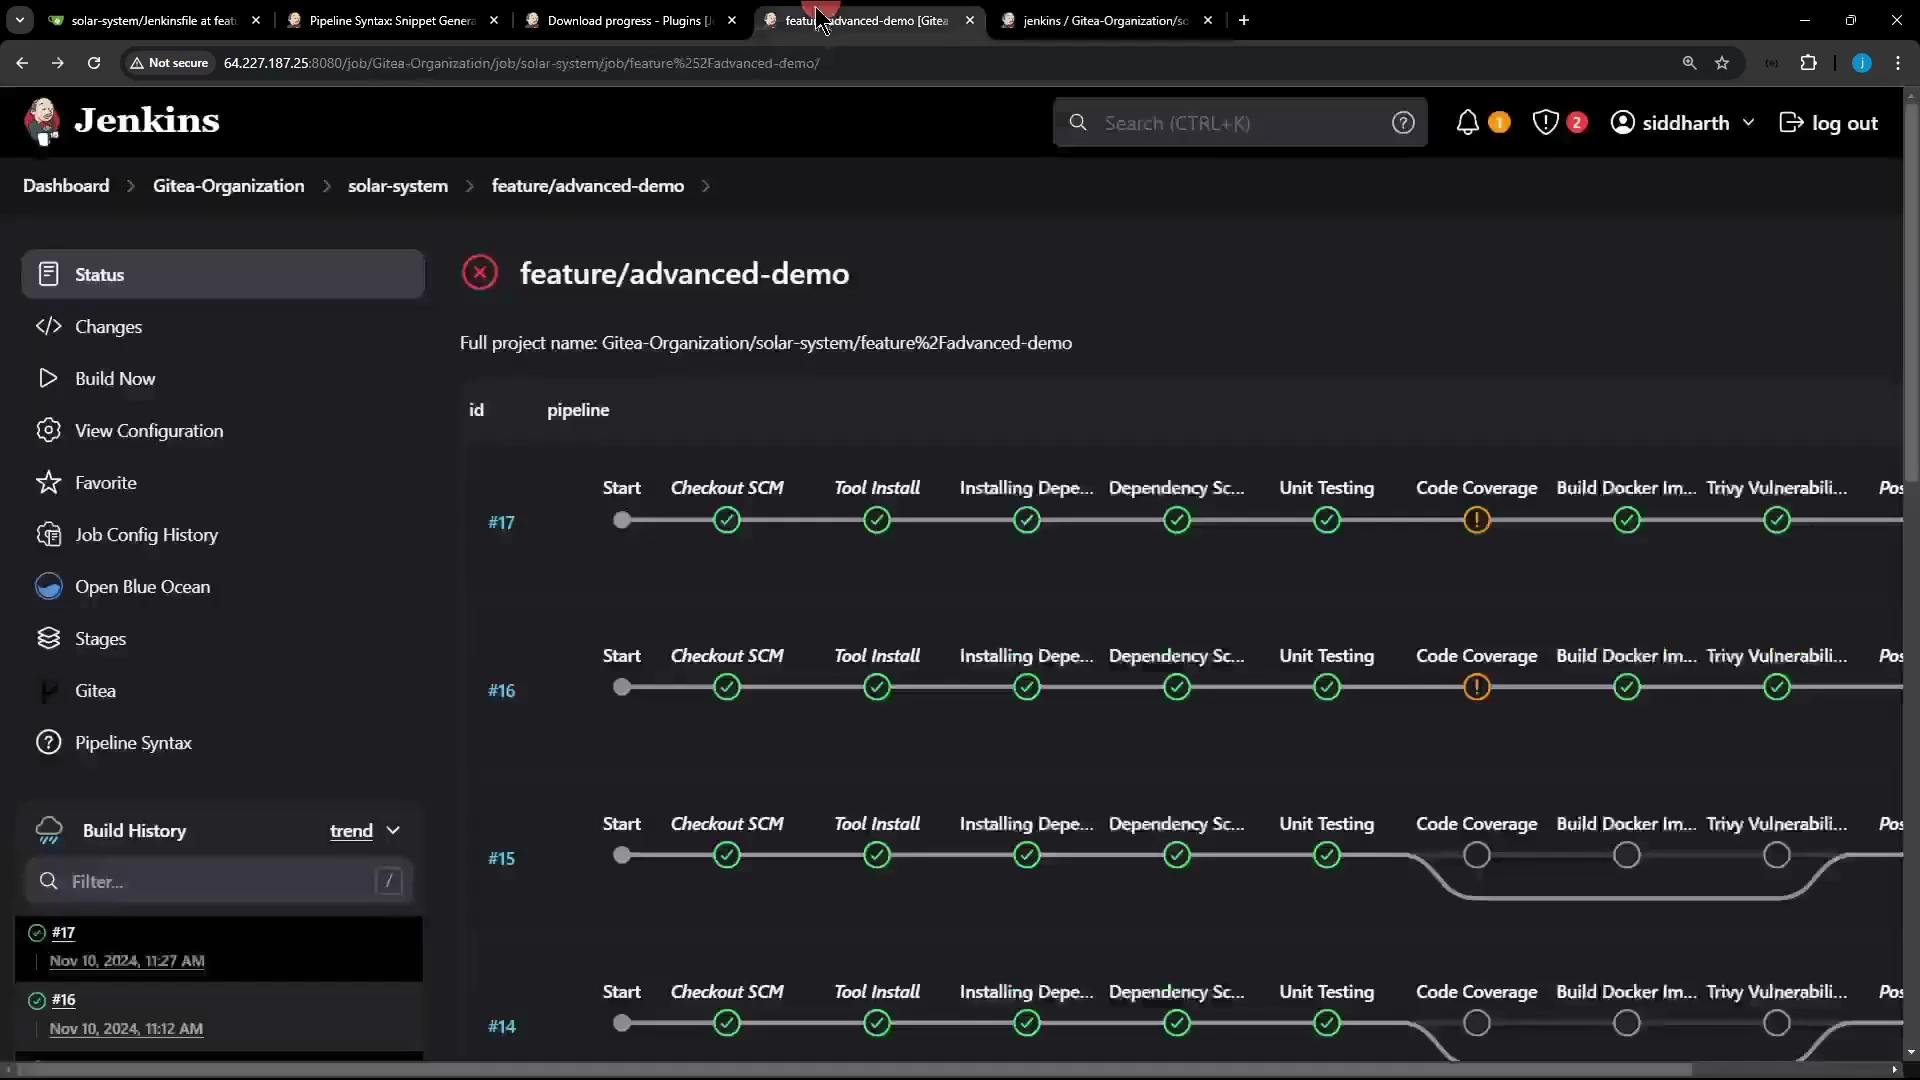
View the job and build runs for visual feedback:
Quick reference
Summary
- Install the Job Cacher plugin and configure a
node_modulescache. - Use a lockfile (such as
package-lock.jsonoryarn.lock) as the cache validity deciding file so the cache is recreated whenever dependencies change. - Combine
cachewithstash/unstashwhen stages run on different agents or when you need to transfer dependencies between stages. - Inspect the classic Jenkins console log for
[Cache]entries to verify cache restore/create behavior.
Use the lockfile as the cache validity deciding file. This ensures the cache is recreated whenever dependencies change, preventing stale or incompatible node_modules from being reused.
- Jenkins Job Cacher plugin documentation: https://plugins.jenkins.io/job-cacher/
- npm lockfile guide: https://docs.npmjs.com/cli/v9/configuring-npm/package-lock-json